Nexus 7 Subaru Liberty Install - Completed!

Stereos, amps, phone kits, Navi...

Nexus 7 Subaru Liberty Install - Completed!

Postby Yorky4321 » Sat Nov 09, 2013 11:50 pm

Hey Guys thought I'd share my Nexus 7 install with you.

Background info:
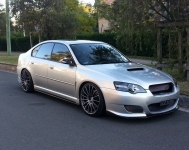
I recently purchased my Subaru Liberty 2006 (MY07) 3.0R Spec B Manual after slaving away underground for about a year and was extremely excited and seriously happy with my decision. Thankfully it had already had a lot of work done to it in regards to the audio setup with the stock head-unit replaced with an after market Alpine CD-5030 along with the required $600 fascia , Amp in the boot powering the stock subwoofer and speakers in the door replaced.
Image

So basically after contemplating purchasing an extremely expensive Pioneer double din head unit or buying an "App Radio" I decided both these options were either way too expensive for what they were or didn't fit my needs and or desires. Hence the start of this project.
I was going to do a piece by piece forum post with updates and pictures but I was too excited and end up getting it all done first whilst taking pictures along the way.

Planning:
Firstly i looked a lot of other nexus 7 installs and found out 2 things. Firstly I'd need a 2012 Nexus 7 Rooted with Timur's USB ROM and a Joycon EXR Steering wheel controller.
I wanted to have the steering wheel controls actually work since the previous owner had done the audio upgrade but had left the controls not working. I considered also creating a reversing camera using a USB webcam I had lying around but the Field of view was horrible so i decided against it.
Image

Parts:
Nexus 7 with Timur's USB-ROM http://mehrvarz.github.io/nexus-7-usbrom/
Subaru 7" AV Panel Kit http://bit.ly/HENwJ7
Subaru Info Panel Relocation Kit http://bit.ly/1ew24ZO
JoyCon EXR Steering wheel controller http://bit.ly/17U0iOb
USB OTG Y-Cable http://bit.ly/1cK9ngn
4-port USB Hub (Random Belkin 4 port hub)

Cost:
Nexus 7 - $170 (I was lucky enough to find one on ebay "Used" that when arrived literally looked like it had never been touched)
Subaru 7" AV Panel Kit - $250
Subaru Info Panel Relocation Kit - $128 ( Extremely expensive for what it actually is but thats JDM for you)
Joycon EXR - ~$56 inc Postage to Aus
USB OTG Y Cable - $14.90
Misc equipment like a new soldering iron , wire , solder etc etc was around $100

Total = Approx $700

For all the parts to arrive from Japan , Korea , Australia and so on it took about 4-5 weeks in total and it was a LONNNGGG 5 weeks of waiting patiently for the gear to finally arrive and for me to make a start. But finally they arrived.
Image
Image
Image
Image
Image (NOT MY IMAGE OF JOYCON JUST USED FOR EXAMPLE)

The idea was relatively simple. Put tablet into new fascia , give it power ,plug accessories in and off I go. But nothing is ever that simple and the project ended up taking quite a bit longer than I expected. The thing that took the most time was RESEARCH.
Finding information as to which wires out of the million that were there were for Steering wheel controls was mission impossible. Thankfully with help from some guys on Club.Liberty and SVXdc from Legacy GT forum I was able to pin point the two wires under the steering column that were the signal wires for the steering wheel controls.
Image
Image
Image
Image

With the wires soldered and extended through to where the tablet was going to sit I was able to plug in the Joycon EXR and test/program the unit using a laptop. This process was relatively painless , the program just took some getting used to. Basically all that had to be done was to detect the 6 buttons and drag and drop what action I wanted them to do.
Image

I then had the idea that if my tablet was to lose all power (become flat) , I would not be able to turn it back on again as it would just sit in that "charging" state with the picture of the battery. Therefore I decided to have a go at extending the power button and externalizing it.
The issue was that it was really really small and the soldered didnt seem to want to stick it it. I eventually managed to get a decent contact ( well what i thought was decent) and it work flawlessly. Until of course I moved it with even the slightest amount of force causing the solder to just come right off.
After about the 5th attempt at this I had in fact managed to melt the minuscule traces on the ribbon cable and broke the whole thing haha. I then ordered a new one off Ebay for $5 but being that it was from America , it cost me $23 for postage :?
Any how here is a picture of what it looked like when it worked.
Image
Image

When the new ribbon cable arrived I decided to give up on that idea for now and possibly revisit it later on if I had either A. Learnt how to solder properly or B. Had another spare as a back up :lol:

Mounting it wasn't very hard, maybe a little fiddly but I used some hot glue for test fitting purposes and soon enough had a good enough position to start drilling some holes
Image

It was shortly there after that i realised the Micro USB port and 3.5mm Jack were in horrible positions (Ran directly into one of the vents). I had 2 options either A. Find some right angle connectors that fit B. Drill holes into the air vent and run the cables through them.
Thankfully I had a brain wave and decided to take apart the tablet again and have a look at the connectors themselves. It appeared that they too were just flexible ribbon cables underneath the stereo speaker bar. So I removed the screws holding down the speaker bar and Ribbon cable , lifted the connectors up in a right angle position and put the speaker bar back in place.
Image

I then marked up some slots on the back panel (case) and cut them out forming small gaps for the connectors to poke out of.
Image
Image
Image
Image

The connectors felt a bit loose and wobbly so I cut up some mesh from an old 5.25" drive bay cover and used it to screw the original screws into. I then hot glued and super glued them down to make sure they wont move.
Image
Image

After that all I had to do was Re test the Joycon , Test the USB Hub , Memory sticks and made sure the USB ROM functionality was working correctly. For Internet connectivity I will be using my HTC ONE via Bluetooth tethering , Wifi Hotspot or most likely via a direct USB cable as I dont want to drain my phone battery as I drive.
Image
Image

Moving the Information panel wasn't hard at all , I just followed the picture instructions that came with the kit (although the writing was in Japanese).
Image
Image

Now all that was left to do was connect the RCA cables to the AUX Input in the head unit, plug everything in and hope for the best.
Here is some final pictures.
Image
Image
Image

Shout out to everyone who gave me advice , tips and tricks and especially Timur for creating such an epic Kernel. If anyone has any questions feel free to PM me or contact email me at johndhodder@hotmail.com.au and ill try help you as best I can. Cheers
Yorky4321
 
Posts: 11
Joined: Tue Jul 23, 2013 1:11 am
Real name: John

Re: Nexus 7 Subaru Liberty Install - Completed!

Postby ez30rb » Sun Nov 10, 2013 9:03 am

Great write up, and nice install !
Barn Crew
User avatar
ez30rb
 
Posts: 451
Joined: Sat Jan 17, 2009 4:52 pm
Location: Sydney
Car: 3.0RB
Profile URL: viewtopic.php?f=10&t=21069

Re: Nexus 7 Subaru Liberty Install - Completed!

Postby Yorky4321 » Sun Nov 10, 2013 5:04 pm

Great write up, and nice install !


Thanks a lot :)
Yorky4321
 
Posts: 11
Joined: Tue Jul 23, 2013 1:11 am
Real name: John

Re: Nexus 7 Subaru Liberty Install - Completed!

Postby HyRax » Sun Nov 10, 2013 9:03 pm

Excellent write-up is excellent. Subscribed.
I was going to procrastinate, but I put it off...
User avatar
HyRax
 
Posts: 1202
Joined: Sat Jul 30, 2011 12:25 am
Location: Sydney
Car: ADM MY19 3.6R Outback
Real name: Jeff
Profile URL: viewtopic.php?f=10&t=15482

Re: Nexus 7 Subaru Liberty Install - Completed!

Postby seanmau5 » Mon Nov 11, 2013 7:18 pm

Nice! Much the same as my install, I too moved the I/O assembly out the back of the Nexus for ease of access. Your fascia sits in the dash much the same as mine...... Not properly!! Anyone else have this issue?
~ Team VW ~ Das Auto ~
User avatar
seanmau5
-stickered-
 
Posts: 3305
Joined: Wed Mar 23, 2011 12:34 am
Location: Sydney, NSW
Car: 2009 Volkswagen Passat CC V6
Real name: Sean
Profile URL: viewtopic.php?f=10&t=13255

Re: Nexus 7 Subaru Liberty Install - Completed!

Postby Yorky4321 » Mon Nov 11, 2013 9:44 pm

seanmau5 wrote:Nice! Much the same as my install, I too moved the I/O assembly out the back of the Nexus for ease of access. Your fascia sits in the dash much the same as mine...... Not properly!! Anyone else have this issue?

Thanks! :D
And what do you mean "Not properly" are you talking about the tablet in the fascia? Or the fascia itself ? Or the Information panel ?
Yorky4321
 
Posts: 11
Joined: Tue Jul 23, 2013 1:11 am
Real name: John

Re: Nexus 7 Subaru Liberty Install - Completed!

Postby seanmau5 » Mon Nov 11, 2013 9:47 pm

Yorky4321 wrote:
seanmau5 wrote:Nice! Much the same as my install, I too moved the I/O assembly out the back of the Nexus for ease of access. Your fascia sits in the dash much the same as mine...... Not properly!! Anyone else have this issue?

Thanks! :D
And what do you mean "Not properly" are you talking about the tablet in the fascia? Or the fascia itself ? Or the Information panel ?


The fascia itself... Doesn't sit flush like the original cubby does.
~ Team VW ~ Das Auto ~
User avatar
seanmau5
-stickered-
 
Posts: 3305
Joined: Wed Mar 23, 2011 12:34 am
Location: Sydney, NSW
Car: 2009 Volkswagen Passat CC V6
Real name: Sean
Profile URL: viewtopic.php?f=10&t=13255

Re: Nexus 7 Subaru Liberty Install - Completed!

Postby Monkey » Sat Jan 04, 2014 7:18 pm

Nice write up and I love the top pic of your car - very shiny! :)

I take it your audio out comes from the 3.5mm (analog) jack since you relocated it?
As you have Timur's ROM, any reason you're not using the USB (digital) audio out with an external USB DAC soundcard eg. http://www.behringer.com/EN/Products/UCA202.aspx
I got mine working yesterday and the sound is far better - particularly the increased bass and volume is a bit higher

Have you had any luck with a USB webcam? I could only one app on Google Play which does this (https://play.google.com/store/apps/deta ... .usbcamera), but it's limited to just a few cameras, and the Logitech C510 720p USB camera I have (which appears to be the same as yours based on your pic?) is not compatible.
User avatar
Monkey
 
Posts: 586
Joined: Mon Mar 25, 2013 8:58 am
Location: Melbourne, Australia
Car: MY07 black 6MT Liberty tbSTI sedan
Real name: David

Re: Nexus 7 Subaru Liberty Install - Completed!

Postby trolley » Fri Jan 31, 2014 12:22 pm

Monkey wrote:Nice write up and I love the top pic of your car - very shiny! :)

I take it your audio out comes from the 3.5mm (analog) jack since you relocated it?
As you have Timur's ROM, any reason you're not using the USB (digital) audio out with an external USB DAC soundcard eg. http://www.behringer.com/EN/Products/UCA202.aspx
I got mine working yesterday and the sound is far better - particularly the increased bass and volume is a bit higher

How did you setup the DAC card to connect to the amp with the stock stereo? I'm assuming that has L and R RCA outputs? Would be great if you could replace the 'AM' stereo button to use the tablet audit (unless you still happen to use AM radio!).

EDIT: Found the FSL-21 component which enables RCA input into the stock head unit :) It's expensive! Is it really that much better than just using AUX in?
trolley
 
Posts: 36
Joined: Sat Dec 17, 2011 5:48 pm
Location: South Sydney
Car: 2007 GT Spec B

Re: Nexus 7 Subaru Liberty Install - Completed!

Postby seanmau5 » Fri Jan 31, 2014 1:56 pm

trolley wrote:EDIT: Found the FSL-21 component which enables RCA input into the stock head unit :) It's expensive! Is it really that much better than just using AUX in?


Yes, I've tried both and using the DAC is 100x better than the AUX in.

Question to OP - how did you go with your info panel relocation kit? Does it fit properly and is there 2 revisions? Reason I ask is I ordered one from AVOjdm which didn't fit and they tell me there is only one. I then ordered one from Garage 88 and got the wrong one again yet Japanparts has 2 revisions listed which I assume is for pre/post facelift models.
~ Team VW ~ Das Auto ~
User avatar
seanmau5
-stickered-
 
Posts: 3305
Joined: Wed Mar 23, 2011 12:34 am
Location: Sydney, NSW
Car: 2009 Volkswagen Passat CC V6
Real name: Sean
Profile URL: viewtopic.php?f=10&t=13255

Re: Nexus 7 Subaru Liberty Install - Completed!

Postby Robbks » Fri Jan 31, 2014 3:36 pm

Japanparts ask you to choose the right Applied Model code.

AVO JDM and G88 need to lift their game. :angry2: :angry2:

http://www.japanparts.com/db/parts_deta ... ARCH_page=
coyote wrote:Sure, a GTR is fast ... but it's about as interesting as listening to grass grow.
User avatar
Robbks
 
Posts: 2185
Joined: Wed Jan 05, 2011 8:21 am
Location: Hobart, Tas
Car: MY06 3.0RB Wagon
Real name: Rob
Profile URL: viewtopic.php?f=10&t=12350

Re: Nexus 7 Subaru Liberty Install - Completed!

Postby Flat6Estate » Fri Jan 31, 2014 4:49 pm

Do the post facelift models even need to have the clock relocated?
The post facelift clock is just a clock. The trip computer functions are all displayed on the odometer display using the steering wheel buttons.
The nexus has the clock shown in the task bar, so is it needed in the long run?

Timbo
MY08 Spec B 3.0L Manual Wagon
1998 Yamaha YZF600R Thundercat - a bit broken :-o
User avatar
Flat6Estate
formerly Timbo_rs2500
 
Posts: 377
Joined: Mon Jun 17, 2013 2:15 pm
Location: Lower Blue Mountains NSW
Car: 2007 MY08 Liberty Wagon 3RB 6spd
Real name: Tim
Profile URL: viewtopic.php?f=10&t=32189&p=425885#p425885

Re: Nexus 7 Subaru Liberty Install - Completed!

Postby seanmau5 » Fri Jan 31, 2014 5:03 pm

Agreed Rob, I've never had an issue with G88 so I'm not pissed off about it but they do know I have a 2005 model as it's in their system. I also said in my email that my car is a pre facelift.

For facelift, if it's just a clock then no you wouldn't if you didn't really want it. I want it in my pre facelift for fuel economy and shit.
~ Team VW ~ Das Auto ~
User avatar
seanmau5
-stickered-
 
Posts: 3305
Joined: Wed Mar 23, 2011 12:34 am
Location: Sydney, NSW
Car: 2009 Volkswagen Passat CC V6
Real name: Sean
Profile URL: viewtopic.php?f=10&t=13255

Re: Nexus 7 Subaru Liberty Install - Completed!

Postby mihai » Fri Jan 31, 2014 6:15 pm

seanmau5 wrote:Agreed Rob, I've never had an issue with G88 so I'm not pissed off about it but they do know I have a 2005 model as it's in their system. I also said in my email that my car is a pre facelift.

For facelift, if it's just a clock then no you wouldn't if you didn't really want it. I want it in my pre facelift for fuel economy and shit.


It's only a clock on the GT's and 3.0R's. The 2.0R and 2.5i's still have it as fuel consumption, temp gauge, trip timer and clock.
[New: MY11 FPV F6 | Winter White | Pioneer DEX-P99RS | Alpine PDX-F6 | Alpine PDX-M12 | JL Audio 12W7-AE ]
[Old: MY07 2.0R | Urban Grey | 5 MT | 6000k HID | LED | Alpine IVA-W502E | Alpine PDX1.1000 | Alpine PDX4.150 | JL Audio 12W7v3 | Focal KRX2 ]
User avatar
mihai
 
Posts: 1641
Joined: Mon Jun 01, 2009 10:27 pm
Location: Melbourne, VIC
Car: MY07 Liberty 2.0R + MY11 FPV F6
Real name: Michael

Re: Nexus 7 Subaru Liberty Install - Completed!

Postby ysKn » Wed Feb 05, 2014 11:10 am

If you used a USB DAC to have audio out of USB instead of the 3.5mm, could you then also plug a 3.5mm mic into that jack instead and wire that up to your A-pillar and have the Nexus 7 pair up to your phone to use as a bluetooth handsfree device (with the required app of course).
Is that possible?
User avatar
ysKn
 
Posts: 67
Joined: Wed May 29, 2013 1:13 am
Location: Victoria
Car: MY07 Liberty

Next

Return to Audio options

Who is online

Users browsing this forum: No registered users and 4 guests