I also used a few pages from the service manual which helped me remove the rear bumper, it's here (https://dl.dropbox.com/u/11792766/forum/Parking%20Sensor/Bumper_Removal.pdf) if you want it.
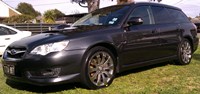
I wanted to get some reverse parking sensors on my Liberty but I thought it costed too much ($300 fitted from Strathfield), so I ended up having a look on eBay and they only cost $30 (Strathfield was selling them for $200)!!! So I ended up getting it from eBay (http://www.ebay.com.au/itm/110804420684), picked the silver to match my car and decided to give it a go installing it myself.
Turned out to be quite easy and enjoyable experience, now I feel more comfortable modding the Liberty.
So I connected the sensor up when I bought them to test that it was working.

Seems like it worked fine, so I went over to my mate's place and he gave me a hand installing it. I'll try explain as much as I can remember.
Inside the boot you will see a plastic panel attached to the trimming, the top one you just turn with a flat head screwdriver and bottom one you press in and it should pop out. The right one you get it out by spinning it towards the middle of the car.

The inside trimming will have a few plastic bolts that you need to pull out, we used a flat head screwdriver to pry them out. Apologies for the blurry photo.

You will also need to remove the trimming across the back of the boot, that you can just pull off once the plastic bolts are out.

Once all the fittings have been removed, you can gently remove the inside trimming to get to the back of the rear light unit. Be careful of the hinge(?) for the bonnet, we had to bend the trimming a bit to get it under the hinge.

Having removed the trimming, you will need to unscrew the 4 bolts to pull the rear light unit out (the white cable ties that is attached to the bolts you can just pull off), then just disconnect the power and carefully pull it out.


The reverse parking sensor is meant to only turn on when the car is in reverse gear, therefore to achieve this we need to piggy-back the wires of the power cable provided off the reverse parking lights. Before I went any further I wanted to test that it everything would work as it should so I connected the power cable directly into the reverse light socket.

After connecting the wires I put the car into reverse and I could hear the sensors beeping so I knew it was working. I wasn't too keen on splicing the wires or soldering it, so I just shoved the cable into the socket as much as I could (it felt like it wasn't going to budge) and then just taped it up with electrical tape. (Yes I know it's quite ghetto, but it'll be easy to get to)

Finally we are ready to take the bumper off!!! Start with the pop screws where the rear light unit was sitting, just get a flat head screwdriver and pop them out.

Some more under the car near the exhuast.

There is one bolt on the inside of the boot, on both sides.

The last and most annoying bolt is hidden behind the plastic around the arc of the wheel. I forgot if we undid that plastic bolt, but either way you just carefully pull that plastic off to get to the last bolt.

It is a 10mm bolt and you need to use a spanner, lucky I have small fingers and could reach it. X marks the spot!


That should be all the bolts. Now pull out the sides of the bumper, and then carefully (try not to use too much force) and lift the bumper up which should pull it out and free it from the plastic teeth like locking mechanism (shrugs).

TADA! Bumper off! Give yourself a pat on the back and have a beer (or 6).

The next bit we kind of winged it and did the best we could with some cloth tape, plastic 30cm ruler and a texta. Marked it out, used the drillbit provided and drilled the sucker! Hopefully you will be more prepared!!!

I decided I want to put the LCD display on top of the dash (driver side) just behind the air vent. The tricky part is figuring out how to get the wire from the boot to the front and hide it, but it was actually quite easy once I figured out how to get the cable into the cabin.
What I used was a clothes hangar, made a little hook and poked it from the boot to the right hand passenger seat... as you can see in the picture.

I used the hook to pull the LCD display cable from the cabin into the boot from the passenger seat. When doing this be careful not to scratch that sexy leather!!!

Now that you've got the cable into the cabin, I would recommend you work at hiding the cable from the front then to the back of the car. Like I said I wanted to mount mine just behind the mini vent, and lucky for me that plastic was quite easy to take out which made it a lot easier to hide the wire.

Work your way towards the back of the car and hide the cable as best as you can. Shouldn't be too hard if you lift up the trimming (?) with a flat head screw driver and just push the cables in.

The side of the rear passenger seat is a plastic fitting which you will need to get the cable around it. If you pull the seat up a bit you should see it and then you can pull the cable around it.


The cable inside the cabin should be all tucked away nicely. With the boot it doesn't matter too much as the wires will behind the boot trimming, out of sight out of mind.

Now you will need to fit the bumper back on and pull all the wires through the holes of the rear head light unit.

Finally just tidy up all the cables and decide where you want to put the main unit. I put mine behind the rear light unit which fits nicely behind the trimming and is stuck on with the double sided tape provided.

Woohoo new reverse parking sensor! As my work colleague would say, "J.D!!!" (Job Done!)
View from the back:

View from the driver seat:

I hope this install will be useful for those that wish to the same on their car. Good luck and thank you for reading!