Ric, can you put this in Walkthroughs and References if you approve? Thanks.
Chadza put together a great walkthrough of installing a Walbro fuel pump in his B4 here: viewtopic.php?f=10&t=5775
So i thought i'd put together a walkthrough of the install of the same pump in a Gen IV Liberty. My car is a pre-facelift GT, i only assume the in tank assembly is the same in other Gen IVs but i haven't installed one in any other Liberty so can't confirm if there are any differences.
I sourced a Walbro GSS342 255L p/hour in tank pump kit from Petroject in Victoria. It cost me $150 for the universal kit.
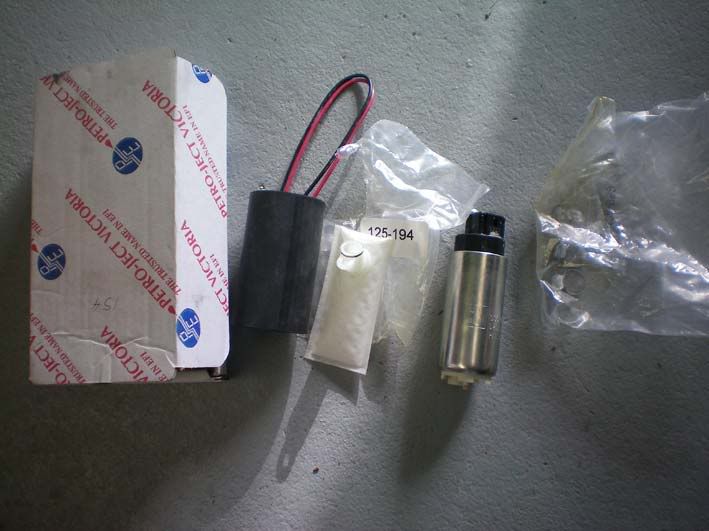
I didn't use all the parts as this kit as is designed for numerous model cars. All i used is the pump and 1x O clip
Time:
It took me nearly 2 hours, but i'm pretty good at this kinda thing so i would allow alot longer if you want to try this.
Tools:
A range of screwdrivers, they are always handy, if you have small ones that's even better!
8mm socket, ratchet and extension
Pliers
Step 1:
Remove seat (I won't show you that as it's super easy)
Step 2:
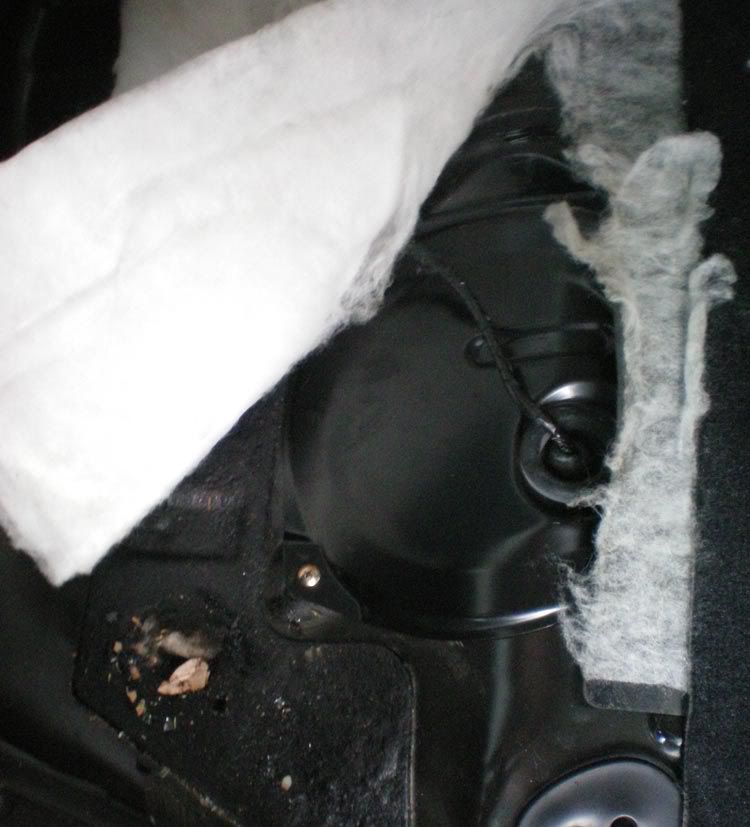
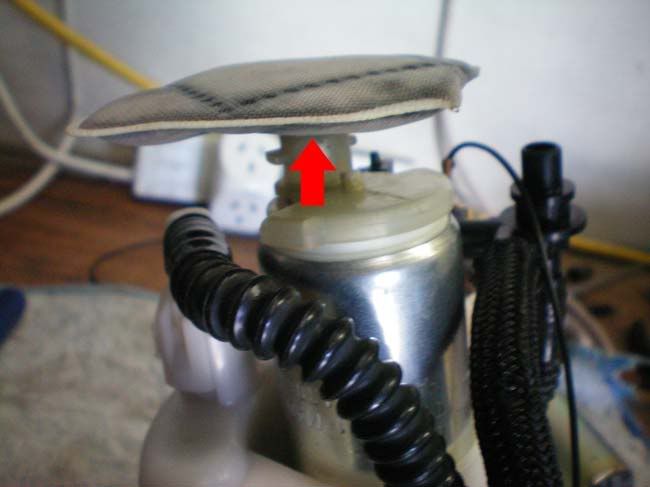
Fold back the white soft stuff to reveal opening, then using a philips head remove 4x screws holding the cover on
Step 3:
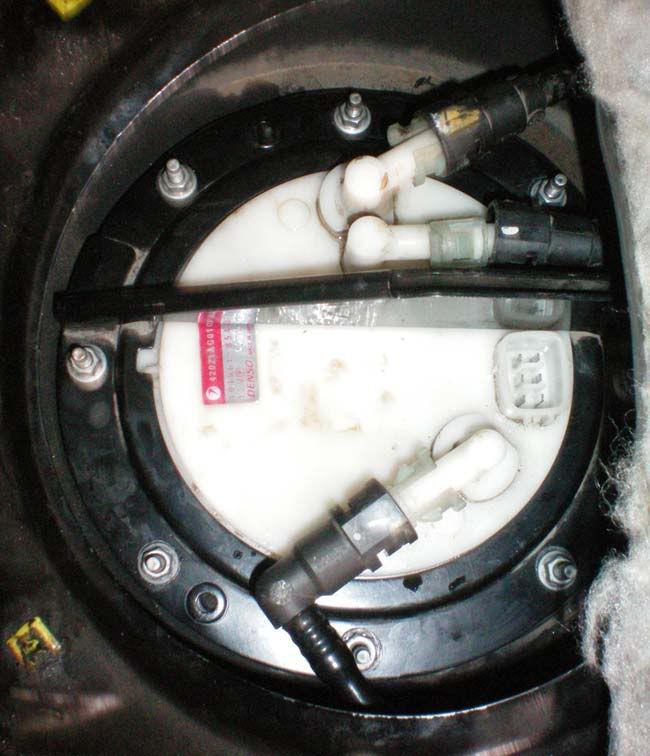
Unplug the electrical connecter that plugs into the top of the fuel pump (no pics, that's easy)
Step 4:
Unplug the 3 fuel lines (these are tricky and require some force. Use long nose pliers to depress the inner clips and then pull really hard. Give it a gentle twist if it doesn't want to budge. (watch out for a little bit of fuel in the lines - have old towels ready)
Then undo 8x nuts holding the assembly in
This pic shows the fuel lines unclipped
Step 5:
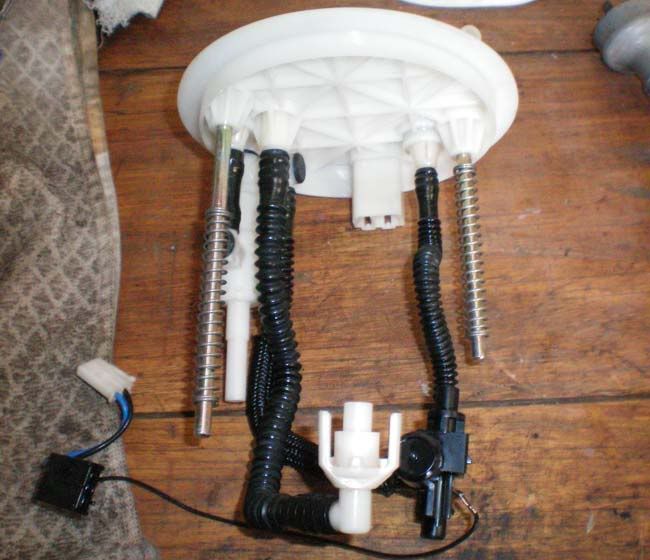
Remove the metal bracket and entire in tank assembly. (carefully so you don't bend the float)
Then tip out the fuel in the canister so you can work on it without covering yourself in petrol!
Step 6:
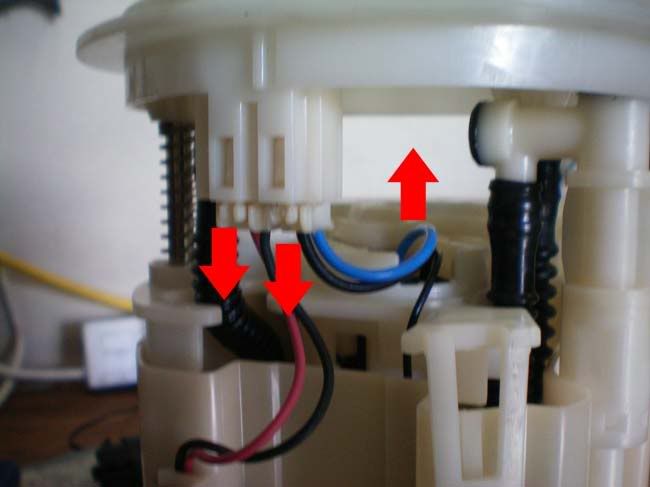
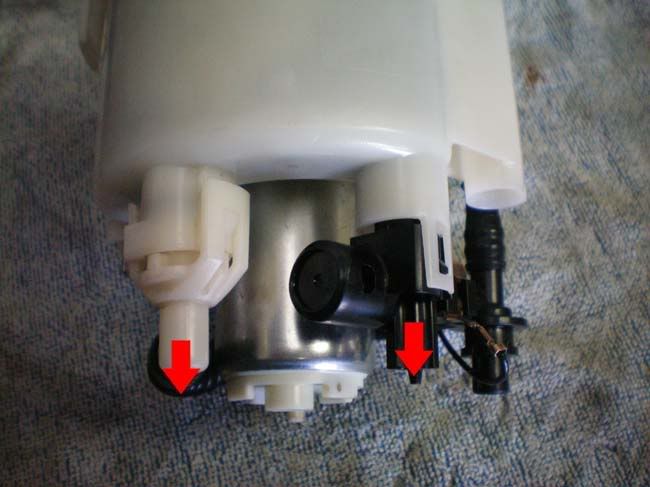
Unplug the wires
Step 7:
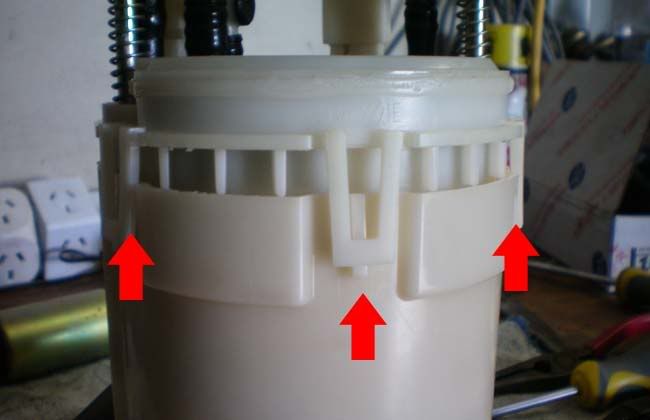
Separate the plastic canister to reveal the pump. There are 4 clips, 3 on one side and 1 on the back. Use flat head screwdrivers to do this and be patient as its pretty stuck in!
Step 8:
Remove the filter, it is held on with an O clip. Put the filter aside as we will re-use it. No need to keep the O clip as you get another one with the pump.
Step 9:
Disconnect the hoses on the bottom which are clipped in
Step 10:
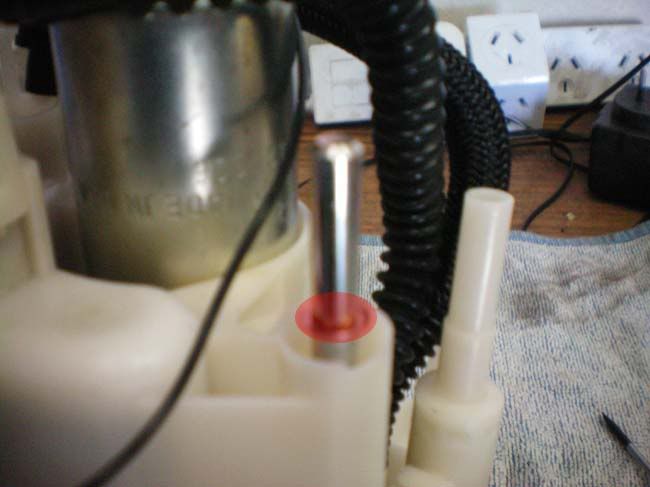
Compress the springs together to reveal a clip on one end of the metal guides. Remove this clip
Step 11:
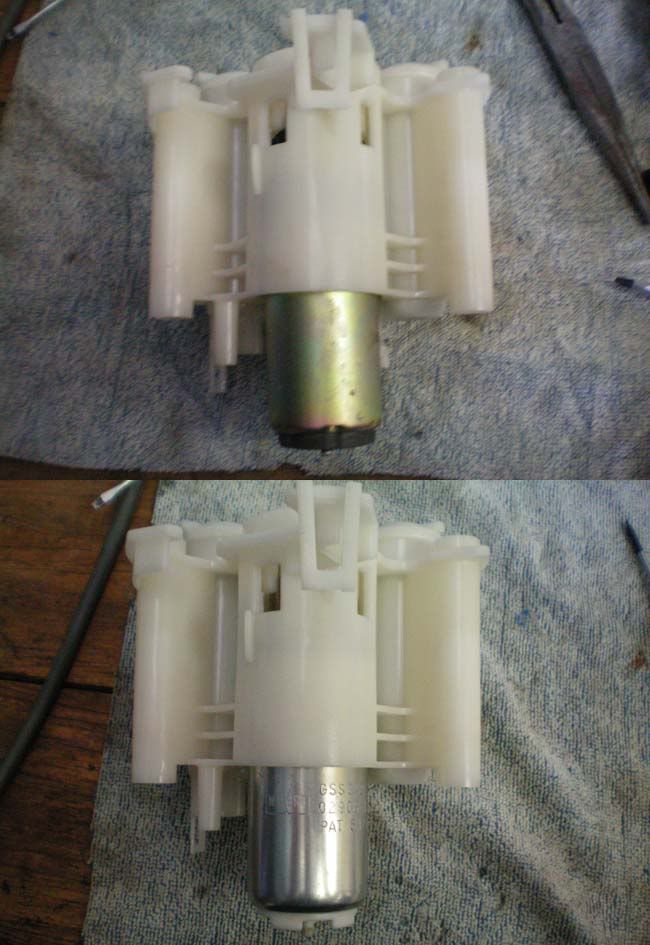
Now remove the entire top assembly. (The only reason do this is to get better access to unclip the pump itself - It's way easier this way, trust me!)
This photo shows the assembly removed and put to the side.
Step 12:
Remove the old pump. There are 2 clips holding it in. Use small flathead screwdrivers from the top to separate the clips and pull down.
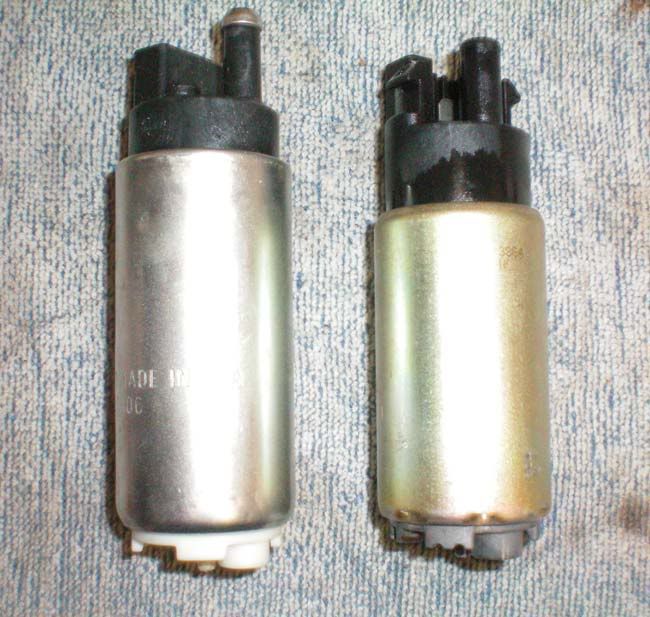
Then install the new pump. There is a plastic sleeve on the OEM pump you don't need. Also make sure the rubber O ring is embedded properly.
Here is a comparison of the Walbro pump next to the OEM one
Step 13:
I re-used the OEM filter as the one that came with the kit was on a 45 degree angle and clearly wouldn't fit. I used a new O clip that came in the pump kit. I asked Subaru about replacement filters and they said i'd have to buy a whole new fuel pump as they don't normally replace the filter on Gen IVs as part of servicing like they did on Gen 3s.
Now the new pump is installed you can reverse this process to put it back together!!
Things to note:
-When clipping the plastic canister back on, there is another rubber O ring in the canister itself. I found it easier to remove the O ring and place it on the 'male' end before pushing back in. It does require some pressure to 'click' the whole plastic canister back together.
-The rubber ring that goes around the bracket under the back seat only has one way to go in so have a look at the 3x guides that help you.
And as Chadza said in his post, re-prime the system a few times by turning the key on and off before starting.
And don't worry about the noise the pump makes, that's normal!
I would recommend getting a professional to do this as it's quite a fiddly job, but if you have the confidence and some very basic tools, anyone can do it!
If anyone has any questions i'm happy to answer them.
Cheers
Andrew