Gozza's GENIII Lib

Show off what mods you've done to your car.

Gozza's GENIII Lib

Postby Gozza » Wed Jul 27, 2011 12:45 pm

This is basically a copy of my thread on Mobile Electronics Australia. A member suggested I put my Liberty here so I thought I would to see what you guys think :)

Original thread: http://www.mobileelectronics.com.au/forums/index.php?/topic/563061-gozzas-geniii-liberty/

The car
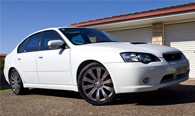
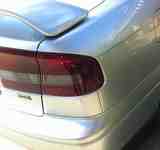
I’vefinally decided to keep my Liberty for the long haul, and give it some decent stereo loving! It’s a manual MY01 3Gen Special Edition GX Liberty with the 2.0L(sadly). On the upside, it has a nice black leather interior with no tears or scratches.

So far, the modifications have been non-existent. Up until last weekend, all I had in her was my old Alpine CDA-9835 running the stock speakers, which didn’t sound too bad, but the tweeters are quite harsh and I get pretty bad listening fatigue on long trips or at high-ish volumes.
IMG_3537 Numberplate.jpg
IMG_3537 Numberplate.jpg (68.83 KiB) Viewed 4358 times

DSC_3426 numberplate.jpg
DSC_3426 numberplate.jpg (82.25 KiB) Viewed 4358 times

Image
Image

Headunit
I managed to source a Pioneer DEH-P80RS which I really like the look of, and had been looking for one for a while! It’s in mint condition which is a major bonus, asany scratches on the brushed aluminium or the face would have really put me off (silly I know). The interface on the P80RS isn’t quite as intuitive as the 9835,and I’m still getting used to it. I always had my 9835 on blackout mode, and I will do so for the P80RS as in my opinion, it looks great with just the buttons and dials lit up.

I will be looking at replacing the standard green lights with some white globes to match the headunit’s illumination (can control the brightness of all the globes I will be replacing on the stalk which is a bonus). I will also be replacing the wood grain trim to something else so keep an eye out for that one.
Image

Speakers
I chose the Crescendo Opus 8.6’s because of the raving reviews I had read, recommendations for them, and their apparently ‘smooth’ sounding tweeters. I’m so sick of harsh speakers that cause listener’s fatigue so this should be awarm welcome. I managed to source them off Rick (Mad89) at formAUDIO at a great price, and I’m sure they would dominate anything else in that price range (hopefully, I will be finding out soon enough!). I didn’t go for a 3-way set as I am wanting to keep the installation simple and without permanently modifying the interior too much (aside from the A-Pillars).

(Photos courtesy of http://www.formaudio.com)
Image
As you can see, the midbass is a quite deep (revised with their 2011 line-up using neo magnets) so this will be a challenge to get them in the doors.. but challenge accepted!
Image

Subwoofer
Not 100%sure on subwoofer yet. Likely candidates are the JL 12w6v2, Boston G512, Morel Ultimo, Hertz Mille (I’m interested to hear how the 12w6v2 sounds due to its good reputation and because they are also not very common in Australia due to their ungodly retail price ($900+); not exactly the best value for money out there compared to the competition)
Image

Amplifiers
I needed something small enough to fit under my front seat, and almost all amplifiers ina single chassis could not do that, so I compromised and decided to get a separate monoblock amplifier and a high powered two channel amplifier (one under each seat). So you could have guessed my excitement when Mobile AudioSolutions put up that clearance sale for Genesis amps! I wanted to go for the Profile Sub Ultra, but funds were not plentiful, the size was a bit too big,and I don’t think I need the extra power anyway. So I decided to get the Profile Two Ultra (150rms x2 @4ohms), and the Profile Sub (500rms @2ohms). For 99% of the time, I’m sure 500rms will be plenty of headroom for me They are also exactly the same dimensions as each other which is nice if I ever want to go for a fancy amplifier rack down the road.

Two Ultra
Image
Profile Sub
Image

More to come!
Last edited by Gozza on Wed Jul 27, 2011 1:36 pm, edited 2 times in total.
User avatar
Gozza
 
Posts: 29
Joined: Tue May 24, 2011 2:08 pm
Location: Sydney, Australia
Car: MY01 Special Edition GX Liberty
Real name: Alex

Re: Gozza's GENIII Lib

Postby garbo41610 » Wed Jul 27, 2011 12:46 pm

Good to see you made it.

Nom nom nom!
Car(s): Steel Silver MY10 GT Wagon + 1985 Subaru Sherpa

Mods: (GT) HKS Panel Filter. The HKS I put in the MY10 is the same filter I took out of my MY05 GT. So yes, they do fit. Custom leather heel pad to minimise carpet wear in the drivers footwell. Slotted front rotors. (Sherpa) 14'' 6 Spoke mags, Chrome Gear Shift (sick!), Alloy Pedals (sicker!), new positive and negative battery terminals, Alpine cda-9827 H/U, JBL GT 6x9's boxed and mounted (sickest!), Kicker DS650.2 component speakers mounted in the footwells in flibreglass pods, Alpine MRP-F200 4 channel amp (4x40wRMS), Rebadged with hektik chrome eBay badges, STi stickers for more powaaaa, "leather" handbrake boot, recarpetted with grey/black car carpet from Bunnings, sick Clarke Rubber boot mat, polished and waxed.
User avatar
garbo41610
-stickered-
 
Posts: 1786
Joined: Thu Jun 11, 2009 11:28 am
Location: Emu Heights and Randwick depending on time of day
Car: MY10 GT Wagon Steel Silver
Real name: Phil

Re: Gozza's GENIII Lib

Postby Gozza » Wed Jul 27, 2011 12:55 pm

Last weekend I decided to get cracking on the headunit!

Soldered and heatshrunk of course (still not very good - still learning)
Image

HVAC taken out (very easy to do! Gotta love Japanese cars)
Image

Headunit in
Image

Sorry about the bad photos!
Image
(In blackout mode - how I normally have it)
Image
User avatar
Gozza
 
Posts: 29
Joined: Tue May 24, 2011 2:08 pm
Location: Sydney, Australia
Car: MY01 Special Edition GX Liberty
Real name: Alex

Re: Gozza's GENIII Lib

Postby Gozza » Wed Jul 27, 2011 1:00 pm

All the gear!
Image
Image
Image

Decided to get the worst part of the job out of the way first.. deadening.
Here is the door - I took the plastic off and it has left a horrible adhesive behind.
Image

The adhesive stuff turned out to be a nightmare to get rid of. Just about went through half a can of degreaser! But the door was cleaned regardless and the outer skin has been deadened. Deadening was also a pain as the outer skin was often interupted with different 'bits' making it hard to position the dynamat and also making me have to cut it into smaller pieces.
Image

I know it doesn't look like much, but this was a long long process and by the time I finished after about 2-3 hours, it was starting to get dark.

Next day;

It was surprisingly hard getting the power wire through the firewall. The only grommet I could have possibly used (due to where the other side ended up - usually too high in the dash) was very tough to get out as it mushroomed on the other side of the firewall. Managed to get it out eventually though and get the power wire through.
Image
Image
Image

Another small modification ;)
Image
Image
User avatar
Gozza
 
Posts: 29
Joined: Tue May 24, 2011 2:08 pm
Location: Sydney, Australia
Car: MY01 Special Edition GX Liberty
Real name: Alex

Re: Gozza's GENIII Lib

Postby Gozza » Wed Jul 27, 2011 1:06 pm

Power wire done! Needs a few more cable ties here or there but mostly done.
Image

Decided I would figure out how I'm going to mount my in-line fuse today.
First, spray painted this little block of wood black and screwed into place (there was a single hole not used so I found a screw the right size and used it rather than drilling into the metal.
Image

Then, I made up a little plate the same size out of 3-ply and sprayed it black too (this was to cover the big screw from the bigger block of wood). I know this is not a work of art, but it's better than nothing I guess. I'm looking for practicality here, this car (especially not its engine bay) isn't going to be on show at any stage.
Image
Image

Also got around to doing the grounding point for the two amplifiers (this is underneath the centre console, strip thingo Plenty of empty space under there. For the grounding point, I sanded the paint off underneath the metal strip. Hopefully this will be a strong enough earth for the amplifiers. The 8 gauge cable is for the two channel (40amps max draw), the 4 gauge is for the monoblock (60amps)
Image

Lastly, the crossovers;
I cut little velcro squares due to the curvature of the metal;
(backing paper reading to take off and get their stickay on)
Image
Image
Hidden! Please excuse the mess :P
Image

These things are as rare as hens teeth so you could imagine my happiness when I found this one for sale!
Image
Image
Image
It has cable management built in! But since the iPod cable was so long (due to my iPod adaptor being right behind the headunit) I had to do two laps! A little bit untidy but it's not visible at any time.
Image
Image

Here is how I installed the iPod adaptor. Used some strong velcro to hold it up behind the HVAC. Fits quite nicely and there is plenty of space when the HVAC goes back in.
Image
Image

It started getting dark but here's the iPod drawer installed.
Image
User avatar
Gozza
 
Posts: 29
Joined: Tue May 24, 2011 2:08 pm
Location: Sydney, Australia
Car: MY01 Special Edition GX Liberty
Real name: Alex

Re: Gozza's GENIII Lib

Postby Gozza » Wed Jul 27, 2011 1:12 pm

Took out the driver's seat too and got onto both the seats with some leather protection stuff while they were out. I wouldn't personally recommend this stuff, I'm currently searching for something different.
Image
Image

Then I took out the centre console and got into it. At this stage I was hoping I wouldn't change my mind about the whole thing :P
Image
Image
Image

I needed to split the remote wire from the headunit into two to go to each amplifier. I also needed a power wire connected for the iPod adaptor.
There was a spare spot in the distro block so I made some use out of it

Since the 'output' end of the distro is separated from the rest of the distro if I just take the fuse out, I can use this for the 12V remote cable (otherwise if it was joined the amplifier would be 'told' to be on all the time and run my battery flat!)
Image

So I put the wires (4 in total) through an 8gauge terminal and heatshrunk the cables. The smaller yellow iPod battery cable is fused for safety too (a whole 2amps!)
Image

I spent almost 2 hours in the dark tidying up cabling (used a pack of 80 cable ties!). I'm very happy with the way it turned out as there were handy OEM looms exactly where I wanted to run my cables to and from.

So at present, I have two lots of cables going under each seat (remote wire, power, ground, RCAs). Sorry I don't have photos, it was dark anyway and it's not that exciting
User avatar
Gozza
 
Posts: 29
Joined: Tue May 24, 2011 2:08 pm
Location: Sydney, Australia
Car: MY01 Special Edition GX Liberty
Real name: Alex

Re: Gozza's GENIII Lib

Postby Gozza » Wed Jul 27, 2011 1:15 pm

No updates for a while, went on holidays, got back and lost motivation, and now it's back

Just a couple of small interior modifications in this one.

I'm not a huge fan of fake woodgrain in a car, and the fascia was a bit old, faded and scratched up so I decided to add some 3m carbon fibre wrap. I know it's not as fancy as real carbon fibre, but I personally like the effect and the price sits well with me too. It doesn't look like a sticker either, it has a sort of texture to it;

Before
Image
After
Image

Before
Image
After
Image

Here is the 'texture' I was talking about. More obvious when you see and feel it in person.
Image

I'm happy with the changes, and I like it more than I thought I would. It's pretty subtle when you're in the car and I don't think it's too over the top either. I think real CF would have looked a little silly in a 10 year old Liberty anyway


The P80RS has white lights (as you would have seen already). So I decided it was time for some interior light updates from the old green. I've started with the easy stuff first and am in the process of changing the lights on the air con unit and on the dash cluster (both a bit fiddly).

So this is what I've done so far. It's an improvement over the green for a very low cost ($8 for the pack of 5 T5 wedge bulb LED's)
Steering wheel column (fills out nicer in person, not quite as well as the old green lighting but better than it shows in this photo)
Image
Ashtray
Image
Glovebox
Image
User avatar
Gozza
 
Posts: 29
Joined: Tue May 24, 2011 2:08 pm
Location: Sydney, Australia
Car: MY01 Special Edition GX Liberty
Real name: Alex

Re: Gozza's GENIII Lib

Postby Gozza » Wed Jul 27, 2011 1:18 pm

I then decided to take my car down to FHRX last week and get one of the staff there to see if they could squeeze my MB-6 midbasses in the doors. I hadn't sound deadened the inner skin of the door yet so I just got them to make the baffles and modify the door, door trim and angle of the baffles just so they would fit. I would then fit the speakers in myself after I sound deaden the inner skin. Paul (Bsyde) was the one that did the install and I just wanted to say he did a great job at getting them in there. The clearance to the window is so tiny, I think I could have spent a full day on them myself and still wouldn't have got them in!

I got around to installing the MB-6 in the passenger door yesterday and here are the results.

Just to give some perspective, this is what I was originally greeted with after taking off the door trim
Image

Passenger side cleaned up
Image

These are the holes in need of sealing (to prevent any 'leaking' to make midbass performance better)
Image
Image

First up, deadening around the speaker. Covered the hole completely;
Image
Then cut around the hole and used the excess dynamat as a little rain roof
Image
Image

Paul got me to space the baffle on two out of three screws using nuts - Leaving a gap (need to fill with silicone to prevent leaks)
Image
Speaker in;
Image
Door done!
Image

Putting back on the door trim (was very slow and careful to make sure nothing touched) went fine.
I don't have any amplifiers in there yet, so I grabbed a home receiver from my house and powered it up through the passive crossover, and it works!! However, there is a downside - As the excursion of the cone increases, it eventually starts 'slapping' against the trim. I'll finish the rest of the install first and then come back to the issue. It might only need a simple modification of the door trim or to try and push the midbass further into the door cavity (if there's room). Anyway, not to worry, I'll deal with it later.
User avatar
Gozza
 
Posts: 29
Joined: Tue May 24, 2011 2:08 pm
Location: Sydney, Australia
Car: MY01 Special Edition GX Liberty
Real name: Alex

Re: Gozza's GENIII Lib

Postby Gozza » Wed Jul 27, 2011 1:33 pm

So yeah, that's pretty much it up to date :) If you have any questions or suggestions I'm more than happy to listen!
User avatar
Gozza
 
Posts: 29
Joined: Tue May 24, 2011 2:08 pm
Location: Sydney, Australia
Car: MY01 Special Edition GX Liberty
Real name: Alex

Re: Gozza's GENIII Lib

Postby tangcla » Wed Jul 27, 2011 2:48 pm

You know in terms of amplifier, you could have got an Alpine PDX-5 and that would have fit under your seat :) that's what I have (and will be selling soon).

4x74WRMS and 1x374WRMS. Not massive power, but plenty of clean power.
www.tangcla.com - photography

Canon 5D Mark III x2 | 16-35mm f/2.8L | 24-70mm f/2.8L IS | 70-200mm f/2.8L IS
100mm f/2.8L IS macro | 200mm f/2.0L IS | 580EX-II x2 | 430EX-II | PocketWizard TT1/TT5
User avatar
tangcla
 
Posts: 7409
Joined: Wed Aug 15, 2007 1:47 pm
Location: Melbourne, VIC
Car: B6 Audi S4 (4.2L V8)
Real name: Clarence
Profile URL: http://www.tangcla.com

Re: Gozza's GENIII Lib

Postby Gozza » Thu Jul 28, 2011 11:24 am

tangcla wrote:You know in terms of amplifier, you could have got an Alpine PDX-5 and that would have fit under your seat :) that's what I have (and will be selling soon).

4x74WRMS and 1x374WRMS. Not massive power, but plenty of clean power.


No offense, but the PDX series are known to have serious noise issues which has apparently been corrected with the new 'PDX-F' series of amplifiers. If I was to go for a single 5 or 3 channel amplifier, I would have gotten the JL HD900/5, but it is a little out of my price range.

Having seperate amplifiers also allows flexibility in the future if I want to run the speakers actively, or if I want to have more power for a subwoofer. I could either upgrade the Profile Sub amp to a Profile Sub Ultra (1000rms), or I could just add another Profile Sub amplifier. 3 and 5 channels sadly don't allow that much flexibility for future upgrades.

The Genesis amplifiers I'm using are in a different league than the PDX range. They are handmade in the UK and are highly regarded in the car audio community (as you would have seen on Mobile Electronics - I've seen your username there). They retail at ~$600 each and I'm soon to find out if they're reputation is with reason :)
User avatar
Gozza
 
Posts: 29
Joined: Tue May 24, 2011 2:08 pm
Location: Sydney, Australia
Car: MY01 Special Edition GX Liberty
Real name: Alex

Re: Gozza's GENIII Lib

Postby teflon » Thu Jul 28, 2011 11:41 am

Great work Gozza. Still a couple of bargain Genesis amps available on MEA I think.

When I did the dynamat on my doors fairly recently and was encountered with the plastic I wasn't sure whether to keep it or chuck it. I asked some people on here and also read around on the legacy GT forums about what to do with it. Some said keep it because it functions as a moisture barrier and others said chuck it as long as you seal all the holes with dynamat. I ended up keeping it because I couldn't be arsed cleaning off the black tar (surface prep took longer than sticking the dynamat usually!) and there were some holes in the gen four doors which I couldn't cover completely.
User avatar
teflon
 
Posts: 374
Joined: Sun Aug 24, 2008 8:17 pm
Location: SA
Car: 2004 MY05 Pearl White Liberty GT
Real name: Phan

Re: Gozza's GENIII Lib

Postby Gozza » Thu Jul 28, 2011 1:27 pm

Thanks for the comment :)

As for the plastic, you're right - If you seal all the service holes (as I did) you can chuck the plastic. I especially didn't want the plastic there still because of the flapping noise is makes when you get the midbass in the doors pumping ;)

And yes, there are some cheap Genesis amplifiers still from Mobile Audio Solutions (MAS). They have great customer service, and the prices are rediculously cheap!

Here's another update too. One that I'm particularly happy about.

Work Emotion CR Kai 17" in Gunmetal Grey
photo(2).JPG
photo(2).JPG (139.94 KiB) Viewed 4267 times

photo.JPG
photo.JPG (122.5 KiB) Viewed 4267 times


IMG_4209.JPG
IMG_4209.JPG (140.77 KiB) Viewed 4039 times

IMG_4206.JPG
IMG_4206.JPG (182.58 KiB) Viewed 4039 times
Last edited by Gozza on Wed Feb 08, 2012 3:28 pm, edited 1 time in total.
User avatar
Gozza
 
Posts: 29
Joined: Tue May 24, 2011 2:08 pm
Location: Sydney, Australia
Car: MY01 Special Edition GX Liberty
Real name: Alex

Re: Gozza's GENIII Lib

Postby teflon » Thu Jul 28, 2011 1:34 pm

Looks great Alex!

And I agree about the plastic making that noise... I've heard it a few times, but didn't want to look at another door panel for a while after spending probably 7-8 hours of my life doing all four doors!
User avatar
teflon
 
Posts: 374
Joined: Sun Aug 24, 2008 8:17 pm
Location: SA
Car: 2004 MY05 Pearl White Liberty GT
Real name: Phan

Re: Gozza's GENIII Lib

Postby toson1911 » Mon Jan 23, 2012 6:22 pm

Hey man i know that this is an old post, but im currently doing the carbon fiber wrap the my gen 3, and i had a question, did u take off the gear shifter boot to get the wrap in the through to the back or did u just get over the top and tried cutting it the right size and feed it in?

Thanks
User avatar
toson1911
 
Posts: 56
Joined: Tue Nov 08, 2011 5:44 pm
Location: Sydney
Car: MY03 Subaru Liberty RX
Real name: Alex


Return to Post your mods

Who is online

Users browsing this forum: No registered users and 1 guest