After some brief research, I decided to settle for a Polk Audio MM840 SVC woofer. These units are typically used to replace the 8" Falkadore's locally and should also function ok when driven by the stock amp, yet provide good drive when/if amp upgrades are to take place. Along with the subwoofer upgrade, I figured I might aswell Dynamat the parcel shelf while it was all apart.
So here's how its done. It should take 3-4 hours from start to finish if you take your time and don't rush.
Skill Level : Minimal
Effort: Medium
Street Cred.: High
Benefit: High
Tools required:
-Stubby Philips head screw driver (for stock subwoofer)
-Various flat-heat sized screwdrivers
-10mm and 12mm sockets
-Hex keys for new subwoofer bolts
-Knife/scissors for dynamat cutting
-Wire crimping tool and side cutters
-Beer
Take your new sub and matting like so;

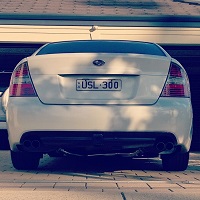
And install in into the back of this;

First up, the rear seat needs to be removed. This is done quite easily by lifting the seat up by the clips which secure it to the chassis. There are two, located directly behind each font seat. Just pull them up and the seat will unlock.

With both unlocked, the seat will slide out.

Next up, to remove the backrest, there are four bolts which hold the bottom onto the chassis. Just simply unbolt them in any order.

To remove the backrest you will need to left the entire structure up towards the roof by ~4cm. There are three hooks on the uprights which the backrest hooks into. Please make sure you fold-down the centre arm rest + peek hole as otherwise it will jam. You can see this hook when the cavity is exposed.

Next, the C-Pillar covers and plastics. The covers will unclip easily, with the exception for the metal clip which will hold on for dear life. Do not force this as it will warp the covers. Instead take a small flat-head screwdriver and push the tab inwards. This requires some gentle care. One unclipped, the cover will slide out.

Once both panels are out, you should have something like this. Take a break, have a beer.

To remove the plastics, there are four bolts. Three can easily by seen, the forth is hidden under the 'SRS Airbag' tab. It comes out quite easily exposing the forth bolt. Once all are out, the plastic will unclip.

Now with the rear shelf cover exposed, to remove it, lift the three tabs out using a large flat-head screwdriver. Please take care as these can easily rip though the cover.

The cover will now slide down, exposing the rear shelf, subwoofer and wiring looms (Subwoofer audio cable and power for the boot light). Remove the subwoofer and have another drink.

Here we have the stock and replacement woofers side by side. Quite a large difference ;p

Yep, same from this angle too

And here

So, at this point you can take two options to wire the new sub in.
1). Re-pin the stock wiring to utilise the stock connector (this is what I did).
2). Cut off the wiring from the old subwoofer and use that (much easier).
Option 1). is harder, and probably doesn't give much benefit, other than the fact you have more surface area in the clips on the subwoofer.

With the 'wiring' done, move back into the car and clean the shelf, removing the clips which hold the two looms down. Scrape off the remaining padding until you are happy.

With that all done, you can move onto the Dynamat. Again, there are two ways you can approach this. Cut and stick small sections (quick, easy, but messy and envolving), or you can cut some templates out of cardboard and transfer those to the Dynamat sheeting. I opted for the second option, as A). it seemed the logical choice, B). is probably quicker.
So, take apart the box your woofer came in, and some scissors and start cutting.

Once done, take the template, trace it out and cut. (Note: If you make the left side first, you can reverse it to make the right side - Please cut extra holes for the ground points on the right)

To install, peel the first 5cm as this makes application much easier

Then apply from the back to the front moulding the matting to the shape of the shelf.

Rinse and repeat for the right and centre. Once done, have another drink.

Clip the looms back in, cut in the require holes for the wiring and you are almost done.

Install the subwoofer, making sure you check the depth of the woofer. For the MM840 I used the provided 3mm spacer to ensure clearance (see below pics).

Now replace everything in the reverse order as above.
As the woofer is substantially larger, the clearance to the torsion beams for the boot is quite close, but enough.
Boot Open;

Side On (~8mm clearance);

Boot Closed (~3mm clearance);

And you are done. Enjoy the remaining beer and revel in the fact you have done something on your car without getting too dirty or too many cuts on your hands.
On a side note, my opinions the Polk MM840;
-I'm currently driving it on +5/+6 Bass (old setting for stock was +4/+5)
-It is not as punchy as the stock woofer, obviously as it is under-driven (as this is quite noticeable)
-However there is more bass overall and in hard drum+bass is really comes into it's own
-Bass is much clearer and blends in nicely with the stock tweaters/speakers
-Overall I'm quite happy with the result and would recommend the upgrade
Enjoy!
VPR
-------------------------------------
Update 21/12/12
So, it seems with the default spacer provided with the Sub, there is abit of tightness with the boot torsion bars.

So to help with data I quickly cadded up a 5.5mm spacer and printed it out with my 3D printer (on a side note I love these things).
The spacer is designed to sit the sub 5.5mm higher on the shelf and sit between the rubber/foam padding and the shelf itself.


Total additional spacing will be ~11.6mm, so around 10mm once tightened.


The sub sits obviously abit higher on the shelf, however doesn't interfere with the cover once placed ontop. (Note, I pulled off the padding around the sub on the cover and stuck it to rear shelf, but neglected to show it here).

And finally, the important part;

Much better
The additional 5.5mm really helps and give a good 4-5mm clearance from the bars, meaning no binding, cracking or random noises when opening the boot.
If people want I could probably print a few spacers out and send them for a small fee.
Anyway, now with the above mod, I heavily suggest having a read of this;