Liberty 2.5i BL 2007, 5 Speed Manual, EJ253

Show off what mods you've done to your car.

Re: Liberty 2.5i BL 2007, 5 Speed Manual, EJ253

Postby jdmsubielover » Tue Nov 03, 2020 5:37 pm

Yowie wrote:Good work. I really appreciate the detailed write-ups with pictures, lessons learned etc.

I'm a big fan of the Liberty GT front brakes fitted to a Forester. Braking goes from being a scary experience (with the tiny stock rotors) to something giving full confidence, more late-braking options and so on.


Thank you mate!
Forester is my fav wagon atm. Started falling in love with them. :D
07 Gen 4-BL 2.5i -5 spd man
User avatar
jdmsubielover
 
Posts: 35
Joined: Sun May 31, 2020 10:26 am
Location: Melbourne
Car: 2.5i Gen 4 BL - 5 Speed Manual
Real name: Nishanth

Re: Liberty 2.5i BL 2007, 5 Speed Manual, EJ253

Postby bigBADbenny » Tue Nov 03, 2020 6:48 pm

Really very impressive, the car looks heavy on intent already, of the road crushing type.

Every subaru is engineered as a drivers car first and foremost, you’re well on your way to revealing that in its entirety :good:
User avatar
bigBADbenny
 
Posts: 10420
Joined: Tue Oct 04, 2011 6:36 pm
Location: Collingwood, Melbourne
Car: MY07 GT-B 6MT OBP Wagon
Real name: Ben Richards
Profile URL: http://tinyurl.com/agvbzop

Re: Liberty 2.5i BL 2007, 5 Speed Manual, EJ253

Postby jdmsubielover » Wed Nov 04, 2020 3:06 pm

bigBADbenny wrote:Really very impressive, the car looks heavy on intent already, of the road crushing type.

Every subaru is engineered as a drivers car first and foremost, you’re well on your way to revealing that in its entirety :good:


Thank you very much Ben.
07 Gen 4-BL 2.5i -5 spd man
User avatar
jdmsubielover
 
Posts: 35
Joined: Sun May 31, 2020 10:26 am
Location: Melbourne
Car: 2.5i Gen 4 BL - 5 Speed Manual
Real name: Nishanth

Re: Liberty 2.5i BL 2007, 5 Speed Manual, EJ253

Postby jdmsubielover » Wed Nov 04, 2020 5:58 pm

Yellow Fog lights

I wanted to have yellow fog lights for that jdm look and i tried some led options. I was satisfied with the appearance and colour of the lights but not much output was there. Literally no use in the rain or foggy weather. I had Osram Nightbreaker laser in my fogs before and the lighting was adequate. But i wanted more out of them and the only way is to replace them with a better aftermarket one. This is the best i've found so far.
After some digging on the interweb I've come across these lights made by Diode dynamics.

https://www.diodedynamics.com/ss3-led-fog-light-kit-for-2008-2009-subaru-legacy.html

These lights come with brackets to mount in the bumper fog light location.


Lights1.jpg
Lights1.jpg (184.53 KiB) Viewed 7010 times


Some stats

Previous Led bulbs
iilumo Solar Hb 4.
Colour 3000k Golden Yellow
Output 550LM each and combined 1100LM
12v-24v

New set up
Diode dynamics
SS3 Led fog light kit For 2008-2009 Legacy or SS3 Led fog light kit Type X, both are similar.
Colour 3000k Yellow, I opted fog in sport output.
Two outputs Sport/Pro
Sport at 1300LM each and combine 2600LM.
Pro at 2700LM each and combine 5400LM.

These lights can be purchased with different optics like driving/fog/spot or flood. Depending on the application there are plenty of options to mount them anywhere.
My idea was to get away without having to install a light bar in front of the vehicle. These lights solve that issue to an extent. They will never be as good as a dedicated spot light but they illuminate everything super bright in their range. I can spot a roo or two now to save myself on the road. Every time i see a car that hit a roo i feel sorry for both poor skippy and the person who wrecked their car due to poor visibility in different severe weather conditions. They illuminate the ditch on the side of the road as well. These lights provide so much lighting and cover the dead space between bottom of the headlight beam to the ground. Driving at night is much more confidence inspiring now. In most conditions they outrun the headlights itself!

Old fogs
Old fogs.jpg
Old fogs.jpg (177.34 KiB) Viewed 7010 times

New fogs
New fogs.jpg
New fogs.jpg (105.98 KiB) Viewed 7010 times

Lights7.jpg
Lights7.jpg (151.48 KiB) Viewed 7010 times


Assembly is really straight forward. SAE lettering should be on the bottom if you mount them right. Brackets are marked left and right.
Instructions are clear and easy. Comes with an adapter to plug them into factory harness.

This is how the bracket looks in the factory fog light location
Lights 14.jpg
Lights 14.jpg (224.7 KiB) Viewed 7010 times


After Mounting the Fog light
Lights 3.jpg
Lights 3.jpg (219.83 KiB) Viewed 7010 times


Adapter
Lights10.jpg
Lights10.jpg (200.19 KiB) Viewed 7010 times


closer look
Lights15.jpg
Lights15.jpg (213.09 KiB) Viewed 7010 times


Heat sink at the back
Lights17.jpg
Lights17.jpg (122.17 KiB) Viewed 7010 times


I adjusted the lights by pushing them all the way down by pressing the bottom part and matched the cut off point with the factory one that i saved for reference. Tightened the screws on the side to keep them in place. Fog lamp cover will just fit normally but there is some gap between the foglight and the bumper fog cover.

This is due to the adjustability they offer. Cars with saggy rear suspension (with or without automatic headlight levelling) benefit from this as the rear usually tends to sit lower and lifts up the front. That minor difference effects headlight/fog light beam pattern and starts annoying other road users. The more weight in the car the higher the lights go. Imagine towing with soft rear suspension, one can barely see the road.

Once i fit Shockworks i have to re align or tilt them a few degrees upwards to compensate the difference in height.

Went for a drive and no one seems to be bothered about the bright lights and i haven't got any flashes from the oncoming traffic. Yet to go for a drive on the highway or in sever weather. Will update on this in future.

Gap that i mentoned
Lights9.jpg
Lights9.jpg (208.25 KiB) Viewed 7010 times
07 Gen 4-BL 2.5i -5 spd man
User avatar
jdmsubielover
 
Posts: 35
Joined: Sun May 31, 2020 10:26 am
Location: Melbourne
Car: 2.5i Gen 4 BL - 5 Speed Manual
Real name: Nishanth

Liberty 2.5i BL 2007, 5 Speed Manual, EJ253

Postby jdmsubielover » Fri Dec 04, 2020 3:16 pm

Pictures with new Lights and Worn out Bushings

Found one of the old bushings that I have removed from the car earlier. Just wanted to show the condition of the rubber bushings taken out from the car.
Bushings deteriorate overtime and replacing them made a huge difference in the driving experience of my car.

Gearbox linkage selector bushing replaced at 203,000 kms with Whiteline KDT957.
IMG_3518.jpg
IMG_3518.jpg (239.41 KiB) Viewed 6834 times

IMG_3519.jpg
IMG_3519.jpg (229.8 KiB) Viewed 6834 times


New Fogs from the previous post
IMG_2983 2.jpg
IMG_2983 2.jpg (244.69 KiB) Viewed 6834 times

IMG_3299 2.jpg
IMG_3299 2.jpg (253.5 KiB) Viewed 6834 times

IMG.jpg
IMG.jpg (252.48 KiB) Viewed 6834 times
07 Gen 4-BL 2.5i -5 spd man
User avatar
jdmsubielover
 
Posts: 35
Joined: Sun May 31, 2020 10:26 am
Location: Melbourne
Car: 2.5i Gen 4 BL - 5 Speed Manual
Real name: Nishanth

Re: Liberty 2.5i BL 2007, 5 Speed Manual, EJ253

Postby Yowie » Fri Dec 04, 2020 9:16 pm

Those yellow foglights look really mean :twisted:

Great stuff.
User avatar
Yowie
 
Posts: 576
Joined: Tue Jul 21, 2015 10:05 pm
Location: Brisbane
Car: SH Forester XT

Re: Liberty 2.5i BL 2007, 5 Speed Manual, EJ253

Postby Turbo Lag » Sun Dec 06, 2020 10:16 am

Your car is looking great now - nice work on the fogs too! Always wanted something a little brighter myself under there. I also heard you got your Shockworks finally, can't wait to see how the car looks once you throw them on. :good:
'04 Subaru Liberty 2.5i Safety Pack Sedan 5MT & '08 Subaru Liberty GT-B Tuned by STI Wagon 6MT & '00 Toyota Altezza RS200-Z 6MT & '96 Honda CBR250RR MC22
User avatar
Turbo Lag
 
Posts: 316
Joined: Sat Jul 17, 2010 12:32 am
Location: Melbourne
Car: 04 2.5i & 08 TBSTI & Altezza
Real name: Leon
Profile URL: viewtopic.php?f=10&t=36287

Re: Liberty 2.5i BL 2007, 5 Speed Manual, EJ253

Postby jdmsubielover » Tue Dec 08, 2020 8:50 pm

Yowie wrote:Those yellow foglights look really mean :twisted:

Great stuff.


Thank you Yowie.
07 Gen 4-BL 2.5i -5 spd man
User avatar
jdmsubielover
 
Posts: 35
Joined: Sun May 31, 2020 10:26 am
Location: Melbourne
Car: 2.5i Gen 4 BL - 5 Speed Manual
Real name: Nishanth

Re: Liberty 2.5i BL 2007, 5 Speed Manual, EJ253

Postby jdmsubielover » Tue Dec 08, 2020 9:19 pm

Turbo Lag wrote:Your car is looking great now - nice work on the fogs too! Always wanted something a little brighter myself under there. I also heard you got your Shockworks finally, can't wait to see how the car looks once you throw them on. :good:


Thank you Leon. You will have to upgrade to post facelift bumper to fit those lights to your car.

Shockworks :D. Loving them!. Dampening is adjusted to soft atm (that's how they arrived). I wanted to drive for sometime and experience them before changing it to medium or the hardest setting. Got the alignment done for street use and didn't go crazy with camber. I think it's at -1 at the front and rear as i have adjustable lower control arms at the rear. Planning on going somewhere this weekend to extract the best out of Shockworks!. I Will post about the installation and driving experience soon.

Box.jpg
Box.jpg (219.24 KiB) Viewed 6771 times
07 Gen 4-BL 2.5i -5 spd man
User avatar
jdmsubielover
 
Posts: 35
Joined: Sun May 31, 2020 10:26 am
Location: Melbourne
Car: 2.5i Gen 4 BL - 5 Speed Manual
Real name: Nishanth

Re: Liberty 2.5i BL 2007, 5 Speed Manual, EJ253

Postby bigBADbenny » Wed Dec 09, 2020 5:09 pm

Too soon for a review?
For me the best aspect of fitting Shockworks is completely forgetting they’re in there, but constantly being suprised when they conquer less than favourable conditions.

Beyond that, their sublime compliance really opens the door to other meaningful suspension and driveline upgrades.
Eg upgrade bushes, alloy &/or adjustable arms, custom adjustable swaybars just slightly harder or softer than stock, rigi collar, and even chassis bracing.

Regarding the latter, if I was doing it all again, I’d do all the sti draw bar parts, as per s204+ & s402.
These are generally compliant in all directions but limit stretching force, theoretically a twofer.
User avatar
bigBADbenny
 
Posts: 10420
Joined: Tue Oct 04, 2011 6:36 pm
Location: Collingwood, Melbourne
Car: MY07 GT-B 6MT OBP Wagon
Real name: Ben Richards
Profile URL: http://tinyurl.com/agvbzop

Re: Liberty 2.5i BL 2007, 5 Speed Manual, EJ253

Postby jdmsubielover » Mon Jun 14, 2021 2:06 pm

bigBADbenny wrote:Too soon for a review?
For me the best aspect of fitting Shockworks is completely forgetting they’re in there, but constantly being suprised when they conquer less than favourable conditions.

Beyond that, their sublime compliance really opens the door to other meaningful suspension and driveline upgrades.
Eg upgrade bushes, alloy &/or adjustable arms, custom adjustable swaybars just slightly harder or softer than stock, rigi collar, and even chassis bracing.

Regarding the latter, if I was doing it all again, I’d do all the sti draw bar parts, as per s204+ & s402.
These are generally compliant in all directions but limit stretching force, theoretically a twofer.


Yeah Ben it was too soon for me to review as i have never owned any form of sports suspension or coilovers on any car. I really wanted to experience all kinds of driving conditions and settings before i give my opinion. I am into 6 months of driving on Shockworks and iv'e tried all different possible settings by now. Mainly street focused, no track stuff atm. They perform well in all kinds of driving conditions and i was often surprised the way they handle bumps even at higher speeds, almost zero body roll at roundabouts and city driving speeds. Feels a little stiff in crawling speeds on a bumpy road but as you pick up speed it gets smoother. Car drives great on the freeway too, very minor steering input required to keep it going straight. Stock shocks at 200,000kms were a lot scary to drive on. I'm following everyone's advice of two finger gap all around and it works well. I get out of most tricky ramps without scraping.
Car is running great now, I have done some fixes and added a few bits that i love from a post facelift gen 4 model lineup. Will soon post abut the what i've fixed.
Thanks to Turbo lag and Ben for all the free advice :smile:
Attachments
IMG_5413.jpg
IMG_5413.jpg (86.01 KiB) Viewed 5427 times
IMG_5566.jpg
IMG_5566.jpg (78.88 KiB) Viewed 5427 times
IMG_5558.jpg
IMG_5558.jpg (74.58 KiB) Viewed 5427 times
07 Gen 4-BL 2.5i -5 spd man
User avatar
jdmsubielover
 
Posts: 35
Joined: Sun May 31, 2020 10:26 am
Location: Melbourne
Car: 2.5i Gen 4 BL - 5 Speed Manual
Real name: Nishanth

Re: Liberty 2.5i BL 2007, 5 Speed Manual, EJ253

Postby bigBADbenny » Wed Jun 16, 2021 7:56 pm

Wheel goalz attained :P

I saw your update on fb with the inlet manifold off :shock:

Any insights?
User avatar
bigBADbenny
 
Posts: 10420
Joined: Tue Oct 04, 2011 6:36 pm
Location: Collingwood, Melbourne
Car: MY07 GT-B 6MT OBP Wagon
Real name: Ben Richards
Profile URL: http://tinyurl.com/agvbzop

Liberty 2.5i BL 2007, 5 Speed Manual, EJ253

Postby jdmsubielover » Sun Jun 20, 2021 2:55 pm

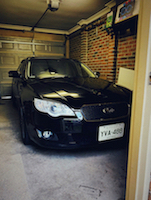
Yeah! I love those wheels and after a 5month wait due to shipping delays from Japan I finally got my hands on them.
Specs are
SSR GTX-01 Dark silver, 17x8 +45 offset, 5x100 PCD. Tyres are the same 235/45R17 which i had on my old rims.

Intake Manifold gaskets and water pipe O rings:

During routine inspection and learning that i do on weekends I've found out that the coolant water pipe sitting below the intake manifold was leaking. Kept an eye on the leak and coolant levels. There was no major loss of coolant but tiny bubbles started appearing even after bleeding the coolant with the funnel method. I got concerned and started looking for a fix which is to take the entire manifold out to gain access to the water pipe. Since I have to take the manifold out I decided that it's a good idea to tackle some of the other issues which might cause problems later down the line.

Theses are the things i've fixed
1. Intake manifold gaskets
2. Intake collector gaskets
3. Coolant temp sensor
4. Water pipe O rings
5. PCV hose ( Plastic PCV on my one)
6. Throttle body cleaning
7. Checking spark plugs and plug seals
8. Coolant hoses to throttle body
9. Power steering hose O ring
10. UEC after putting everything back together

IMG_5484.jpg
IMG_5484.jpg (89.91 KiB) Viewed 5349 times


Ordered all the pars from partsouq and got my tools from my work over the weekend. Started off by disconnecting the battery and removing the snorkel and air box.
Drained the coolant and to make it easy and not to get confused, I started disconnecting all the plugs and earth connections which plug into the intake manifold wiring harness. I always click pictures before stripping stuff so that i have something to refer to if i'm stuck somewhere. Once everything is disconnected I unbolted the bracket holding the wiring harness main plug. Disconnected EGR pipe, all the coolant hoses going to the radiator, throttle body and heater core. After disconnecting all connectors and double checking i started unbolting the bolts which hold the intake manifold in place. It was fairly easy and having electric tools made it even quicker. Remember electric impact gun should be used only to undo bolts and not to tighten as you can easily strip the thread on them. Even being in the mechanic profession i learnt it the hard way. You'll be surprised how easy it is to strip threads on bolts by using electric tools to tighten even after starting the thread by hand. Takes time but using hand tools is the best way and a failsafe method.

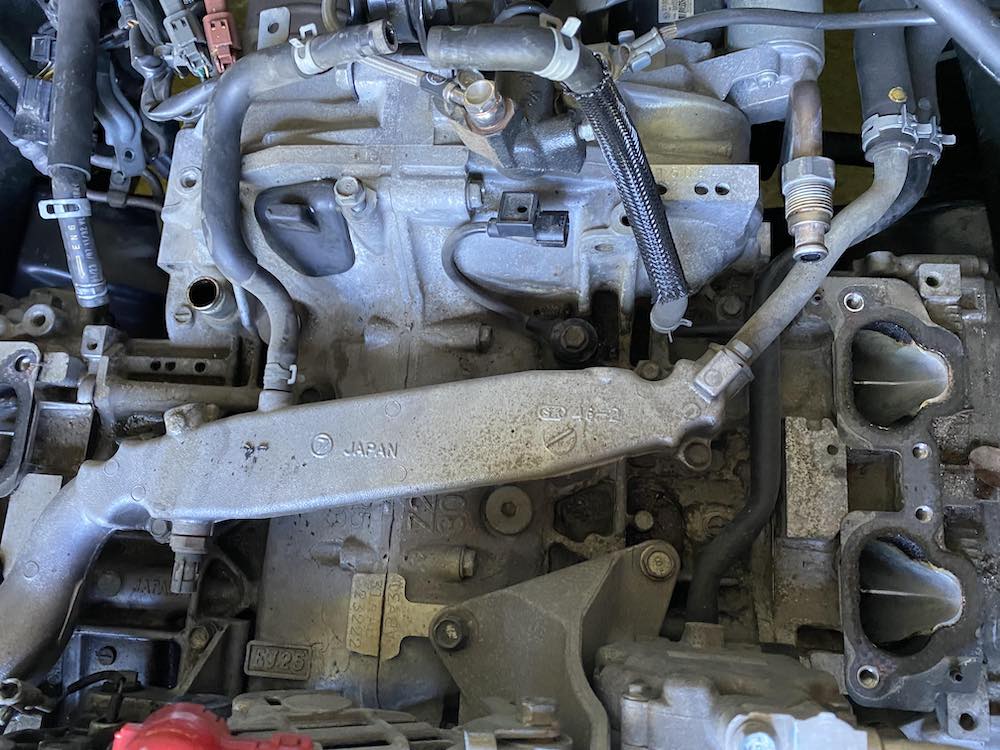
Once the manifold bolts are loose you need to lift it out of place and undo the O2 sensor plug bracket. You will have access to that bolt easily after the intake manifold is loose. once the bracket is off, just work your way through and lift up the manifold making sure everything is disconnected. My mate gave me a hand in this step as the manifold is a bit heavy and its hard to see behind. Once the manifold is out I covered the inlets with a clean rag and vacuumed all the dirt and debris. While both the inlets are covered i sprayed some Orange agent degreaser and brake clean to clean the top of the block. After that step I vacuumed once again and unbolted the water pipe.
Driver side.jpg
Driver side.jpg (100.26 KiB) Viewed 5349 times

Passenger side.jpg
Passenger side.jpg (112.91 KiB) Viewed 5349 times

IMG_5844.jpg
IMG_5844.jpg (131.44 KiB) Viewed 5349 times


Once the water pipe was out i could see the coolant leak. I'm pretty sure these were never replaced considering the condition. O ring's were flat and oozing coolant from the sides. Good thing was that there was no contamination or staining anywhere. I took the old O rings out, Cleaned the surface to install new O rings. I gave a good clean with a detailing brush and vacuumed everything around the openings.

IMG_5851.jpg
IMG_5851.jpg (142.37 KiB) Viewed 5349 times

IMG_5852.jpg
IMG_5852.jpg (120.38 KiB) Viewed 5349 times

IMG_5860.jpg
IMG_5860.jpg (103.7 KiB) Viewed 5349 times


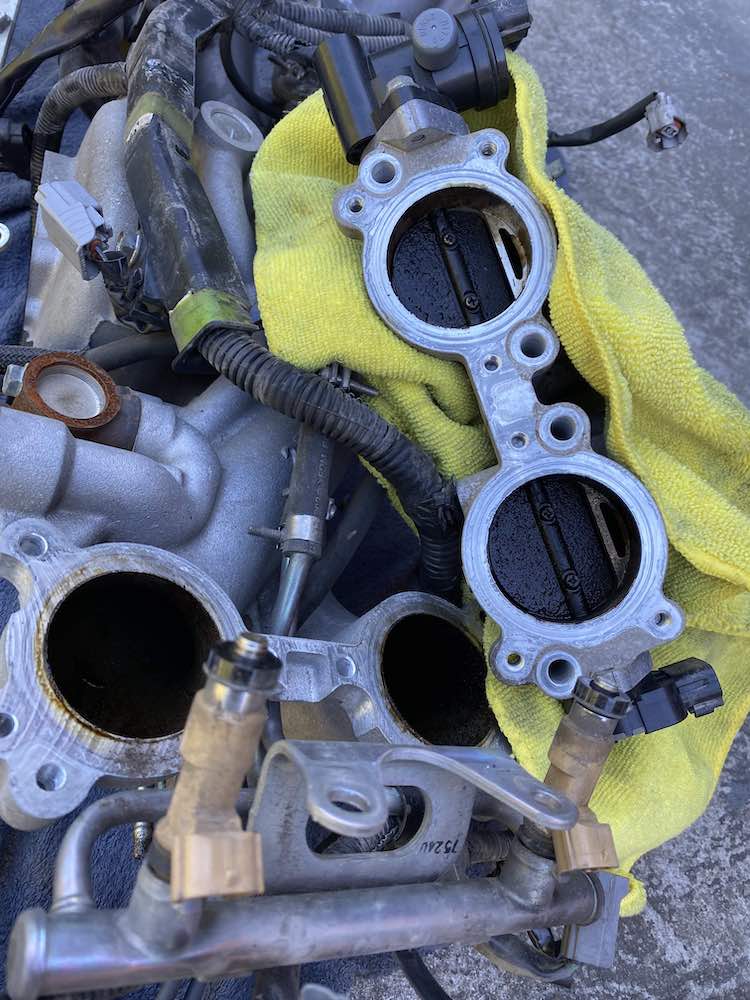
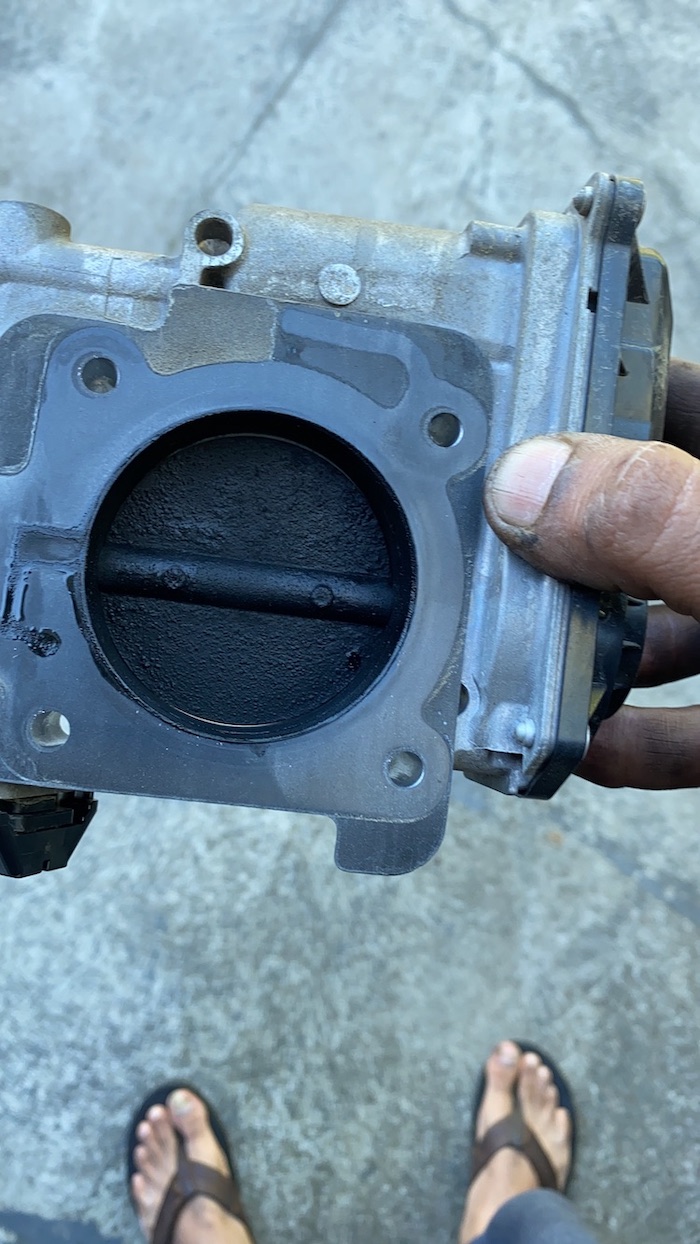
Now it's time to tackle the intake manifold gaskets. Removed the old gaskets and started cleaning the gasket residue. Took me about 30min a side to get the surface clean and flat. Soaking the gasket with brake clean and using a combination long flat head screwdriver, scraper, sand paper and worksop blade made it a bit easy. After cleaning and preparing the surface for new O rings and Intake gaskets i started working on the Intake manifold and throttle body. Started by undoing the bolts for injector cover and the bolts which hold the intake collector. Everything was caked in carbon and was filthy. No cleaner will do a decent job without contact cleaning. I soaked them with CRC throttle body cleaner and gently scraped out all the carbon deposits. after that I used a clean lint free rag and wiped them clean. Have to be gentle as the runners inside the manifold are fragile and can be damaged easily. Repeated the same on the other side and got rid of all the carbon deposits. While assembling back i used new gaskets and checked the injector seats and Injectors. They seem to be in good condition even after 13years of driving. Did the same cleaning with the main throttle body and i assembled everything back together to the intake manifold. Pay attention to the fragile Throttle body gasket.

IMG_5868.jpg
IMG_5868.jpg (111.54 KiB) Viewed 5349 times

img.jpg
img.jpg (230.46 KiB) Viewed 5349 times


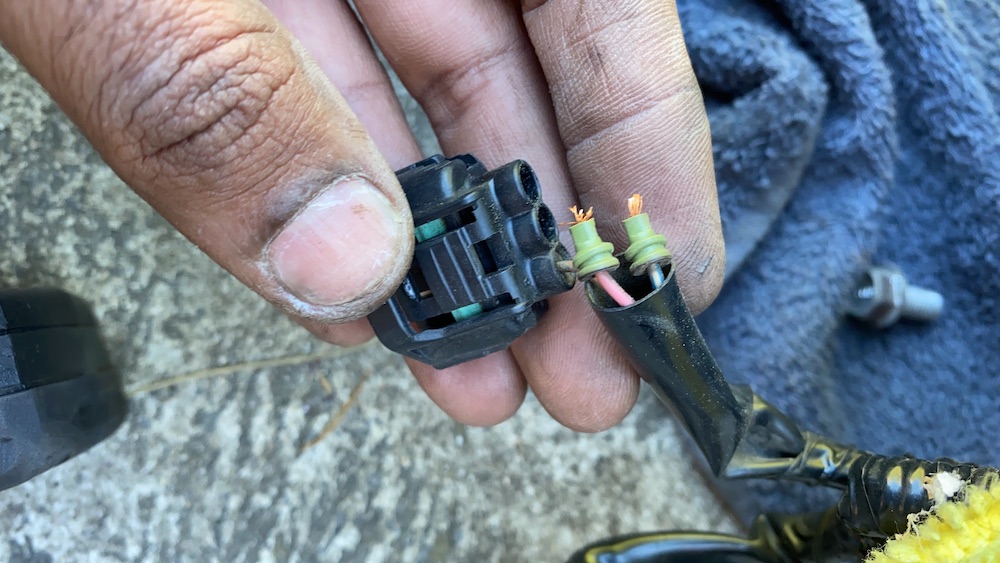
I installed new water pipe O rings, new coolant temperature sensor and new throttle body coolant hoses. Once the water pipe was fixed next step was to install new intake manifold gaskets. While installing the manifold back be careful as its easy to mismatch the hole and damage the new gaskets. My mate helped me install the manifold back correctly and all the bolts lined up correctly. A bright torch will come in handy here. I started threading the bolts by hand and once i installed all the bolts i tightened them in a criss cross pattern. All the bolts were tightened with hand tools, I didn't follow torque specs but i went by feel and snug them up nicely. Once all the bolts were installed i started connecting all the connectors to the sensors and earth cables. To my nightmare one of the connectors to the intake runners (not sure if its the right term) was broken and the cables popped out. Connected them the right way by looking at previous pictures and i was glad that i got all my tools with me over the weekend.

img1.jpg
img1.jpg (183.81 KiB) Viewed 5349 times


Connected everything back, filled coolant and scanned for codes. P2007 code appeared on the scanner. cleared the code, checked all the connectors and scanned again. This time no codes on the scanner 8) . Started the engine and let it idle for sometime while i do some checks. I bled the coolant and i went for a drive. I was surprised with the amount of difference cleaning the manifold and throttle bodies made in the driving experience. There was absolutely no hesitation in idling and while taking off in first gear. Even while normal driving in the city i noticed that the engine pulls cleanly in all gears. Drivability is much better and i could really feel the difference of having a clean intake manifold. Fuel economy increased considerably but i have to test it to have exact figures. I noticed that the Engine gets up to operating temperature much quicker than before. I used Subaru uec for the manifold and did an oil and filter change after that. Started using Penrite Hpr5 5w-40 now with genuine subaru oil filter. I was using castrol 5w-30 before.
07 Gen 4-BL 2.5i -5 spd man
User avatar
jdmsubielover
 
Posts: 35
Joined: Sun May 31, 2020 10:26 am
Location: Melbourne
Car: 2.5i Gen 4 BL - 5 Speed Manual
Real name: Nishanth

Re: Liberty 2.5i BL 2007, 5 Speed Manual, EJ253

Postby Yowie » Sun Jun 20, 2021 9:39 pm

Quality write-up!

For comparison's sake, here is the manifold side of a throttle body when the car has run E85 for a fair while:

Image
User avatar
Yowie
 
Posts: 576
Joined: Tue Jul 21, 2015 10:05 pm
Location: Brisbane
Car: SH Forester XT

Re: Liberty 2.5i BL 2007, 5 Speed Manual, EJ253

Postby bigBADbenny » Mon Jun 21, 2021 7:26 am

Judging by the condition of the intake manifold gaskets: you may have had a leak there?
User avatar
bigBADbenny
 
Posts: 10420
Joined: Tue Oct 04, 2011 6:36 pm
Location: Collingwood, Melbourne
Car: MY07 GT-B 6MT OBP Wagon
Real name: Ben Richards
Profile URL: http://tinyurl.com/agvbzop

PreviousNext

Return to Post your mods

Who is online

Users browsing this forum: No registered users and 15 guests