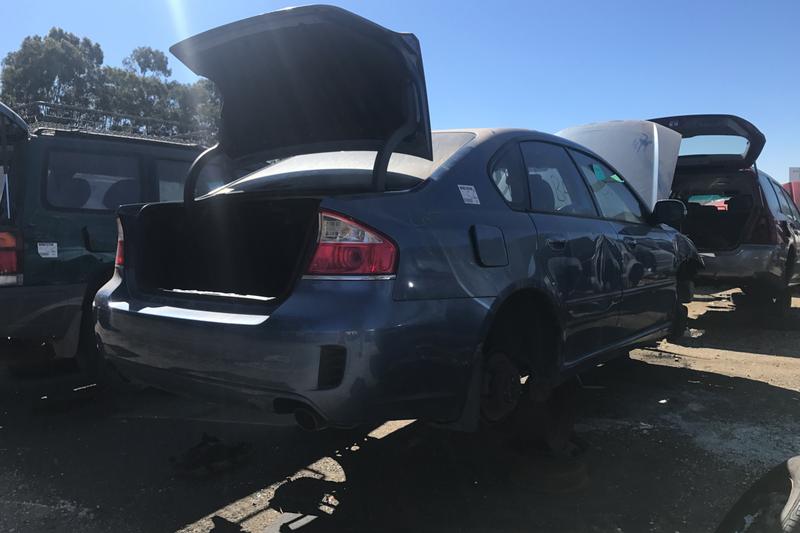
Soo soo Lucky too that it broke in the driveway! The worst part of owning a subaru is the 14mm drain bolt... Absolute PINTA... at one point i considered welding a socket to it Haha Much like trying to remove the cam bolts.

Australian Liberty Owners Club
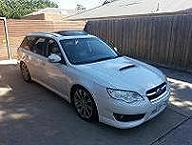
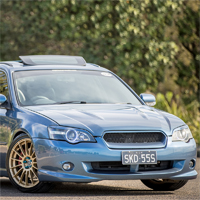
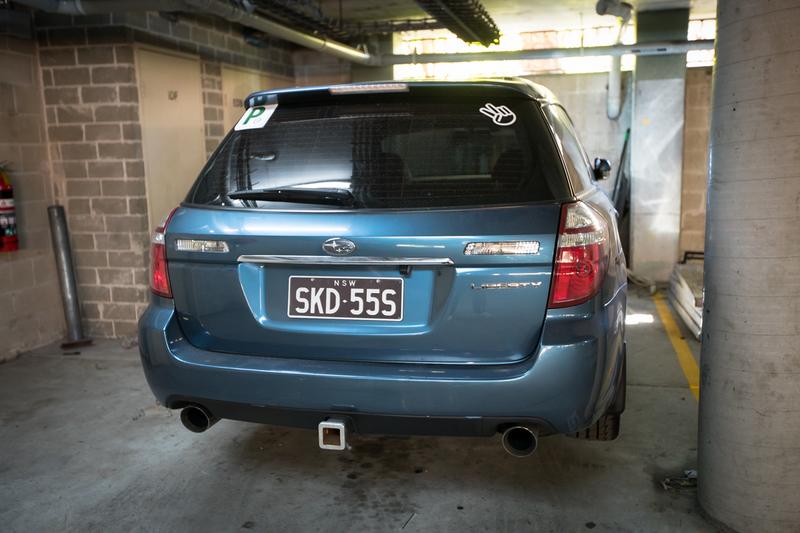
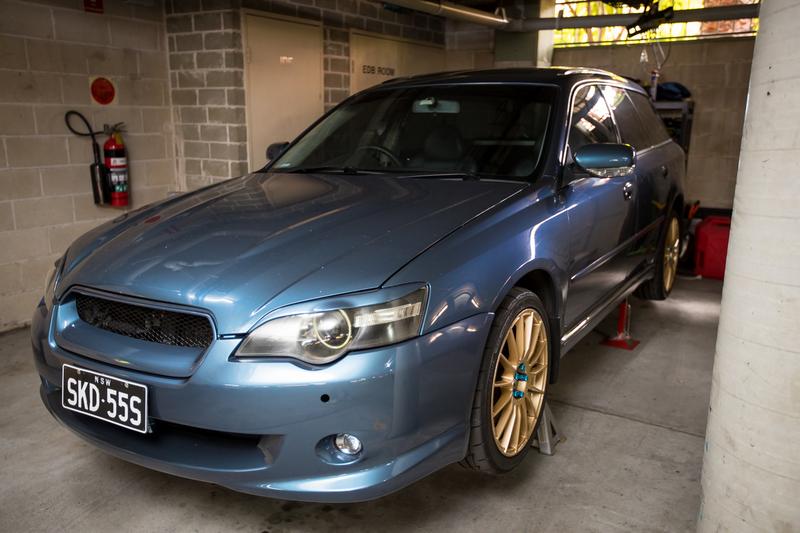
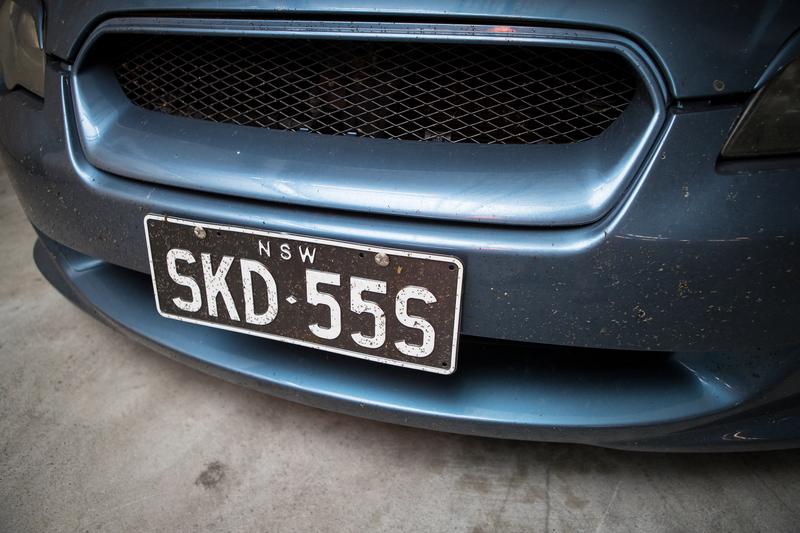
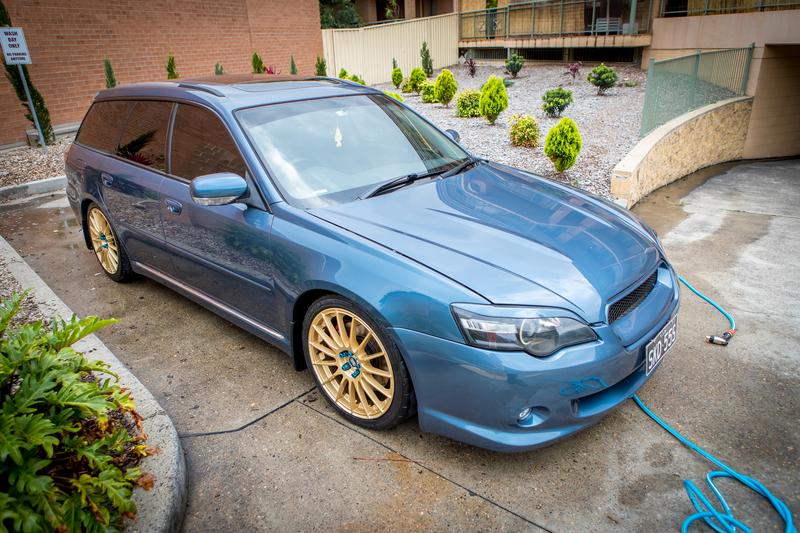
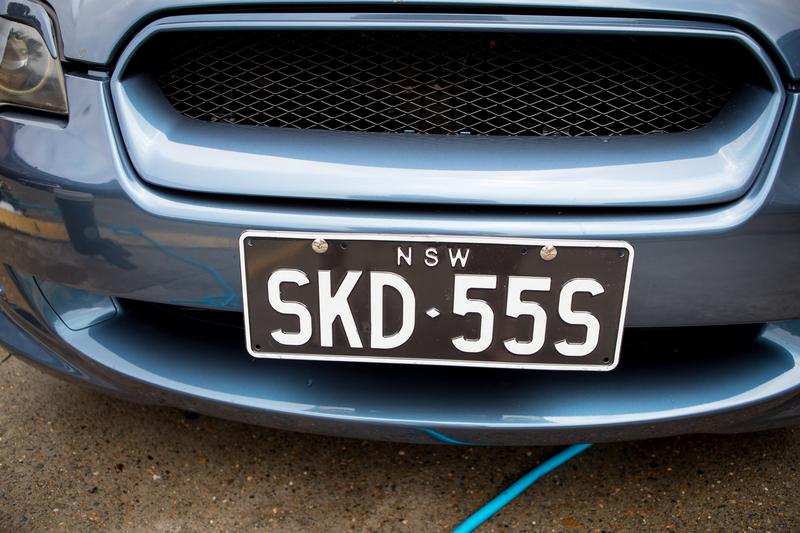
Member Profile - James' H6 Wagon - SKD55S
Re: Member Profile - James' H6 Wagon - SKD55S
![]() by MadmanSean » Fri Aug 18, 2017 12:05 pm
by MadmanSean » Fri Aug 18, 2017 12:05 pm
Awesome stuff mate! 
Soo soo Lucky too that it broke in the driveway! The worst part of owning a subaru is the 14mm drain bolt... Absolute PINTA... at one point i considered welding a socket to it Haha Much like trying to remove the cam bolts.
Soo soo Lucky too that it broke in the driveway! The worst part of owning a subaru is the 14mm drain bolt... Absolute PINTA... at one point i considered welding a socket to it Haha Much like trying to remove the cam bolts.
Subaru ECU Unbricking, Unlocking and Bench Flashing/Recovery service! Check out SICK CHIPS @ https://www.facebook.com/SickChips/
http://forum.liberty.asn.au/viewtopic.php?f=56&t=35489
If you'd like to say thank you feel free to Buy me a coffee https://www.buymeacoffee.com/sickchips
http://forum.liberty.asn.au/viewtopic.php?f=56&t=35489
If you'd like to say thank you feel free to Buy me a coffee https://www.buymeacoffee.com/sickchips
-
MadmanSean - Posts: 188
- Joined: Tue Mar 17, 2015 6:27 pm
- Location: Melbourne
- Car: 2007 Libert GT SpecB wagon
- Real name: Sean
- Profile URL: viewtopic.php?f=10&t=33793
Re: Member Profile - James' H6 Wagon - SKD55S
![]() by applegeek897 » Sun Aug 20, 2017 9:48 pm
by applegeek897 » Sun Aug 20, 2017 9:48 pm
August 2017: Once again, Heasman worked their magic on the alignment and the car is driving amazing, certainly better then ever before. They did mention that that even once fully tightened they could still move the body of the drivers side coilover. They have put this in writing for me which should help in hopefully getting it replaced, cause quite honestly, it's pathetic for an expensive and vertically brand new product.
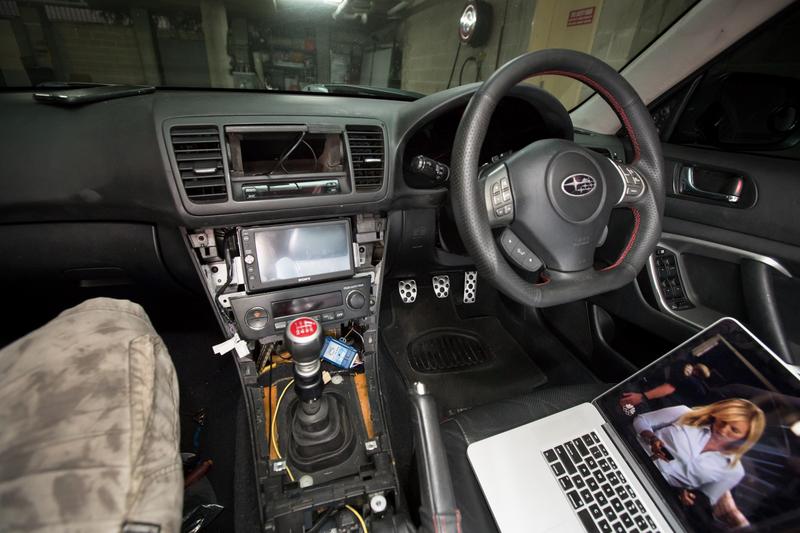
Anyway, finally I can get something, that thanks to the control arm fiasco, I was meant to get started on weeks ago. This car has been crying for a proper stereo since the day I got it, finally it's getting one. Be prepared there is going to be ALOT of pictures and info.
Time to go through everything. Starting with the least interesting, for me anyway.
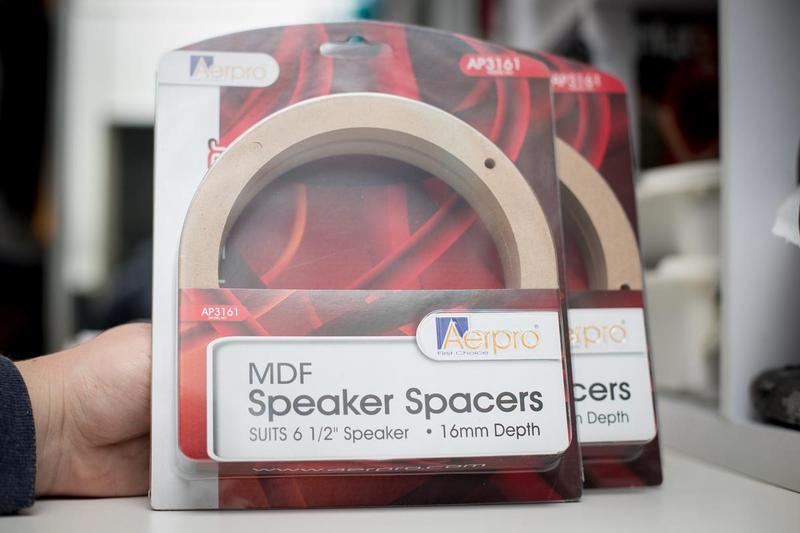
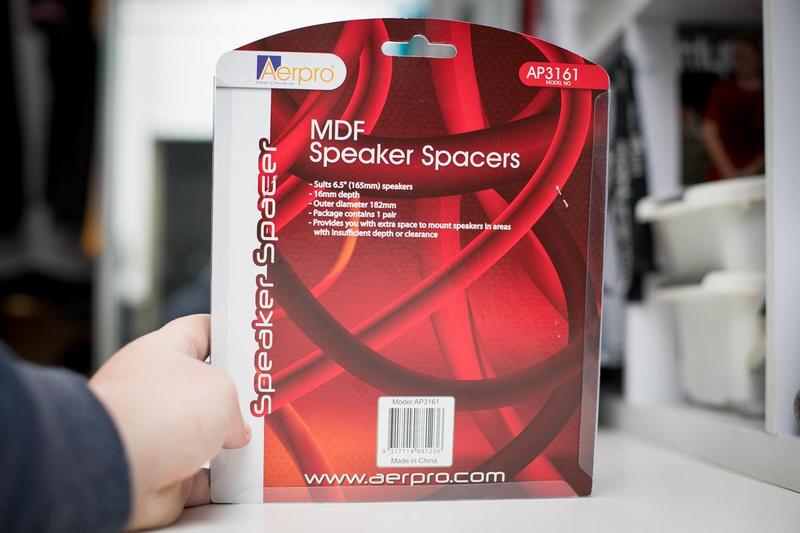
Despite knowing that they would basically be useless, I grabbed a set of universal 6.5" 16mm thick MDF spacers. They were $8.00 and made it easier to do a nice circle, but otherwise, no help getting the speaker actually secured to the door.
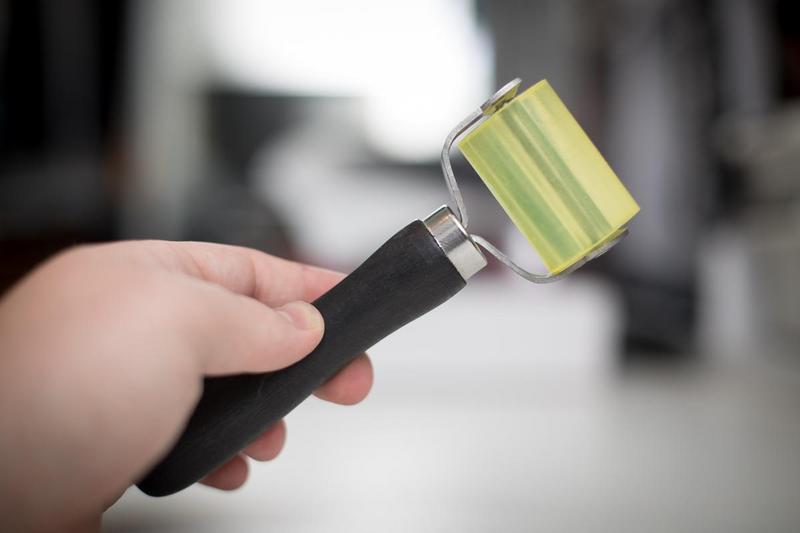
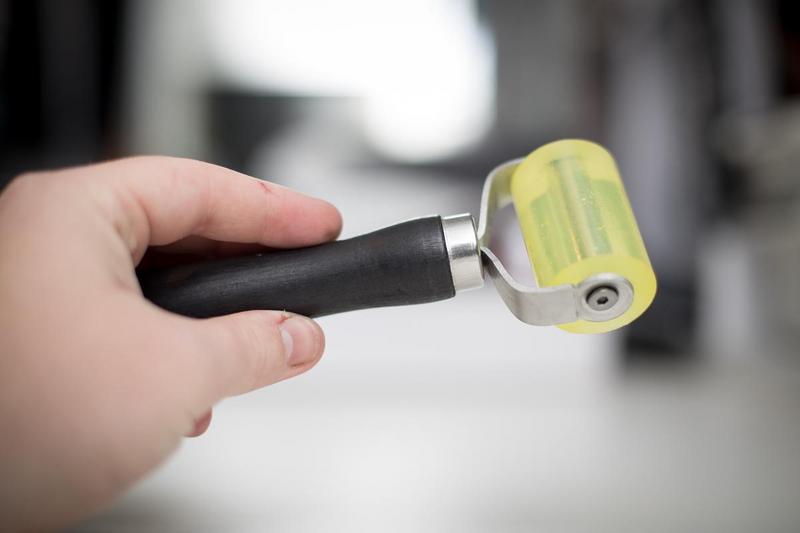
I knew that I would need a somewhat half decent roller for the sound deadening. There were plenty going for well over $40.00 which I refused to pay for something like that. I ended up settling for this Roadkill unit. It's utter crap and the one screw on it kept falling off. Oh well.
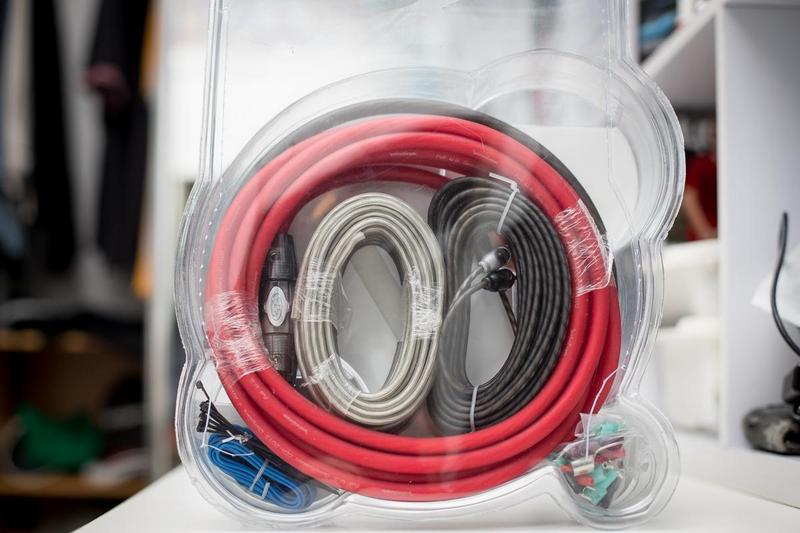
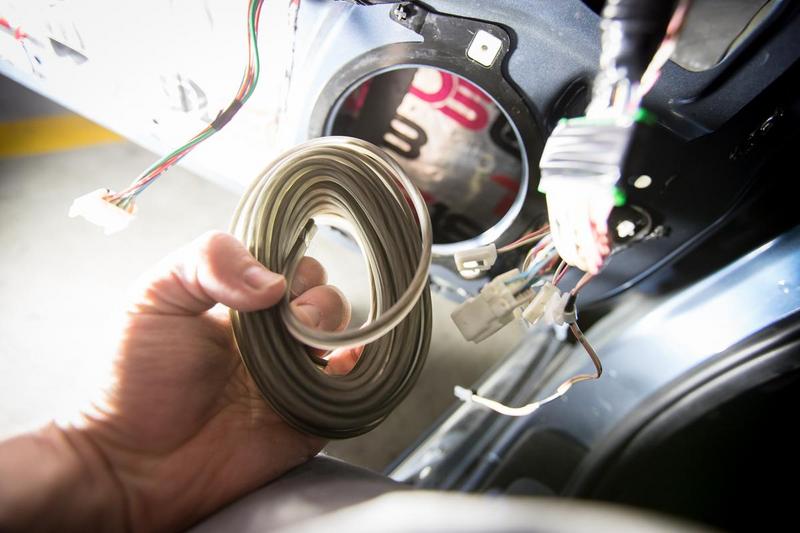
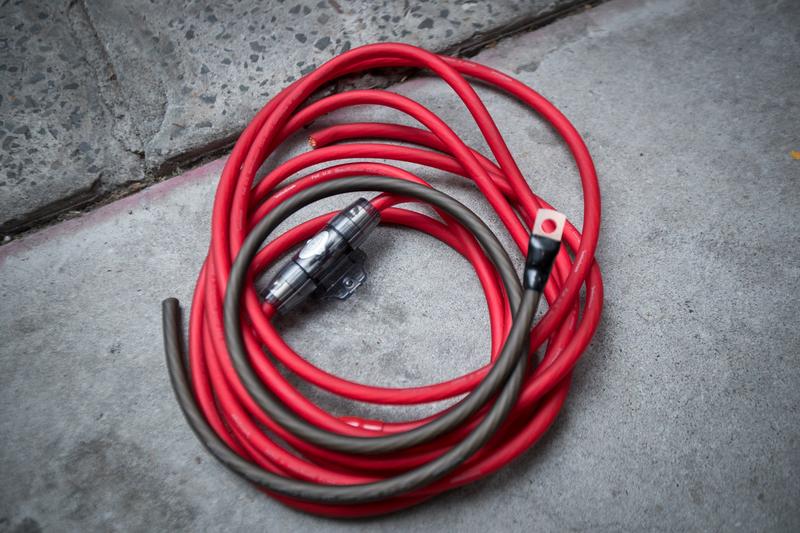
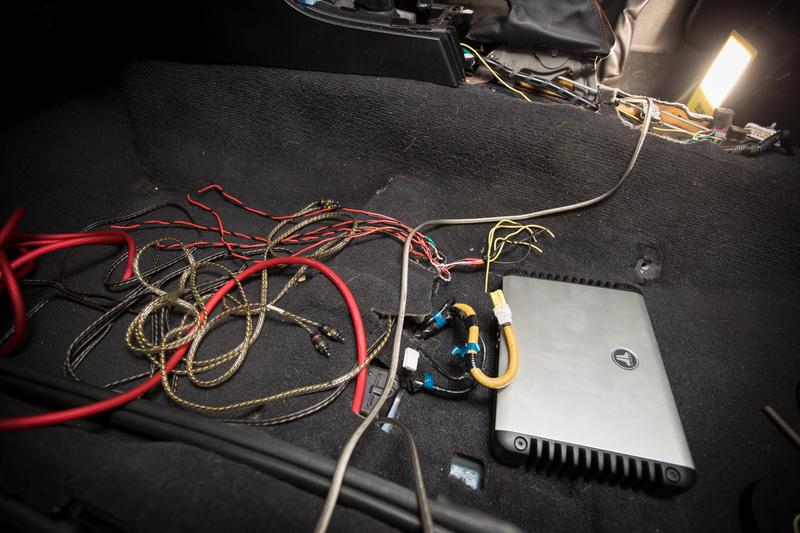
While the roller didn't feel like quality, this wiring kit does. This is a Rockford 4GA amplifier Wiring Kit.
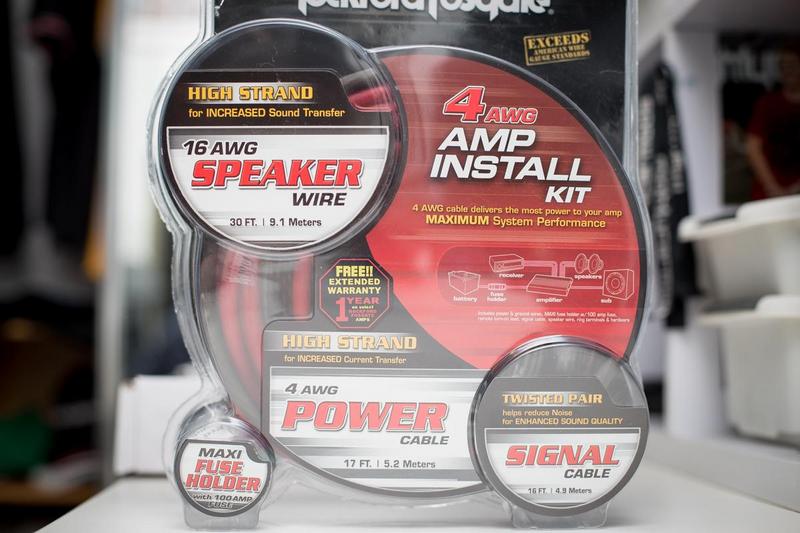
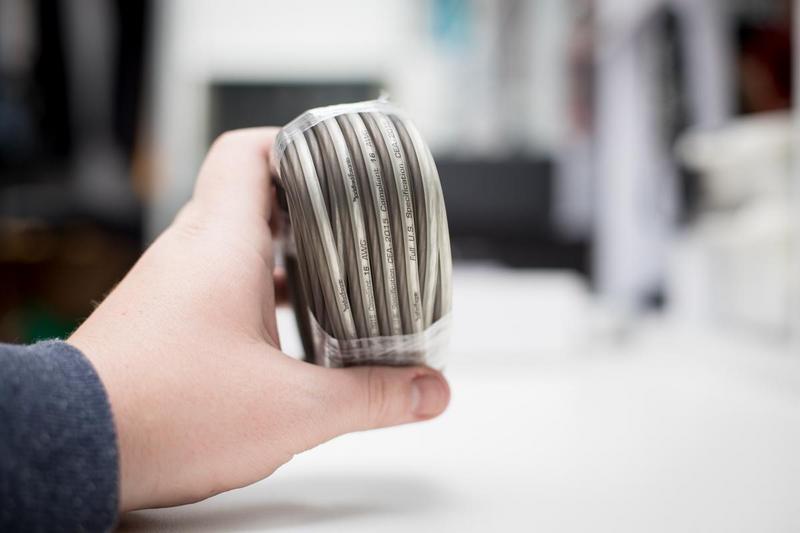
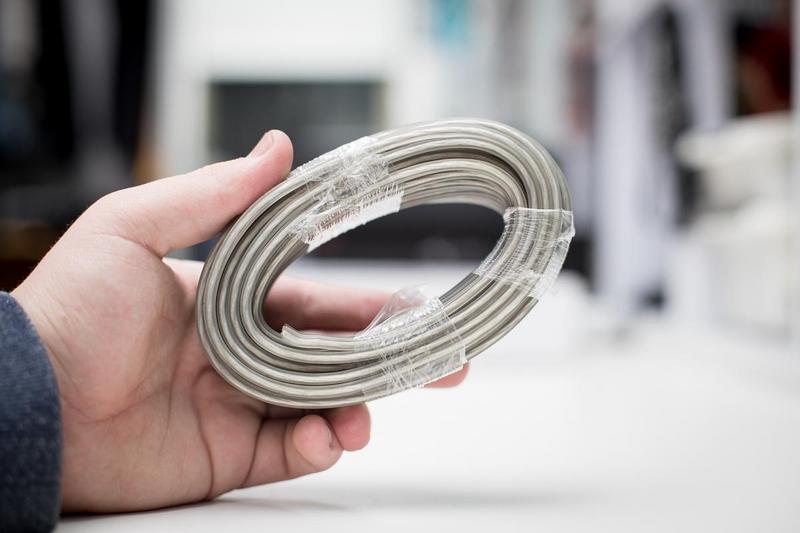
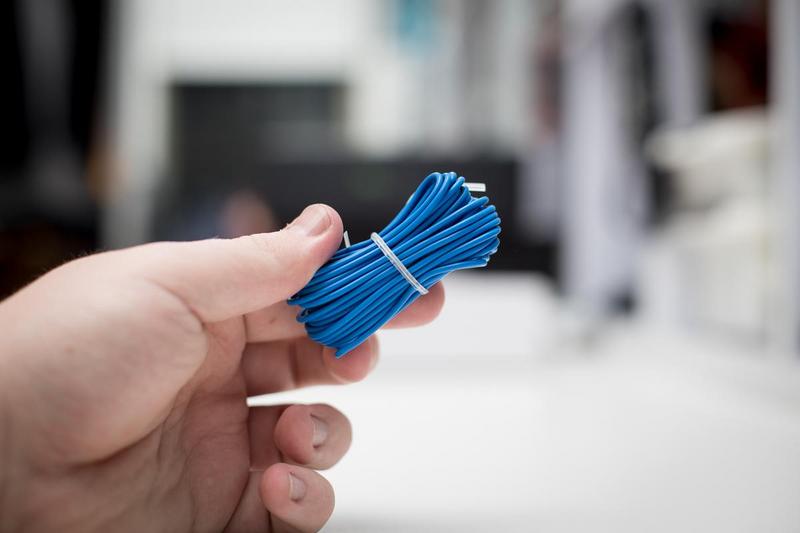
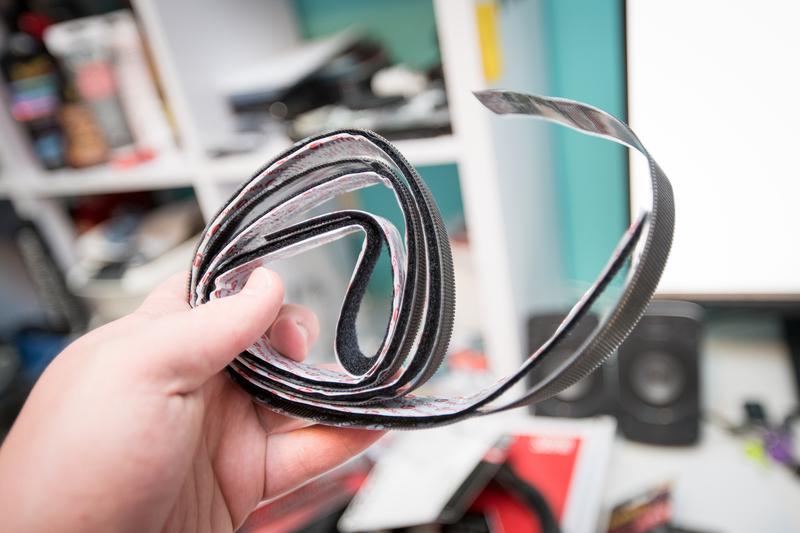
9.1 meters of super beefy 16 gauge speaker wire, there is heaps here but I can already see myself running out.
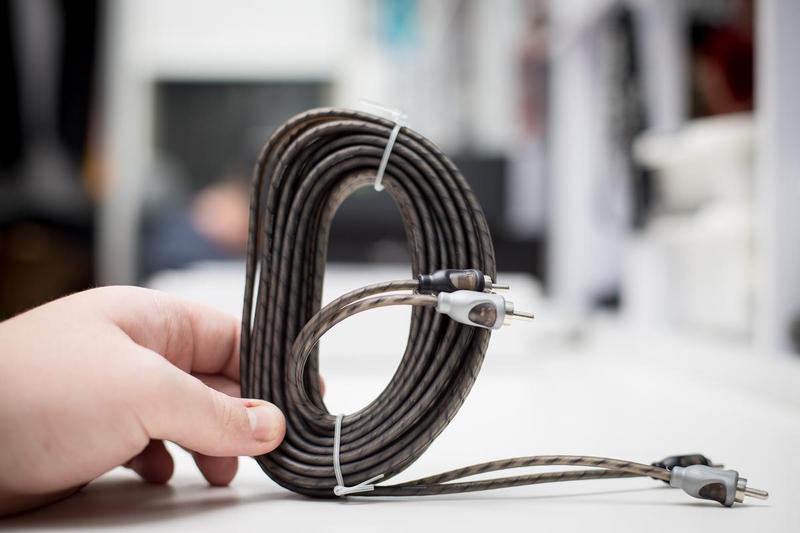
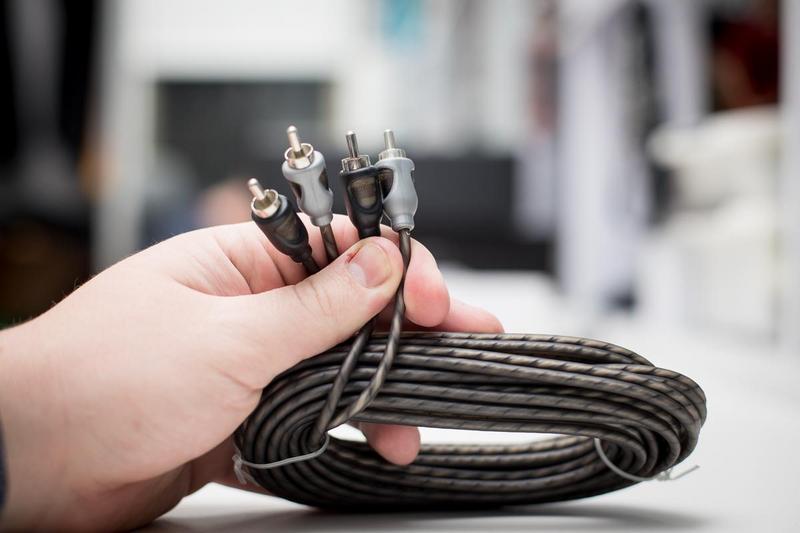
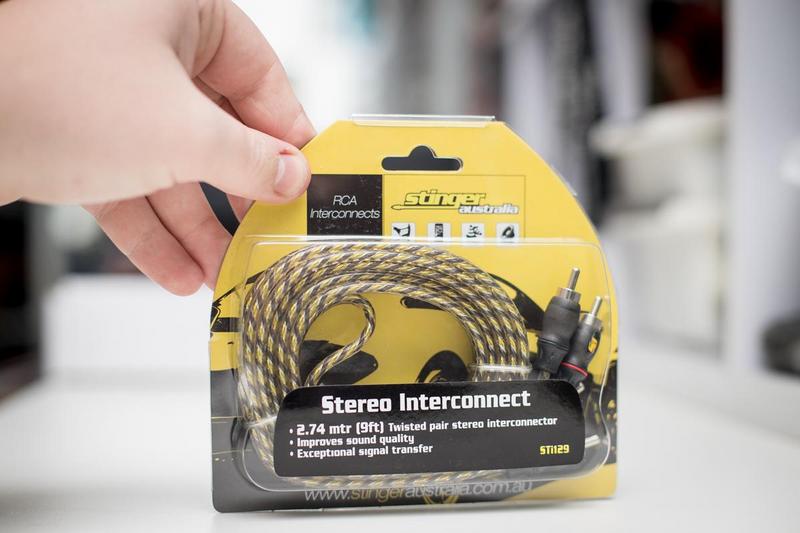
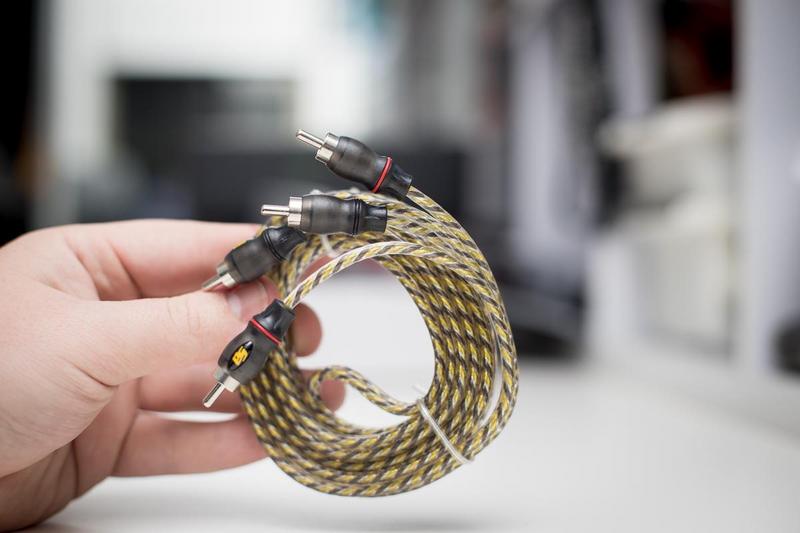
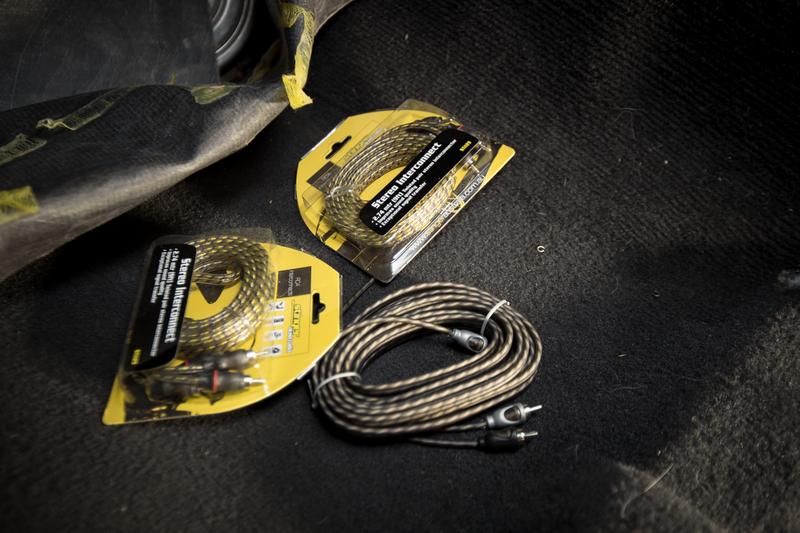
Nice set of RCA cables.
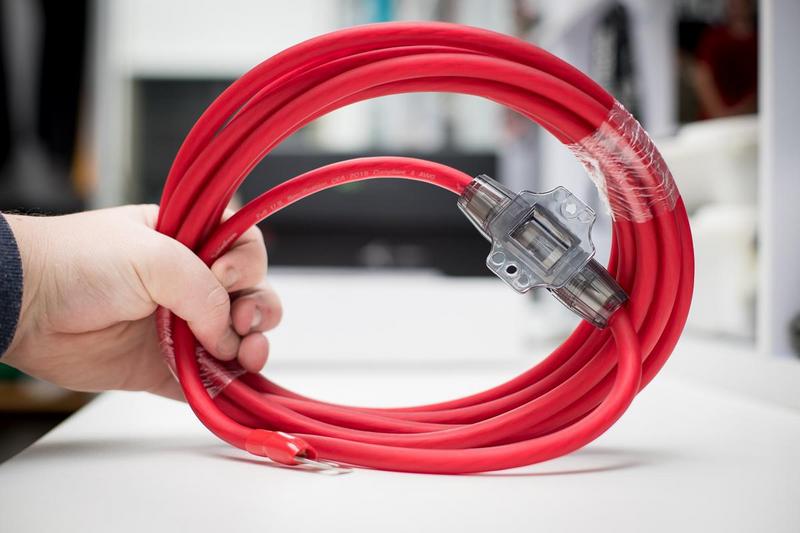
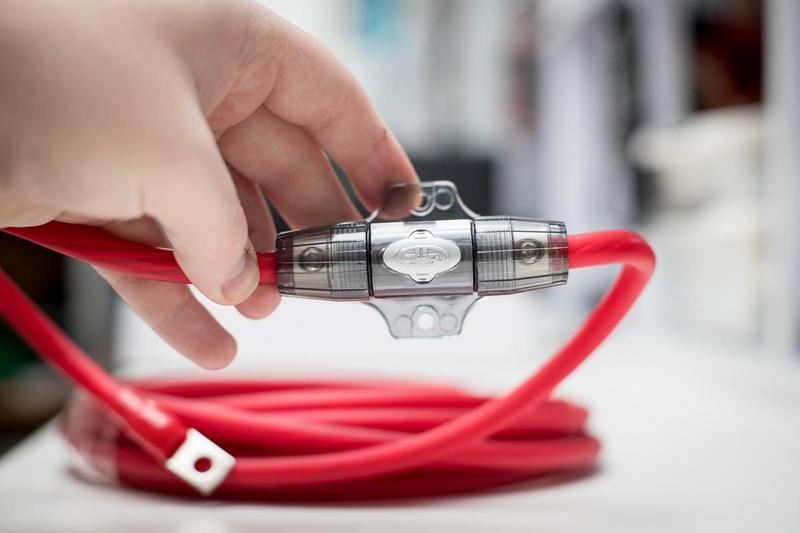
4 gauge power wire with a nice fuse holder.
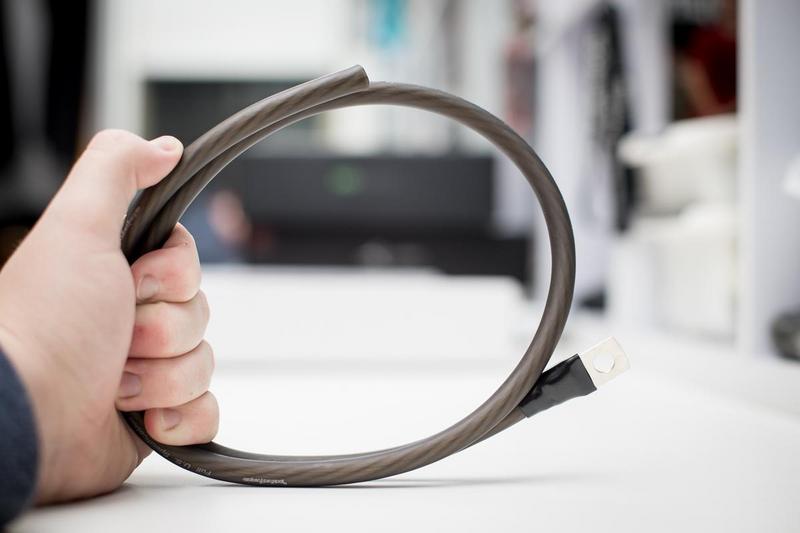
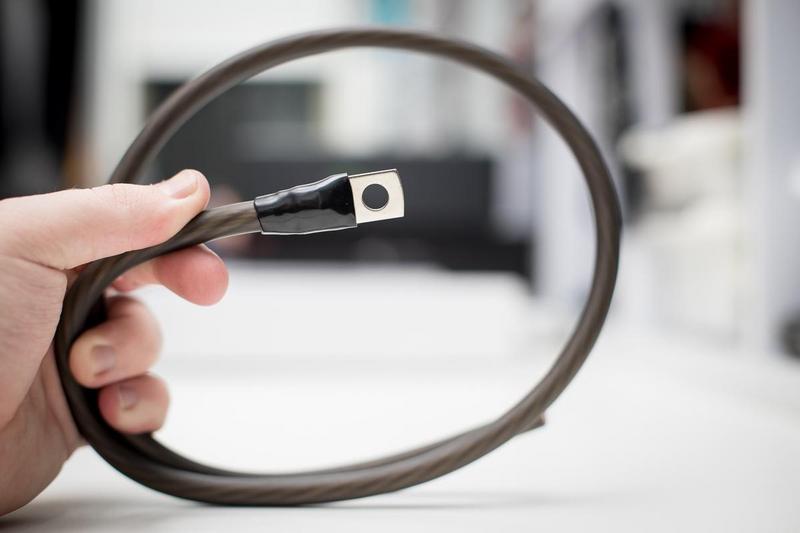
4 gauge ground wire, nice and short. I'll likely throw this on the passenger seat mount as this has worked well for me in the past.
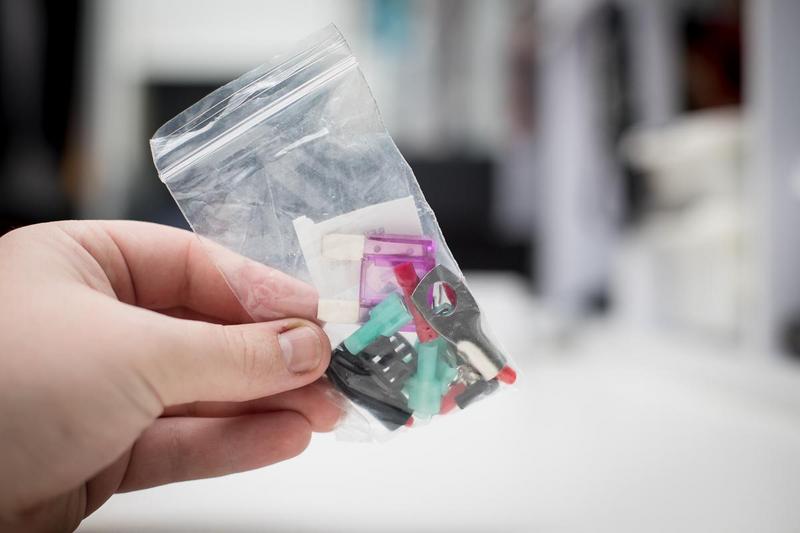
Also comes with a REM wire and a few other goodies.
I needed three sets total of RCA cables as I'll be using a five-channel amp. So I grabbed two sets of Stinger 3 meter RCA's.
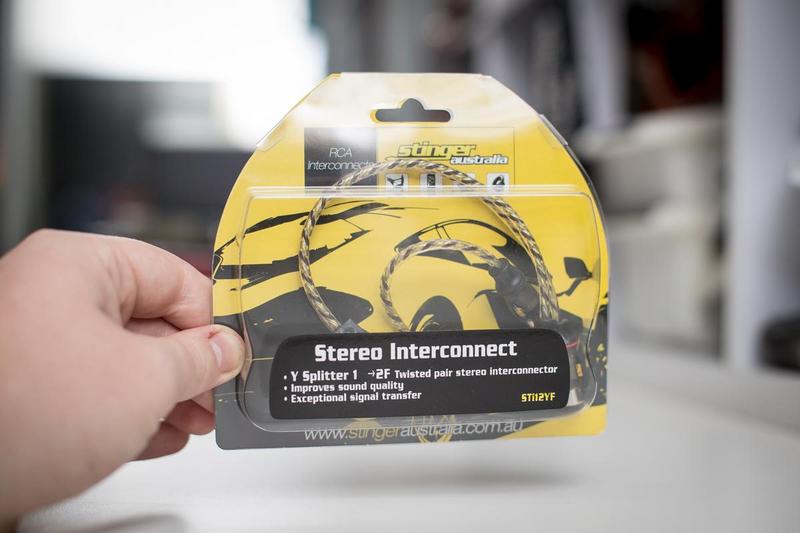
Due to the fact that the Sony XAV-AX100 has a single RCA for the subwoofer I needed to grab a two into one, again another Stinger unit.

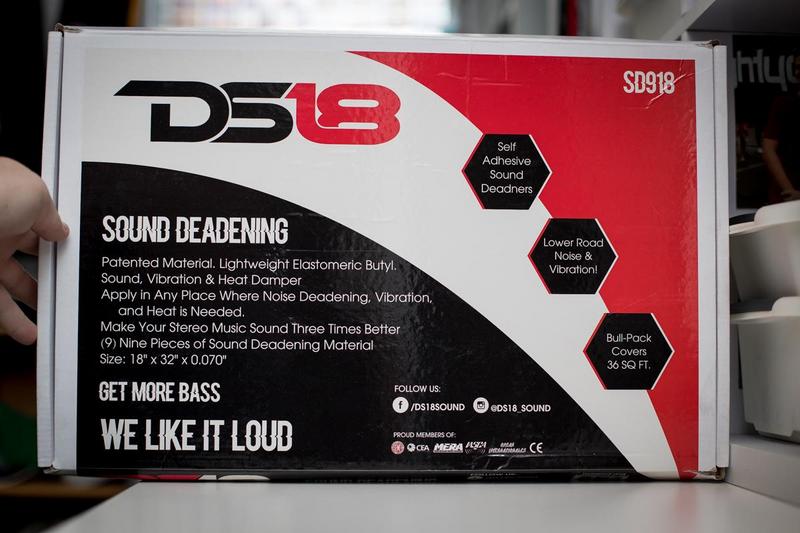
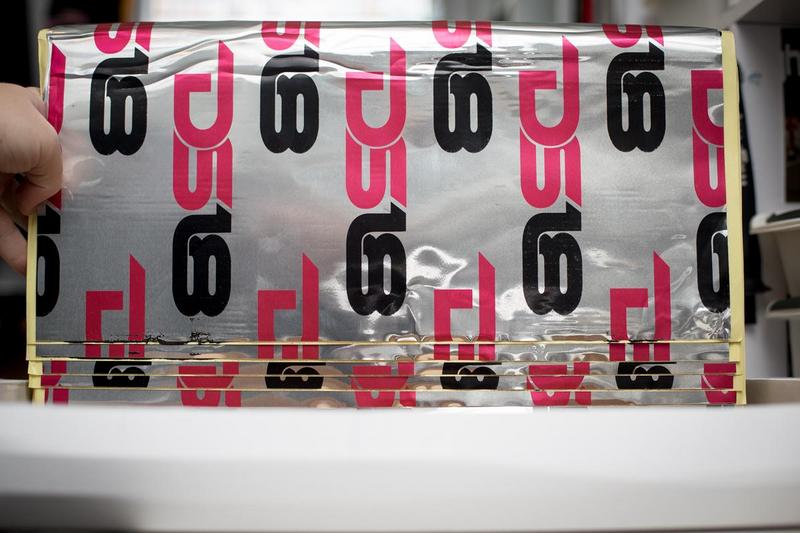
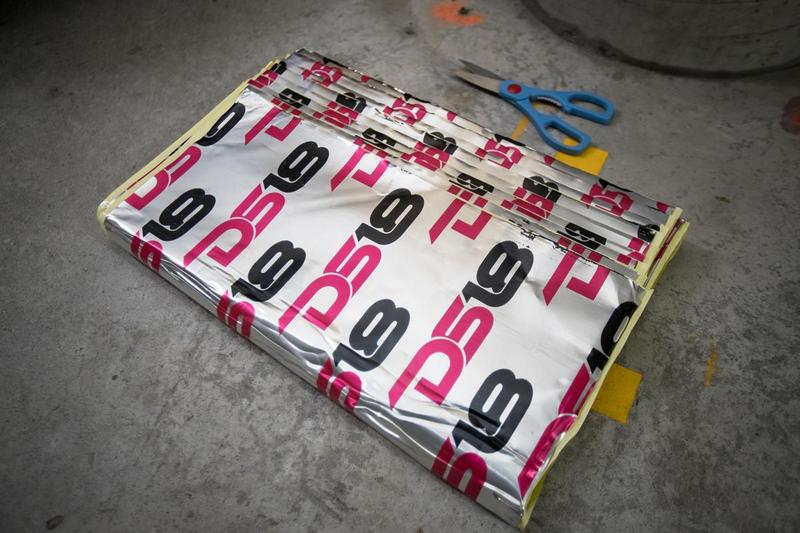
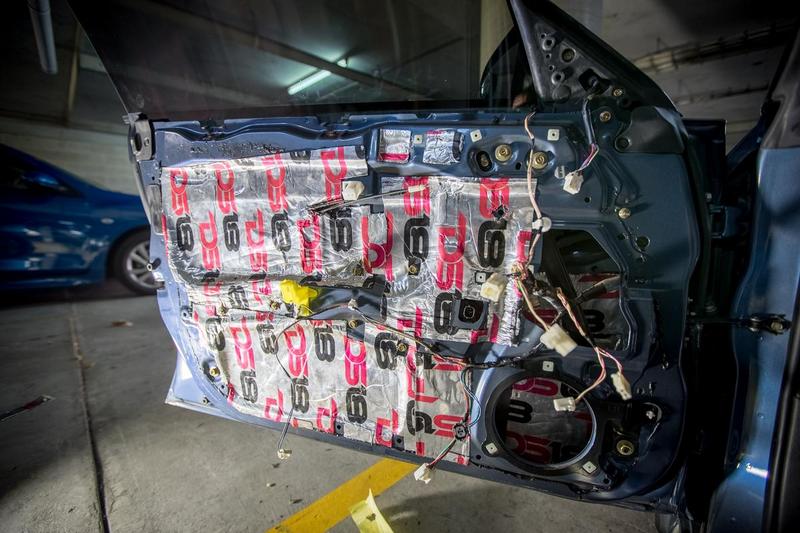
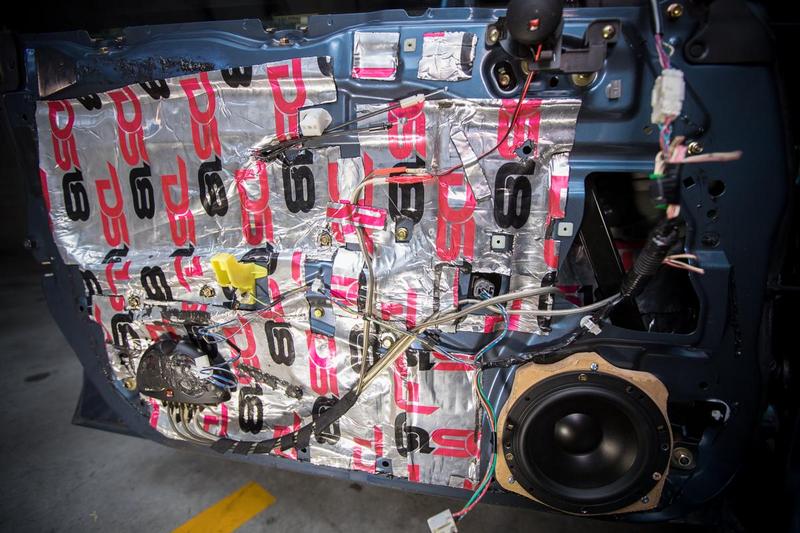
For sound deadening I decided to go for some DS18, hey it ain't Dynamat but it also isn't the price of Dynamat so it'll be fine. I grabbed two bulk packs so I'll have plenty and don't have to worry about being frugal with it, plus any left overs can go in the daily.
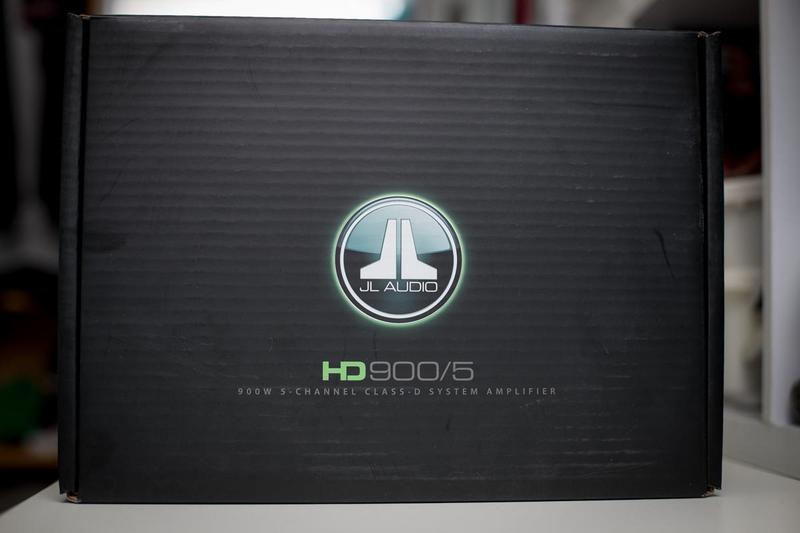
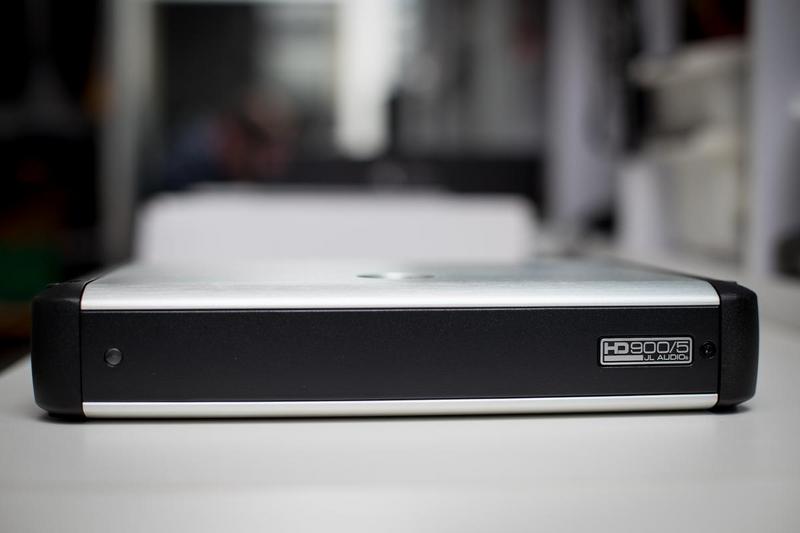
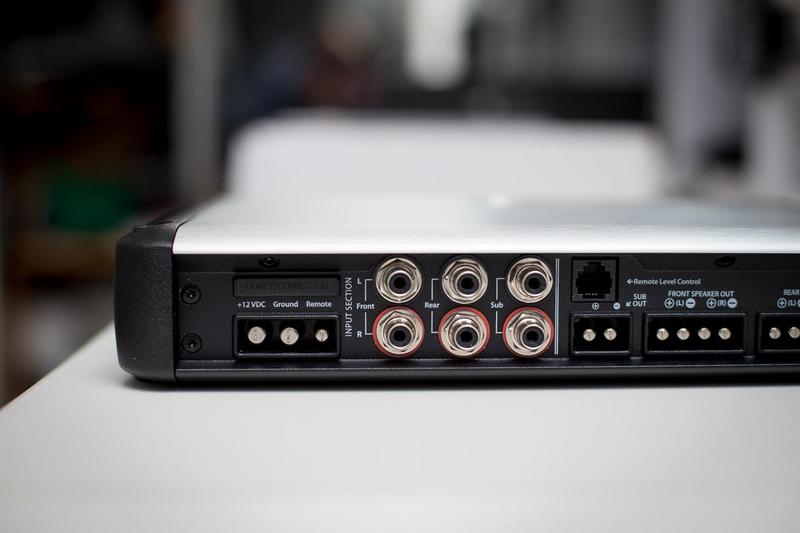
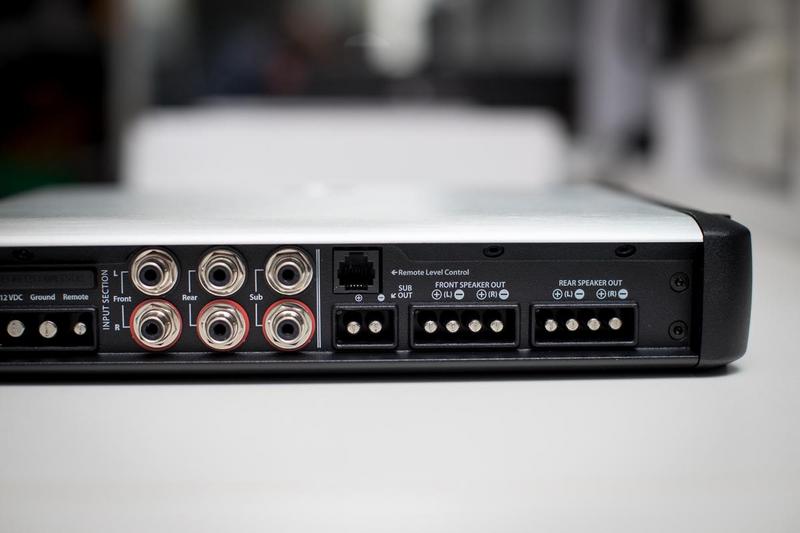
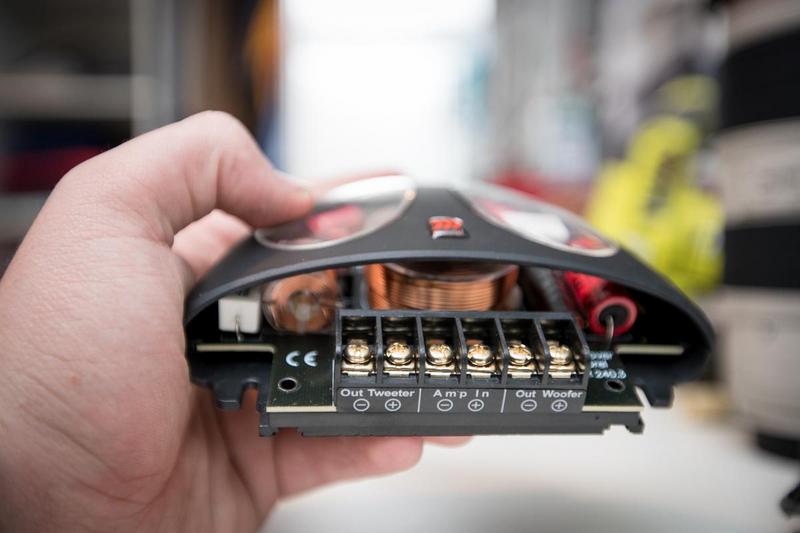
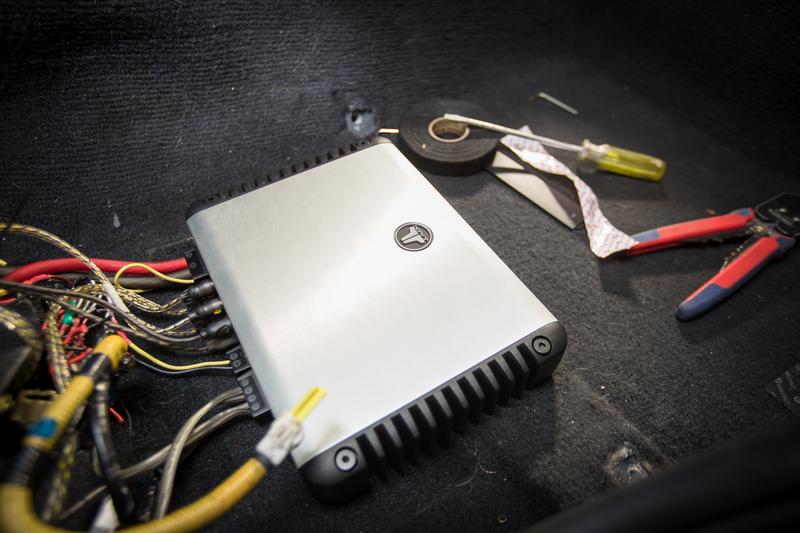
Now onto the good stuff. Starting with the amp, I was not in the slightest interested in the idea of running two amplifiers. So that meant running a five-channel. Plus the car was designed to have one amp under the passenger seat anyway. I ended up with a JL Audio HD900/5 900W five-channel amplifier. It's such a nice looking unit but surprisedly compact, although super dense, this was a heavy bastard.
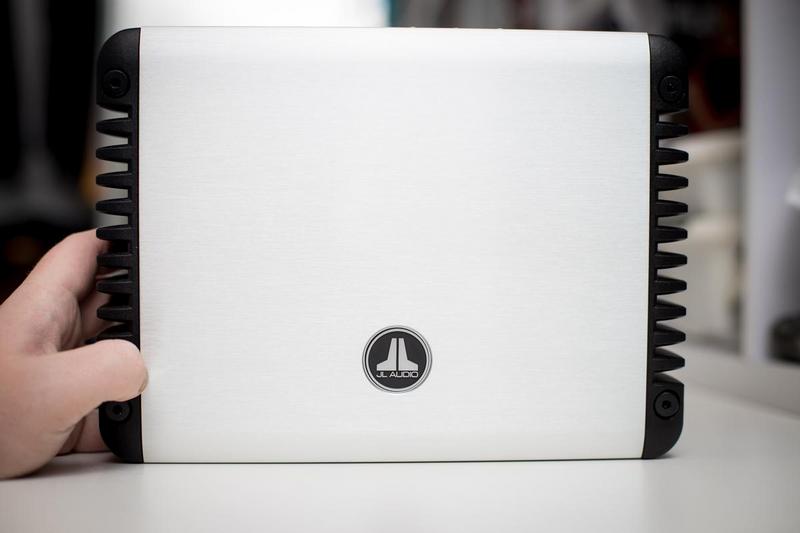
Nice to see all of the tuning controls are actually hidden behind a panel so there is no chance of screwing them up.
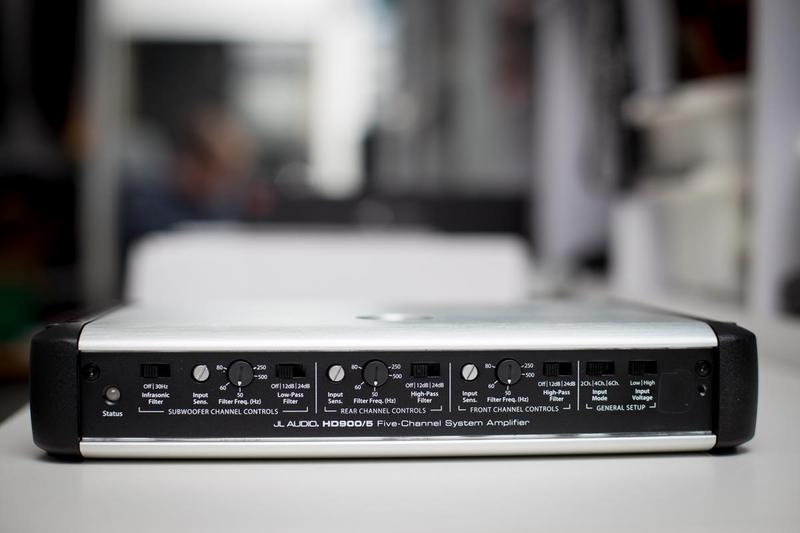
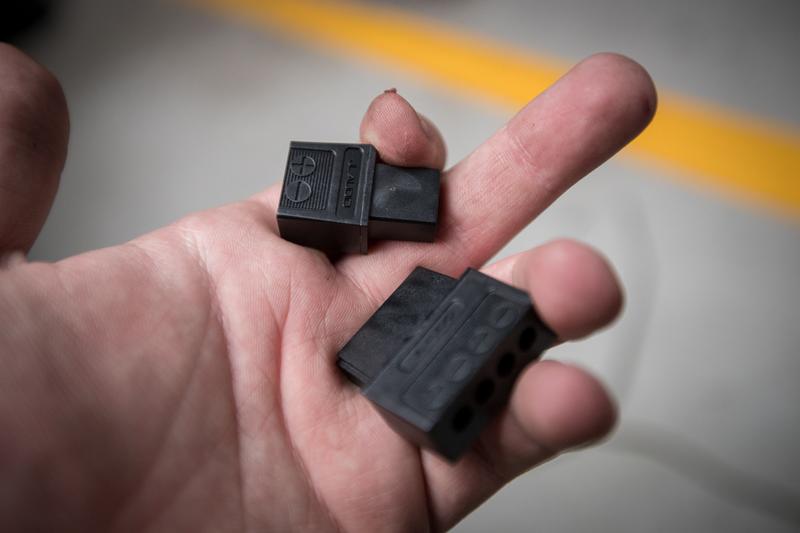
The amp uses these fancy quick disconnect things for easy removal.
Plenty of I/O ready for tunes.
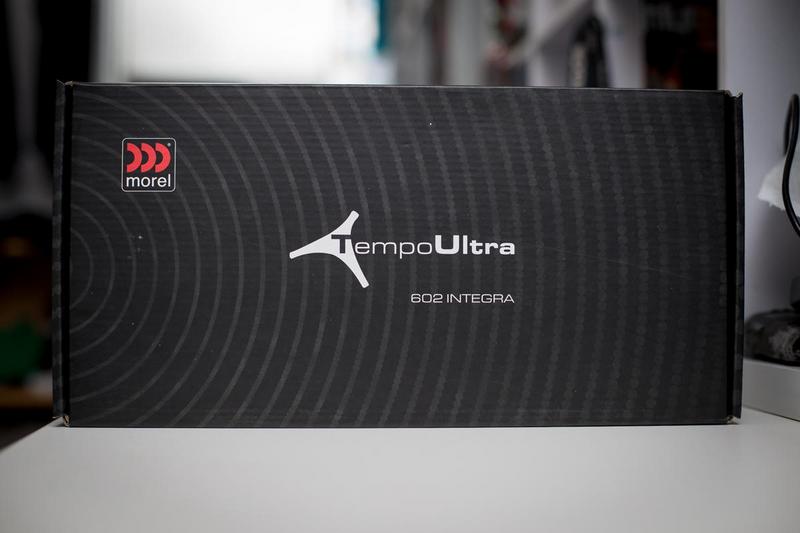
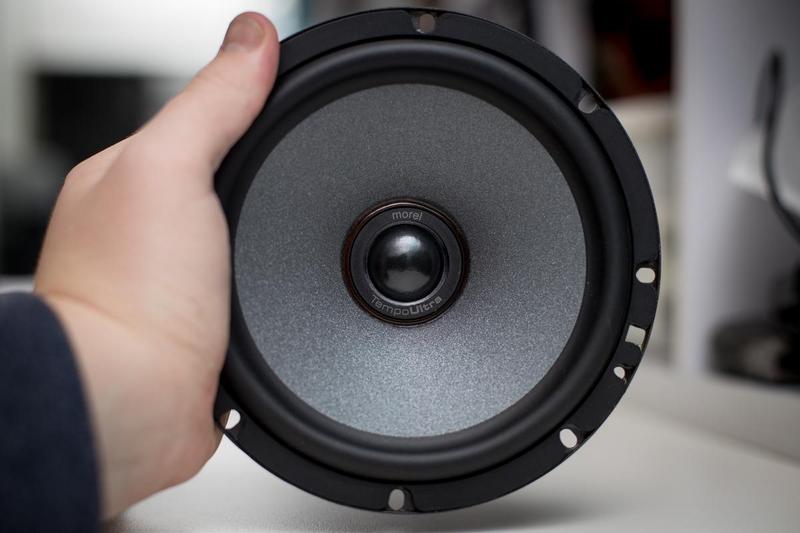
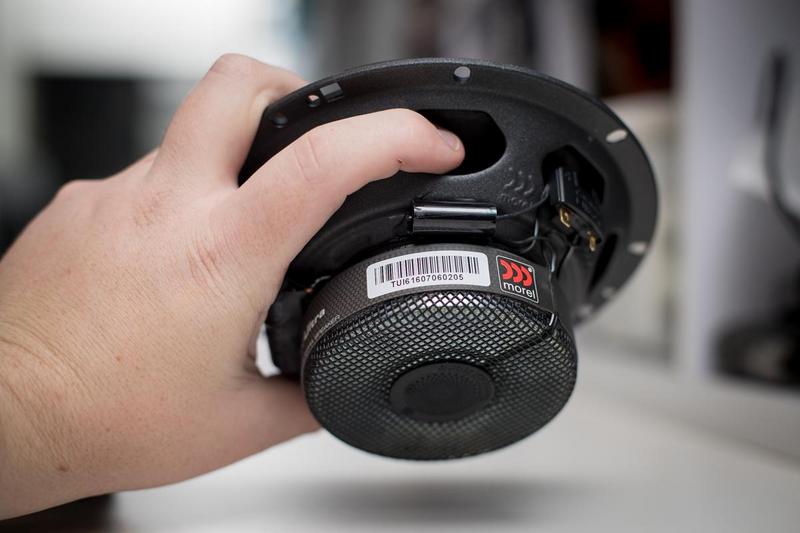
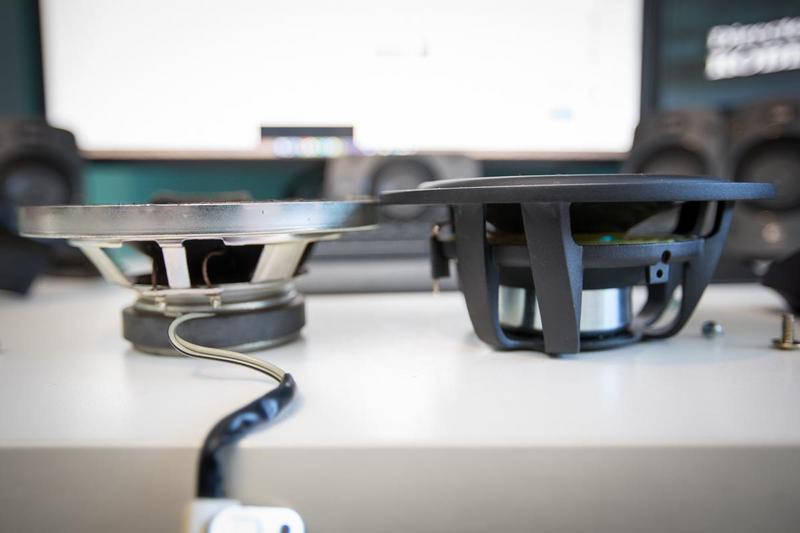
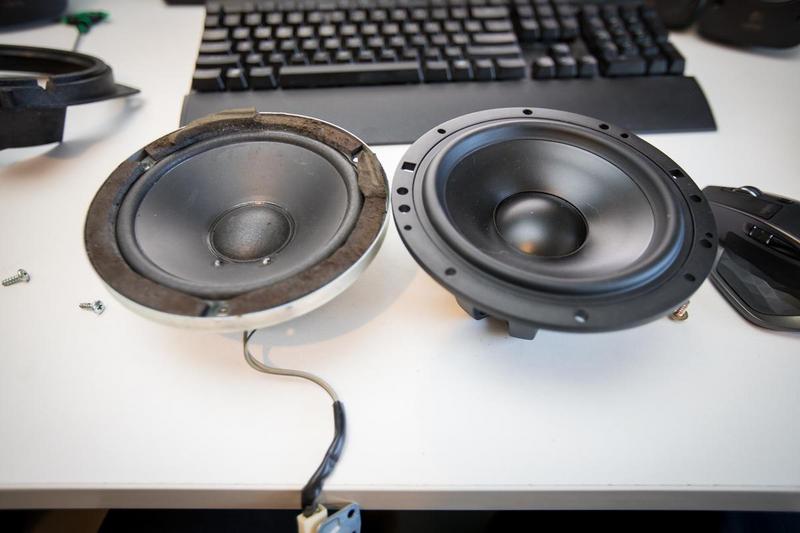
Next up was the rear, I didn't need anything super special but I wanted something decent for some fill, plus the rears were blown anyway. There is only one space in the door for a single 6" as the original was a two-way. I ended up with a pair of Morel Tempo Ultra 602 Integra's. These are super reasonably priced and should do well in the back. I'll see what they're like, might be a great option for the daily.
Nice.
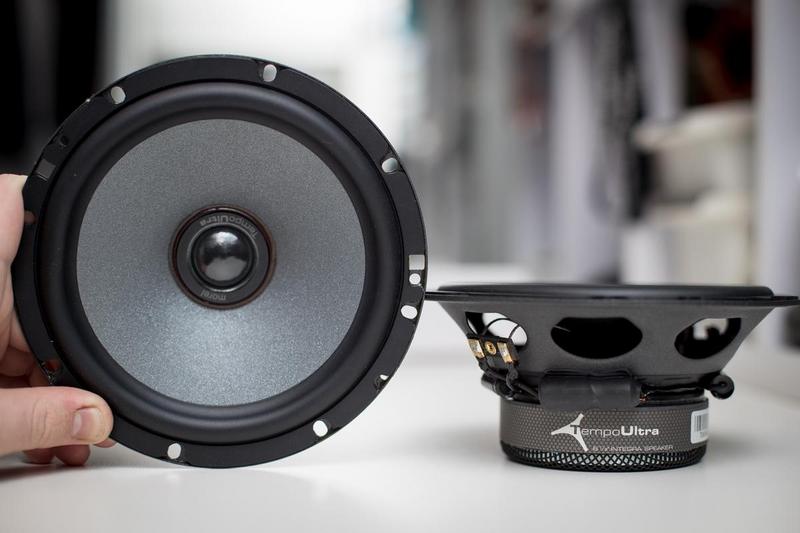
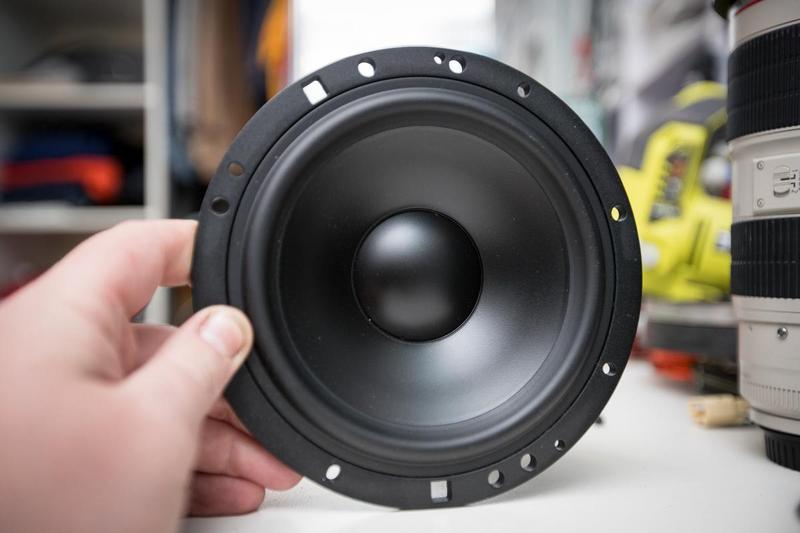
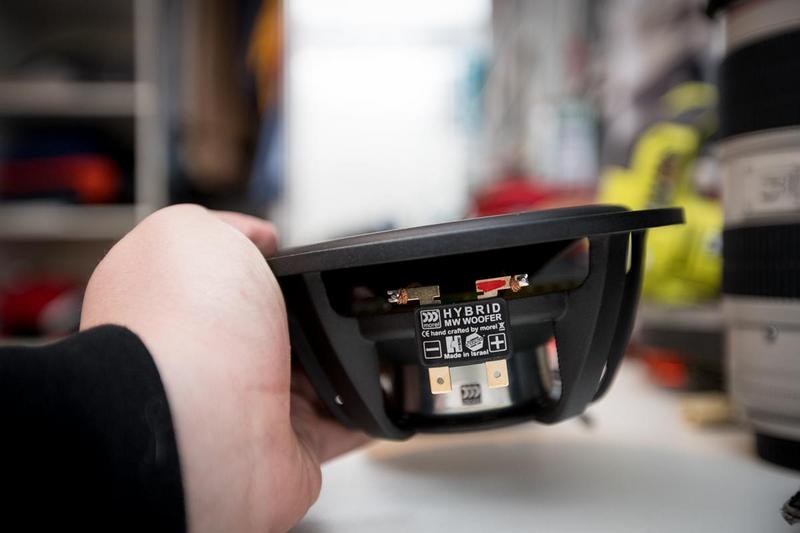
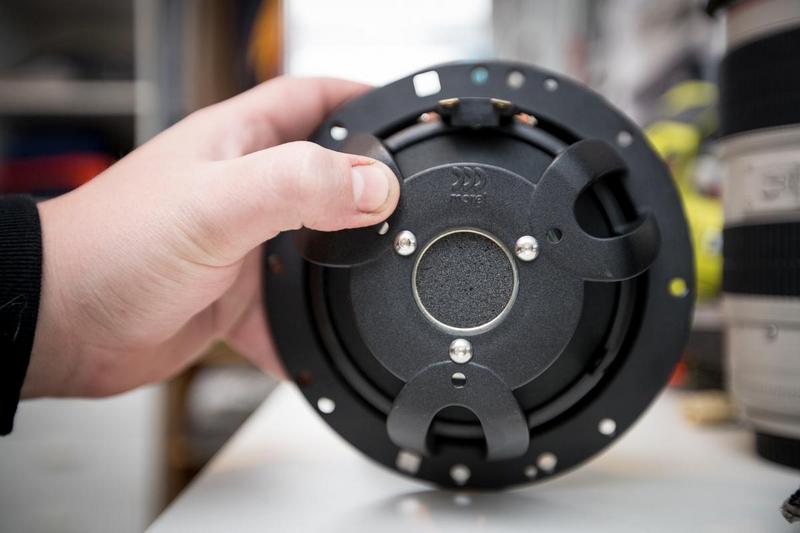
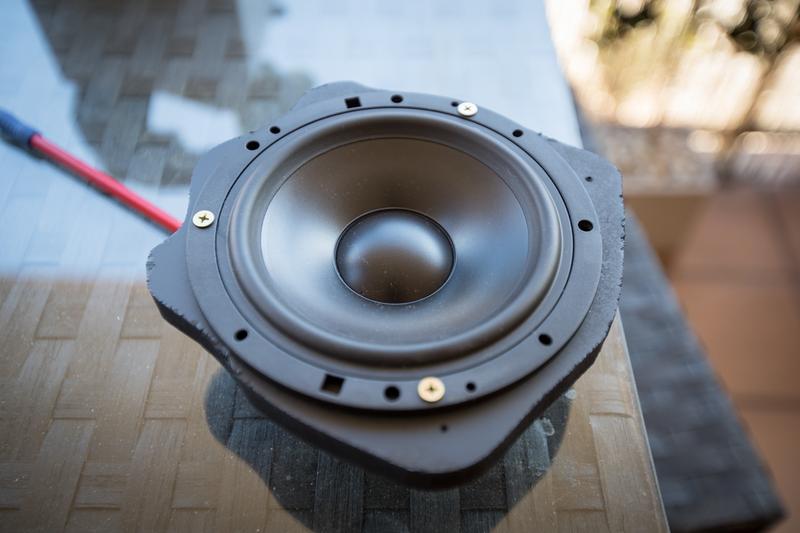
Lastly what I hope will be somewhat of the piece to resistance. A nice set of two-way 6.5" Morel Hybrid 602's. I was going to go with the three-way versions but they couldn't get them in stock and I'm kinda glad about that because it means the install is going to be way easier because of it. These things are like mini subs.
They even feel quality.
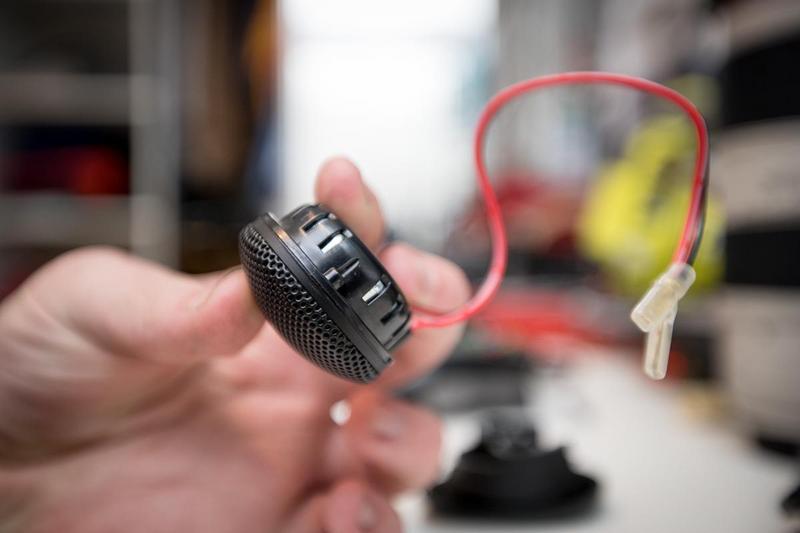
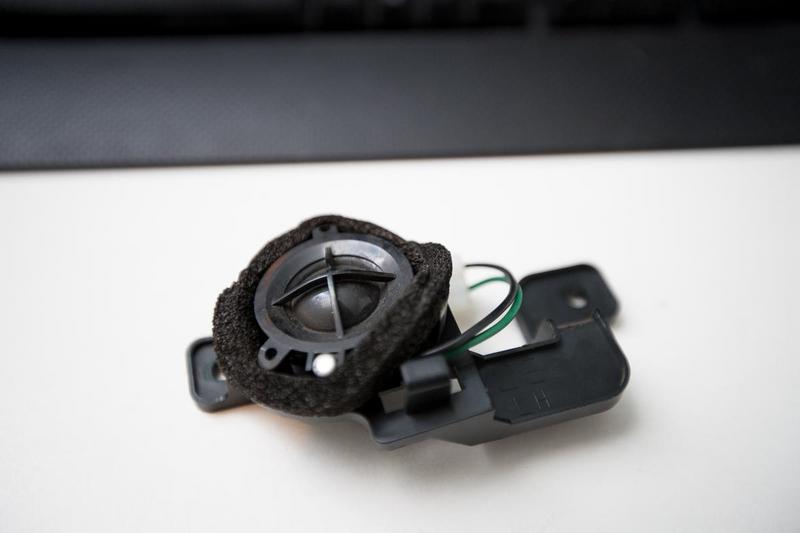
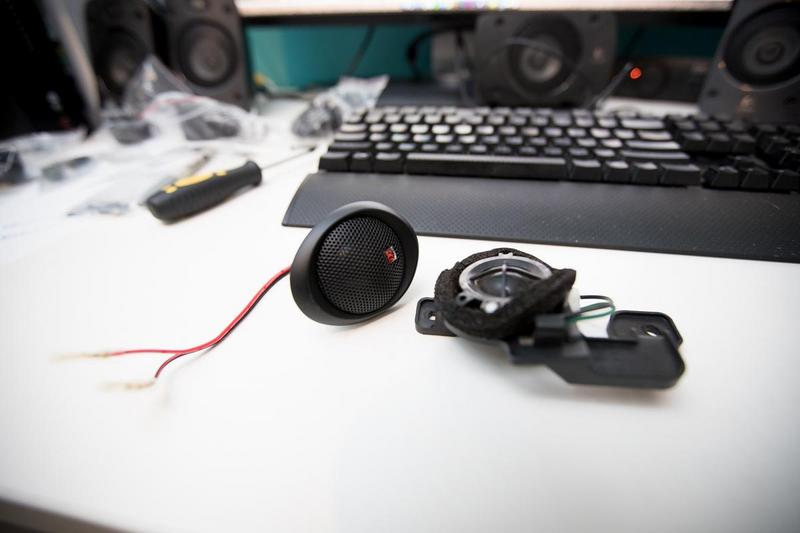
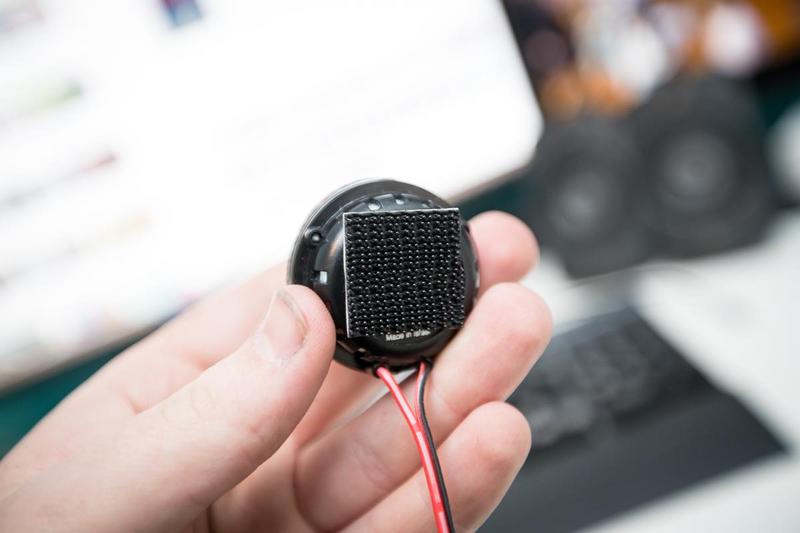
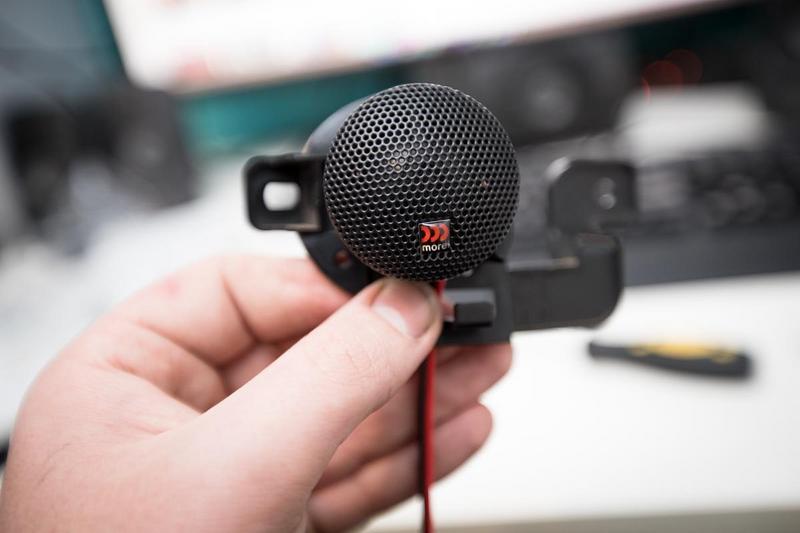
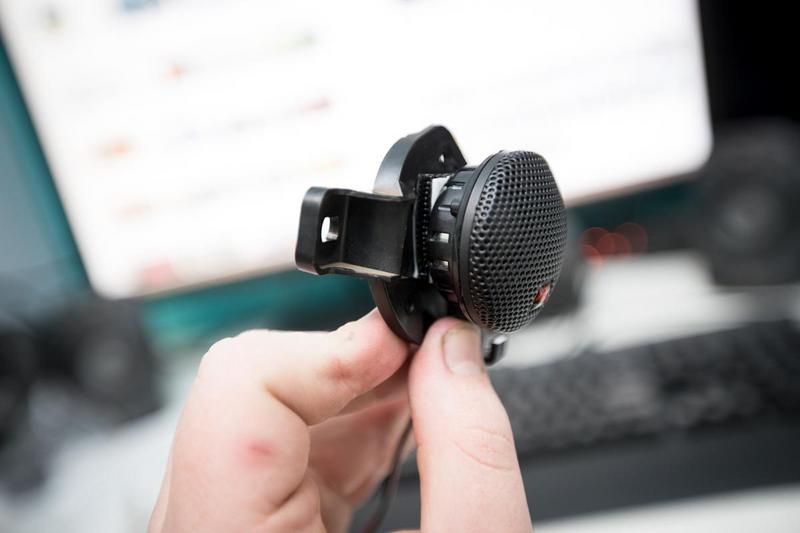
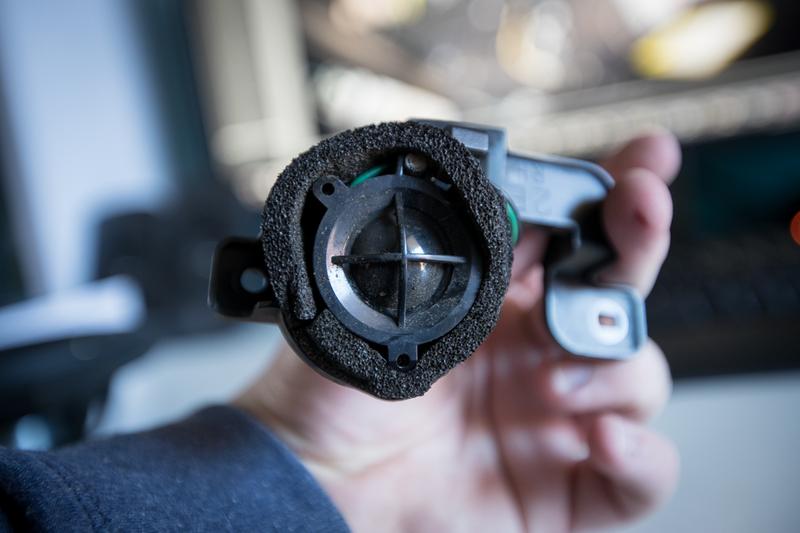
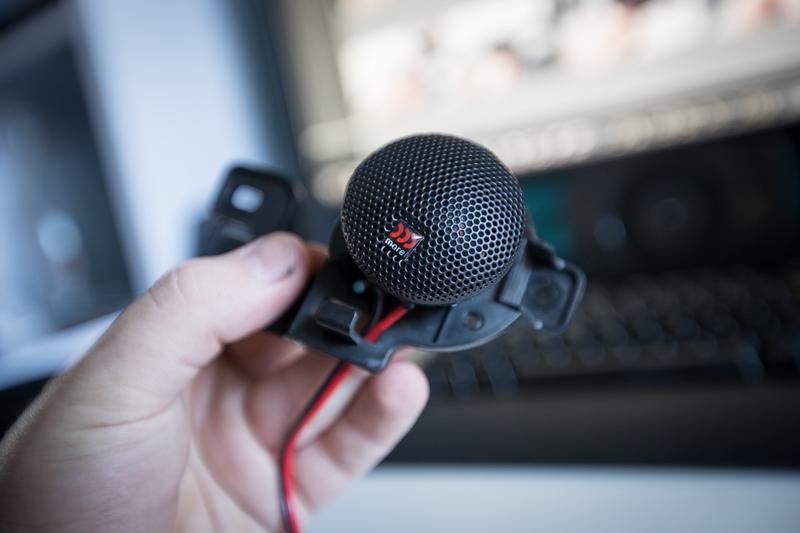
Tweeters.

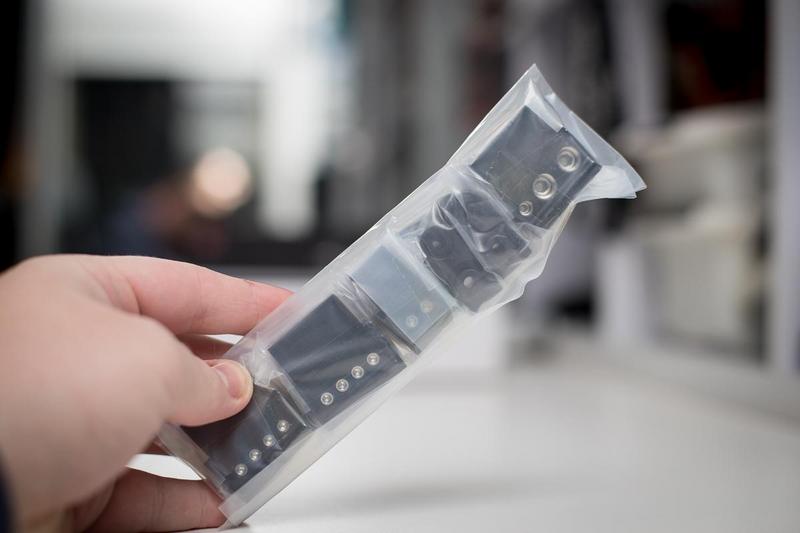
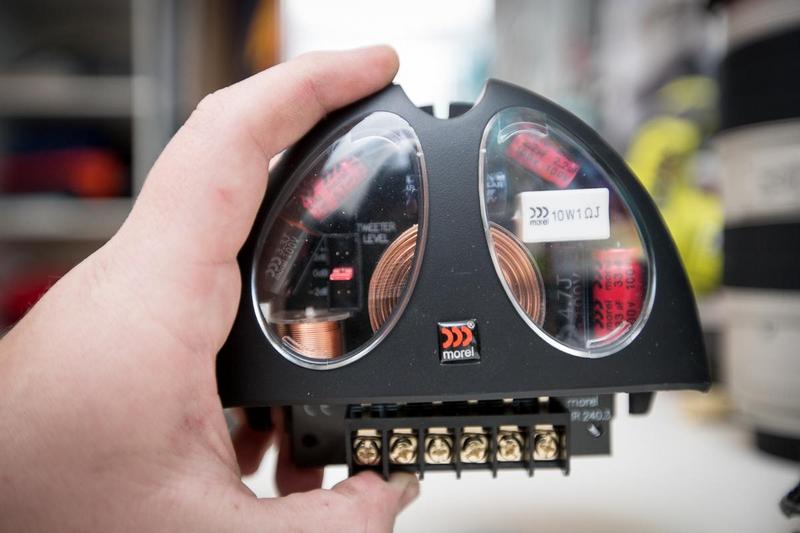
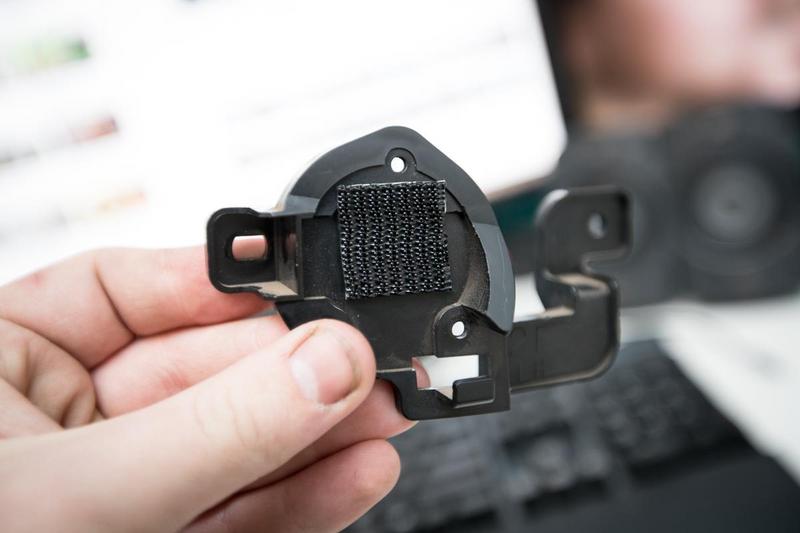
Bug-looking crossover.
So that's basically all the parts. As for a subwoofer, the car already has a 8" low profile kicker unit in the factory location that even at this point I have to have on -5 because the rattle is so bad. So for now I'll leave that in and see what it's like running off the amp and after some sound deadening.
Time to get onto the install.
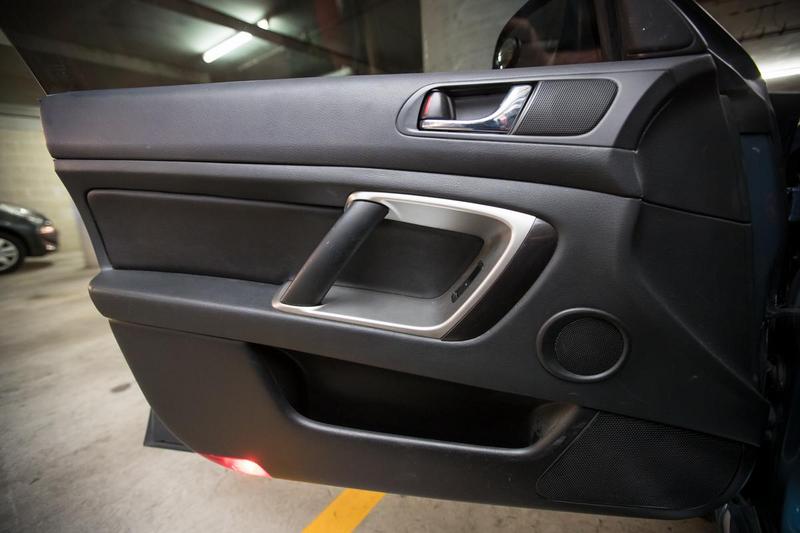
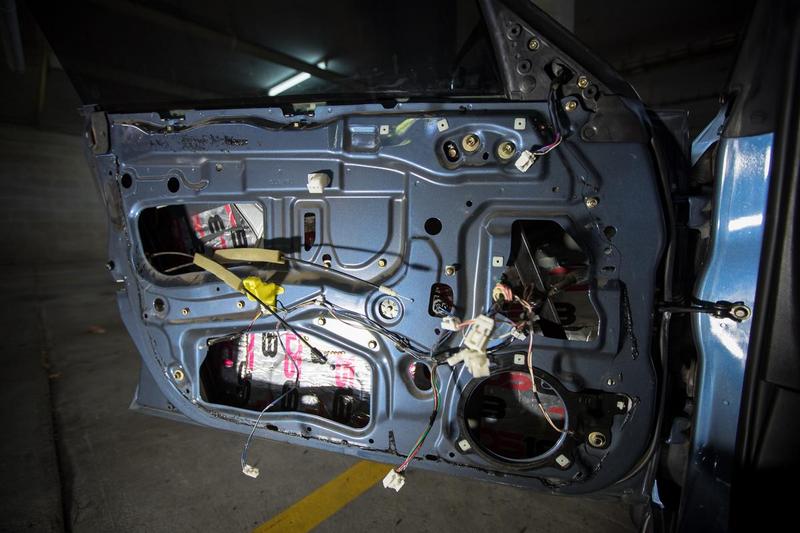
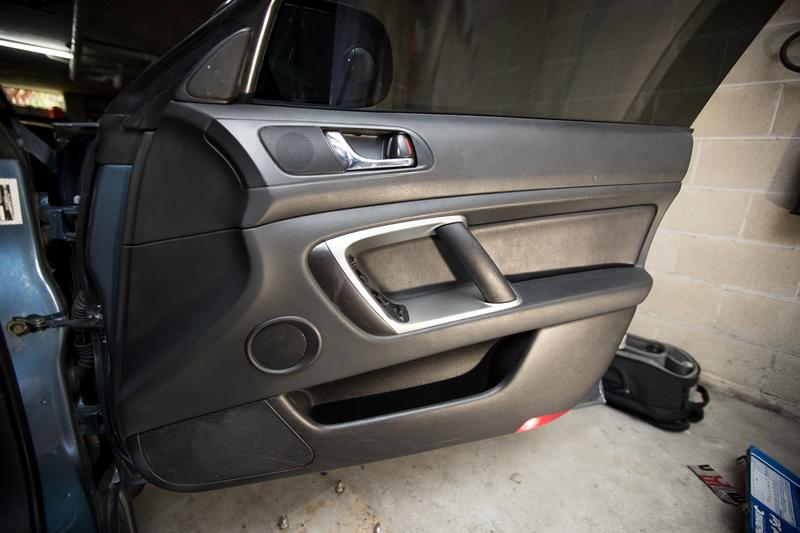
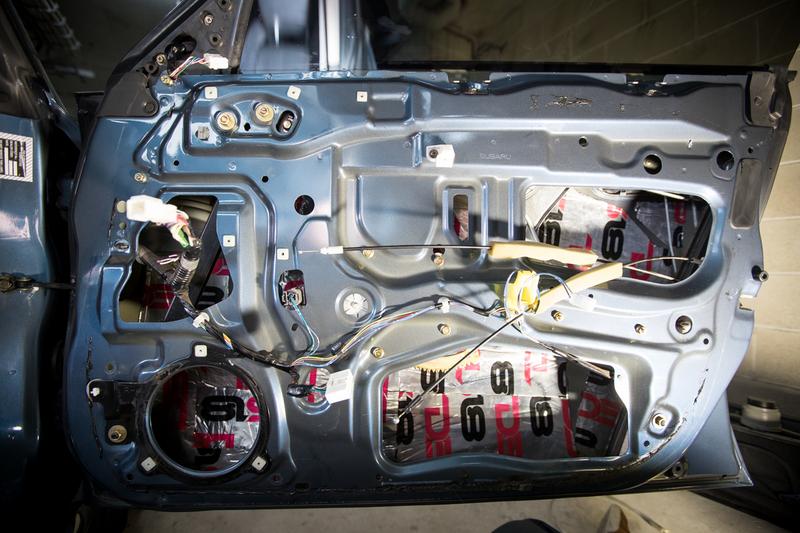
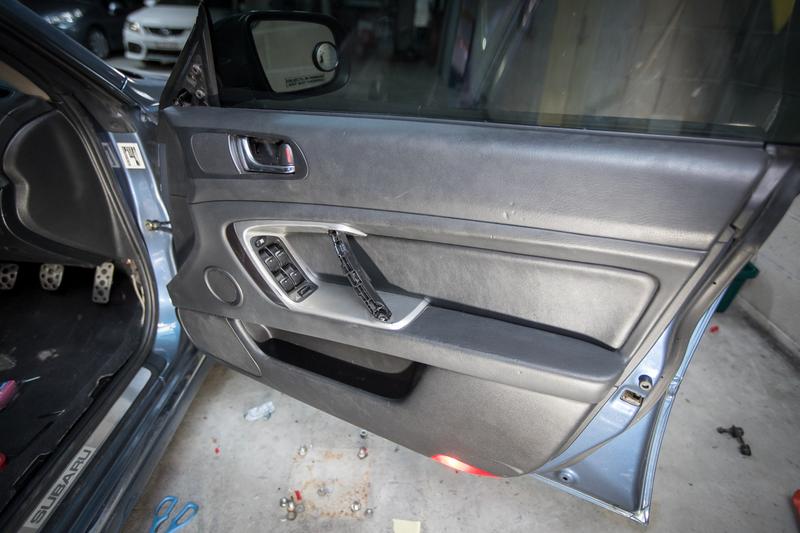
Door card off.
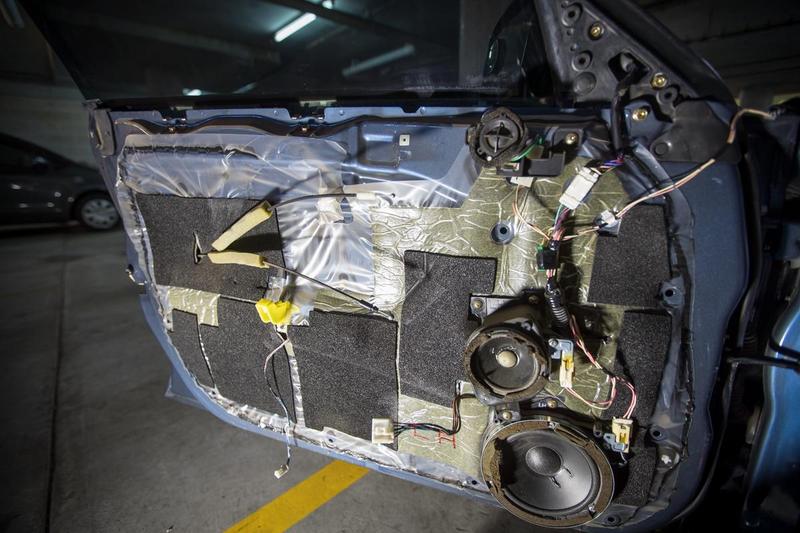
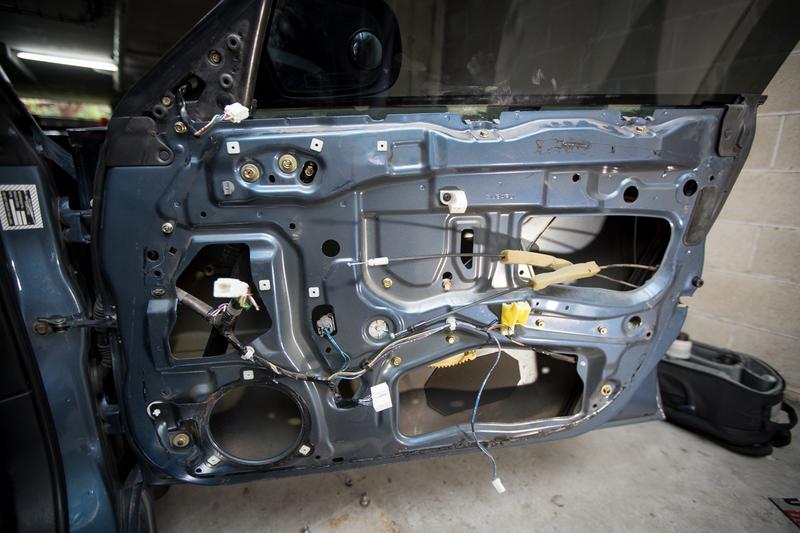
Speakers ripped out and vapour shield off.

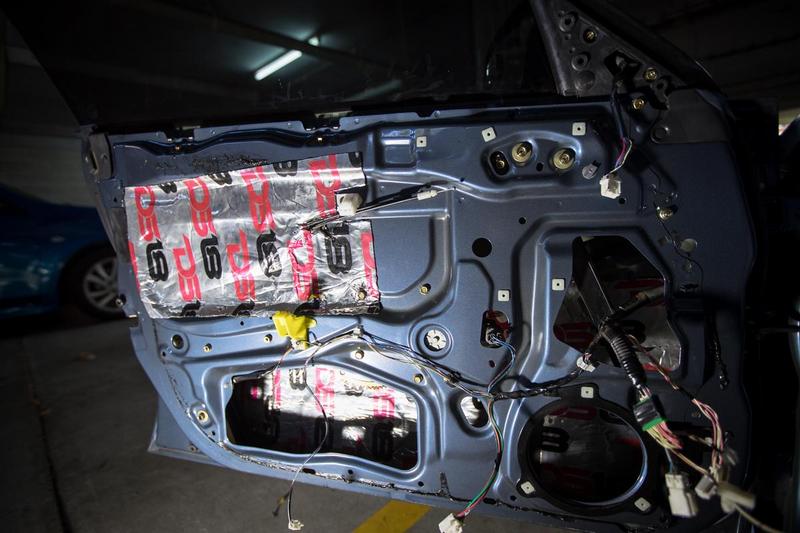
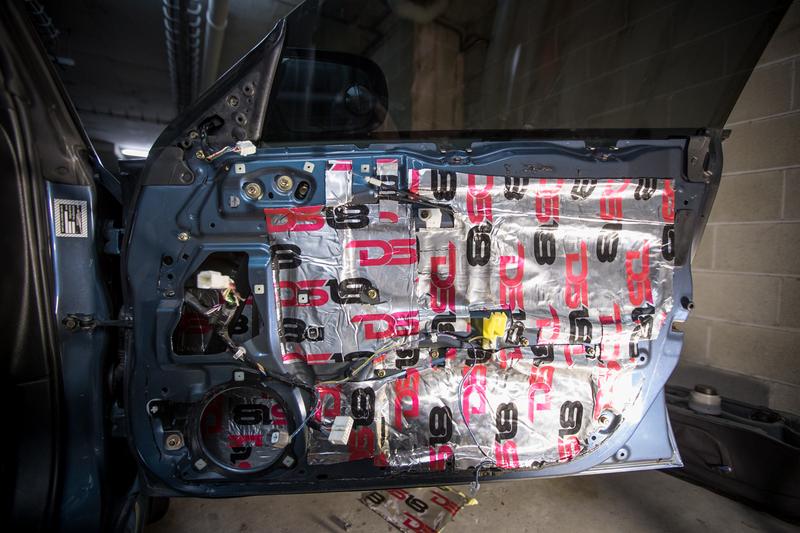
I decided to start with sound deadening before anything else, at least on the inside. Due to the fact that I had so much of it I decided to do both the inner and outside skin of the door.
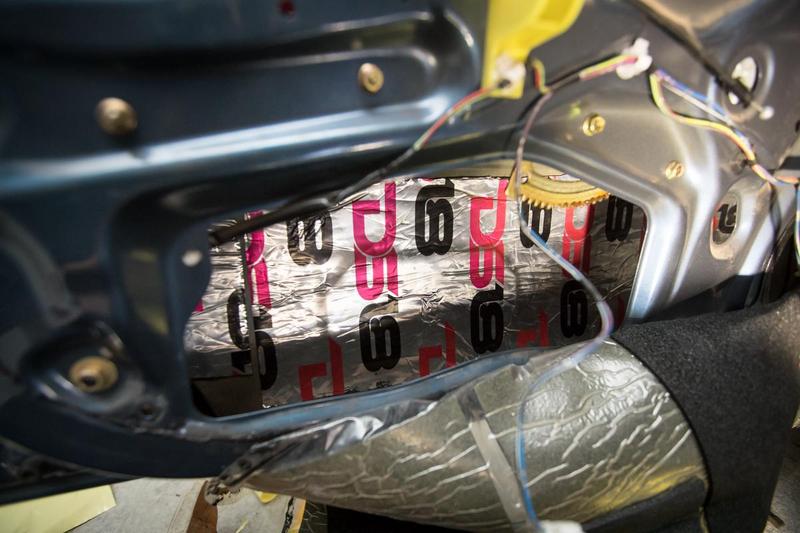
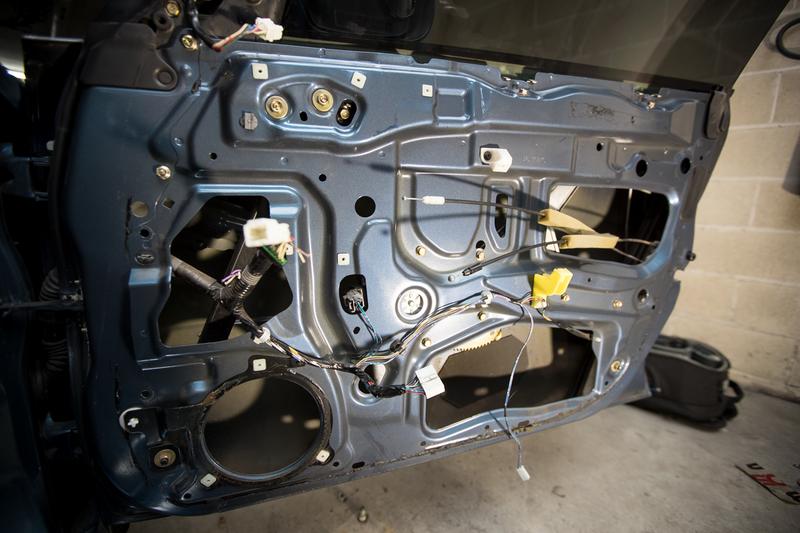
I used three main big chunks and then filled some gaps with some off cuts.
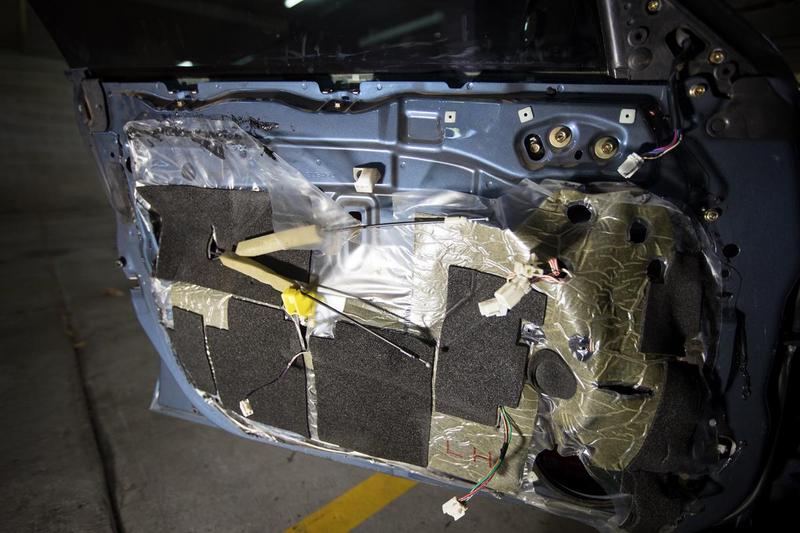
Now onto the inner but before that I gave it a good clean to make sure I had good adhesion.
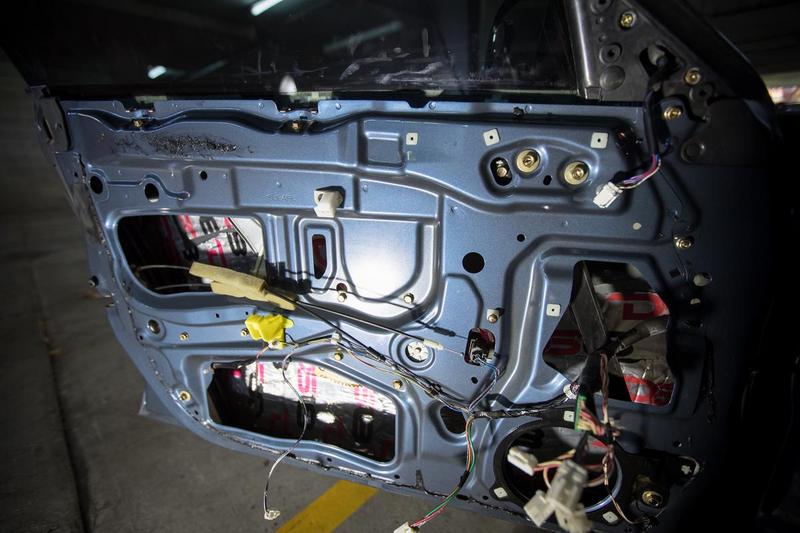
Slowly but surely it all came on.

While I might be approaching diminishing return I had it, so may as well use it.
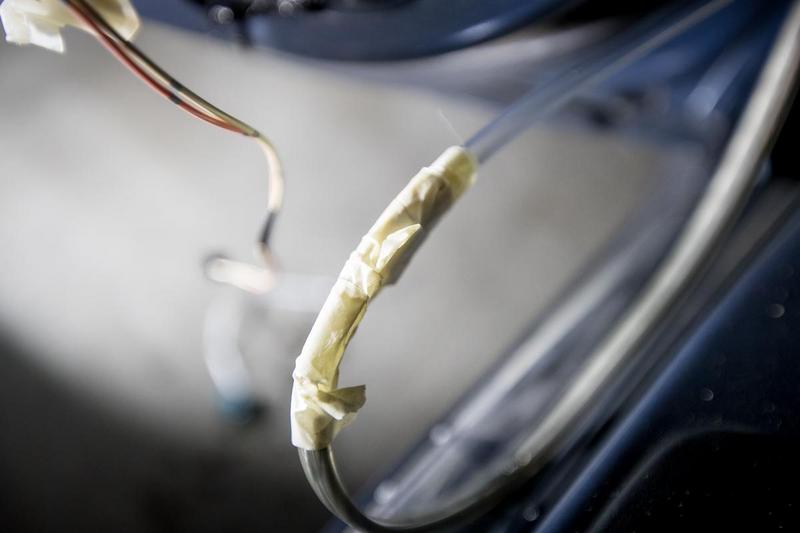
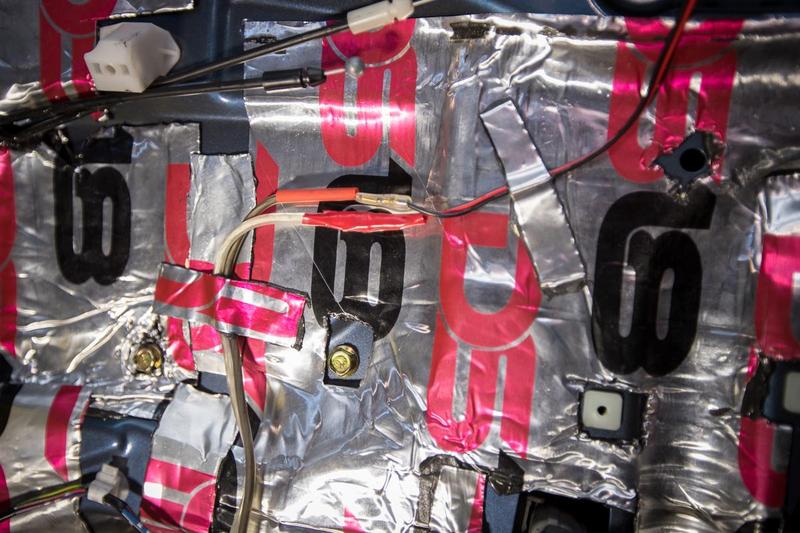
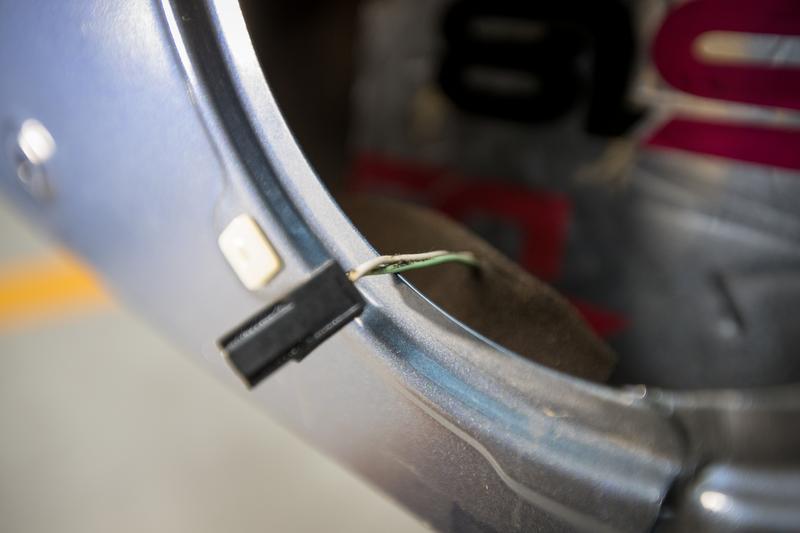
With that basically finished I needed to get the new speaker wire through the door grommet.
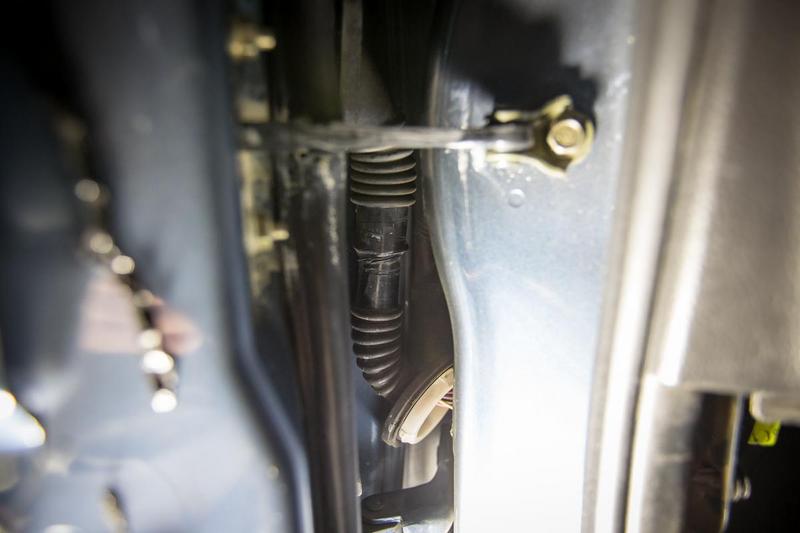
With some whiteline 'high performance' lube I managed to negotiate this high tech tubing up the grommet.
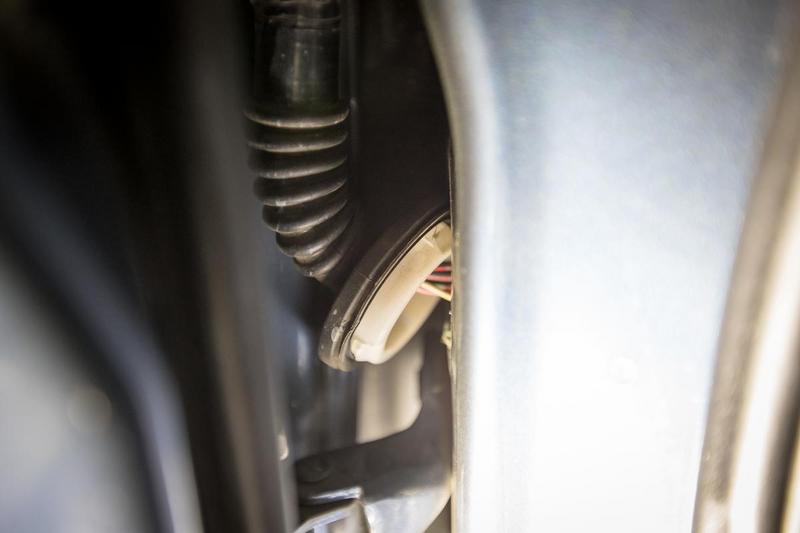
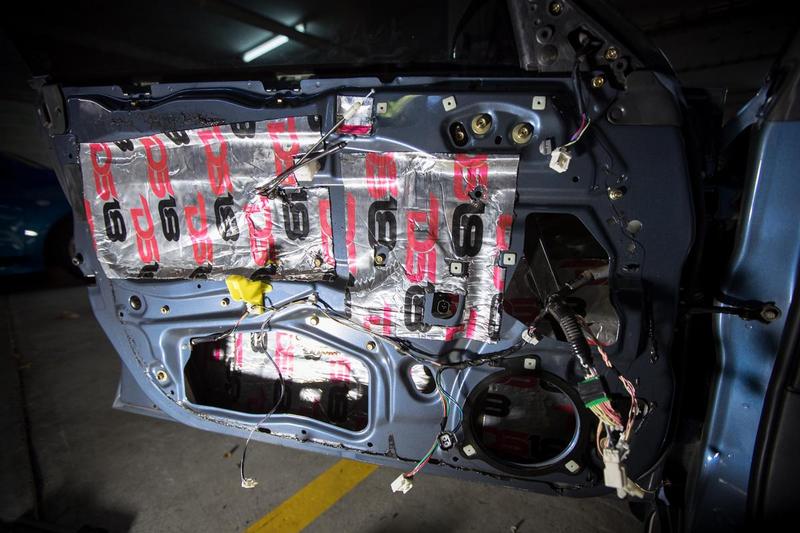
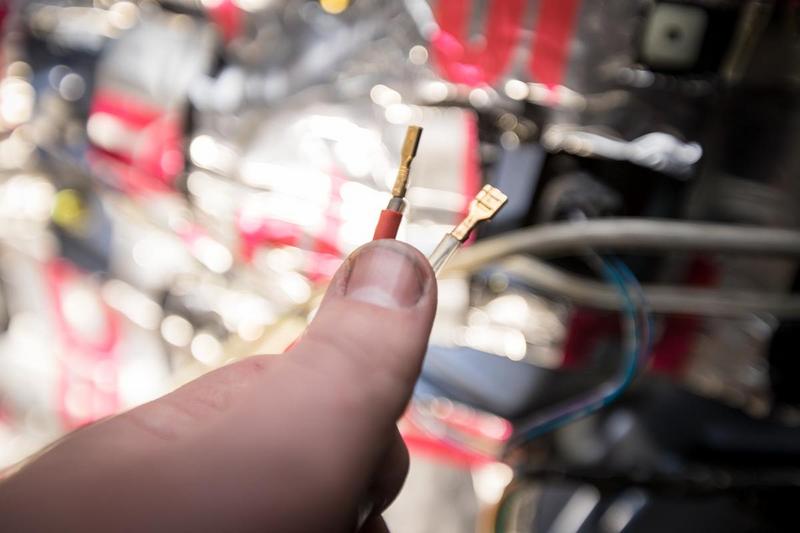
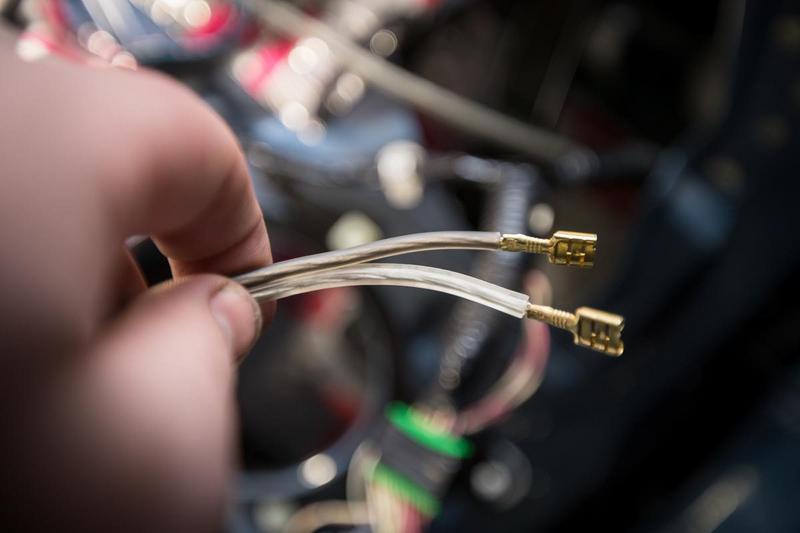
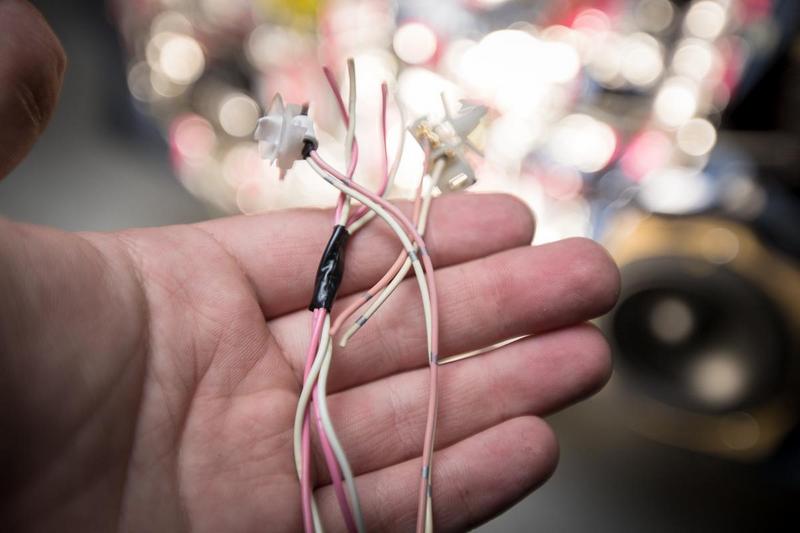
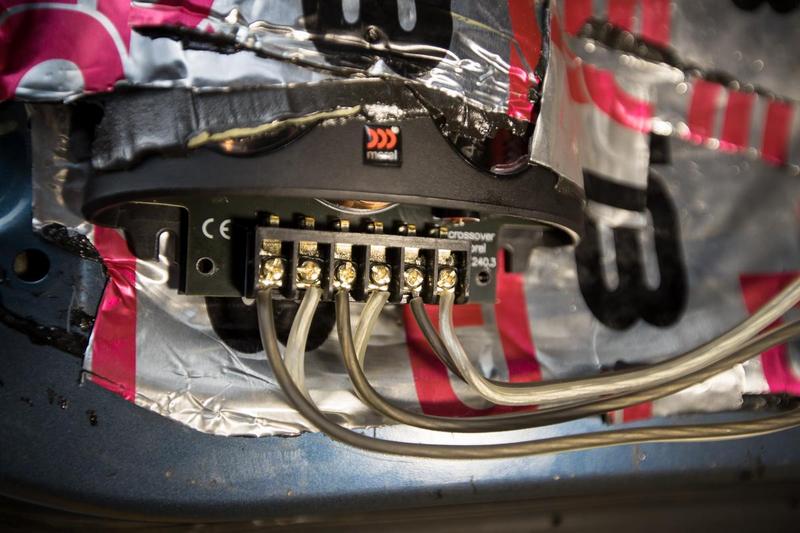
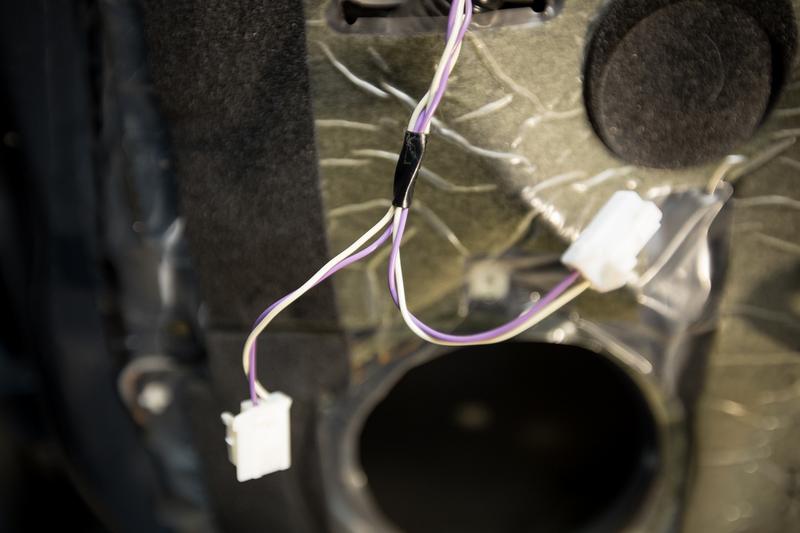
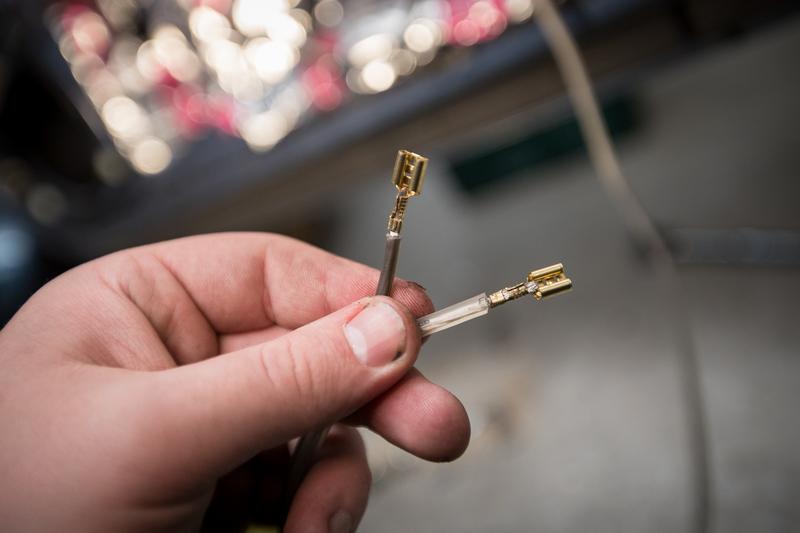
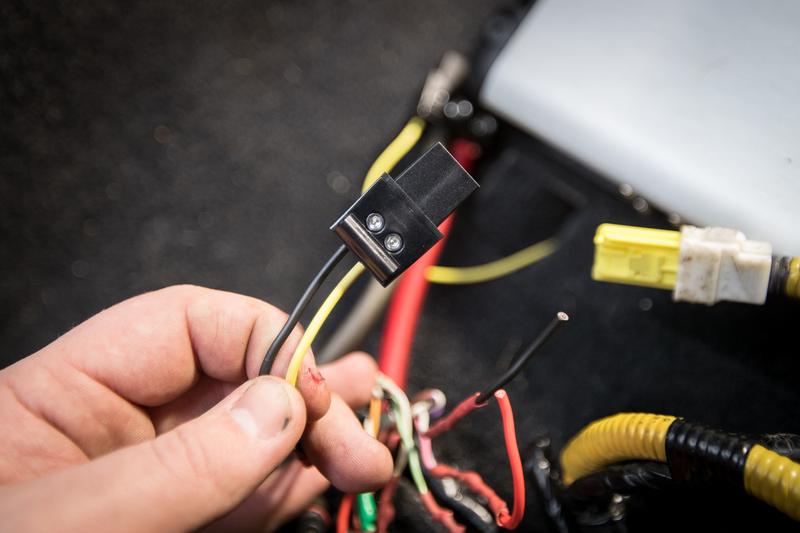
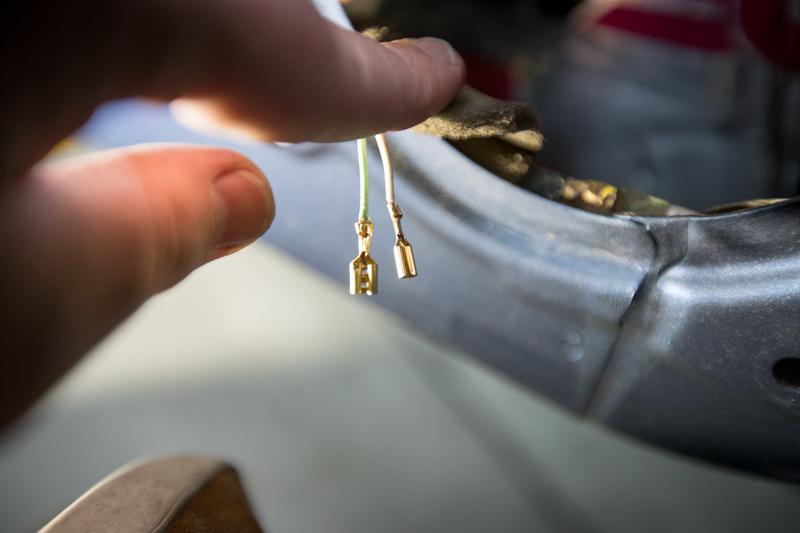
With the cable through to connect the crossover to the amp I needed to sort the wiring for the speakers and tweeter. Time to get the crimps out.
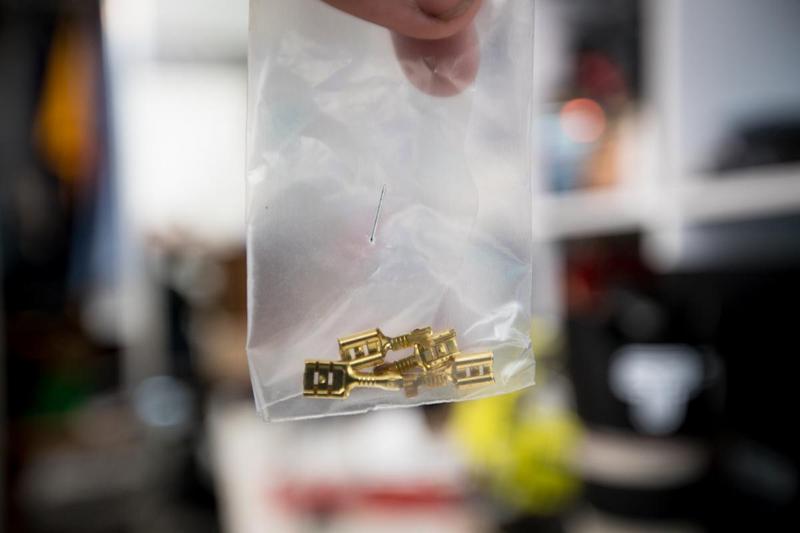
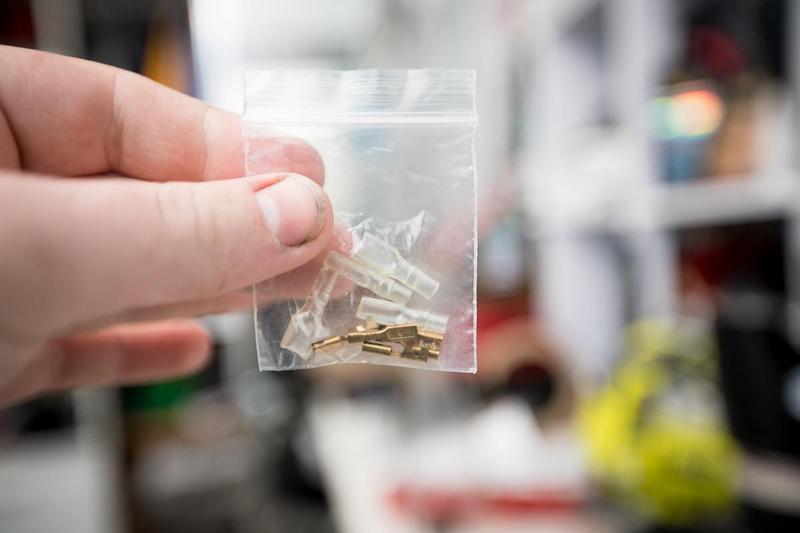
Tweeter and speaker wire sorted.
Once that was done all the old wiring could be deleted.
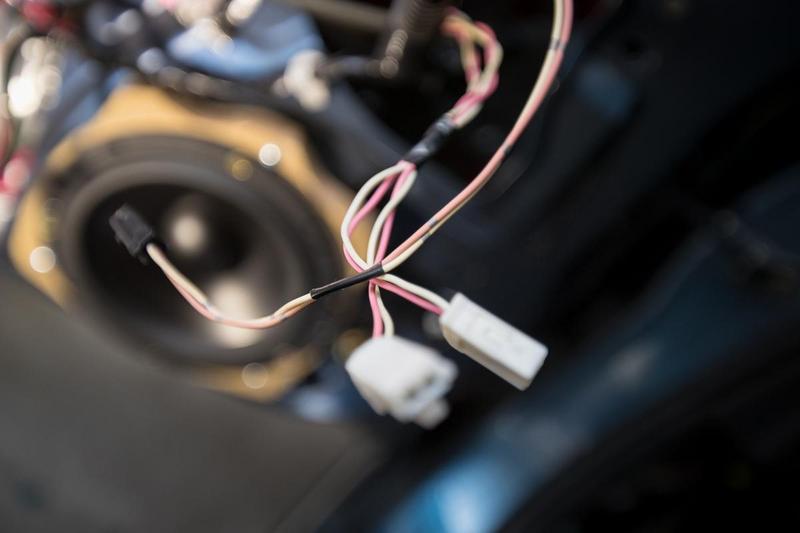
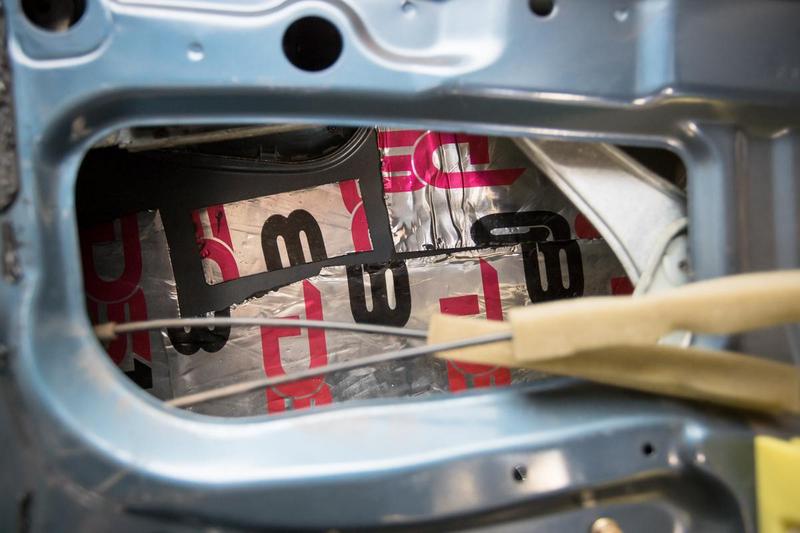
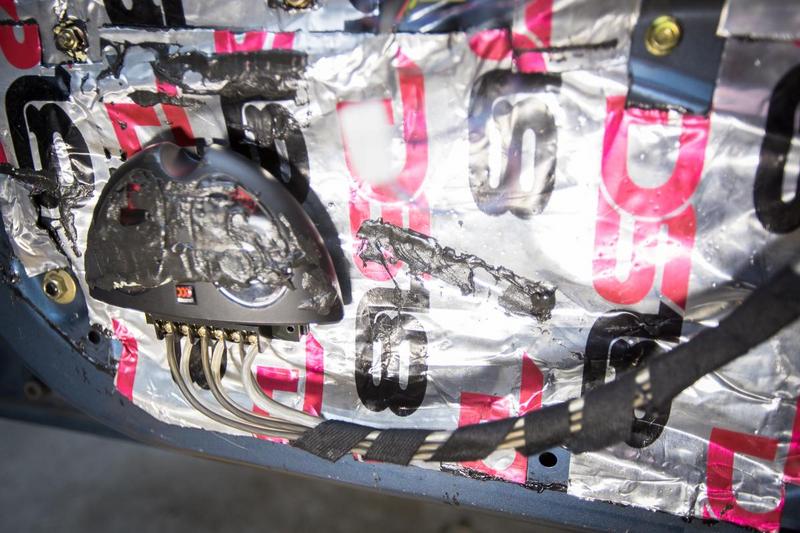
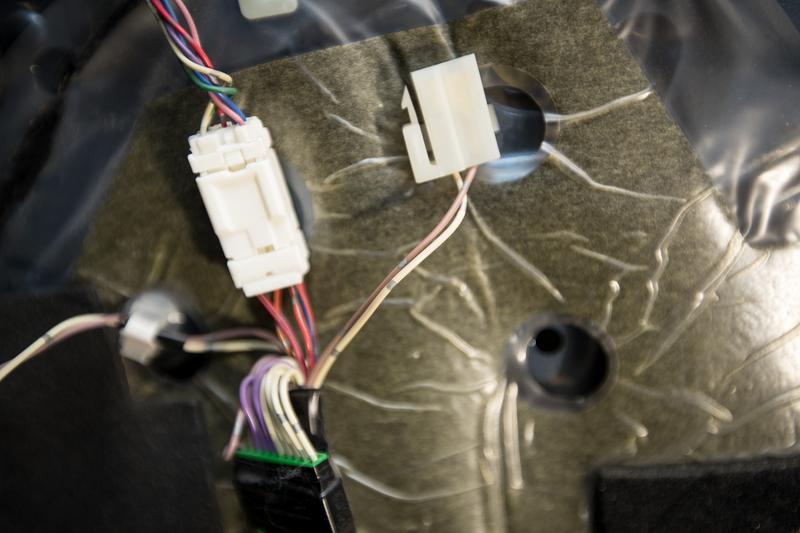
Once that was sorted I could now find a place to mount the crossover. This seemed like the best place.
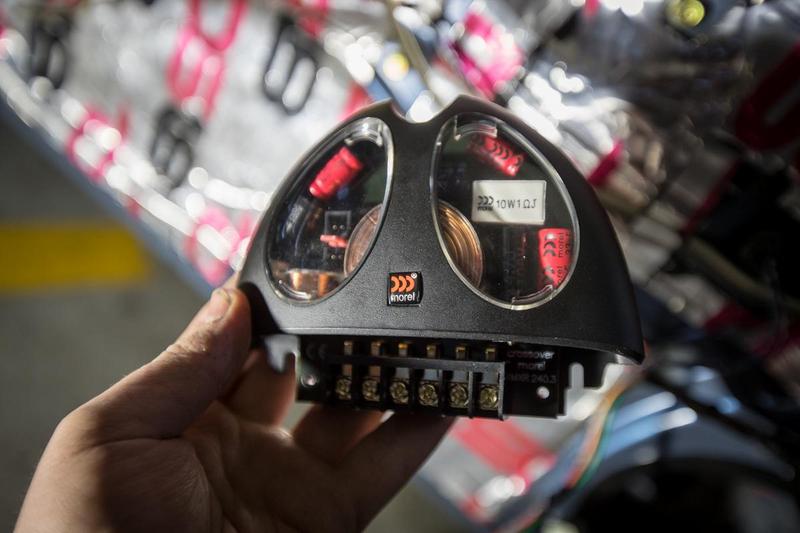
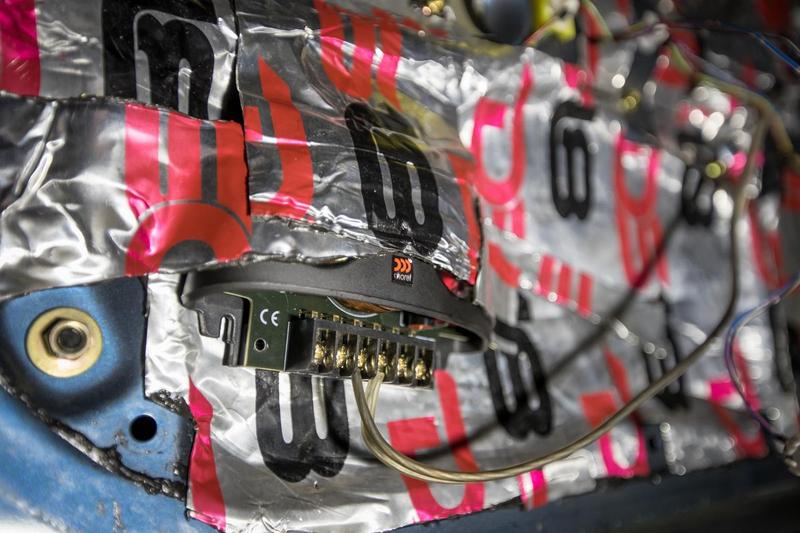
I was recommended to actually use the DS18 to mount it, strangely though it actually started to somewhat sag and fall down so I had to re think it.
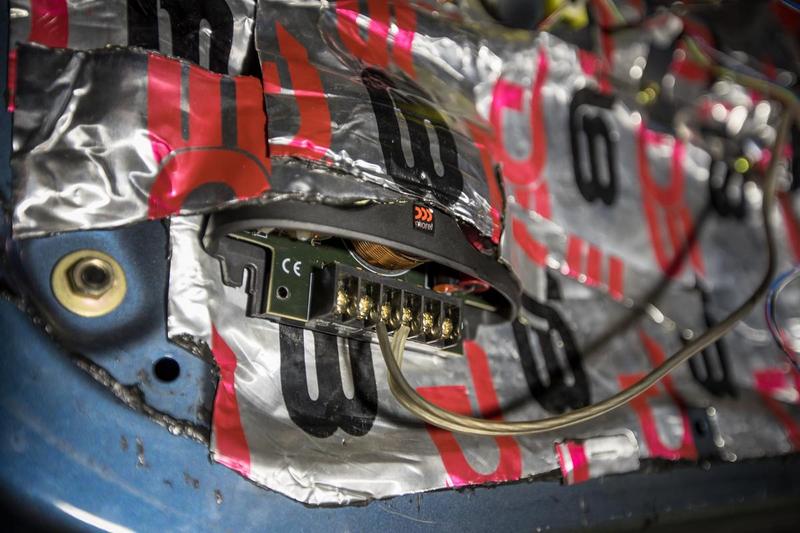
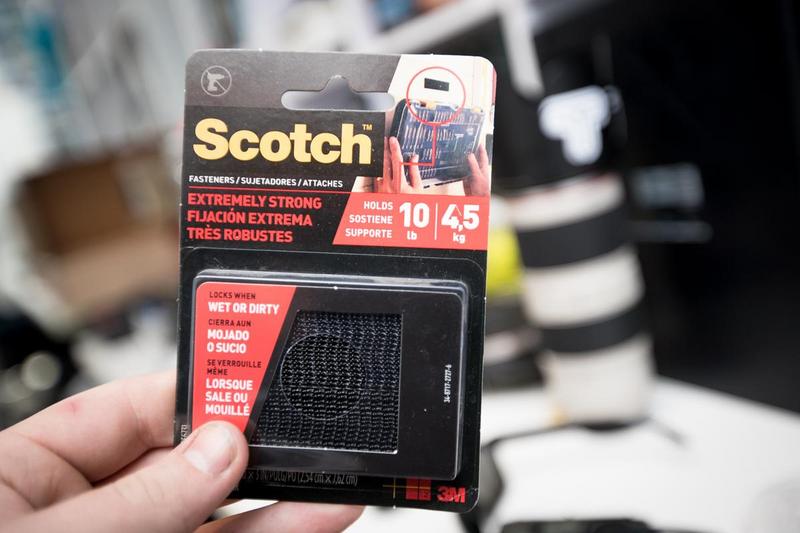
Some 3M Dual Lock seemed to be the perfect way to mount it, doesn't look like it's going anyway.
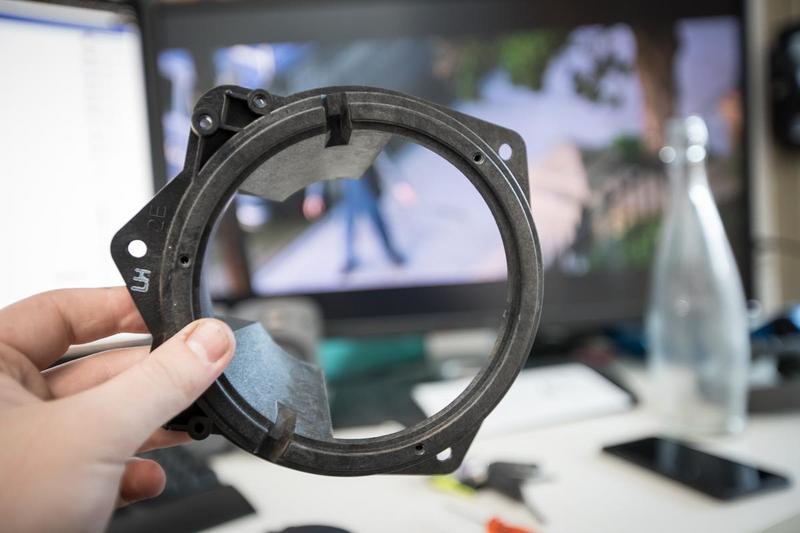
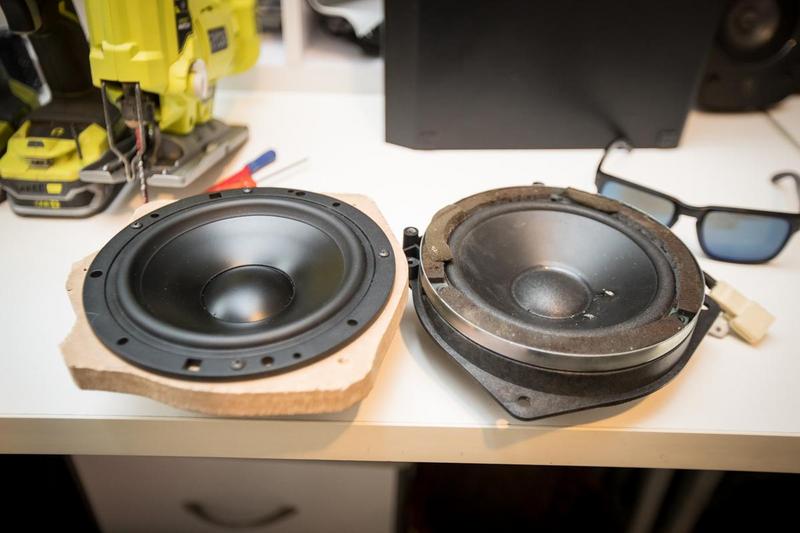
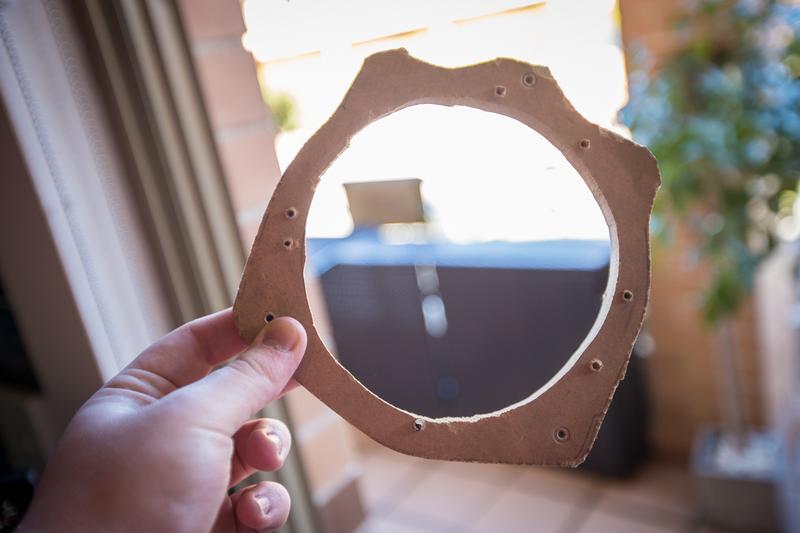
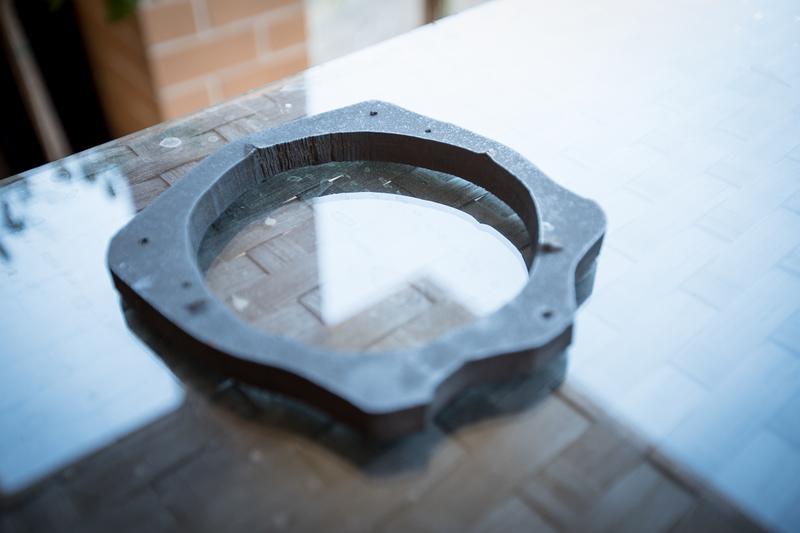
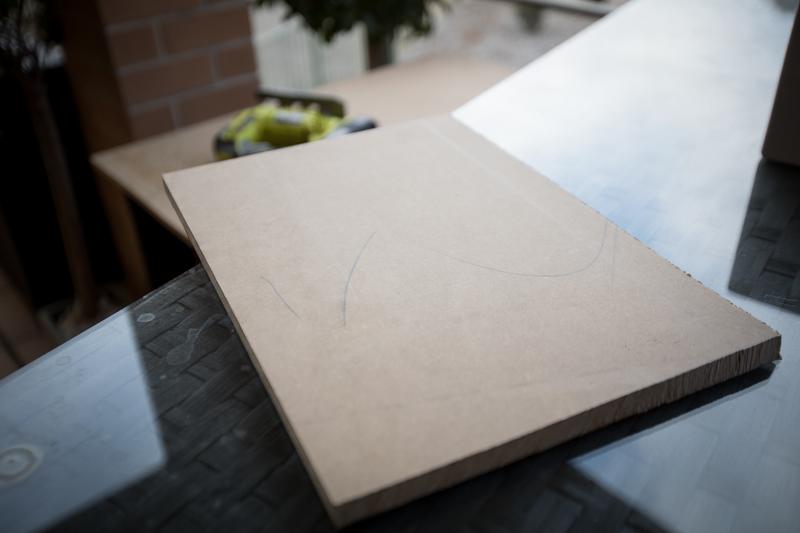
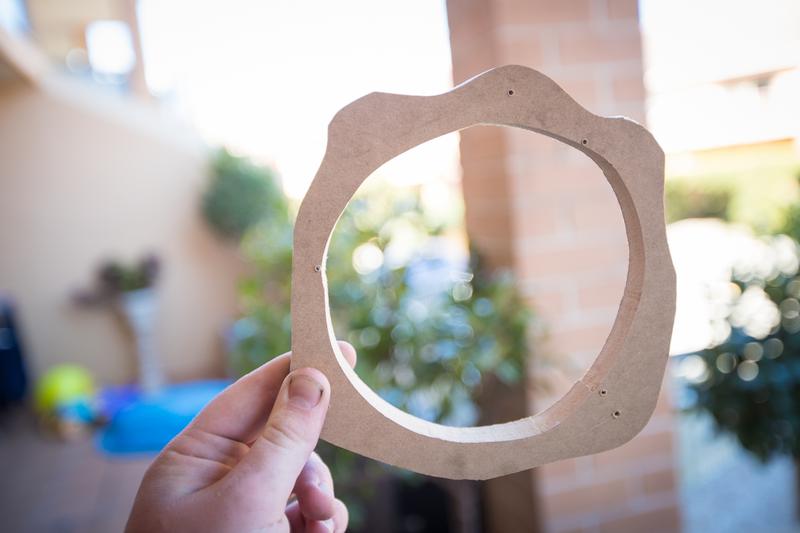
Before I continue on that I need to make an adapter to mount to the speaker to the door. I'm happy to see that there isn't much of size or height difference between the two which should make, making mounts a bit easier.
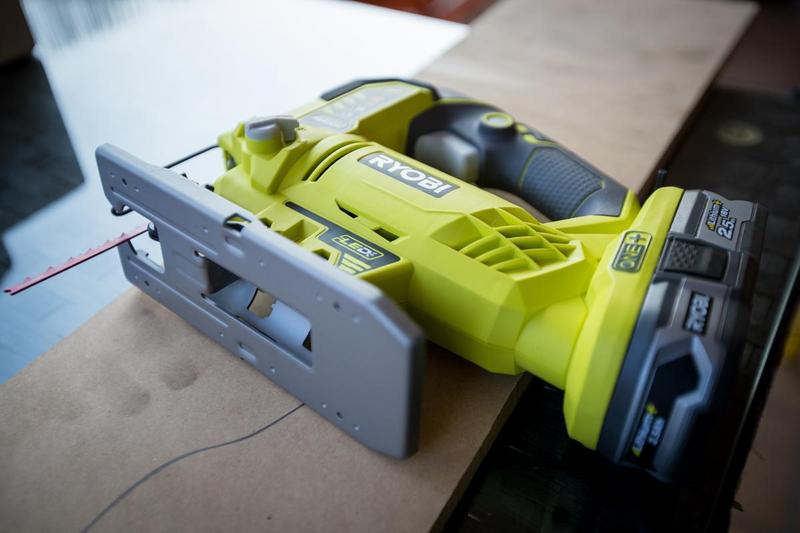
I had a butt tone of 16mm MDF laying around which was certainly convenient. Quick trip to Bunnings and a jigsaw was purchased.
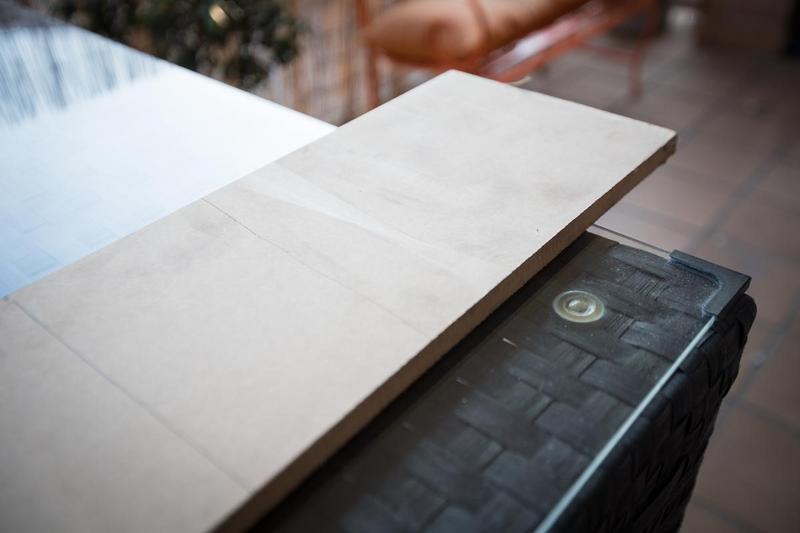
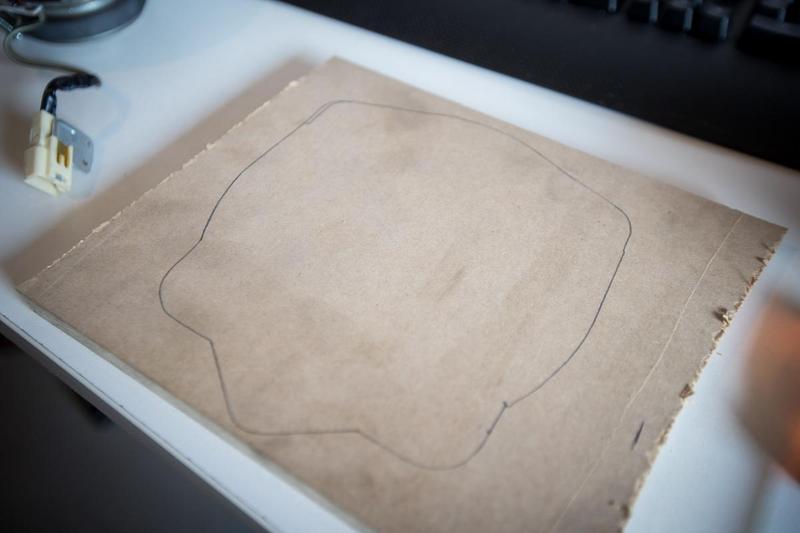
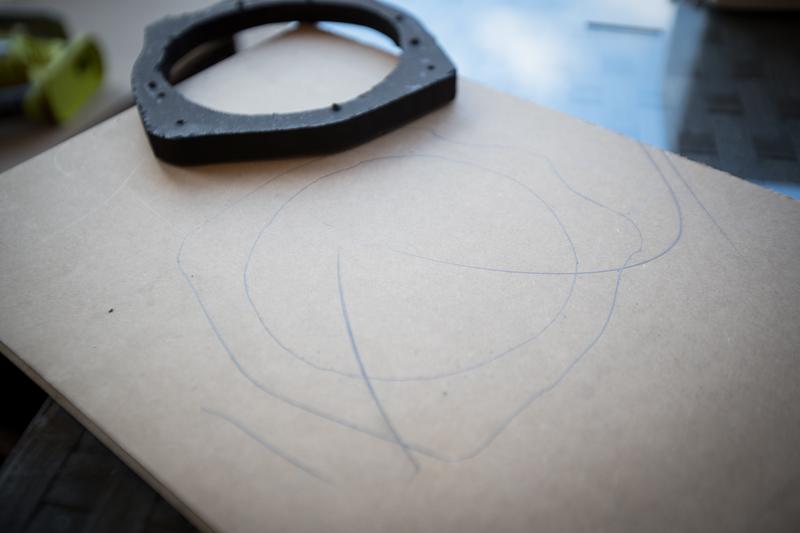
Using the original mount I measured out onto the MDF.
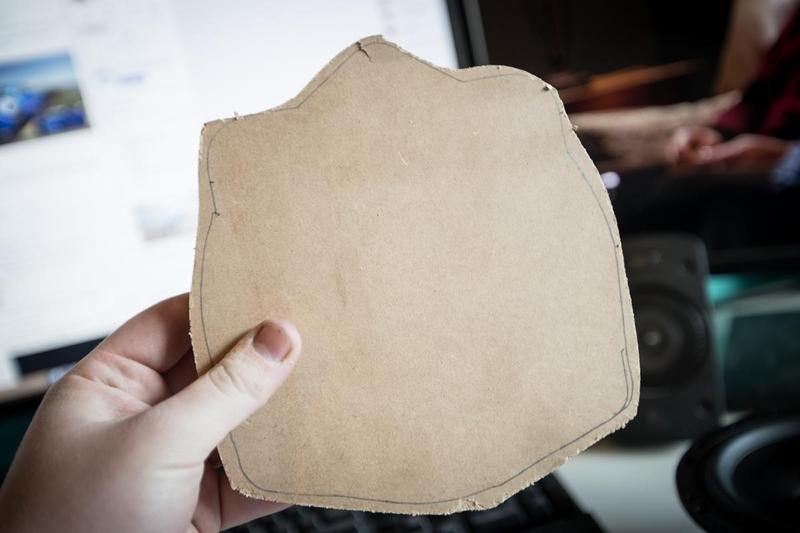
Started with a rough cutout and then using the cheap universal spacers a what mostly looks like a perfect circle was cut out.
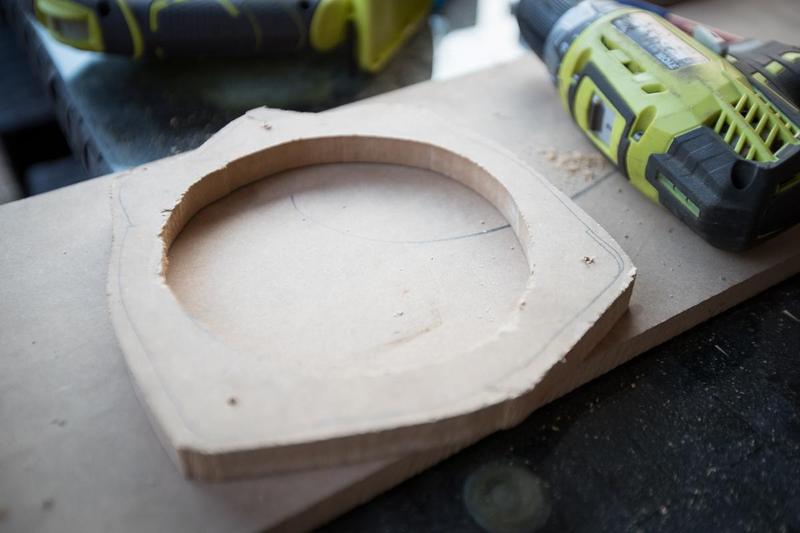
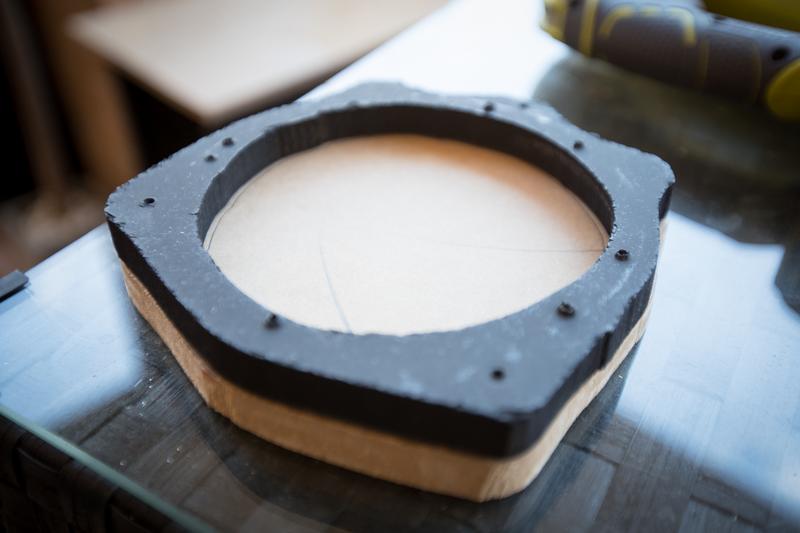
Mounting holes were then cut and on the speaker went.
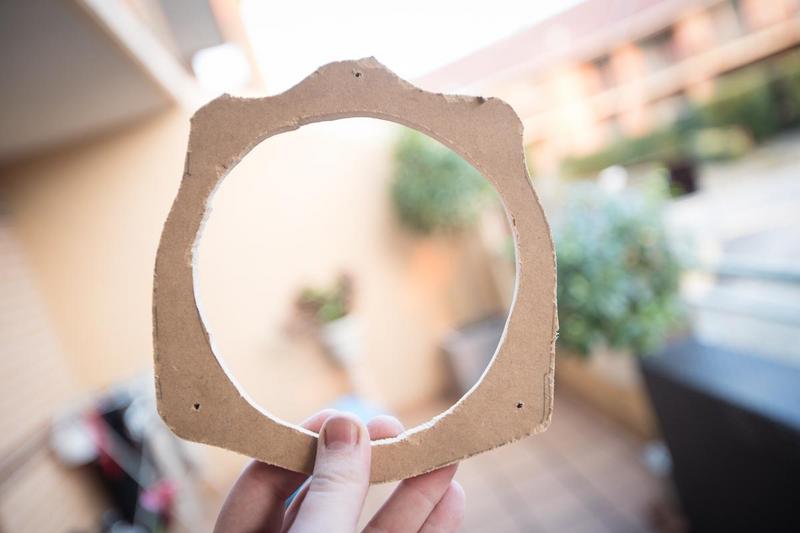
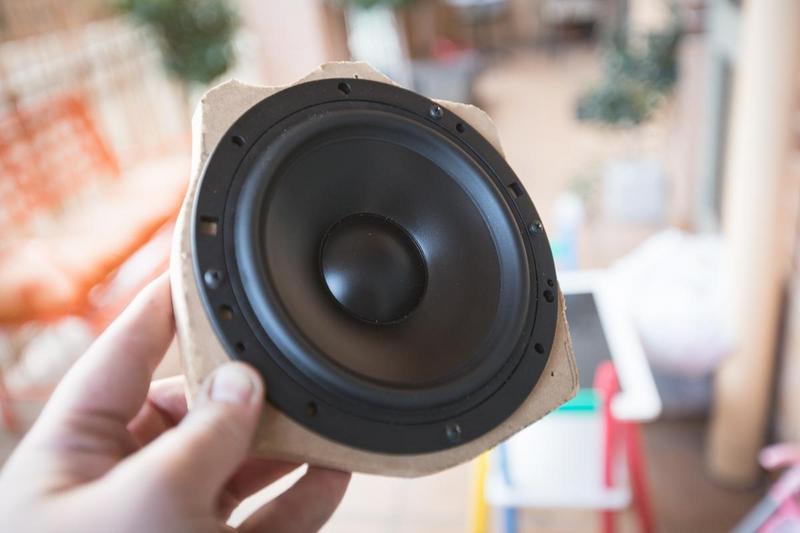
Size ended up almost prefect.

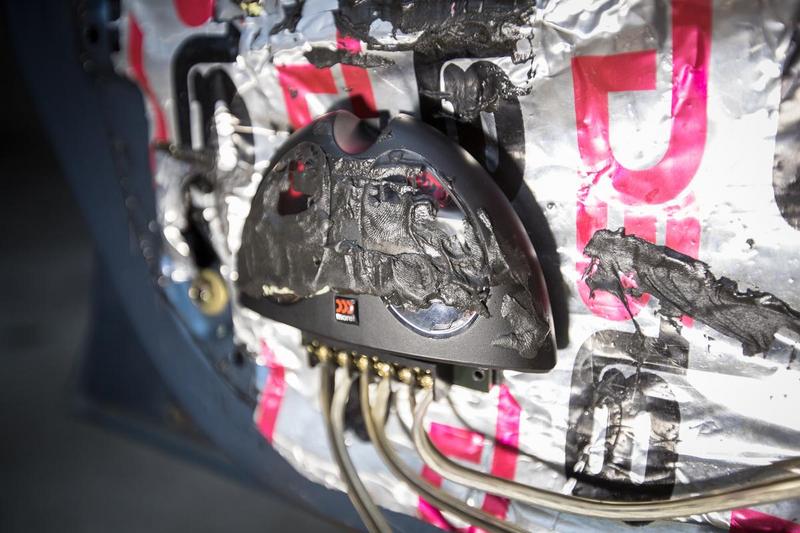
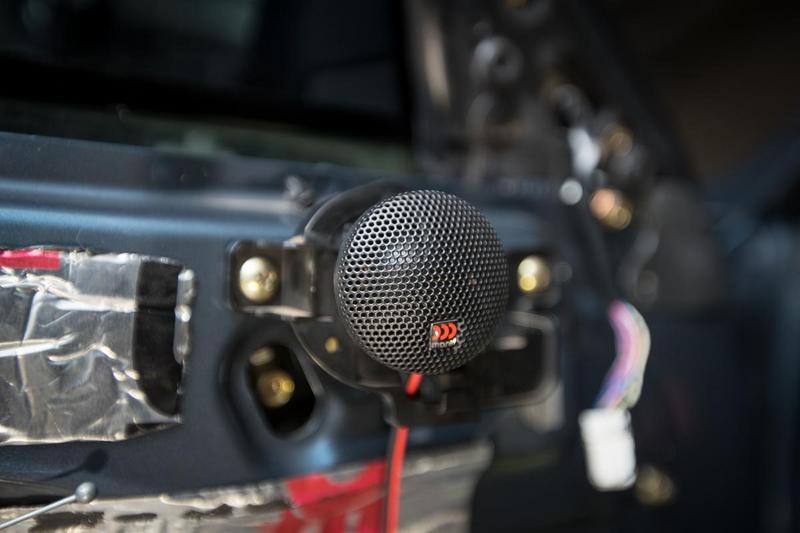
With the issue of mounting the woofer I needed a way to mount the single tweeter.
3M Dual Lock to the rescue again.
Perfect.
That's not going anyway.
Woofer in.

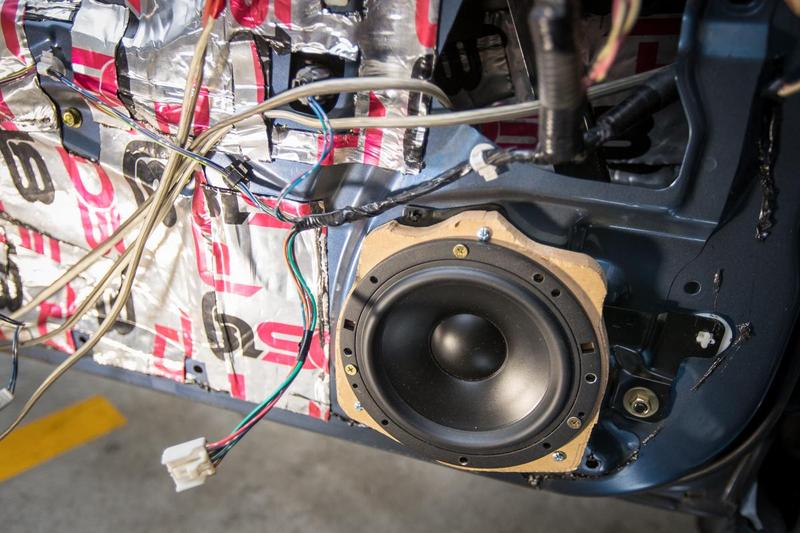
Then onto a touch of cable management.
Much better.
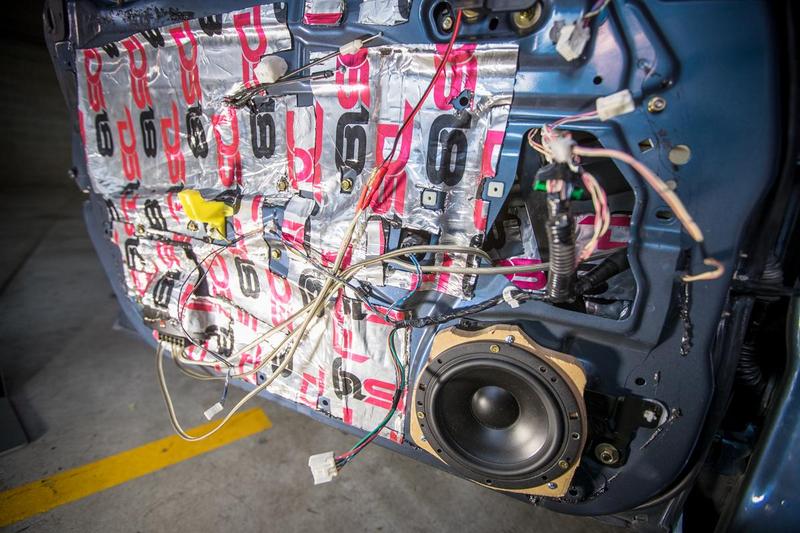
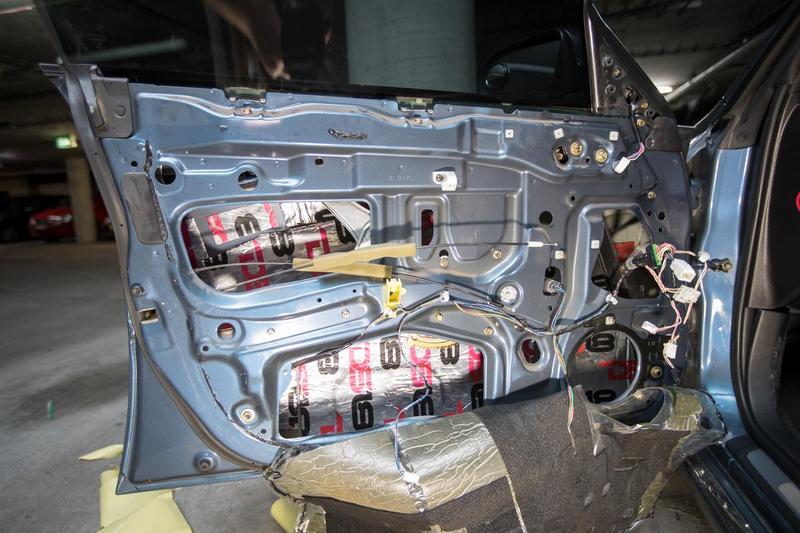
So basically that's everything that needs doing on the one door. I'll fill the last whole in the door when everything is tested. Now it was time to remove the passenger seat to get to the old amp.
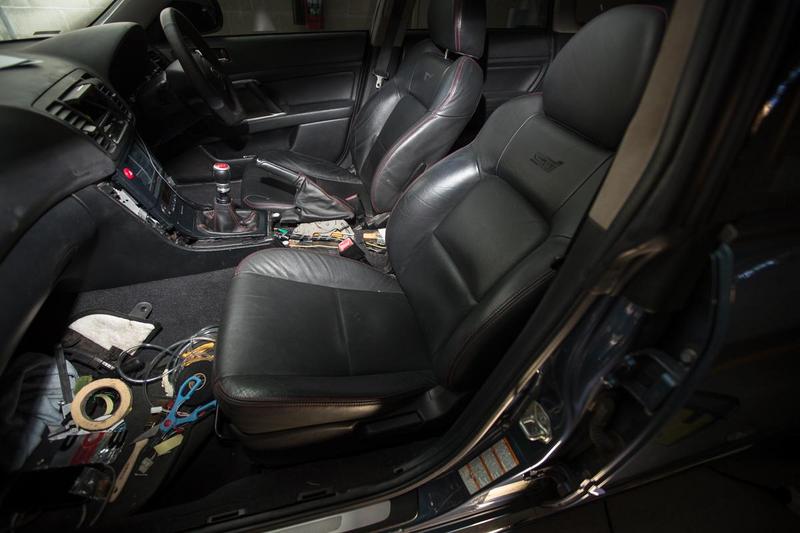
Looks like the previous owner had the amp purely for the sub and even more strangely it had two pissy wires for the power and ground each. Happy to see this out.

The amp will be a perfect addition for the daily once I get a better set of speakers for it. That's it for the day. Hopefully I can get a few hours in during the week and fingers crossed have everything in by the end of next weekend.
Anyway, finally I can get something, that thanks to the control arm fiasco, I was meant to get started on weeks ago. This car has been crying for a proper stereo since the day I got it, finally it's getting one. Be prepared there is going to be ALOT of pictures and info.
Time to go through everything. Starting with the least interesting, for me anyway.
Despite knowing that they would basically be useless, I grabbed a set of universal 6.5" 16mm thick MDF spacers. They were $8.00 and made it easier to do a nice circle, but otherwise, no help getting the speaker actually secured to the door.
I knew that I would need a somewhat half decent roller for the sound deadening. There were plenty going for well over $40.00 which I refused to pay for something like that. I ended up settling for this Roadkill unit. It's utter crap and the one screw on it kept falling off. Oh well.
While the roller didn't feel like quality, this wiring kit does. This is a Rockford 4GA amplifier Wiring Kit.
9.1 meters of super beefy 16 gauge speaker wire, there is heaps here but I can already see myself running out.
Nice set of RCA cables.
4 gauge power wire with a nice fuse holder.
4 gauge ground wire, nice and short. I'll likely throw this on the passenger seat mount as this has worked well for me in the past.
Also comes with a REM wire and a few other goodies.
I needed three sets total of RCA cables as I'll be using a five-channel amp. So I grabbed two sets of Stinger 3 meter RCA's.
Due to the fact that the Sony XAV-AX100 has a single RCA for the subwoofer I needed to grab a two into one, again another Stinger unit.
For sound deadening I decided to go for some DS18, hey it ain't Dynamat but it also isn't the price of Dynamat so it'll be fine. I grabbed two bulk packs so I'll have plenty and don't have to worry about being frugal with it, plus any left overs can go in the daily.
Now onto the good stuff. Starting with the amp, I was not in the slightest interested in the idea of running two amplifiers. So that meant running a five-channel. Plus the car was designed to have one amp under the passenger seat anyway. I ended up with a JL Audio HD900/5 900W five-channel amplifier. It's such a nice looking unit but surprisedly compact, although super dense, this was a heavy bastard.
Nice to see all of the tuning controls are actually hidden behind a panel so there is no chance of screwing them up.
The amp uses these fancy quick disconnect things for easy removal.
Plenty of I/O ready for tunes.
Next up was the rear, I didn't need anything super special but I wanted something decent for some fill, plus the rears were blown anyway. There is only one space in the door for a single 6" as the original was a two-way. I ended up with a pair of Morel Tempo Ultra 602 Integra's. These are super reasonably priced and should do well in the back. I'll see what they're like, might be a great option for the daily.
Nice.
Lastly what I hope will be somewhat of the piece to resistance. A nice set of two-way 6.5" Morel Hybrid 602's. I was going to go with the three-way versions but they couldn't get them in stock and I'm kinda glad about that because it means the install is going to be way easier because of it. These things are like mini subs.
They even feel quality.
Tweeters.
Bug-looking crossover.
So that's basically all the parts. As for a subwoofer, the car already has a 8" low profile kicker unit in the factory location that even at this point I have to have on -5 because the rattle is so bad. So for now I'll leave that in and see what it's like running off the amp and after some sound deadening.
Time to get onto the install.
Door card off.
Speakers ripped out and vapour shield off.
I decided to start with sound deadening before anything else, at least on the inside. Due to the fact that I had so much of it I decided to do both the inner and outside skin of the door.
I used three main big chunks and then filled some gaps with some off cuts.
Now onto the inner but before that I gave it a good clean to make sure I had good adhesion.
Slowly but surely it all came on.
While I might be approaching diminishing return I had it, so may as well use it.
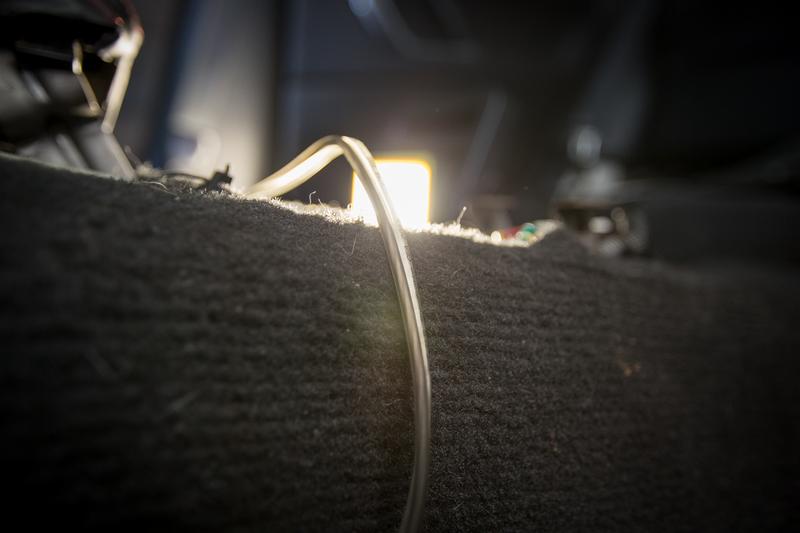
With that basically finished I needed to get the new speaker wire through the door grommet.
With some whiteline 'high performance' lube I managed to negotiate this high tech tubing up the grommet.
With the cable through to connect the crossover to the amp I needed to sort the wiring for the speakers and tweeter. Time to get the crimps out.
Tweeter and speaker wire sorted.
Once that was done all the old wiring could be deleted.
Once that was sorted I could now find a place to mount the crossover. This seemed like the best place.
I was recommended to actually use the DS18 to mount it, strangely though it actually started to somewhat sag and fall down so I had to re think it.
Some 3M Dual Lock seemed to be the perfect way to mount it, doesn't look like it's going anyway.
Before I continue on that I need to make an adapter to mount to the speaker to the door. I'm happy to see that there isn't much of size or height difference between the two which should make, making mounts a bit easier.
I had a butt tone of 16mm MDF laying around which was certainly convenient. Quick trip to Bunnings and a jigsaw was purchased.
Using the original mount I measured out onto the MDF.
Started with a rough cutout and then using the cheap universal spacers a what mostly looks like a perfect circle was cut out.
Mounting holes were then cut and on the speaker went.
Size ended up almost prefect.
With the issue of mounting the woofer I needed a way to mount the single tweeter.
3M Dual Lock to the rescue again.
Perfect.
That's not going anyway.
Woofer in.
Then onto a touch of cable management.
Much better.
So basically that's everything that needs doing on the one door. I'll fill the last whole in the door when everything is tested. Now it was time to remove the passenger seat to get to the old amp.
Looks like the previous owner had the amp purely for the sub and even more strangely it had two pissy wires for the power and ground each. Happy to see this out.
The amp will be a perfect addition for the daily once I get a better set of speakers for it. That's it for the day. Hopefully I can get a few hours in during the week and fingers crossed have everything in by the end of next weekend.
Last edited by applegeek897 on Fri May 25, 2018 5:22 pm, edited 1 time in total.
Daily: '00 Daihatsu Cuore "Kelly" - Build Thread -
Project / Weekender: '05 Subaru Liberty 3.0R-B Wagon - Build Thread -
Motorcycle: '14 Triumph Street Triple 660 - Build Thread -
Project / Weekender: '05 Subaru Liberty 3.0R-B Wagon - Build Thread -
Motorcycle: '14 Triumph Street Triple 660 - Build Thread -
-
applegeek897 - Posts: 246
- Joined: Sun Jun 07, 2015 1:02 am
- Location: Sydney, NSW
- Car: 05' 3R-B Wagon, 00' Daihatsu Cuore
- Real name: James
- Profile URL: viewtopic.php?f=10&t=31247
Re: Member Profile - James' H6 Wagon - SKD55S
![]() by Uncletoby » Mon Aug 21, 2017 12:39 pm
by Uncletoby » Mon Aug 21, 2017 12:39 pm
Great work man, love the attention to detail.
Only problem using that amp for your daily is that it's a monoblock so you won't get stereo sound
Sent from my iPhone using Tapatalk
Only problem using that amp for your daily is that it's a monoblock so you won't get stereo sound
Sent from my iPhone using Tapatalk
- Uncletoby
- Posts: 1
- Joined: Sun Mar 26, 2017 3:09 pm
Re: Member Profile - James' H6 Wagon - SKD55S
![]() by jarrenowen » Tue Aug 22, 2017 1:42 pm
by jarrenowen » Tue Aug 22, 2017 1:42 pm
Uncletoby wrote:Great work man, love the attention to detail.
Only problem using that amp for your daily is that it's a monoblock so you won't get stereo sound
Sent from my iPhone using Tapatalk
he got a hd900/5 JL audio, 5 channel amp 4x100 1x500. 4 door speakers and a sub, perfect setup.
ps love your build quality james, keep up the good work. hd900/5 is a killer amp.
- jarrenowen
- Posts: 234
- Joined: Tue Jun 09, 2015 12:48 pm
- Location: Newcastle
- Car: 2007 Liberty Gt Spec.B
- Real name: Jarren
- Profile URL: viewtopic.php?f=10&t=31061
Re: Member Profile - James' H6 Wagon - SKD55S
![]() by applegeek897 » Tue Aug 22, 2017 9:20 pm
by applegeek897 » Tue Aug 22, 2017 9:20 pm
jarrenowen wrote:Uncletoby wrote:Great work man, love the attention to detail.
Only problem using that amp for your daily is that it's a monoblock so you won't get stereo sound
Sent from my iPhone using Tapatalk
he got a hd900/5 JL audio, 5 channel amp 4x100 1x500. 4 door speakers and a sub, perfect setup.
ps love your build quality james, keep up the good work. hd900/5 is a killer amp.
Thanks man, so keen to get everything done, can't wait to hear it. The amp Toby is speaking about is the Kicker that I pulled out, it'll likely go in my Daily, Daihatsu Cuore not the Subaru
Daily: '00 Daihatsu Cuore "Kelly" - Build Thread -
Project / Weekender: '05 Subaru Liberty 3.0R-B Wagon - Build Thread -
Motorcycle: '14 Triumph Street Triple 660 - Build Thread -
Project / Weekender: '05 Subaru Liberty 3.0R-B Wagon - Build Thread -
Motorcycle: '14 Triumph Street Triple 660 - Build Thread -
-
applegeek897 - Posts: 246
- Joined: Sun Jun 07, 2015 1:02 am
- Location: Sydney, NSW
- Car: 05' 3R-B Wagon, 00' Daihatsu Cuore
- Real name: James
- Profile URL: viewtopic.php?f=10&t=31247
Re: Member Profile - James' H6 Wagon - SKD55S
![]() by applegeek897 » Sat Aug 26, 2017 9:45 pm
by applegeek897 » Sat Aug 26, 2017 9:45 pm
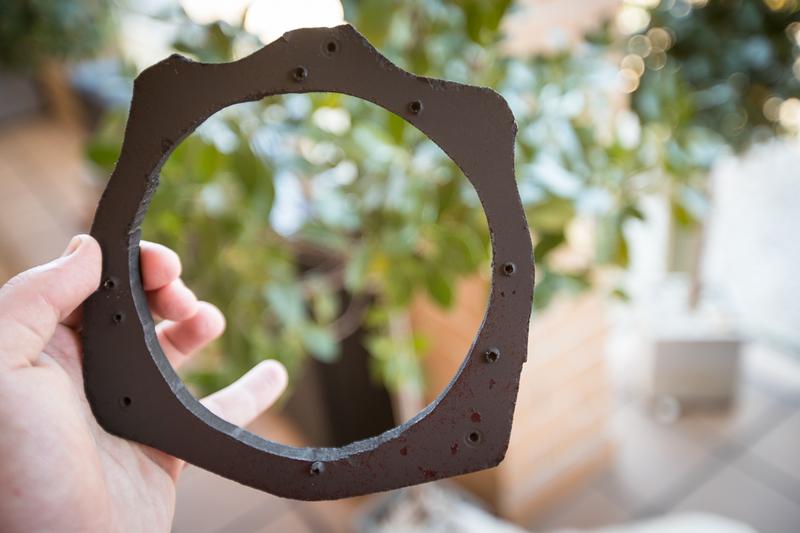
August 2017: Let the install continue. After a recommendation, I thought I would paint the spacer to reduce the chance of it disintegrating due to moisture.

A quick trip to Bunnings and a cheap can of matte black was acquired.
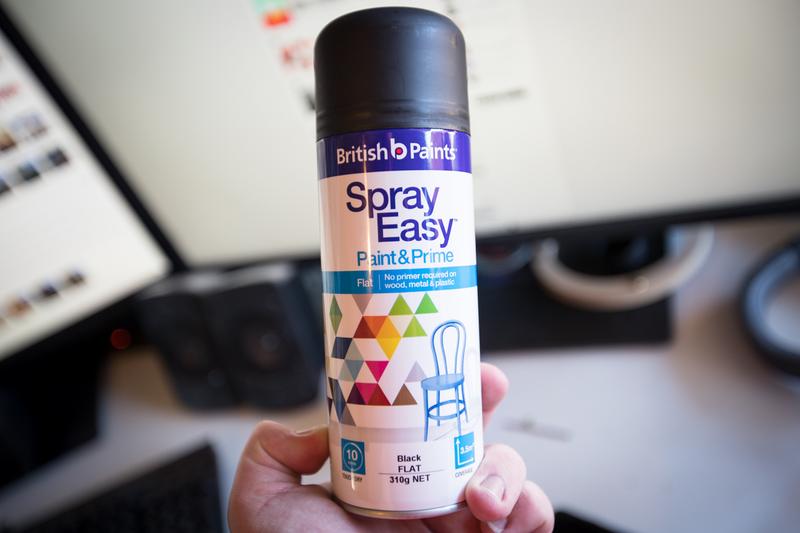
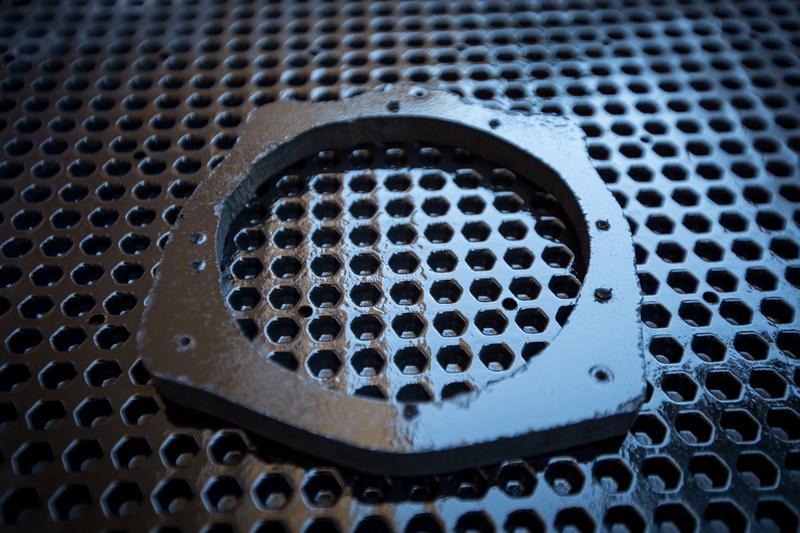
It'll do the job for a quickie.
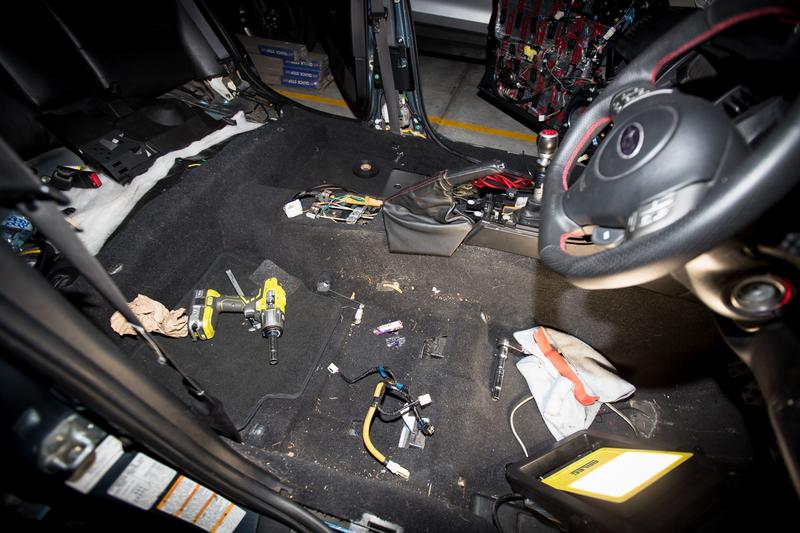
Anyway, back to the car. This mess needed to be sorted asap.
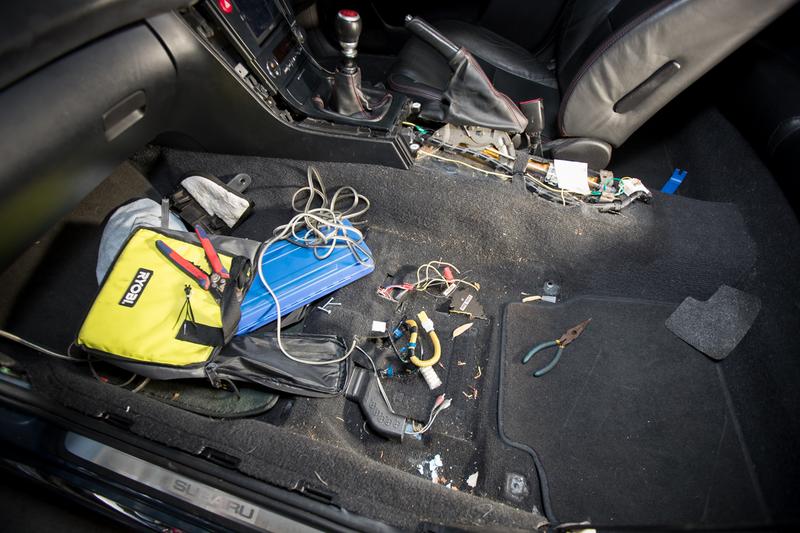
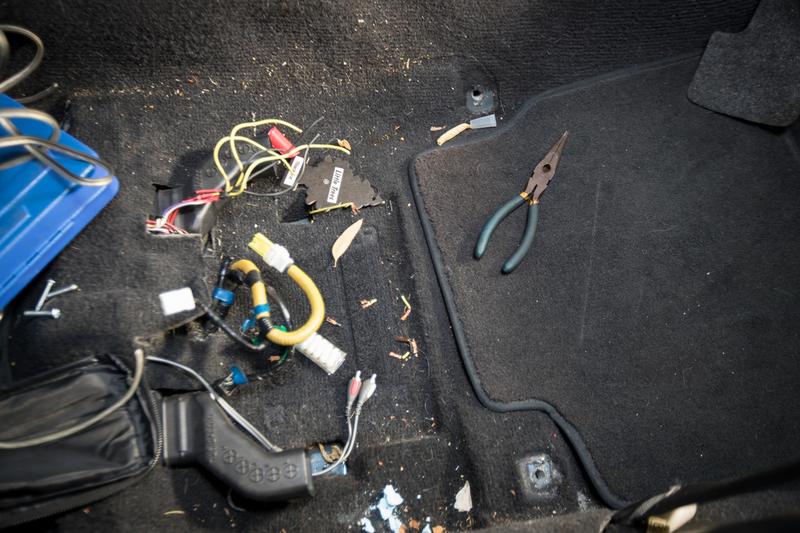
Ah, much better.
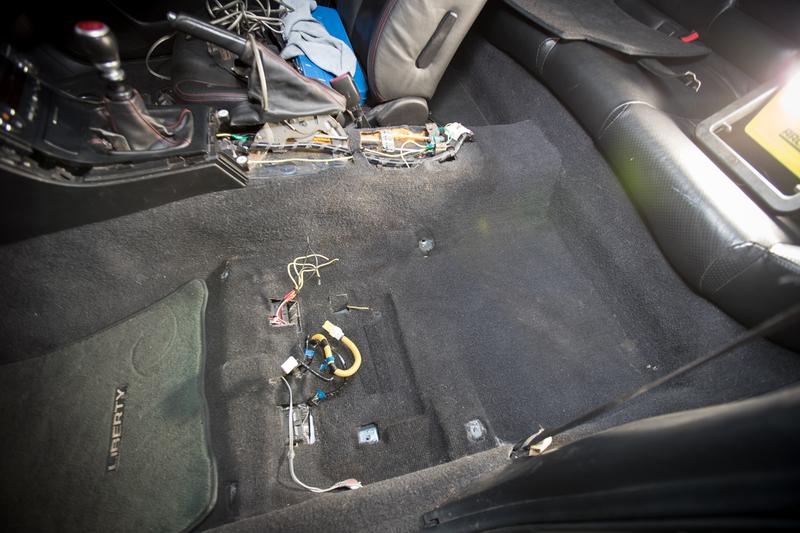
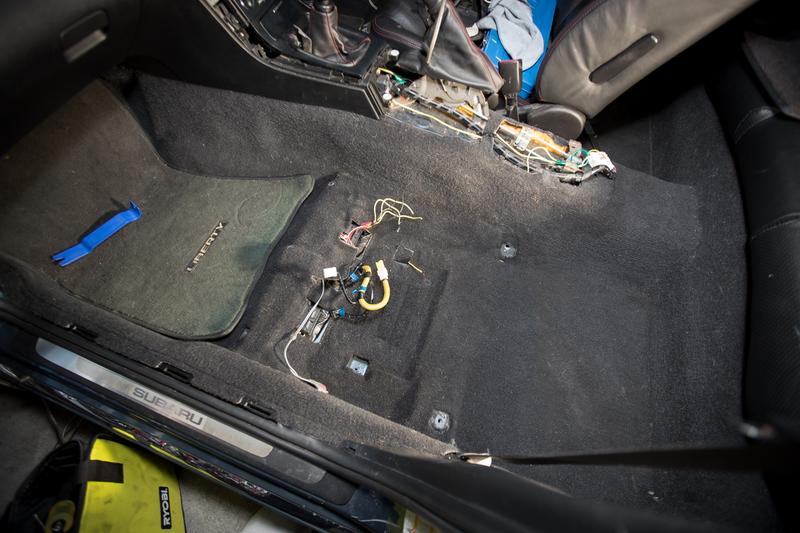
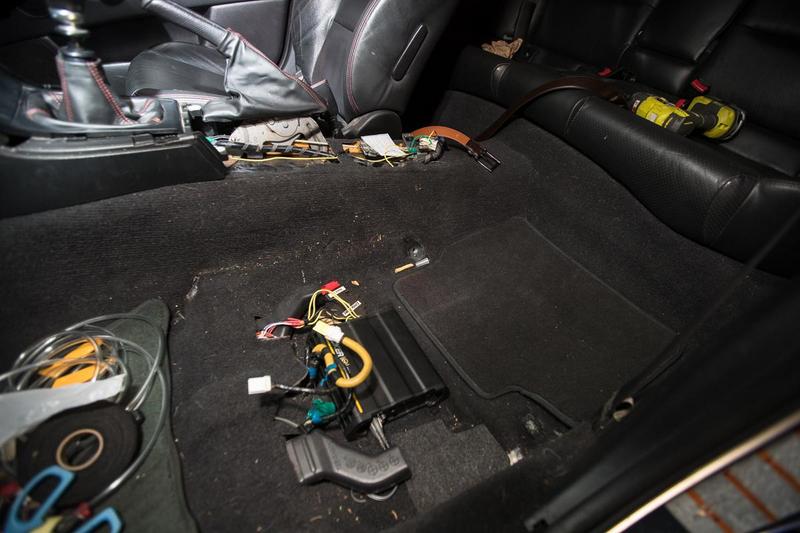
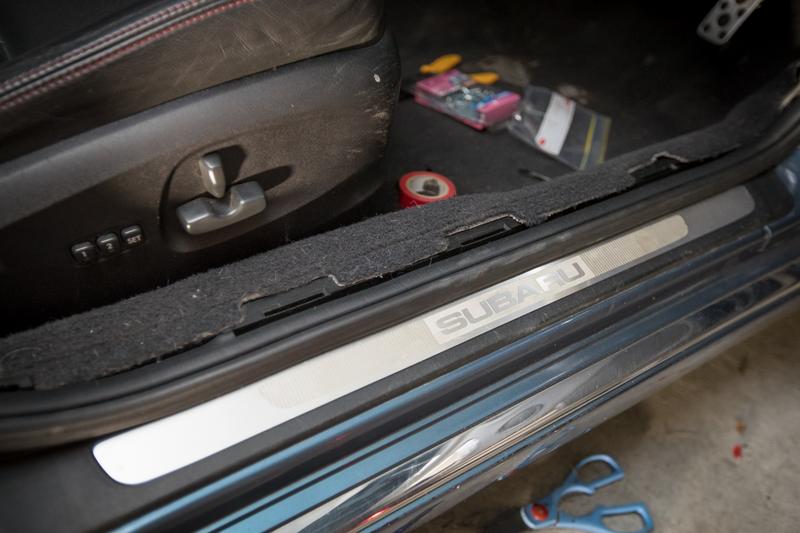
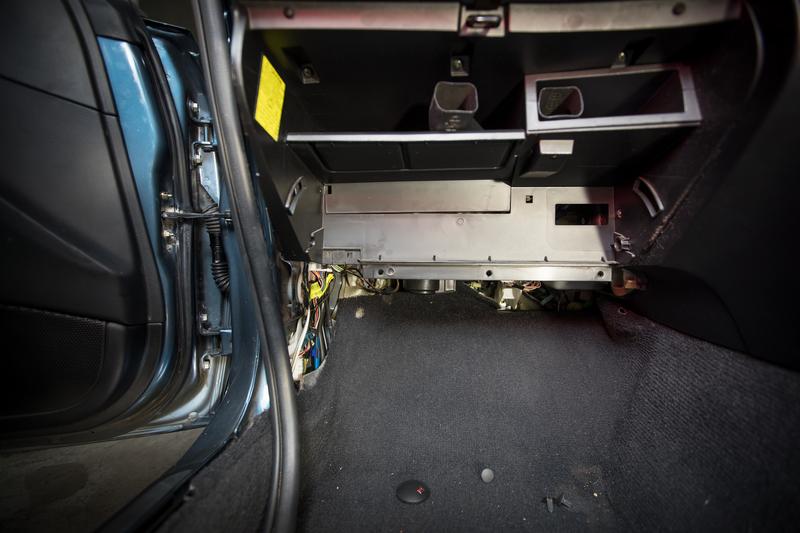
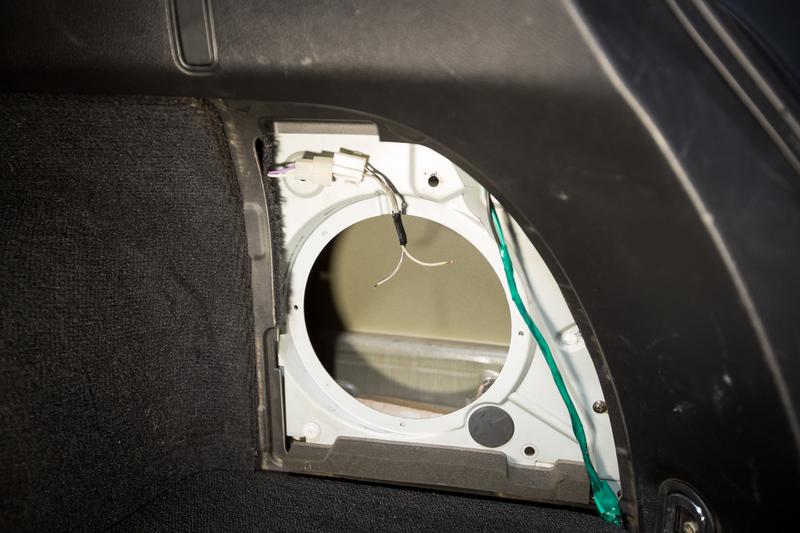
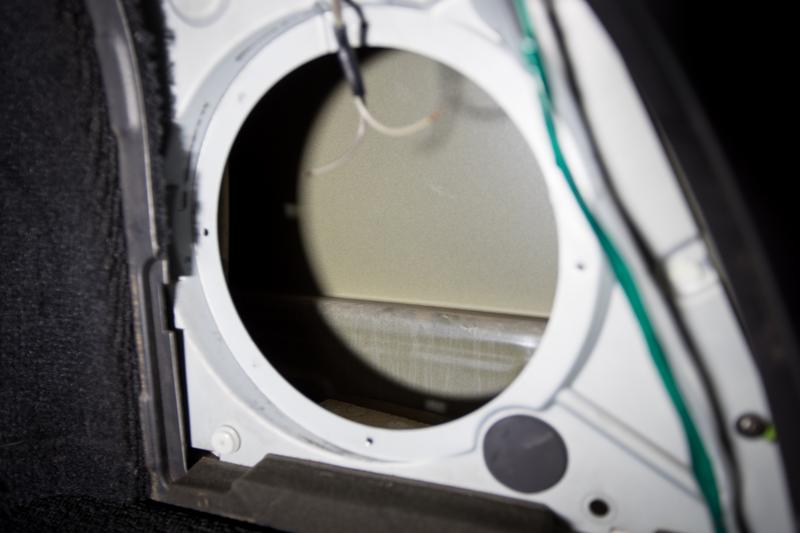
Next some of the trim and rear seats needed to come off so I could free the carpet.
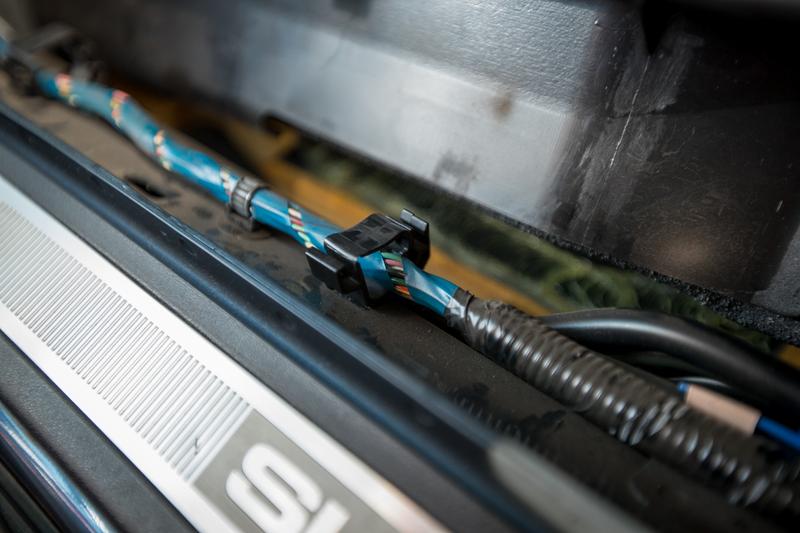
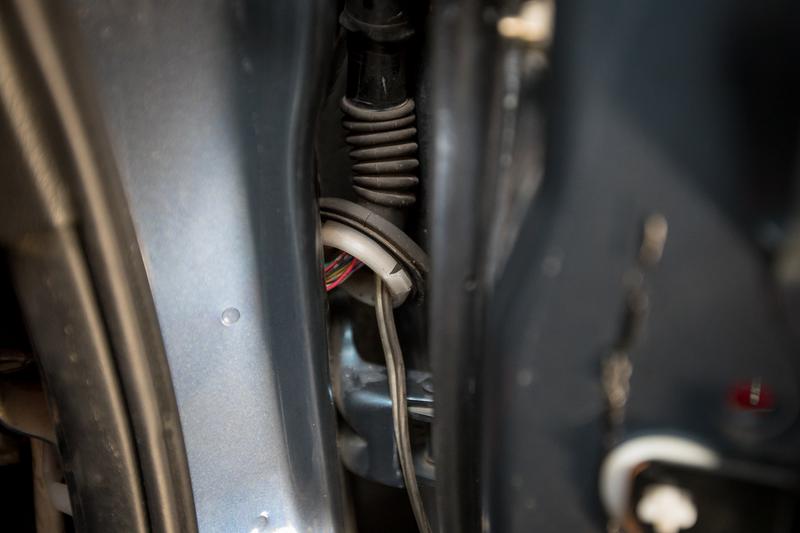
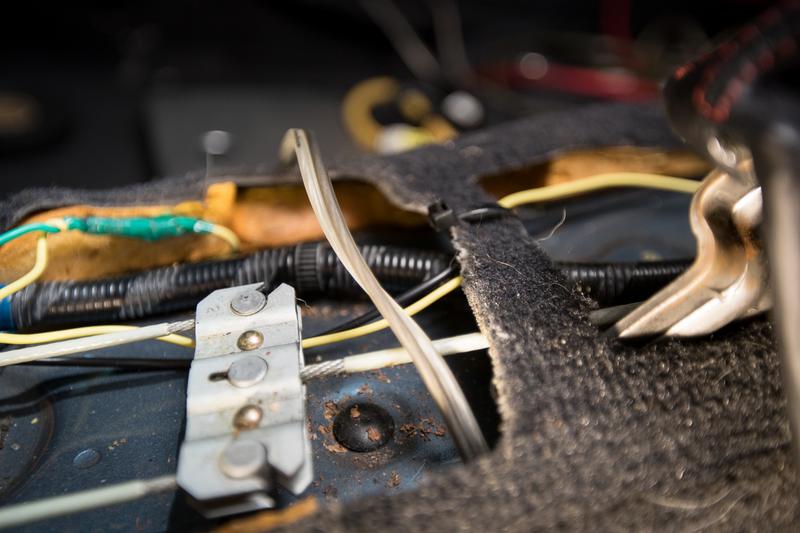
So nice of Subaru to leave plenty of space to route more wires.
Now it was time to remove anything that would no longer be needed from the old system.

Started with removing all the speaker wire as it won't be needed anymore. I remember the previous owner saying that rerouted the wires to go directly to headunit so it would bypass the amp.
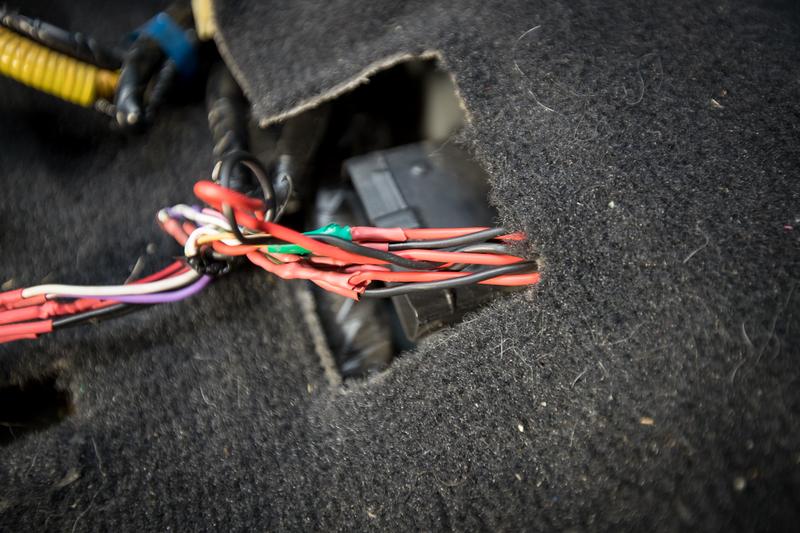
While it was nice to finally clean the wiring back there two things that have taken up some room, which I never really looked into. First was this 'Response AA3074' which after a quick google turned out to be a device that apparently helps reduce noise through the system that can be caused by power to the headunit, rather then screw with it, I'm going to leave it there, everything works so rather then possibly brake something and then not get it working again it'll stay.

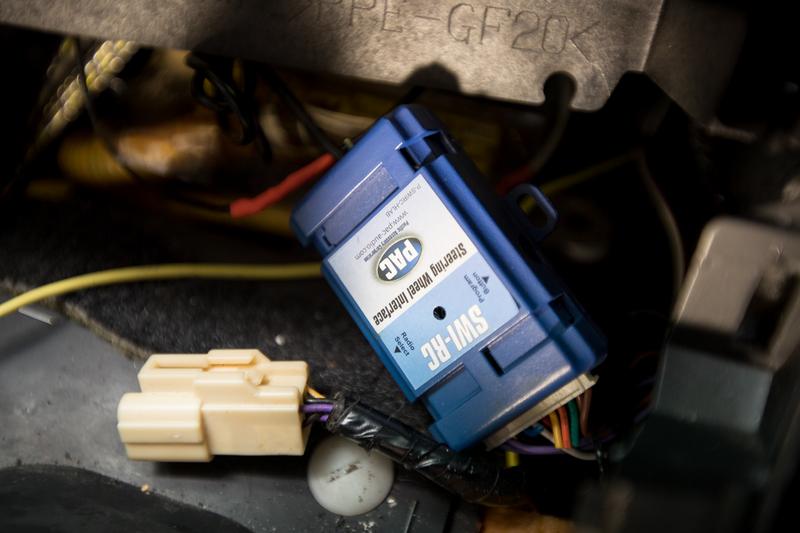
Then I found this, looks like this was the way the pervious owner had hooked up the steering wheel controls to work with the aftermarket headunit. This stopped working a couple months after I bought the car, which I imagine must have just been from a reset headunit. It'll also stay and I'll see if I can make it work with the new headunit.
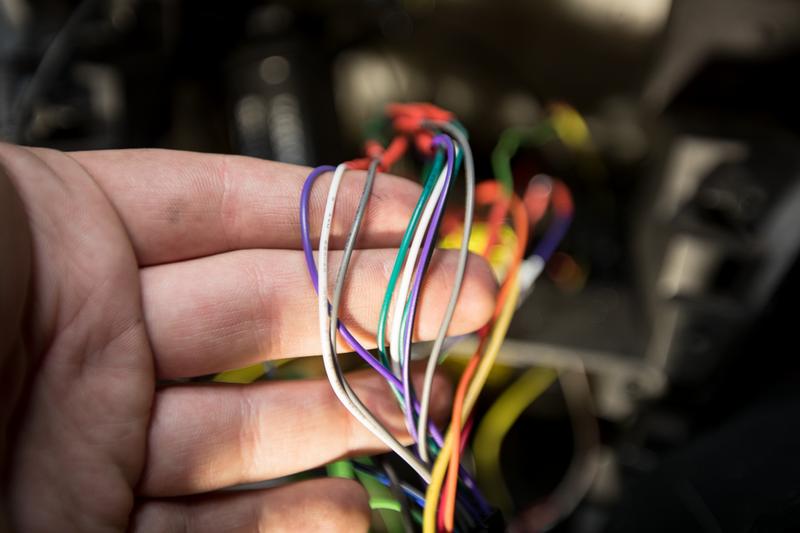
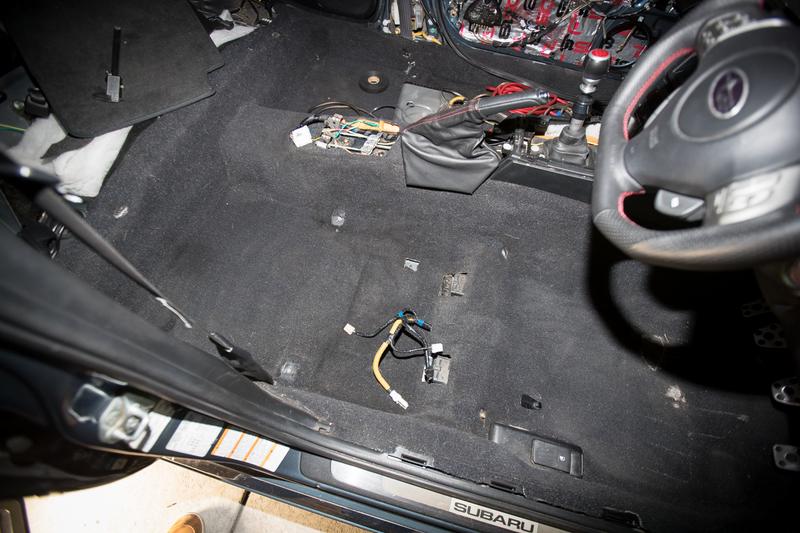
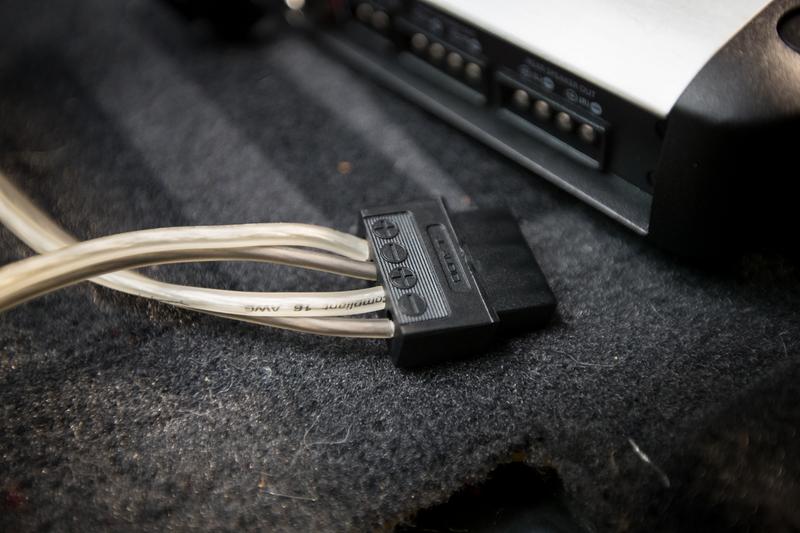
With all the old speaker wire out I could get onto the RCA's
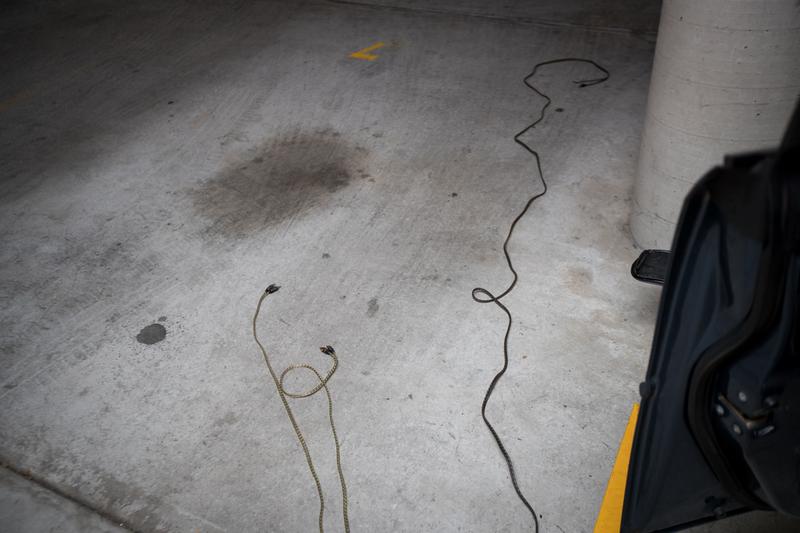
Man they were long, especially the Rockford one. I get it though, they must do it for people wanting to do a boot install, so cable management will certainly need to be done.
Then they needed to be run through the carpet.

Before the headunit went back I needed to add the single RCA converter for the sub.
Next was to route the power wire through the firewall.
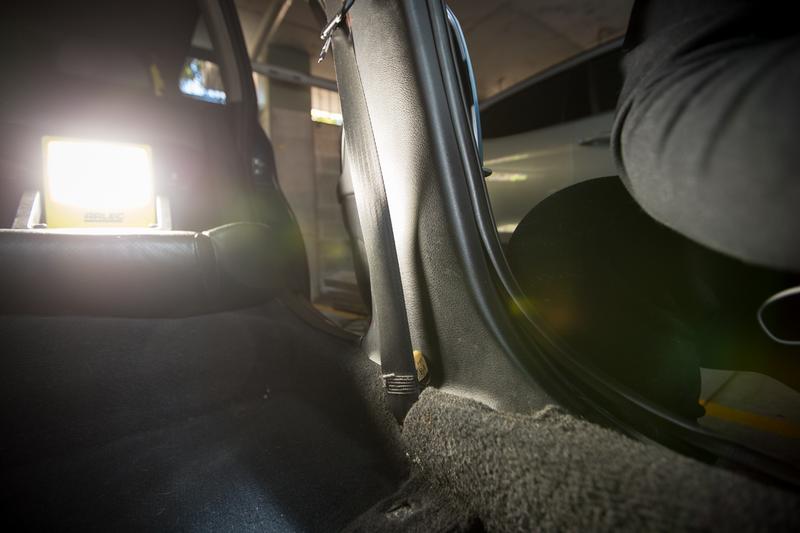
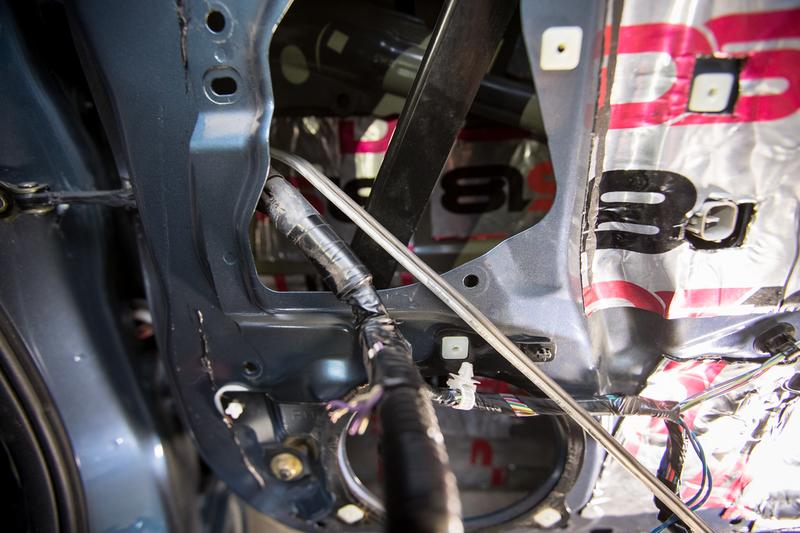
Once again Subaru was nice enough to leave a grommet in the perfect place.
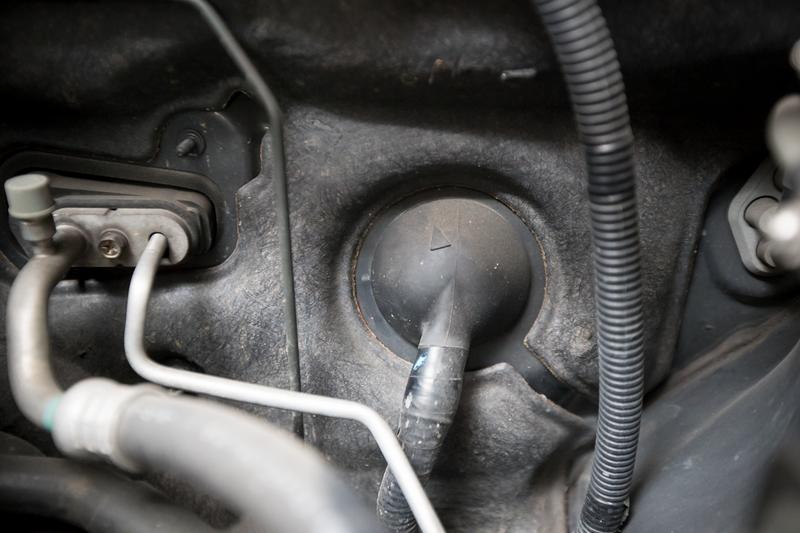

Once I mocked it up everything came together.

Once again heaps longer then it needs to be but I'll cut that in the morning. That's it for today, more tomorrow.
A quick trip to Bunnings and a cheap can of matte black was acquired.
It'll do the job for a quickie.
Anyway, back to the car. This mess needed to be sorted asap.
Ah, much better.
Next some of the trim and rear seats needed to come off so I could free the carpet.
So nice of Subaru to leave plenty of space to route more wires.
Now it was time to remove anything that would no longer be needed from the old system.
Started with removing all the speaker wire as it won't be needed anymore. I remember the previous owner saying that rerouted the wires to go directly to headunit so it would bypass the amp.
While it was nice to finally clean the wiring back there two things that have taken up some room, which I never really looked into. First was this 'Response AA3074' which after a quick google turned out to be a device that apparently helps reduce noise through the system that can be caused by power to the headunit, rather then screw with it, I'm going to leave it there, everything works so rather then possibly brake something and then not get it working again it'll stay.
Then I found this, looks like this was the way the pervious owner had hooked up the steering wheel controls to work with the aftermarket headunit. This stopped working a couple months after I bought the car, which I imagine must have just been from a reset headunit. It'll also stay and I'll see if I can make it work with the new headunit.
With all the old speaker wire out I could get onto the RCA's
Man they were long, especially the Rockford one. I get it though, they must do it for people wanting to do a boot install, so cable management will certainly need to be done.
Then they needed to be run through the carpet.
Before the headunit went back I needed to add the single RCA converter for the sub.
Next was to route the power wire through the firewall.
Once again Subaru was nice enough to leave a grommet in the perfect place.
Once I mocked it up everything came together.
Once again heaps longer then it needs to be but I'll cut that in the morning. That's it for today, more tomorrow.
Last edited by applegeek897 on Fri May 25, 2018 5:29 pm, edited 1 time in total.
Daily: '00 Daihatsu Cuore "Kelly" - Build Thread -
Project / Weekender: '05 Subaru Liberty 3.0R-B Wagon - Build Thread -
Motorcycle: '14 Triumph Street Triple 660 - Build Thread -
Project / Weekender: '05 Subaru Liberty 3.0R-B Wagon - Build Thread -
Motorcycle: '14 Triumph Street Triple 660 - Build Thread -
-
applegeek897 - Posts: 246
- Joined: Sun Jun 07, 2015 1:02 am
- Location: Sydney, NSW
- Car: 05' 3R-B Wagon, 00' Daihatsu Cuore
- Real name: James
- Profile URL: viewtopic.php?f=10&t=31247
Re: Member Profile - James' H6 Wagon - SKD55S
![]() by applegeek897 » Mon Sep 04, 2017 8:41 pm
by applegeek897 » Mon Sep 04, 2017 8:41 pm
September 2017: The work continues. Before continuing on the wiring I thought it best to move onto the drivers side door.
After a clean it was good to go.

Old connectors also cut off.
Inside and out done.
Speaker wire routed through.
I was hoping I wouldn't have to bother but the drivers seat had to also come out. And another good cleaning.
Once that was done it was time to make another adapter/spacer.
Having the old one made it a much quicker process.
Splash of paint and done.

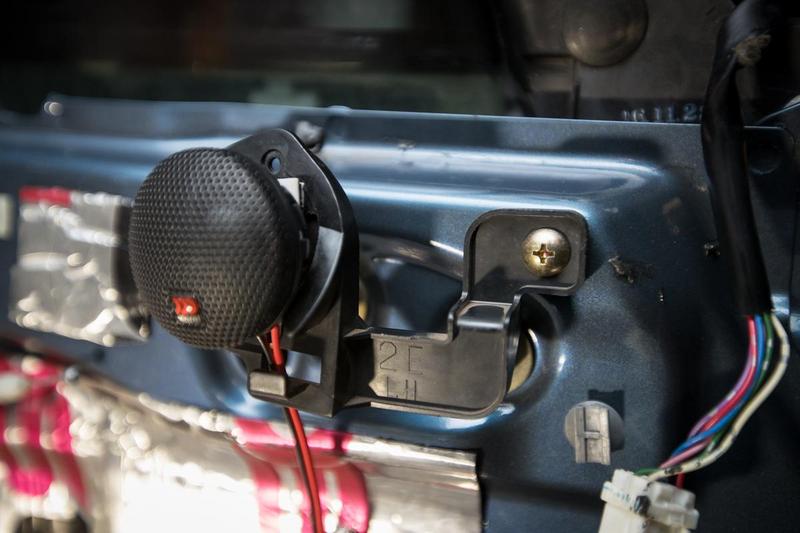
Tweeter was also done.
Back to wiring, driver side speaker wire routed through the tunnel area.
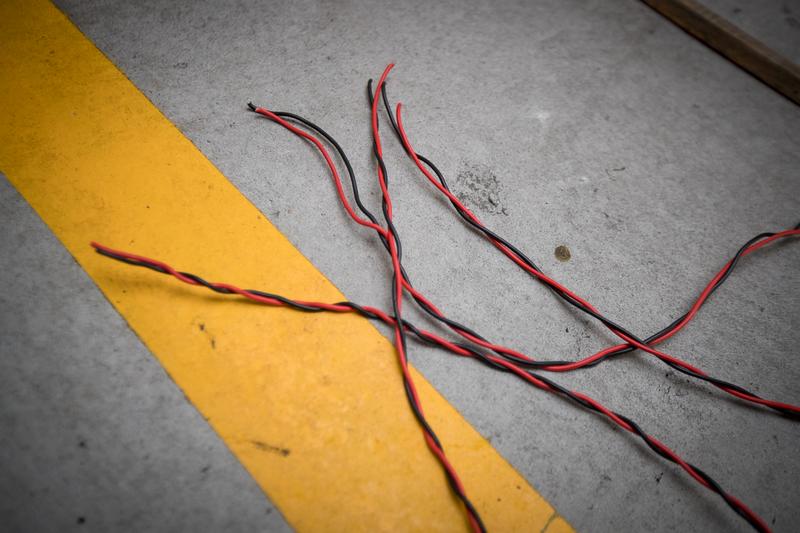
Cable management was next on the list, starting with removing most of the old original speaker wire, although at least for now I will actually be keeping the rears as despite having a shit tonne I've already run out, oh well should be fine for the rears.
Crimps and crossover also went on for the drivers side.

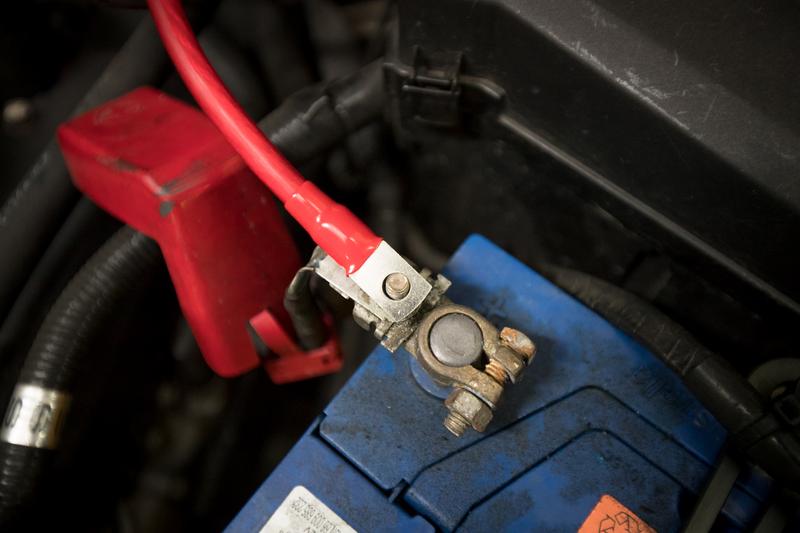
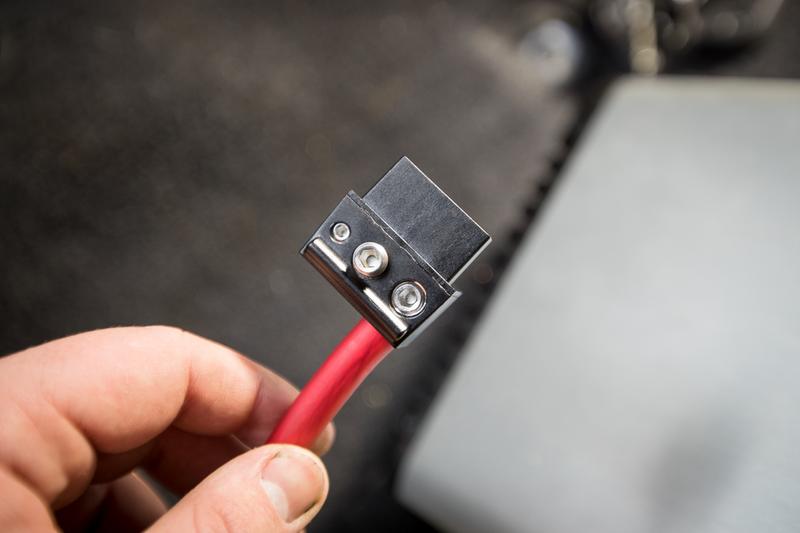
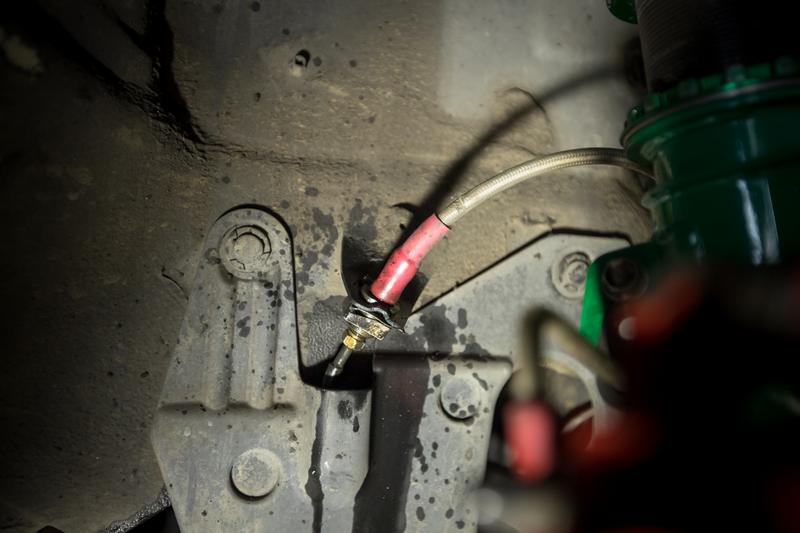
Power and ground next, there was a perfect place for the ground on the handbrake cable mount.
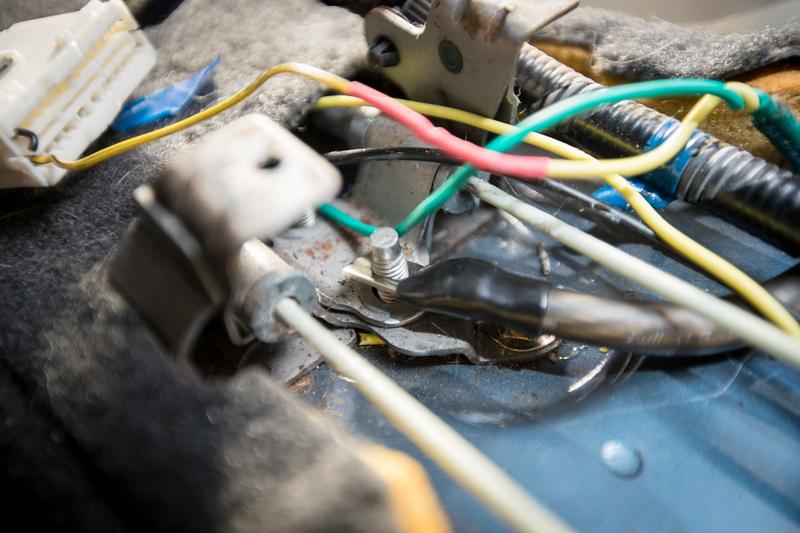
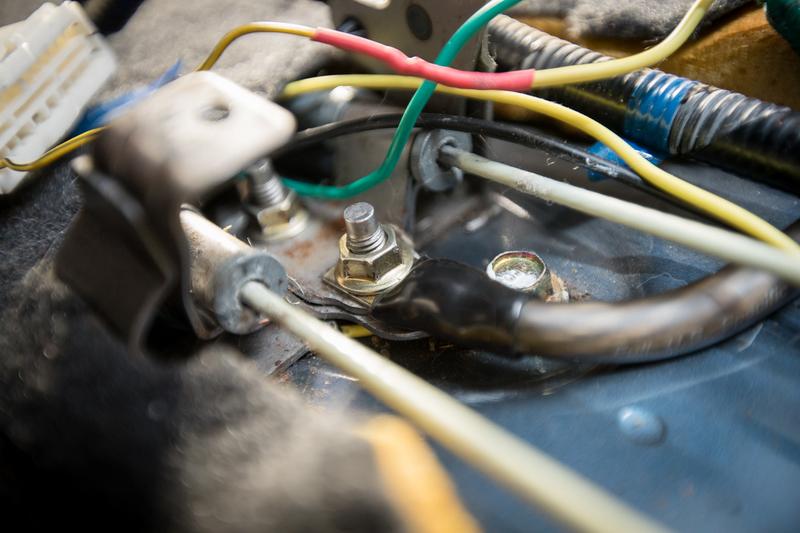
Then power.
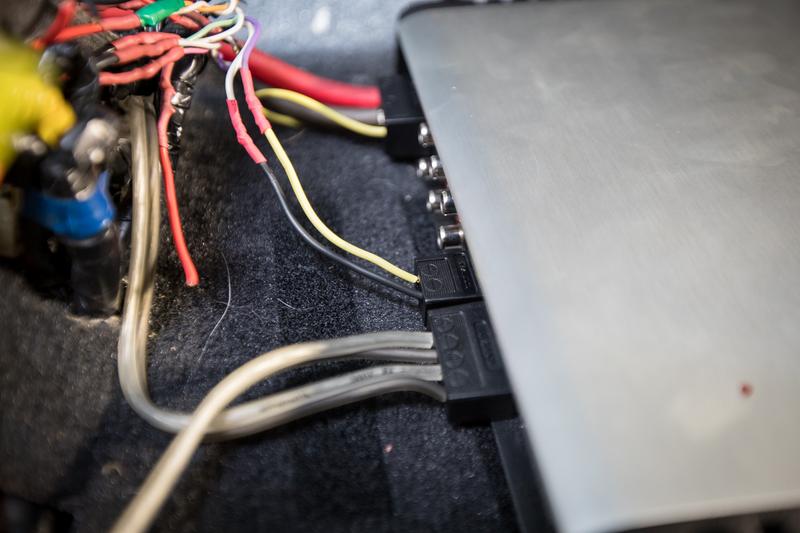
These quick disconnects are awesome.
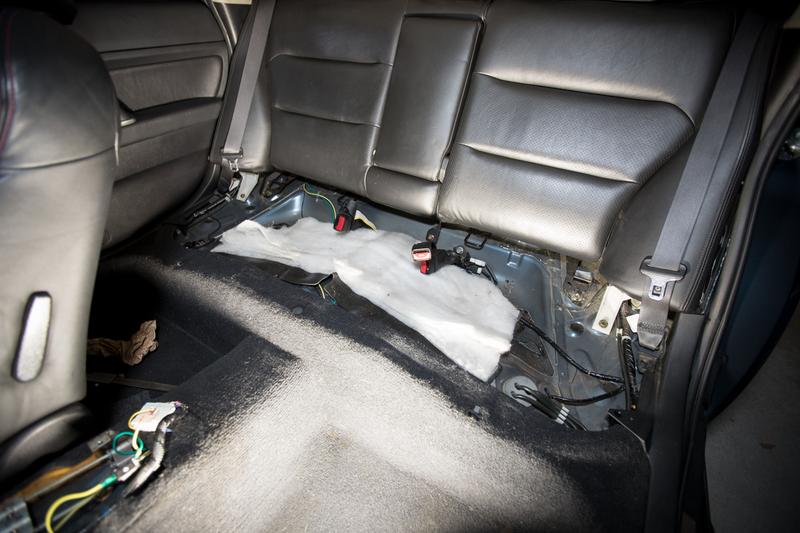
Ground and REM next.
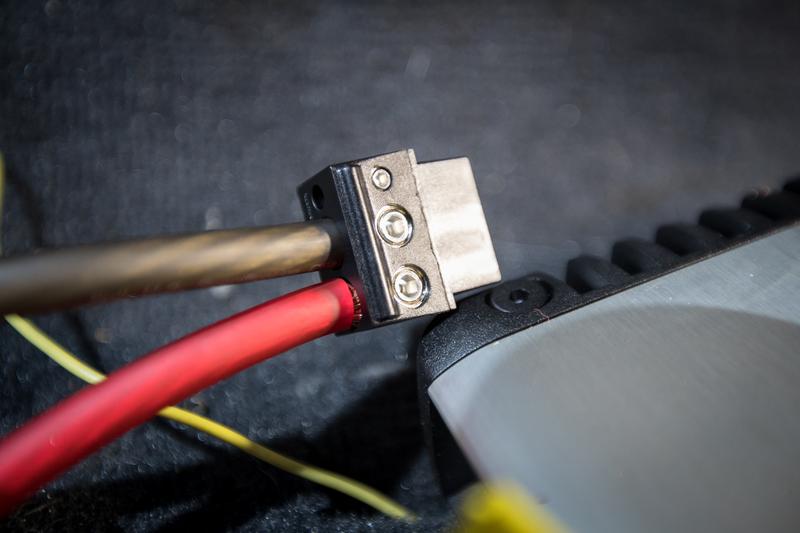
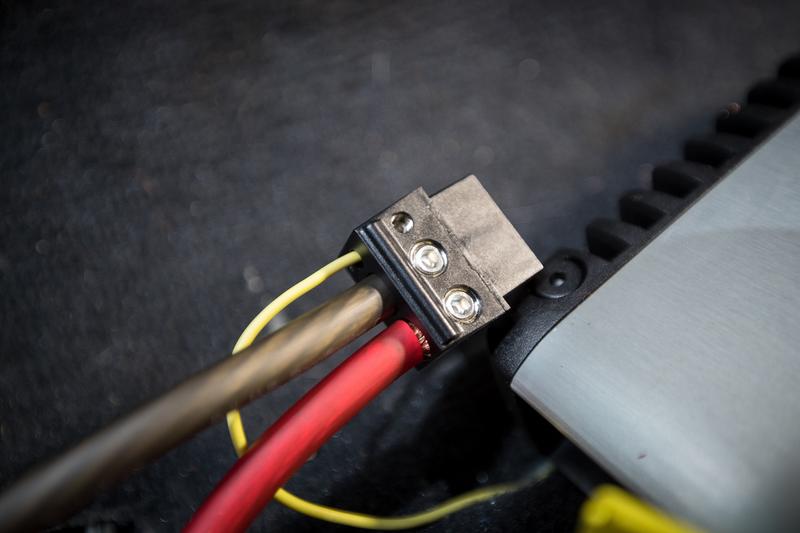
Followed by sub and front speakers.
In she goes.
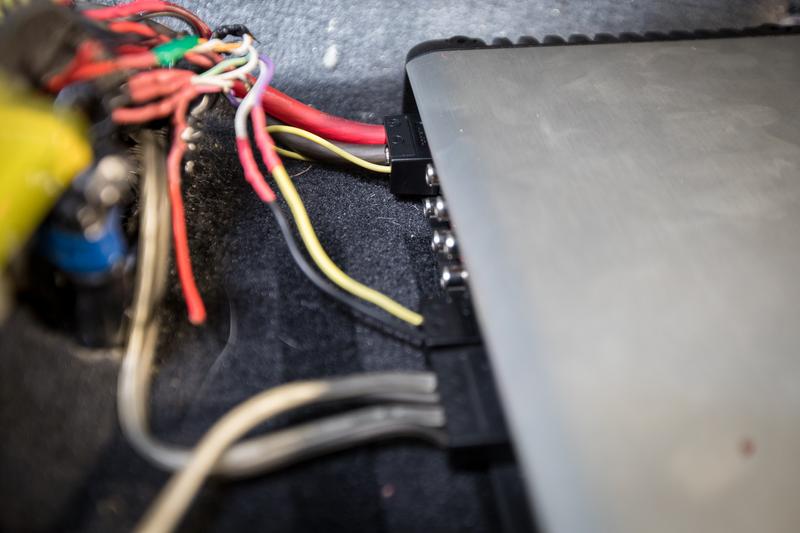
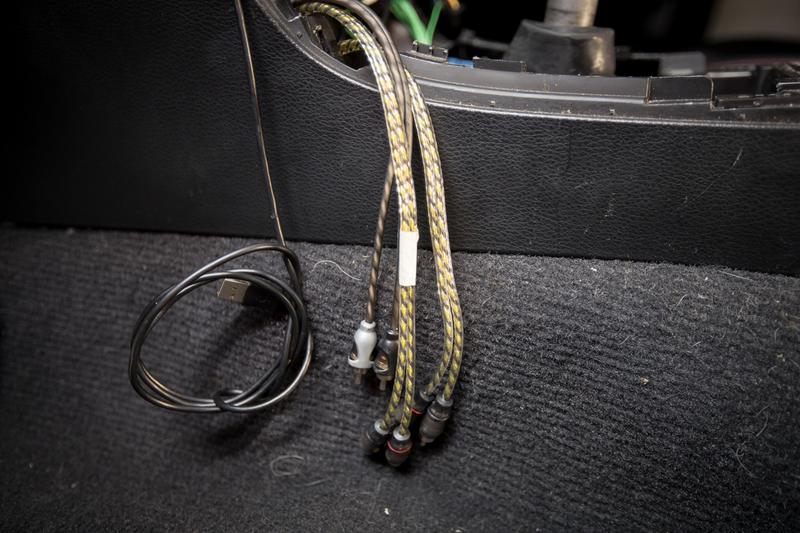
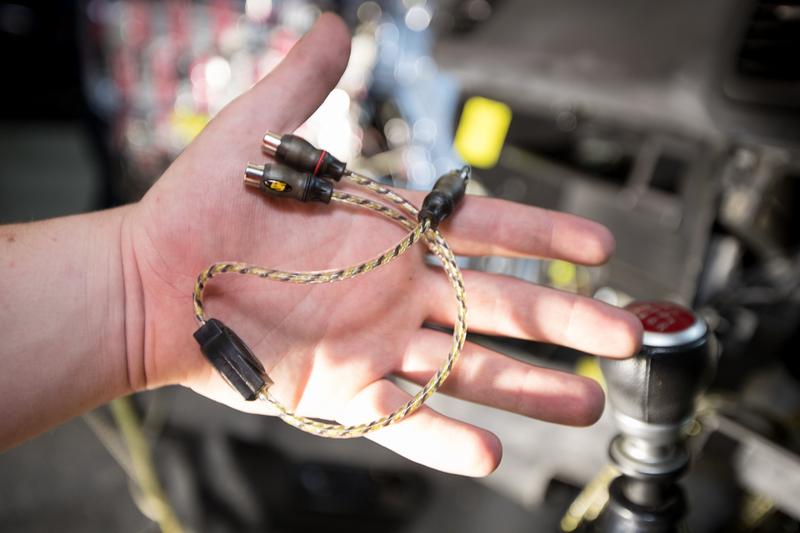
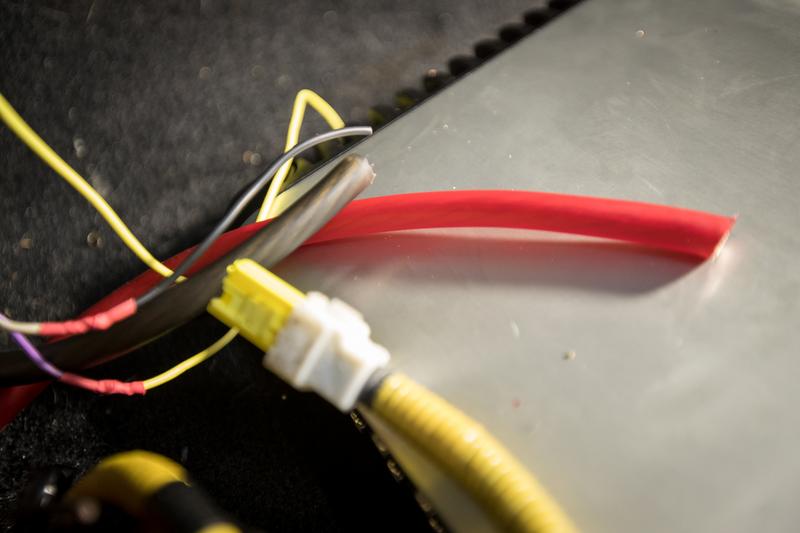
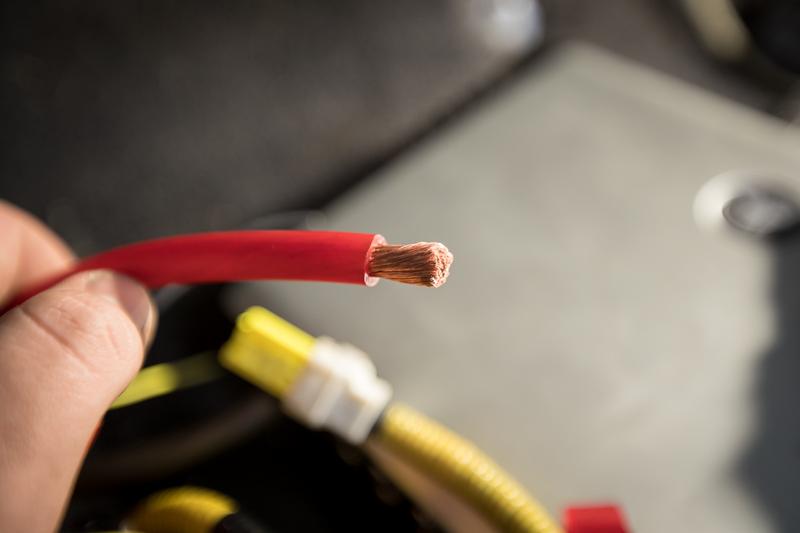
RCA were also somewhat organised and plugged in, man these were so long, one well more then the length of the car.
Fuse could then go in for amp power.

After hours of adjusting things like the cross over and wiring in the door I could finally get the door cards back on after testing the sound.
Then some of the trim could finally go back on.
So the front is pretty much complete. Likely some fine tuning to do but we'll see. Even not at all being tuned it sounds freaking amazing. Tomorrow I'll attack the sub area, it needs sound deadening BAD!
After a clean it was good to go.
Old connectors also cut off.
Inside and out done.
Speaker wire routed through.
I was hoping I wouldn't have to bother but the drivers seat had to also come out. And another good cleaning.
Once that was done it was time to make another adapter/spacer.
Having the old one made it a much quicker process.
Splash of paint and done.
Tweeter was also done.
Back to wiring, driver side speaker wire routed through the tunnel area.
Cable management was next on the list, starting with removing most of the old original speaker wire, although at least for now I will actually be keeping the rears as despite having a shit tonne I've already run out, oh well should be fine for the rears.
Crimps and crossover also went on for the drivers side.
Power and ground next, there was a perfect place for the ground on the handbrake cable mount.
Then power.
These quick disconnects are awesome.
Ground and REM next.
Followed by sub and front speakers.
In she goes.
RCA were also somewhat organised and plugged in, man these were so long, one well more then the length of the car.
Fuse could then go in for amp power.
After hours of adjusting things like the cross over and wiring in the door I could finally get the door cards back on after testing the sound.
Then some of the trim could finally go back on.
So the front is pretty much complete. Likely some fine tuning to do but we'll see. Even not at all being tuned it sounds freaking amazing. Tomorrow I'll attack the sub area, it needs sound deadening BAD!
Last edited by applegeek897 on Fri May 25, 2018 5:43 pm, edited 1 time in total.
Daily: '00 Daihatsu Cuore "Kelly" - Build Thread -
Project / Weekender: '05 Subaru Liberty 3.0R-B Wagon - Build Thread -
Motorcycle: '14 Triumph Street Triple 660 - Build Thread -
Project / Weekender: '05 Subaru Liberty 3.0R-B Wagon - Build Thread -
Motorcycle: '14 Triumph Street Triple 660 - Build Thread -
-
applegeek897 - Posts: 246
- Joined: Sun Jun 07, 2015 1:02 am
- Location: Sydney, NSW
- Car: 05' 3R-B Wagon, 00' Daihatsu Cuore
- Real name: James
- Profile URL: viewtopic.php?f=10&t=31247
Re: Member Profile - James' H6 Wagon - SKD55S
![]() by MadmanSean » Thu Sep 07, 2017 12:52 pm
by MadmanSean » Thu Sep 07, 2017 12:52 pm
Once again mate AWESOME work! I need a get me one of those cordless Jigsaw's 
Make sure that ground cable has the Spade connector touching the un-painted surface so it gets a decent earth, another thing i always do is cover the whole bolt, metal spade and surface area with Vaseline so it conducts REAL GOOOOD
Bet the tunes are sounding soo much better now
Make sure that ground cable has the Spade connector touching the un-painted surface so it gets a decent earth, another thing i always do is cover the whole bolt, metal spade and surface area with Vaseline so it conducts REAL GOOOOD
Bet the tunes are sounding soo much better now
Subaru ECU Unbricking, Unlocking and Bench Flashing/Recovery service! Check out SICK CHIPS @ https://www.facebook.com/SickChips/
http://forum.liberty.asn.au/viewtopic.php?f=56&t=35489
If you'd like to say thank you feel free to Buy me a coffee https://www.buymeacoffee.com/sickchips
http://forum.liberty.asn.au/viewtopic.php?f=56&t=35489
If you'd like to say thank you feel free to Buy me a coffee https://www.buymeacoffee.com/sickchips
-
MadmanSean - Posts: 188
- Joined: Tue Mar 17, 2015 6:27 pm
- Location: Melbourne
- Car: 2007 Libert GT SpecB wagon
- Real name: Sean
- Profile URL: viewtopic.php?f=10&t=33793
Re: Member Profile - James' H6 Wagon - SKD55S
![]() by applegeek897 » Thu Sep 21, 2017 9:42 pm
by applegeek897 » Thu Sep 21, 2017 9:42 pm
MadmanSean wrote:Once again mate AWESOME work! I need a get me one of those cordless Jigsaw's
Make sure that ground cable has the Spade connector touching the un-painted surface so it gets a decent earth, another thing i always do is cover the whole bolt, metal spade and surface area with Vaseline so it conducts REAL GOOOOD
Bet the tunes are sounding soo much better now
Thanks man, everything is almost finished, I did go back strip the surface and throw some dielectric grease on there so she's all good.
September 2017: So while I would love to be spending time on getting the stereo finished, of which it almost is, I was surprised with this.
While this was something I really wasn't feeling like oh well, off to Pick n Payless.
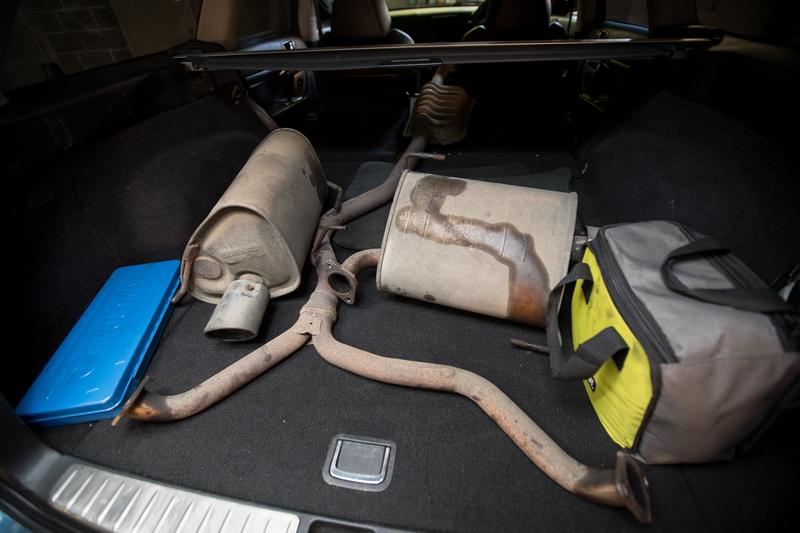
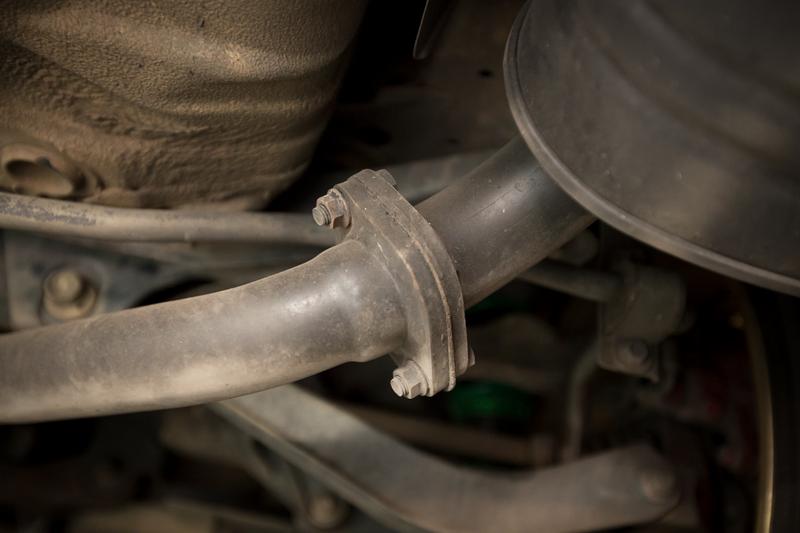
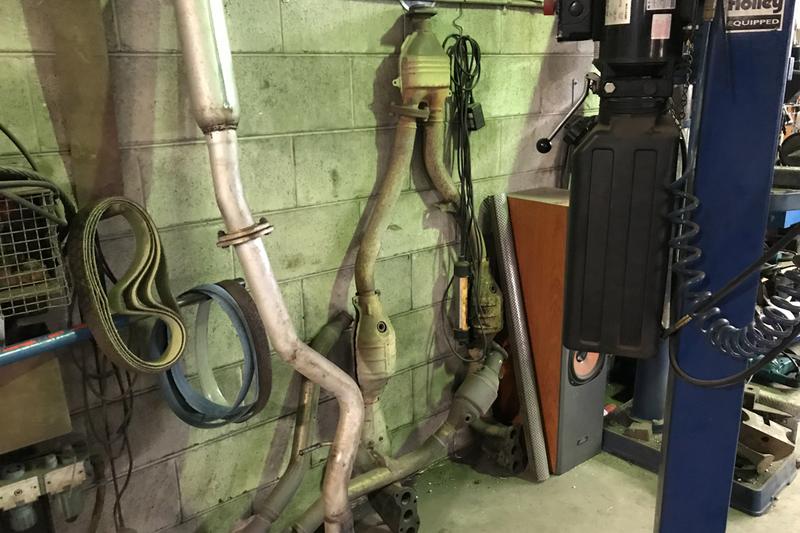
After raiding that sedan for it's cat-back and an old GC8 for it's mounting hardware, I have a nice stock cat-back to hopefully get me under noise limit.
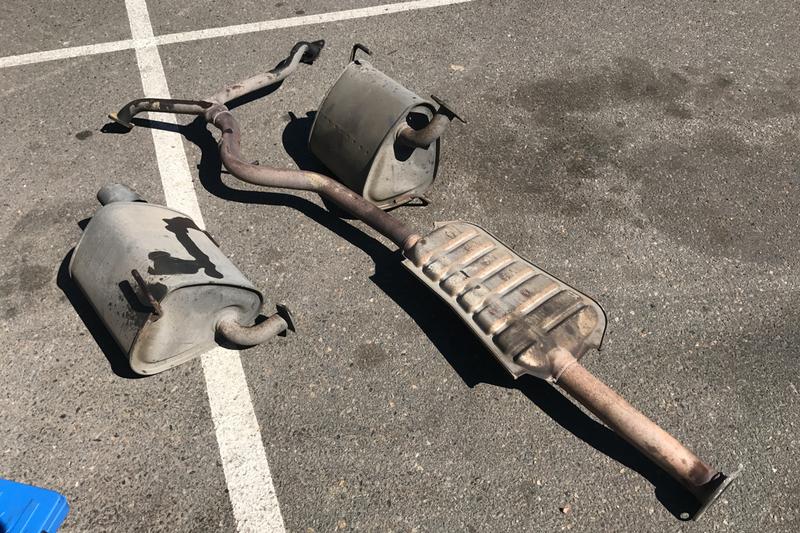
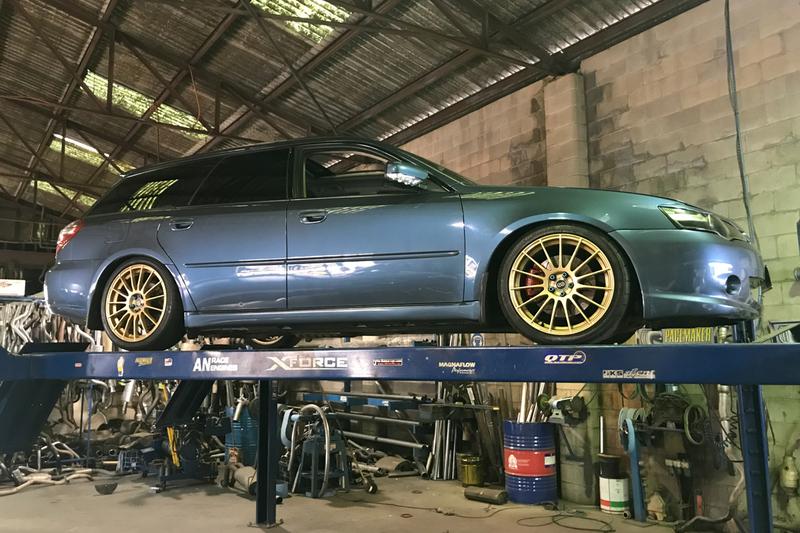
Straight home to install, car up in the air.
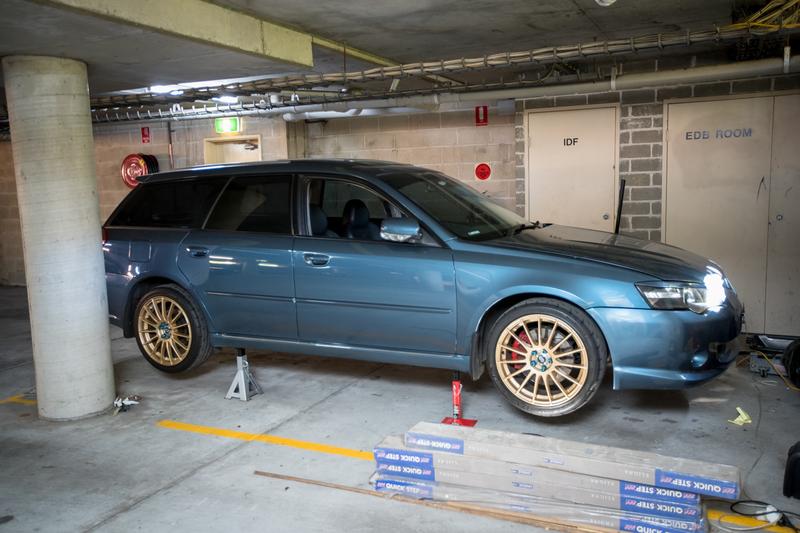
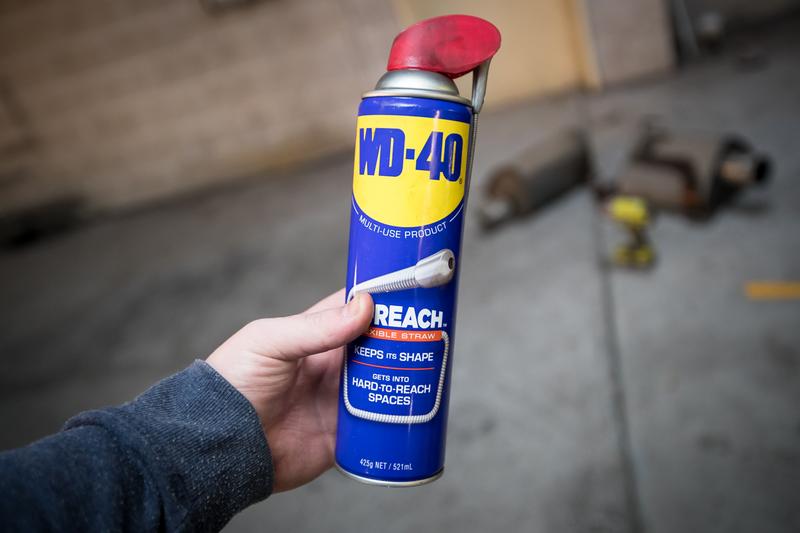
Parts out and WD at the ready.
Goodbye for now.
The hangers were stubborn but WD like always did the trick.
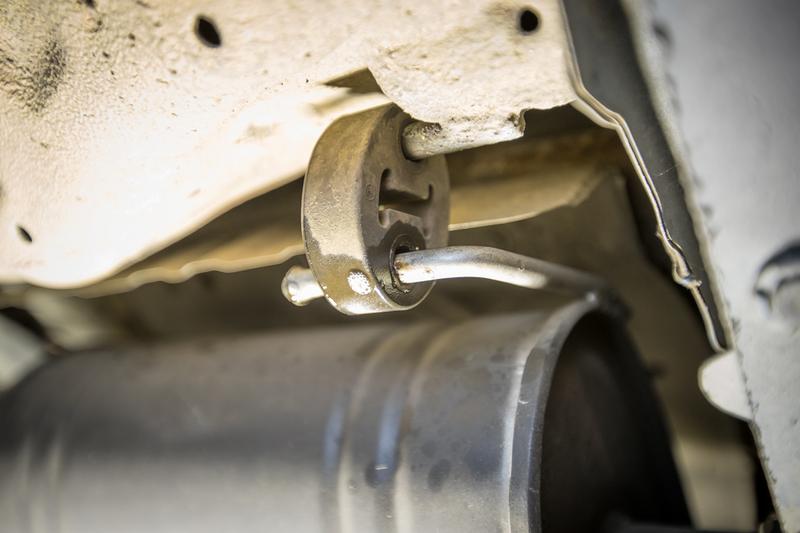
Off they came.
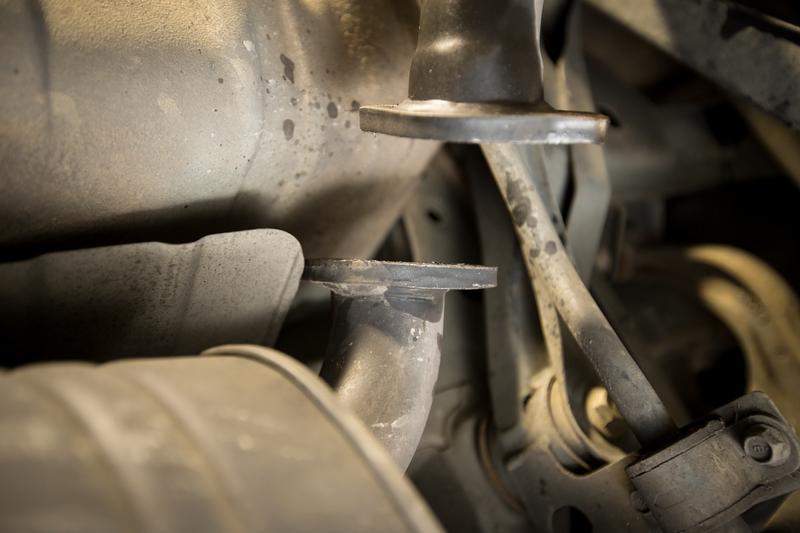
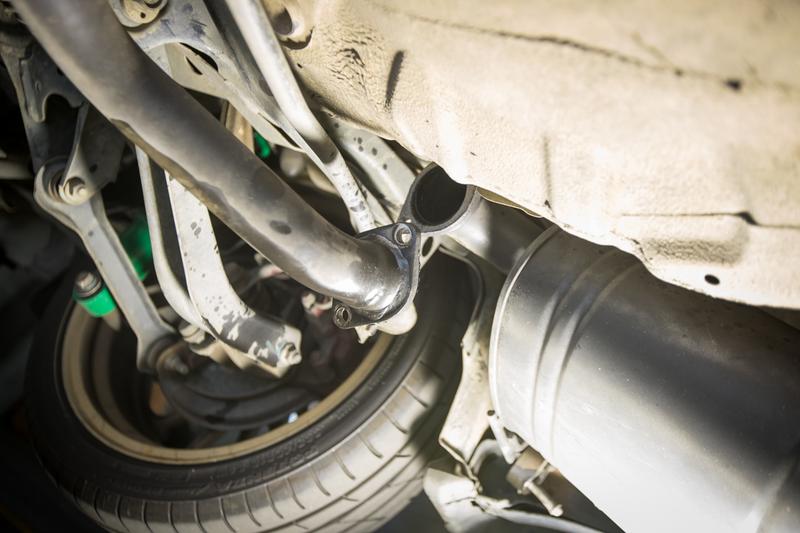
It was at this point I moved onto the centre section which to my extreme frustration it wasn't close to going to fit. Everything lined up but the flange was about 45 degrees off. I'd just have to hope it's fine, so the rear mufflers on their own went on. Yuck.
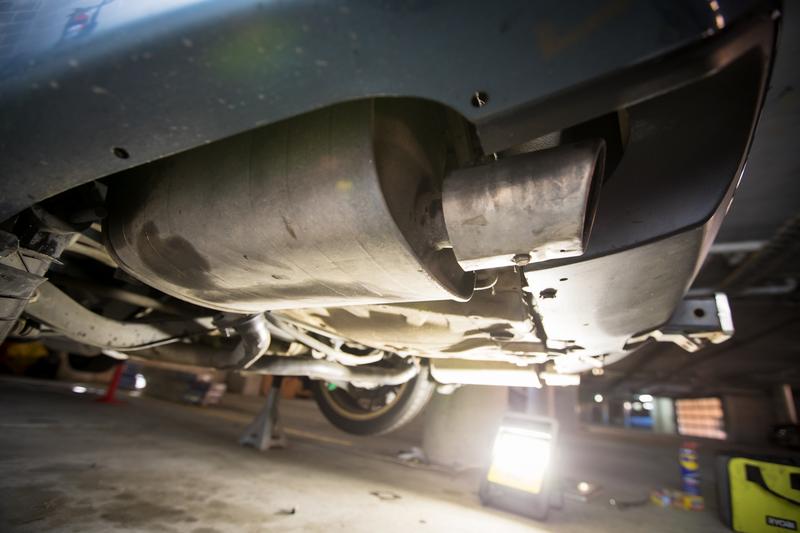
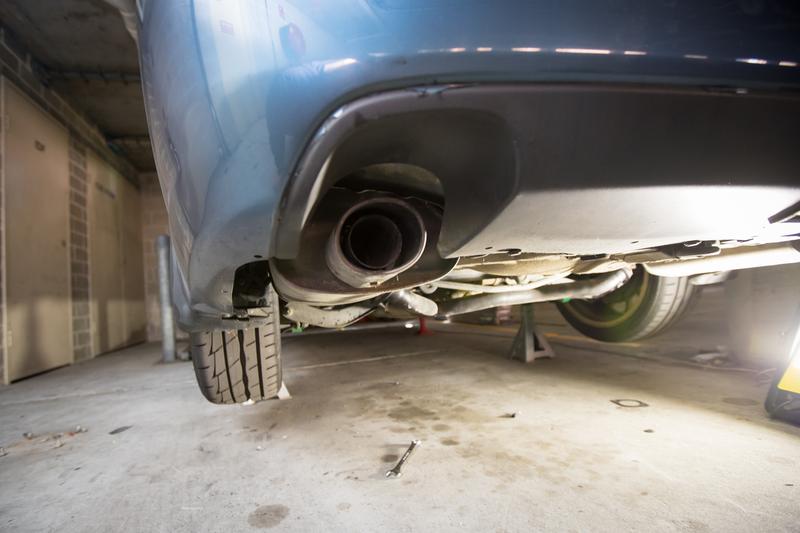
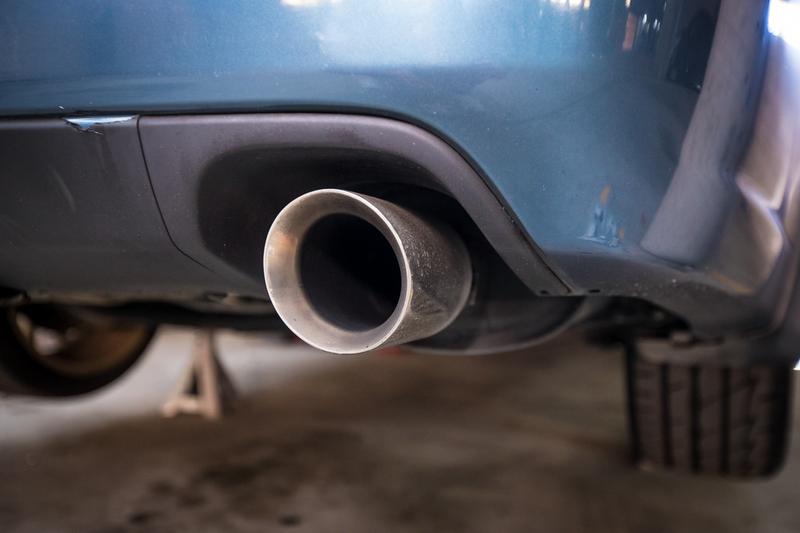
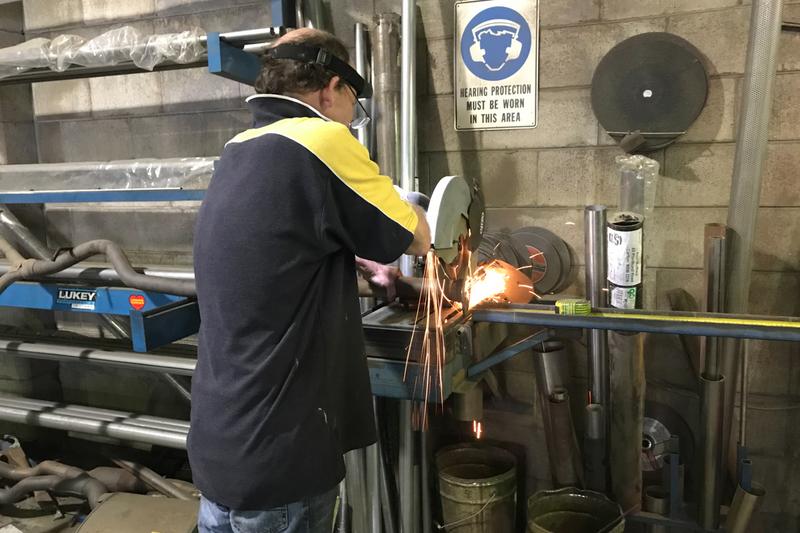
Later that afternoon I dropped by a place that does testing and, it failed. Just. 89 on the acceleration and 97 on the deceleration, all because of the rasp from the hotdog muffler in the X-Force Mid section. The rasp was BAD, the system overall was much quieter. Man it was strange driving the car. Anyway, so now off the Best Mufflers so Chris can work his magic and get it perfect.
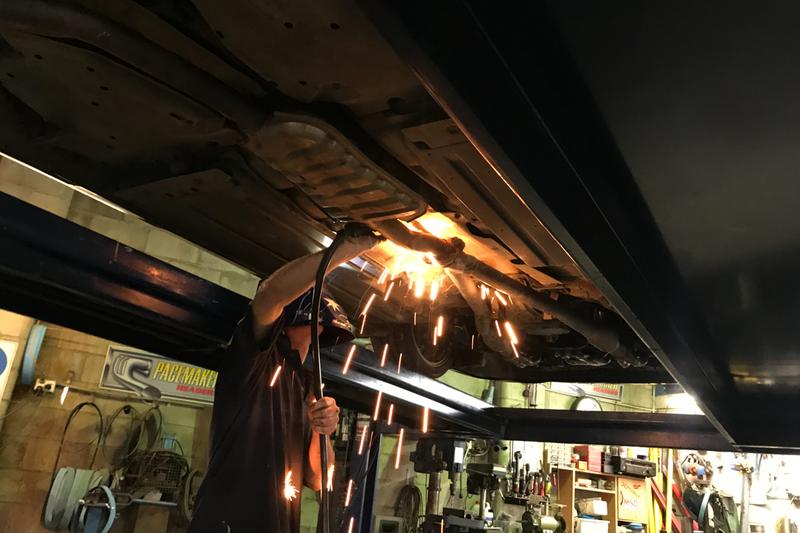
Chris got straight into cutting the flange off so he could rotate it. Some modification was needed to make it fit perfectly to the custom mid section, and off the xforce centre came.
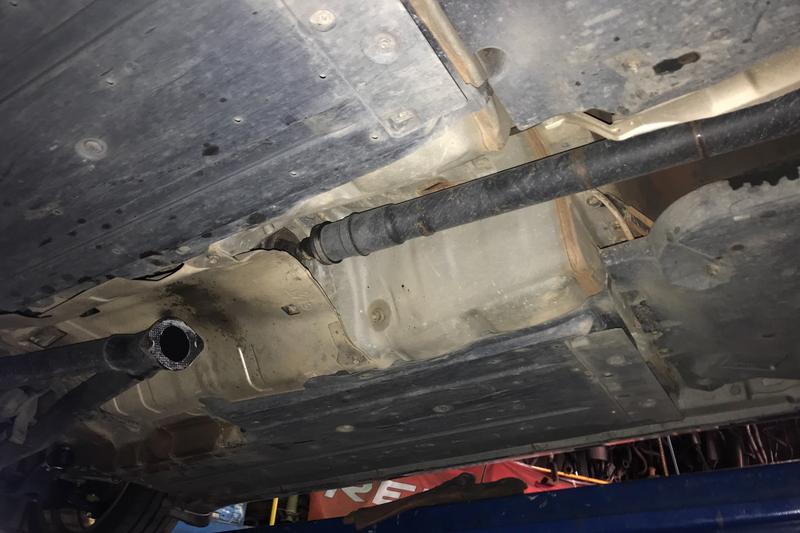
On it went.
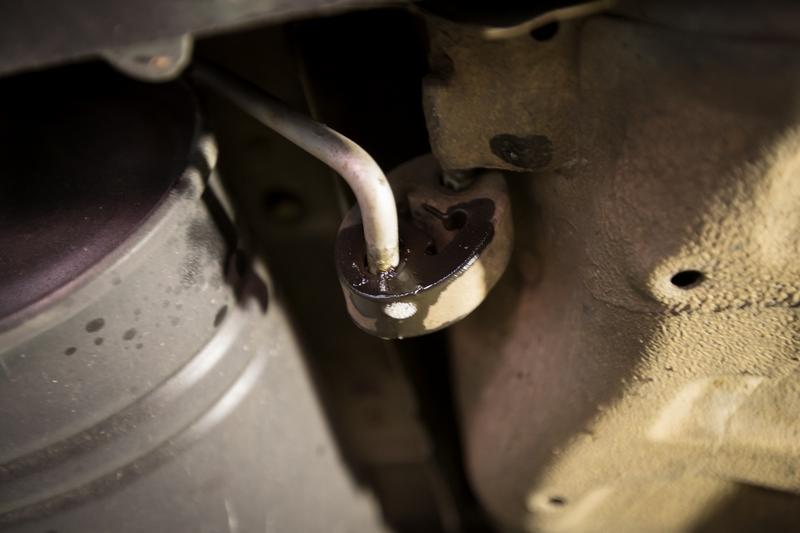
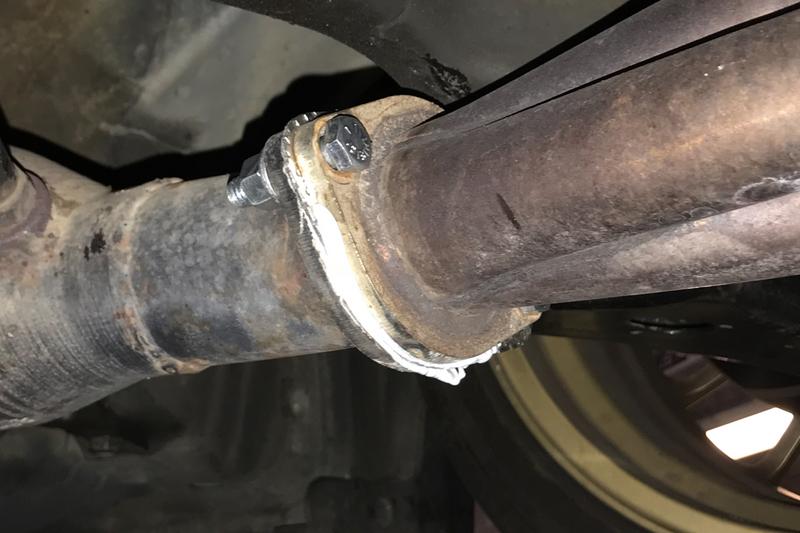
Then we noticed this, yeah, thanks to my new lows and the coilovers dropping the car got to the point where this happened. Blew both gaskets from the headers to cat pipe.
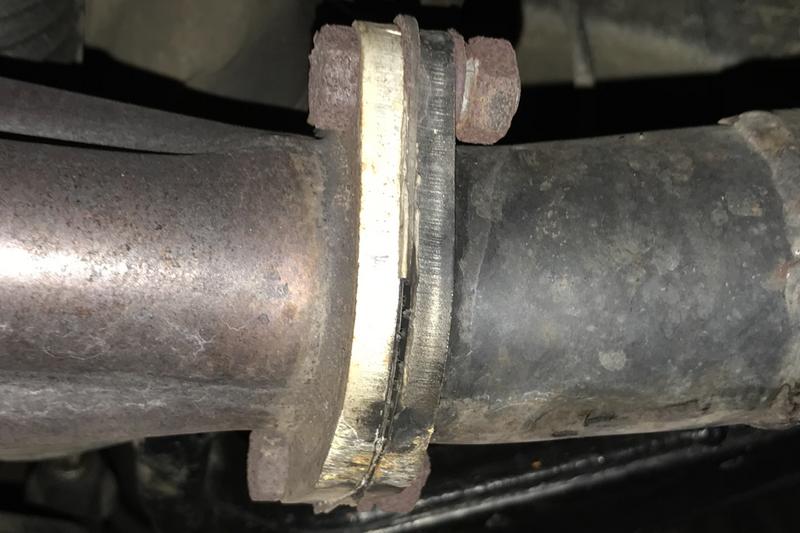
Looks like it was in bad shape anyway, these were the supplied ones. New ones were much better.
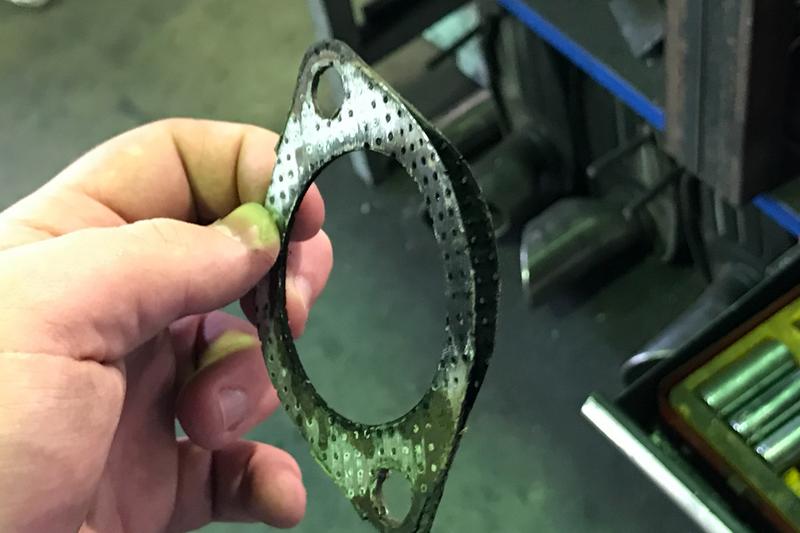
Fixed and we're done.
With all the leaks done, everything was sounding much better, or worse depending on how one looks at it. It's soooooo quiet but also no rasp, I can't believe how much of a difference that centre muffler makes. So we will have to see in the next couple of weeks if it's fine, it really should be. Luckily he also has a entire front section with all three cats if they give me shit for the high flow cats, again. Hopefully not.
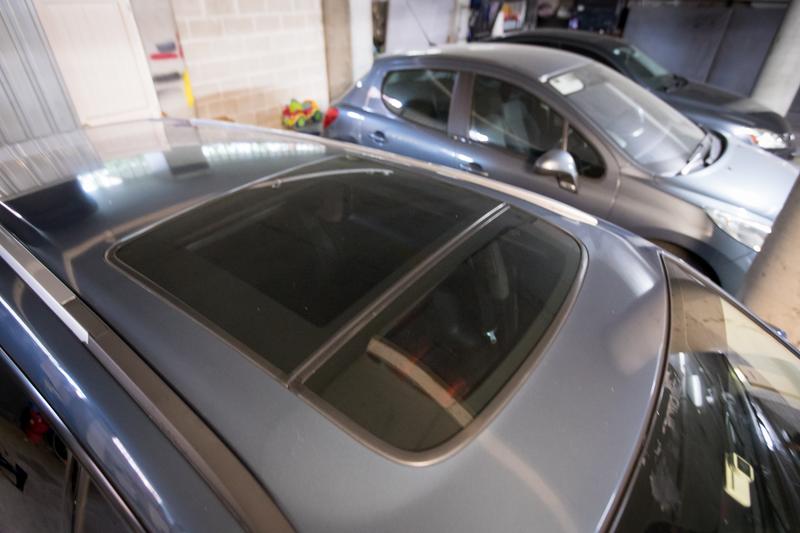
In better news, Show Me Your Tints came round to do my mothers new car and I had him tint the sunroof, how didn't I do this before.
Before
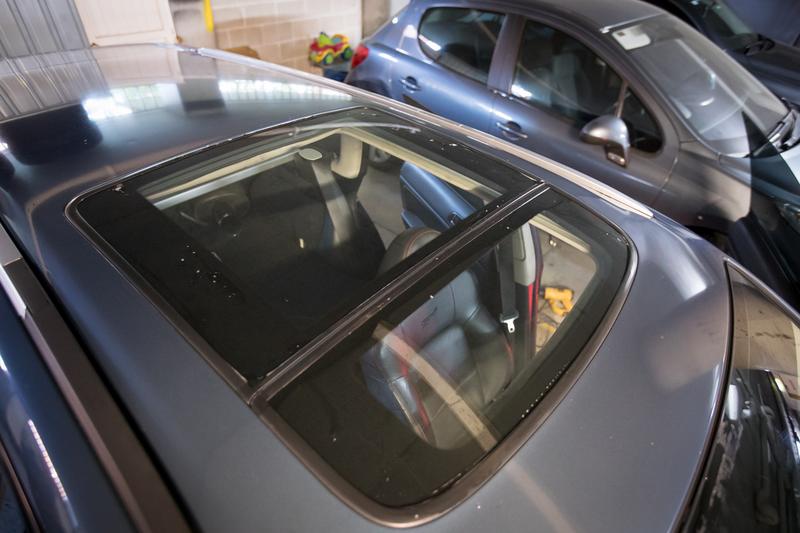
50/50
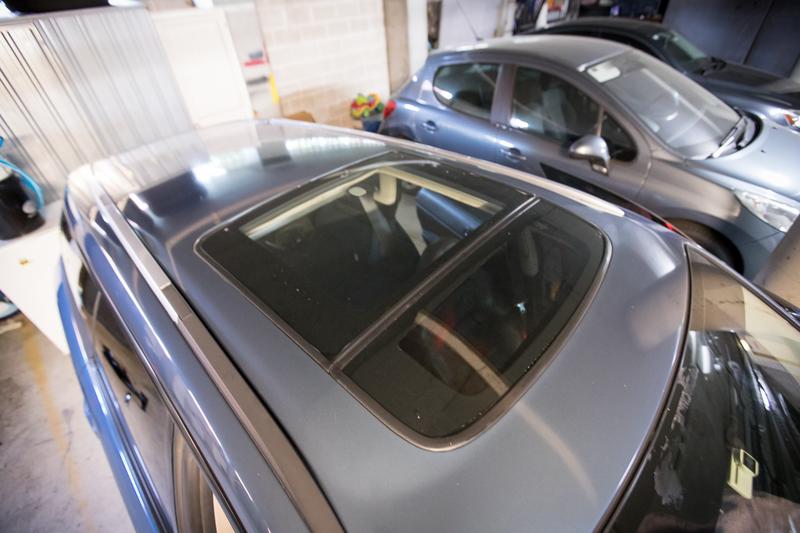
And done, so good.
Last edited by applegeek897 on Fri May 25, 2018 6:04 pm, edited 1 time in total.
Daily: '00 Daihatsu Cuore "Kelly" - Build Thread -
Project / Weekender: '05 Subaru Liberty 3.0R-B Wagon - Build Thread -
Motorcycle: '14 Triumph Street Triple 660 - Build Thread -
Project / Weekender: '05 Subaru Liberty 3.0R-B Wagon - Build Thread -
Motorcycle: '14 Triumph Street Triple 660 - Build Thread -
-
applegeek897 - Posts: 246
- Joined: Sun Jun 07, 2015 1:02 am
- Location: Sydney, NSW
- Car: 05' 3R-B Wagon, 00' Daihatsu Cuore
- Real name: James
- Profile URL: viewtopic.php?f=10&t=31247
Re: Member Profile - James' H6 Wagon - SKD55S
![]() by applegeek897 » Sun Sep 24, 2017 7:24 pm
by applegeek897 » Sun Sep 24, 2017 7:24 pm
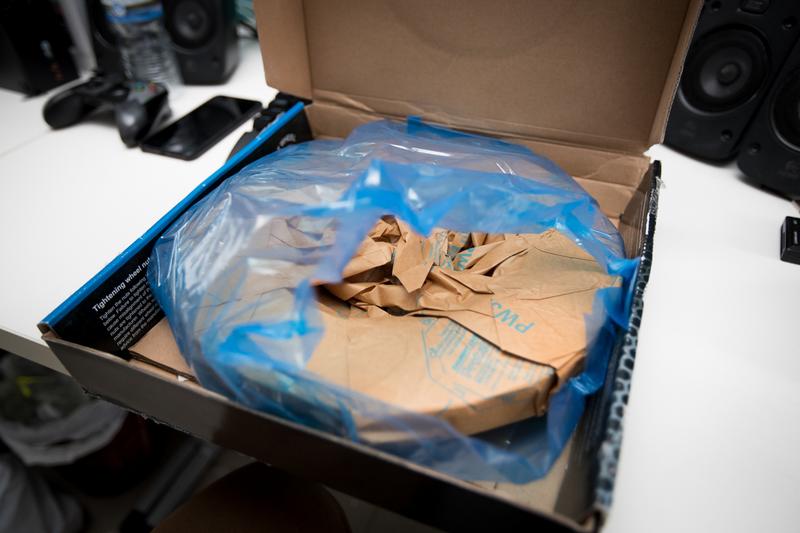
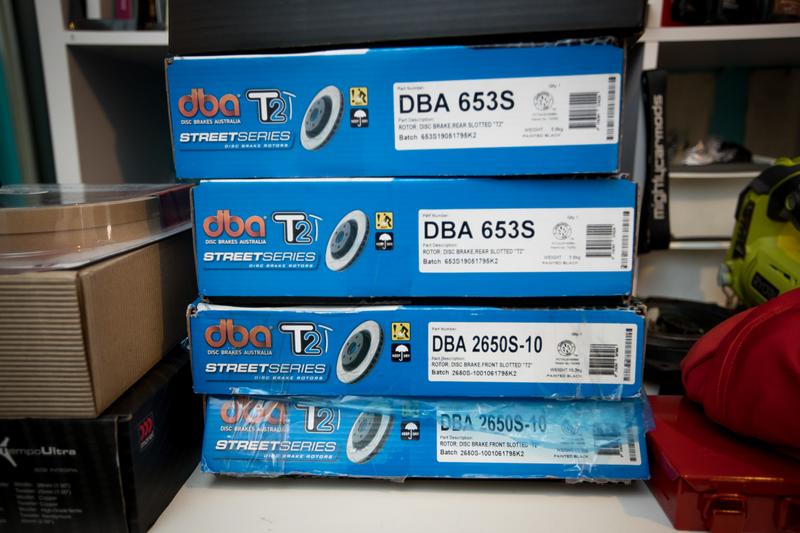
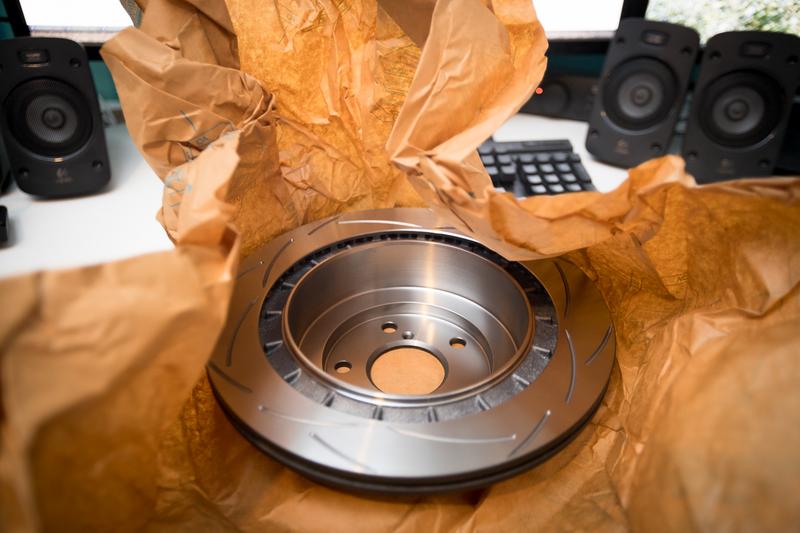
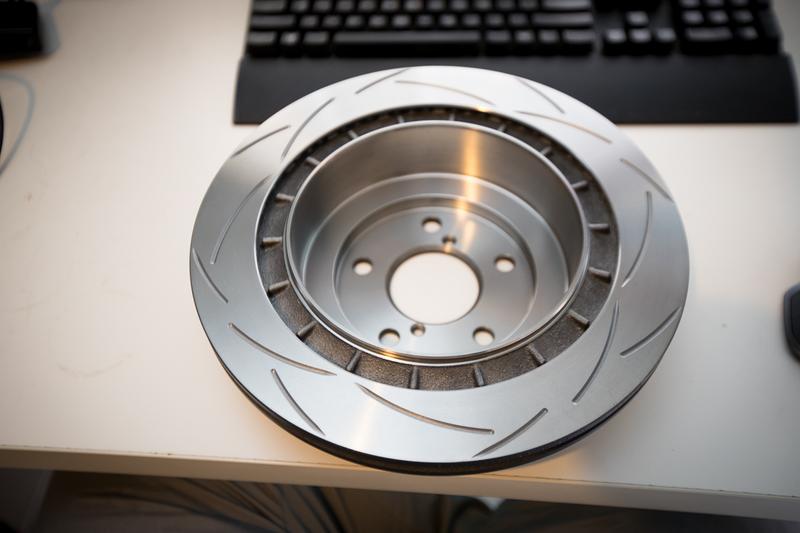
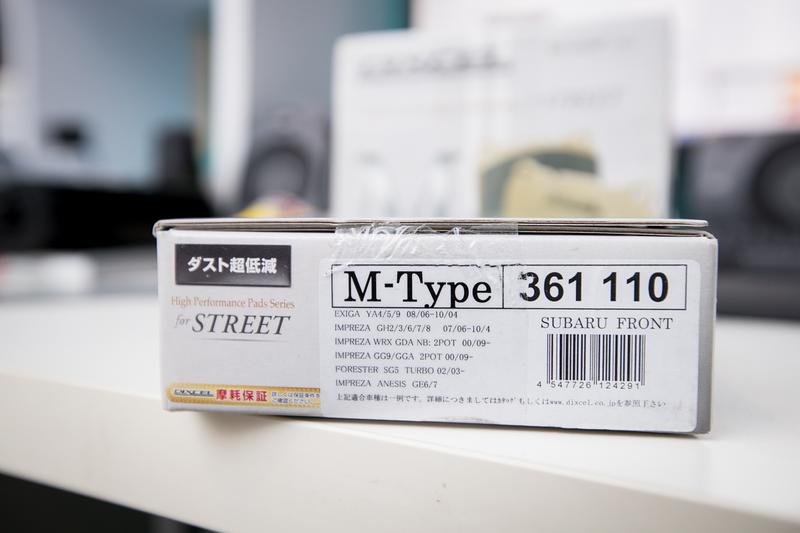
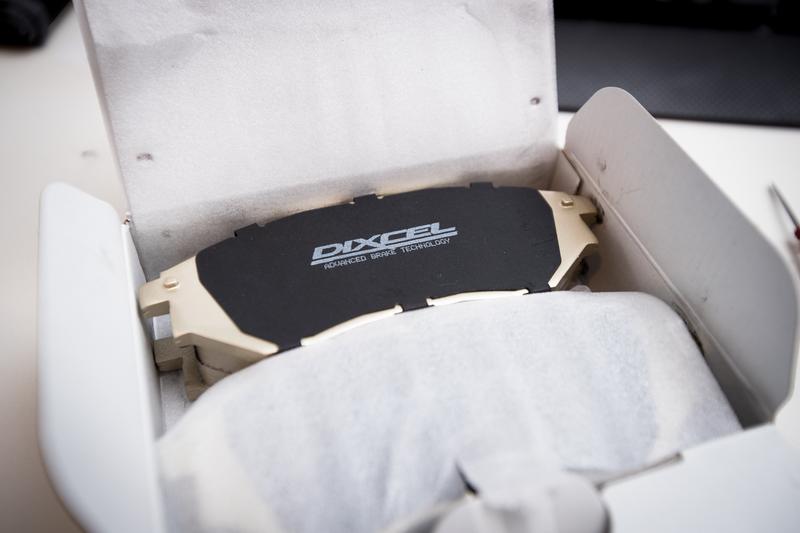
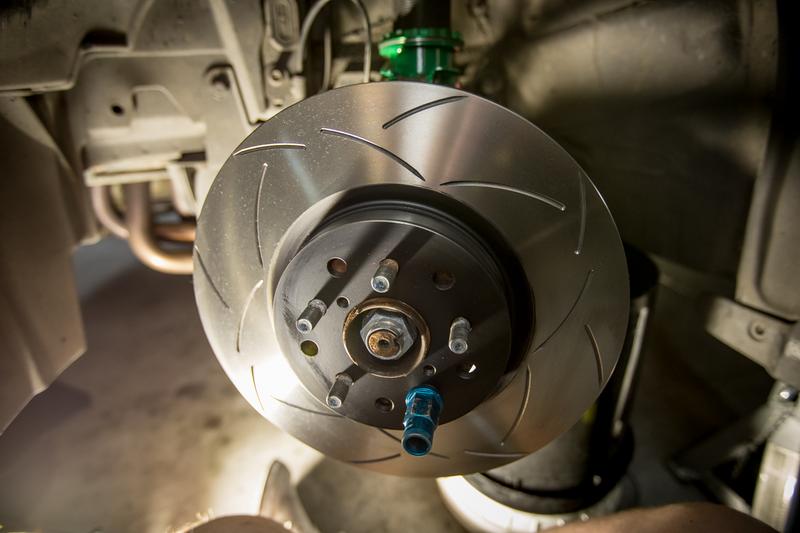
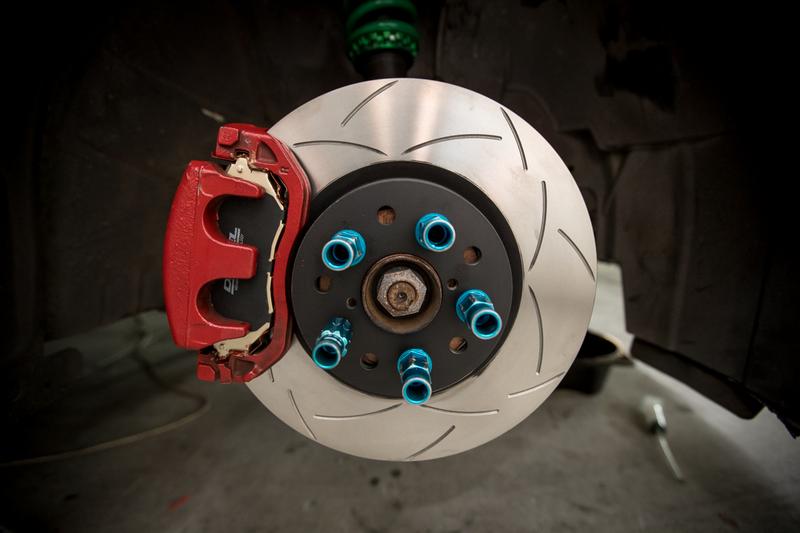
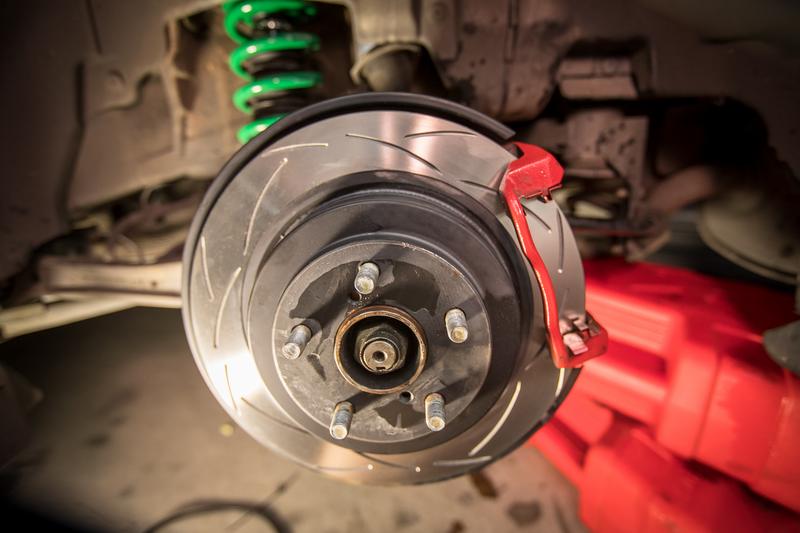
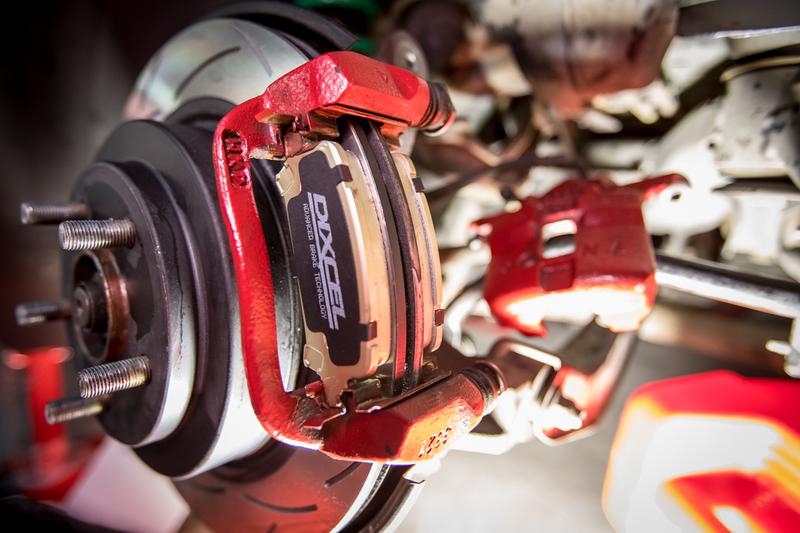
September 2017: Pads have arrived now so it’s time to move onto brakes, product shots first of course.
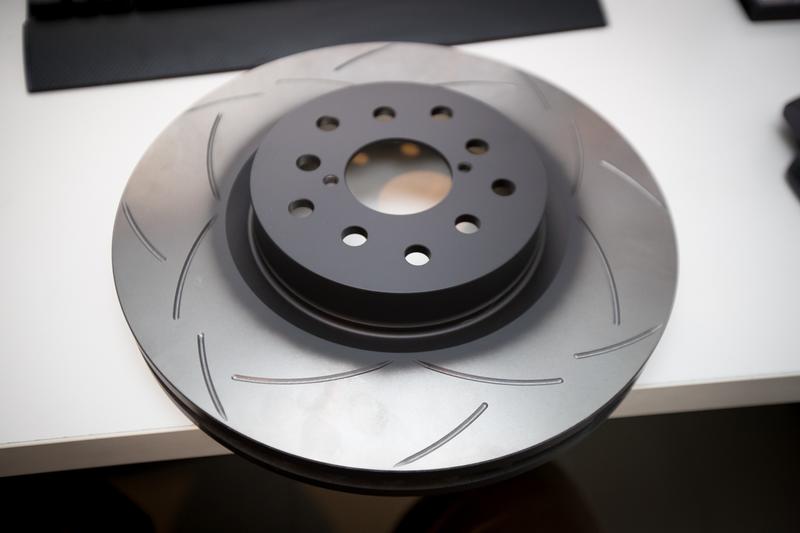
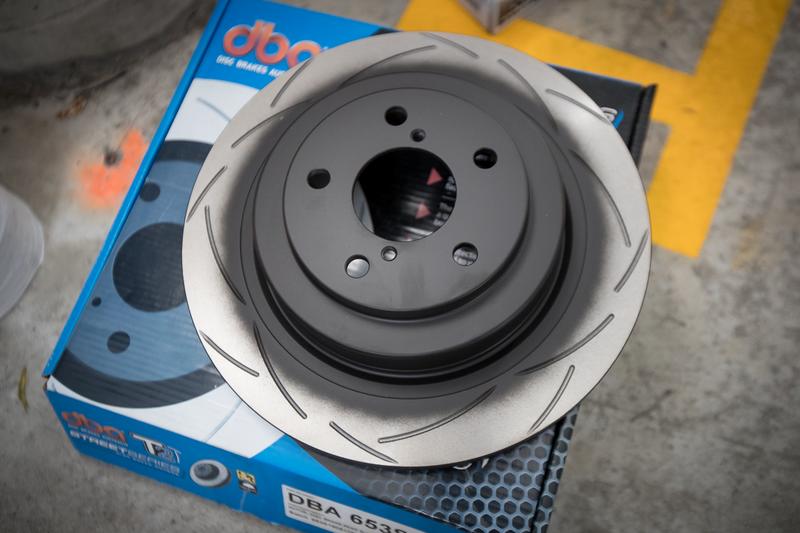
Rotors wise I decided to go for a set of Slotted DBA T2’s for a decent value to performance to bling ratio, I do love how they look.
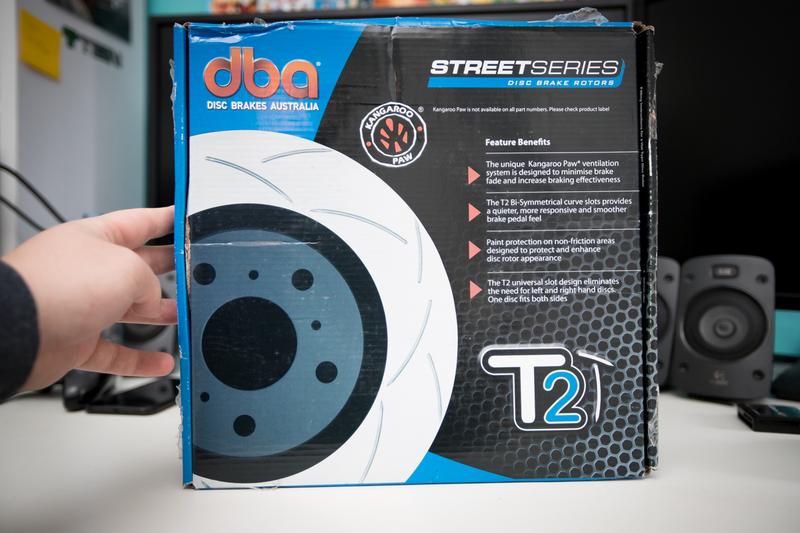
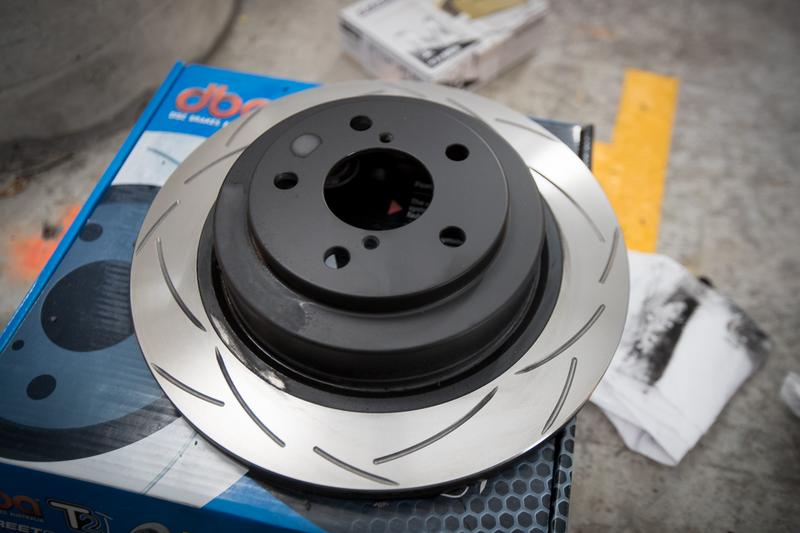
They are big.
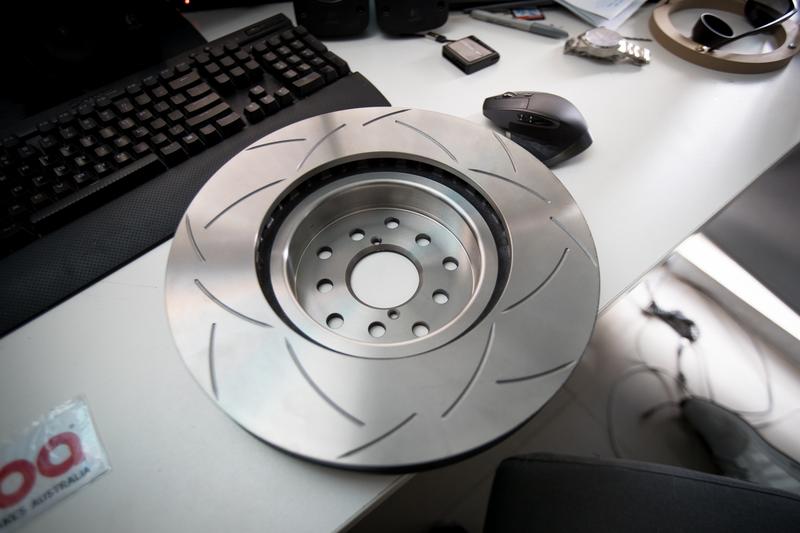
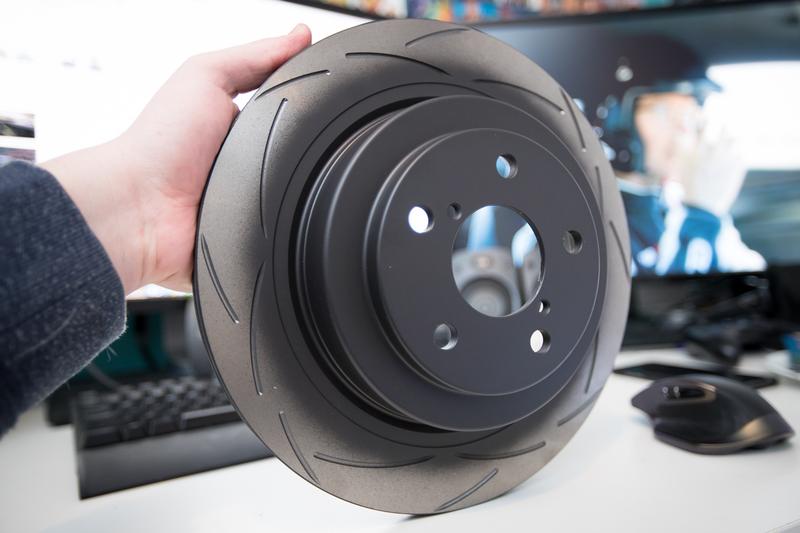
And after a shipping mishap the rears arrive some time later.
Not as big but still good looking.
[
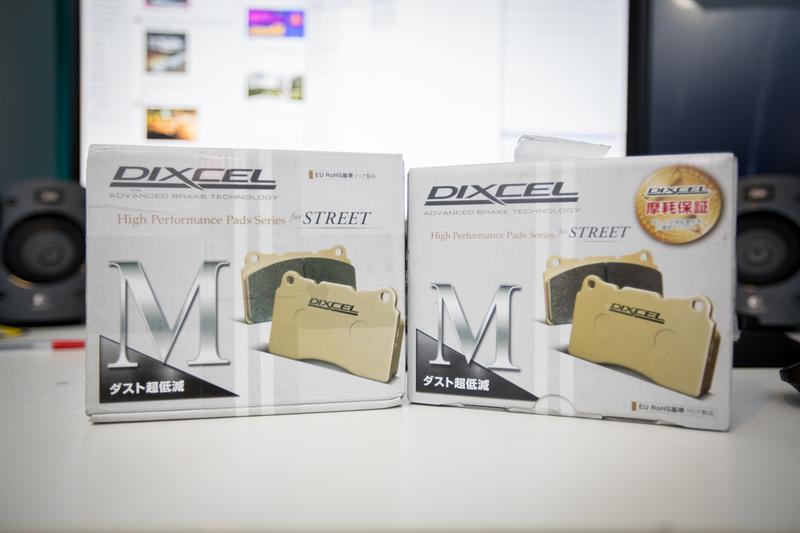
The pads were a fairly easy choice, it seems to be what most people with these setups go for, I’ve heard nothing but good things and the price is pretty good.
While I was keen to have a look there was mishap with Garage 88 and I was sent pads for a JDM spec BPE which apparently doesn’t have the same brake setup as Australia.
After figuring out the issue I contacted Garage 88 and they had the correct parts next day. Truely epic customer service.
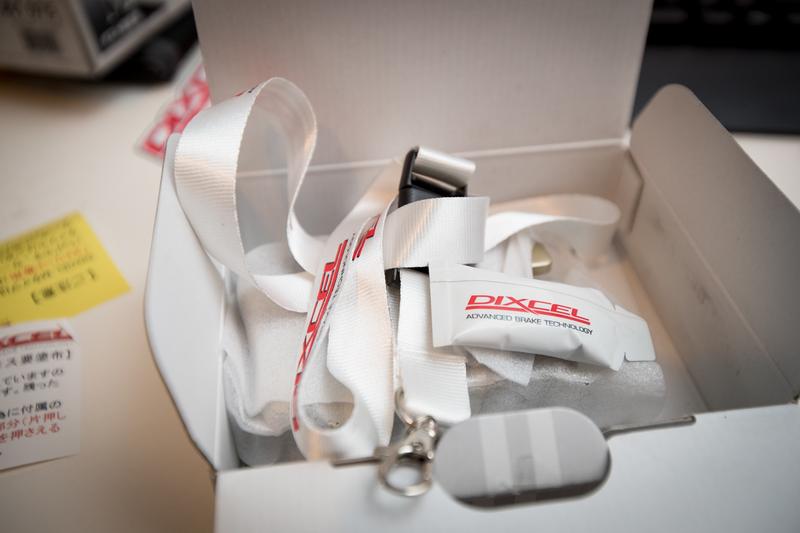
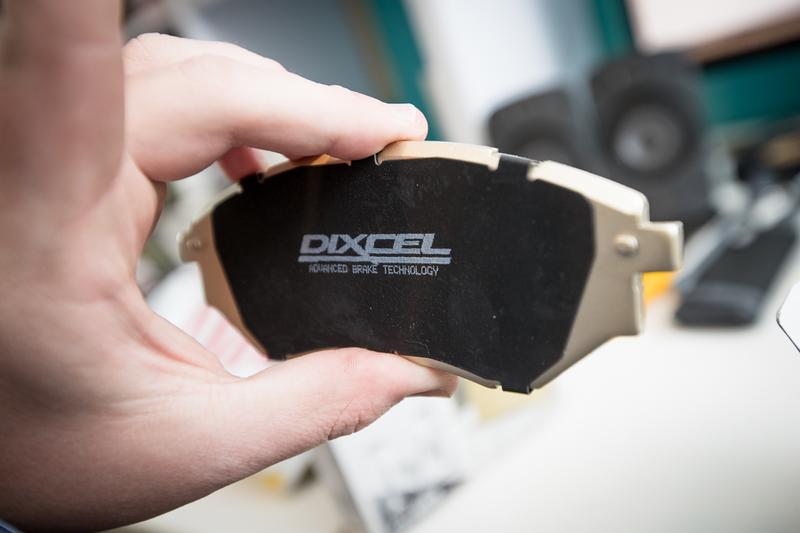
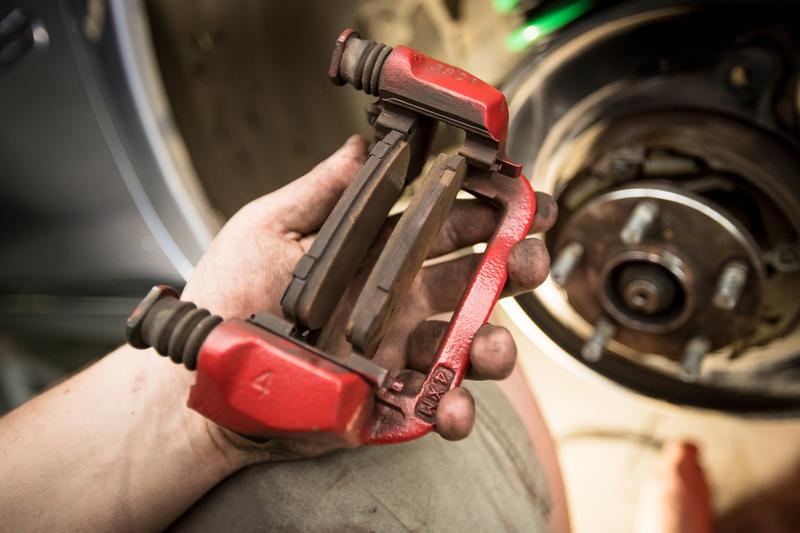
Now onto the correct goodies, Dixcel Type-M pads front and rear.
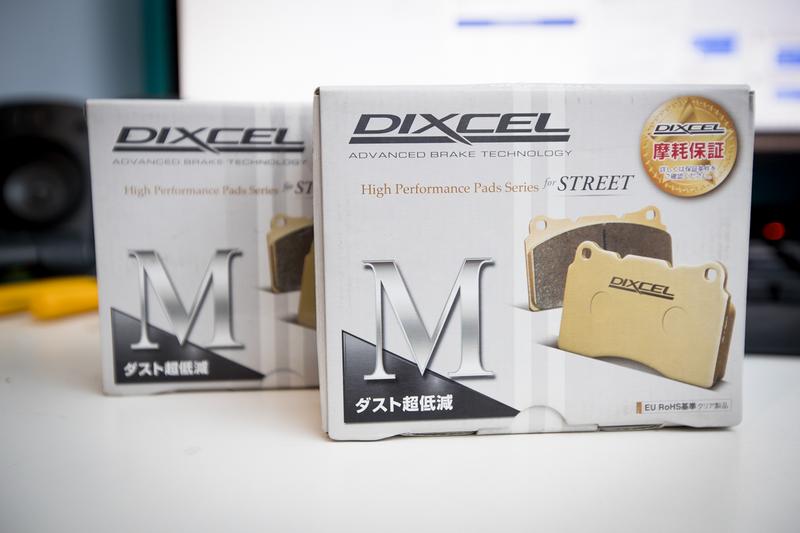
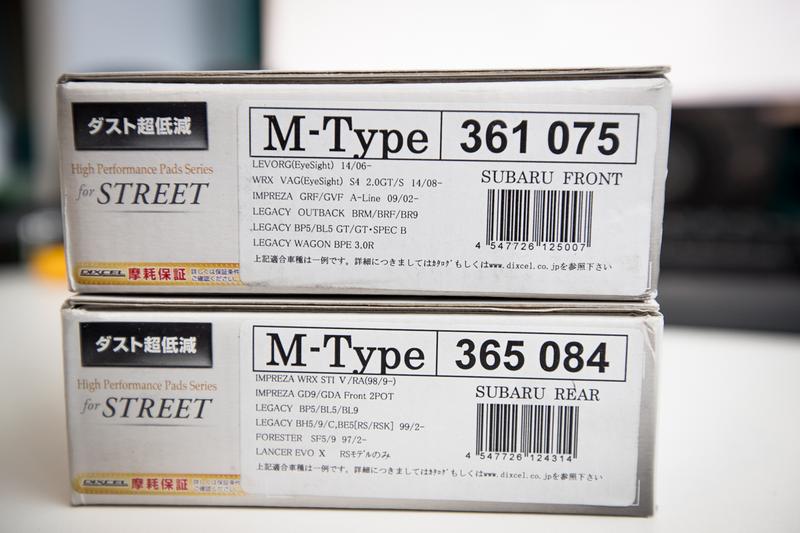
Goodies in the front.
Goodies in the back.
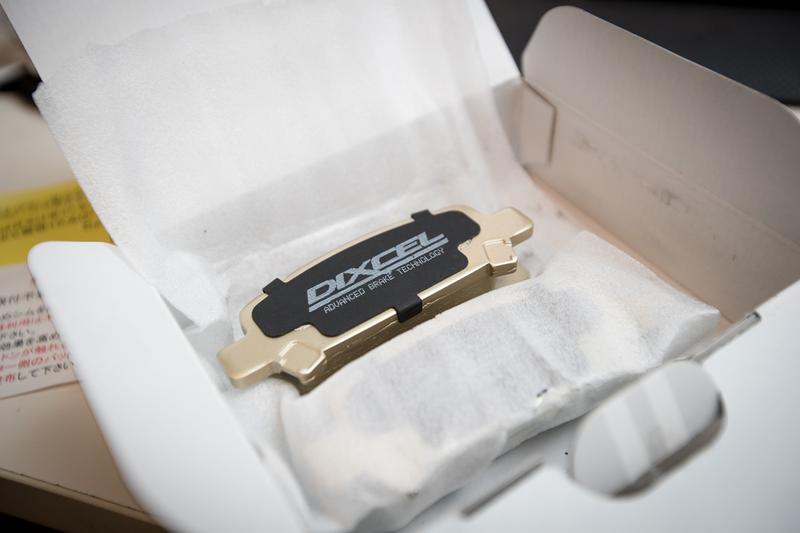
Not so sure how I feel about the gold but oh well.
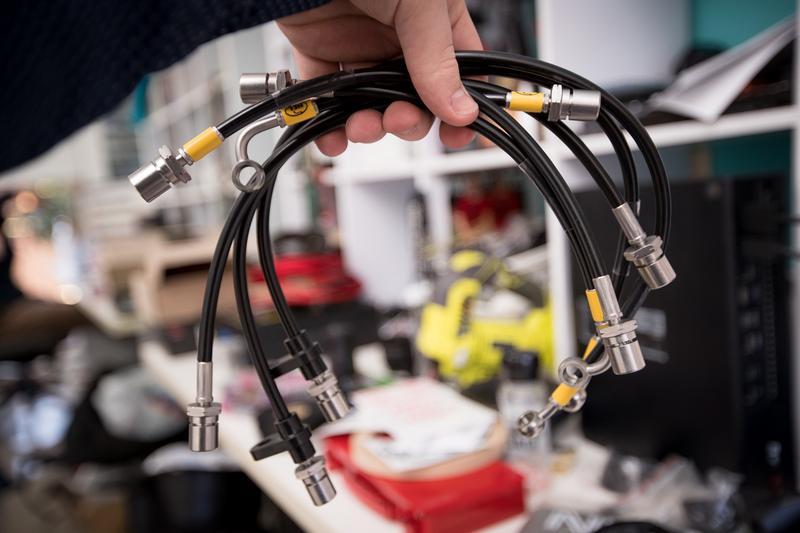
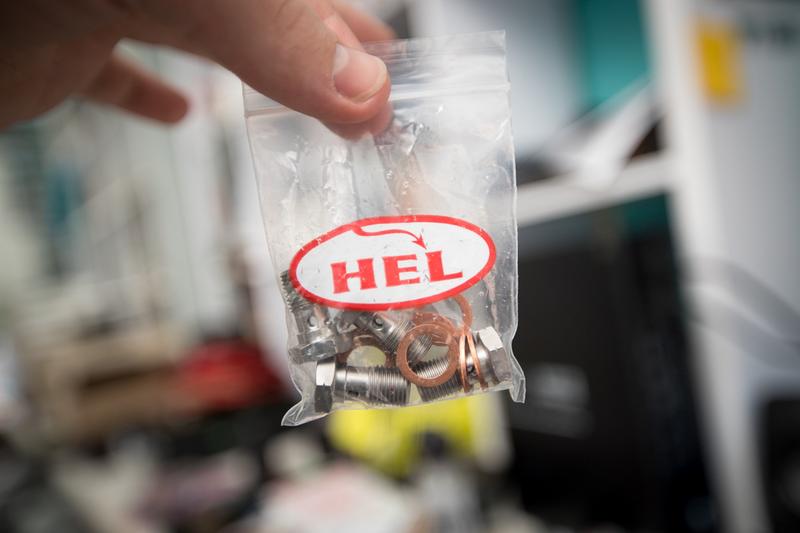
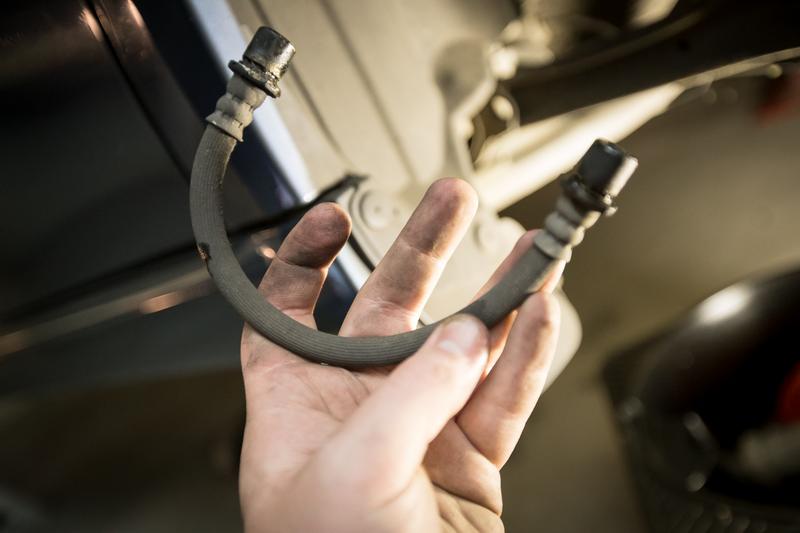
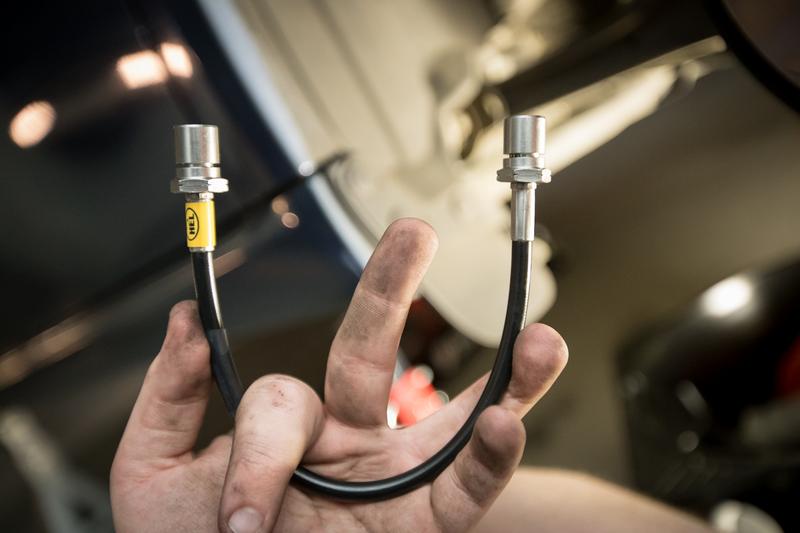
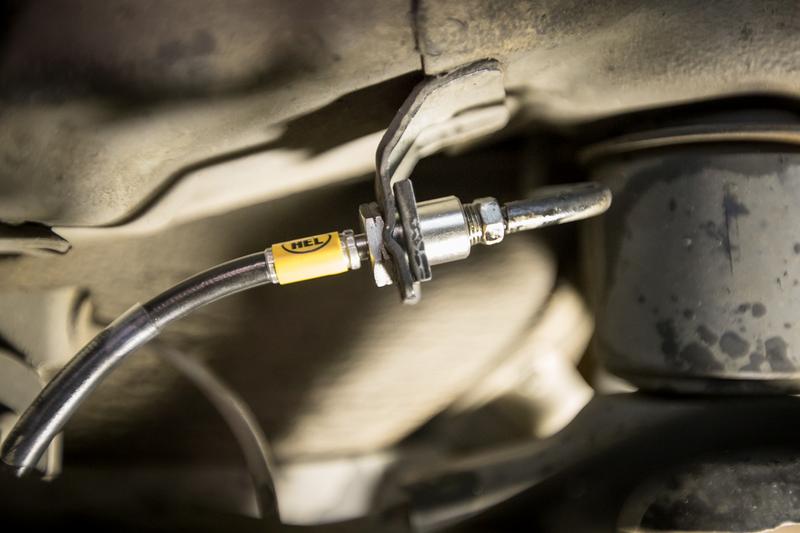
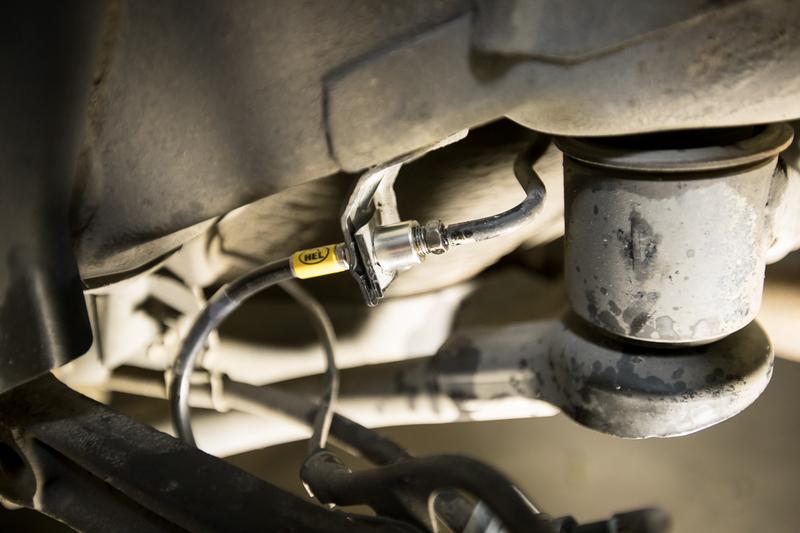
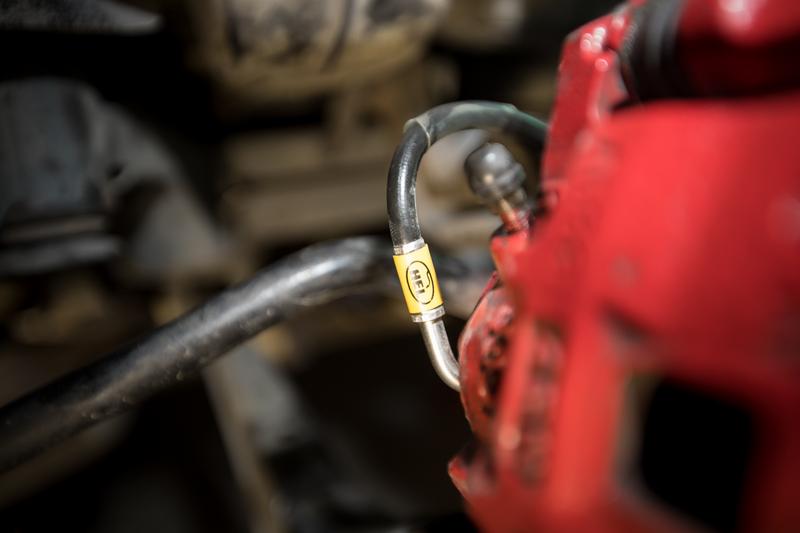
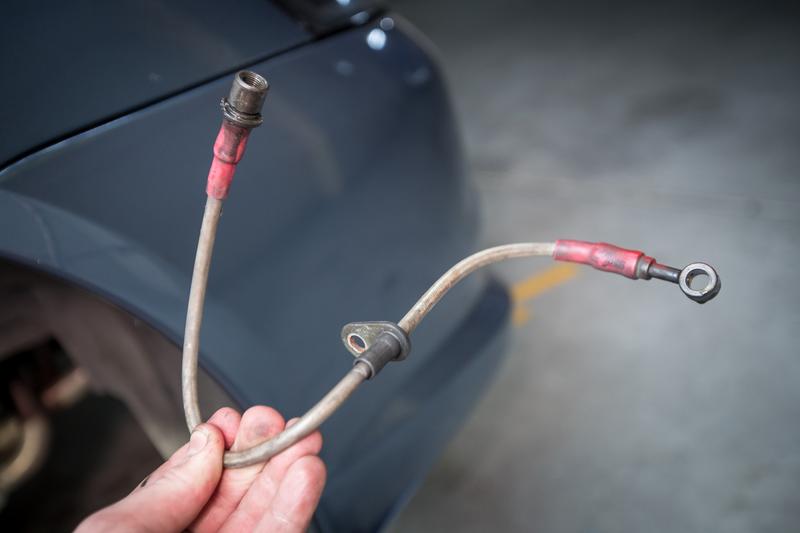
Lastly was onto braided lines. The car already currently STI lines in the front but still has the old lines in the rear. So rather then just replacing one thing, I would just be better off replacing everything. BCW came to the rescue again and supplied some Hel Braided Brake Lines, in a stealthy all black.

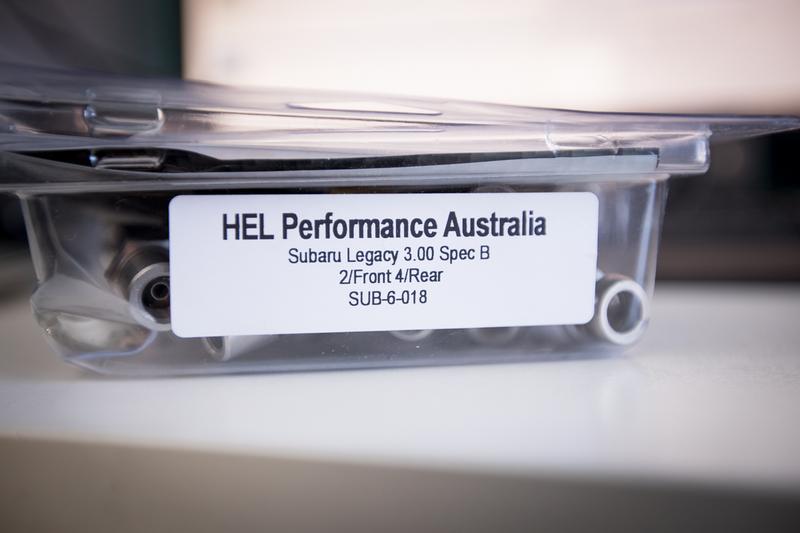
They feel quality and also come with the necessary hardware.
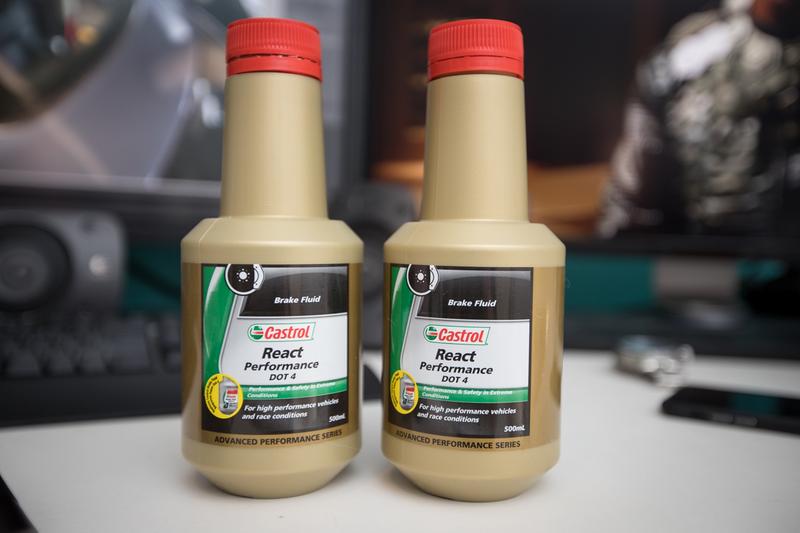
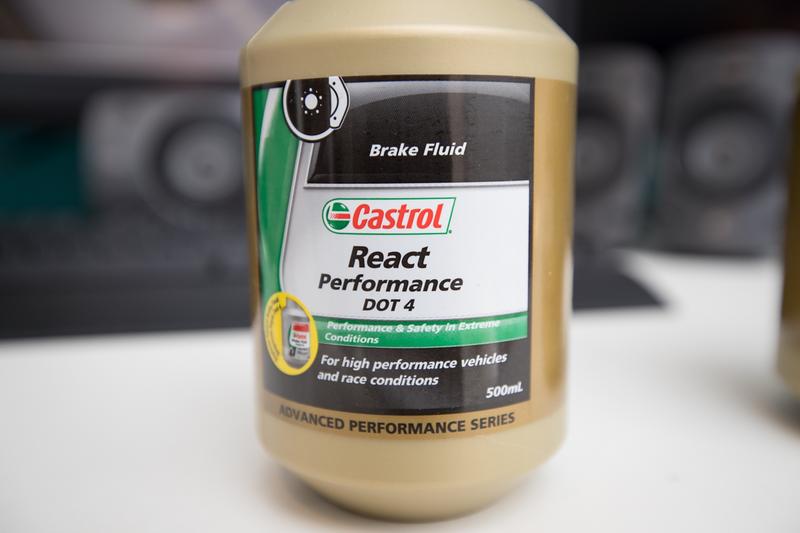
Before I start pulling anything apart I wanted to get started on flushing all the old fluid, cause who knows how long it’s been in there. I certainly haven’t changed it in the last two years of ownership. I decided on some Castrol React Performance Dot 4, also something that seems like a popular choice on Liberties.
Up and ready for work.
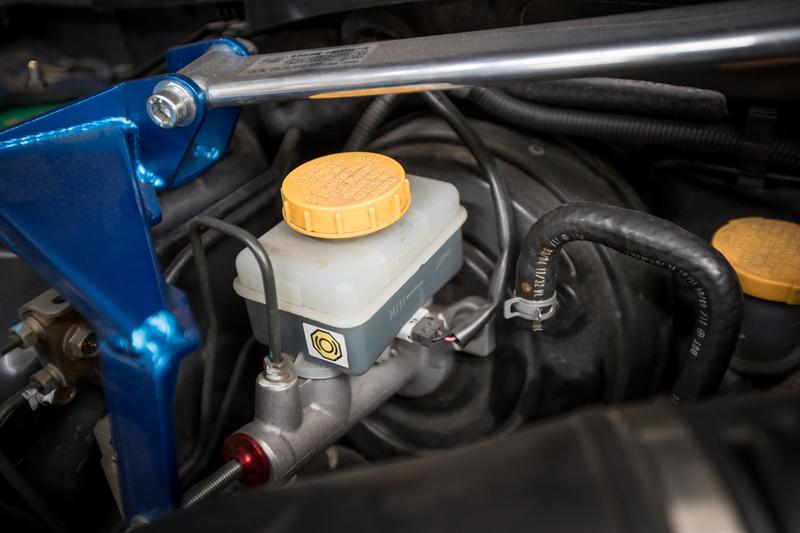
Started with pulling out a load of the old fluid out of the master cylinder to make thing a bit easier.
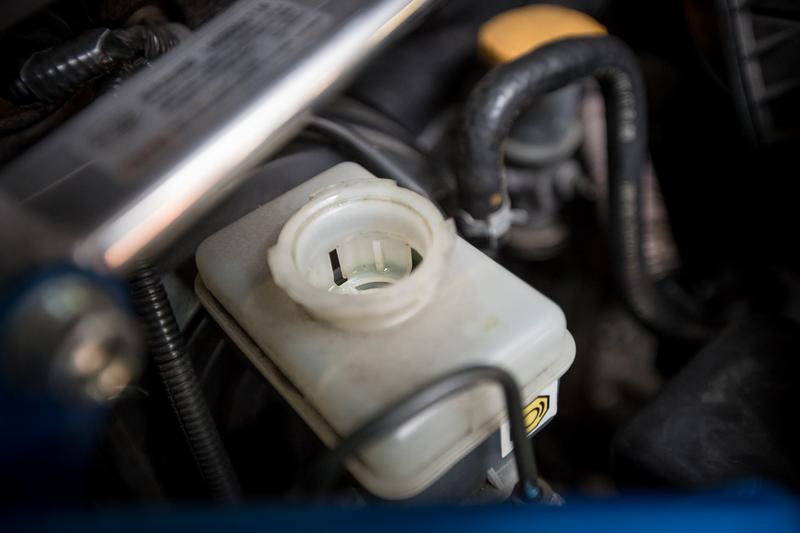
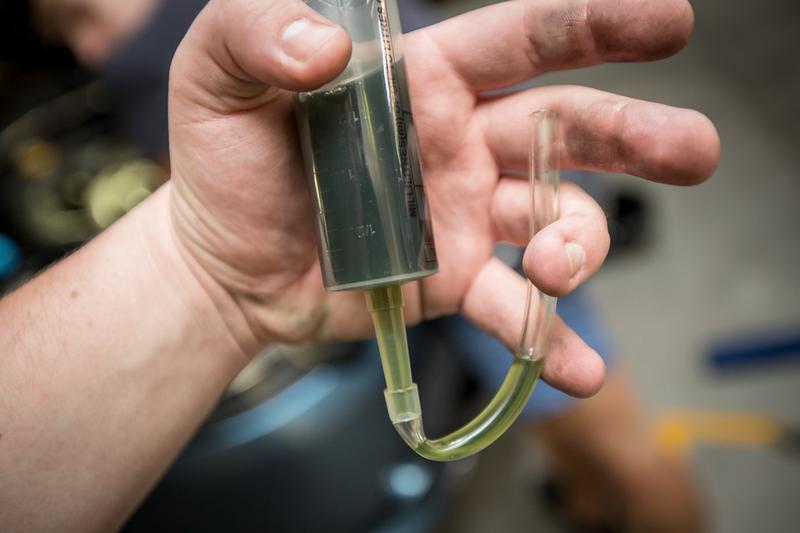
Ghetto bottle at the ready and the flushing could begin. Starting with passenger rear, being the furthest away from the master cylinder.
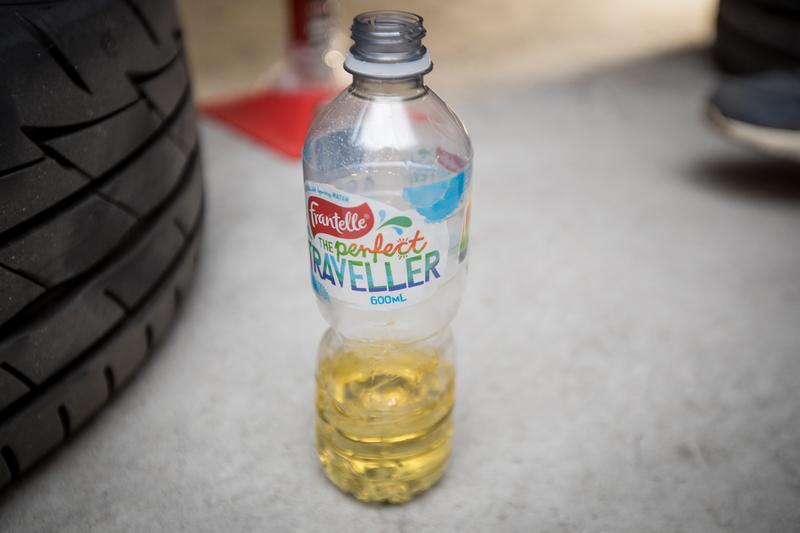
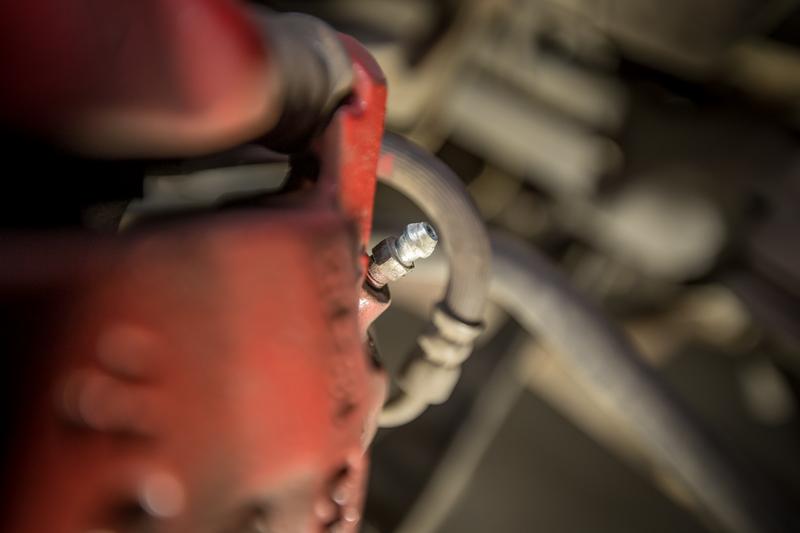
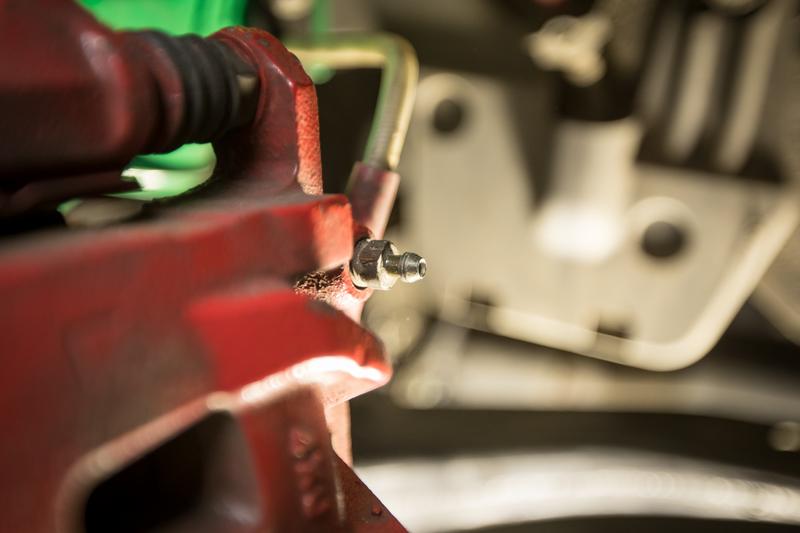
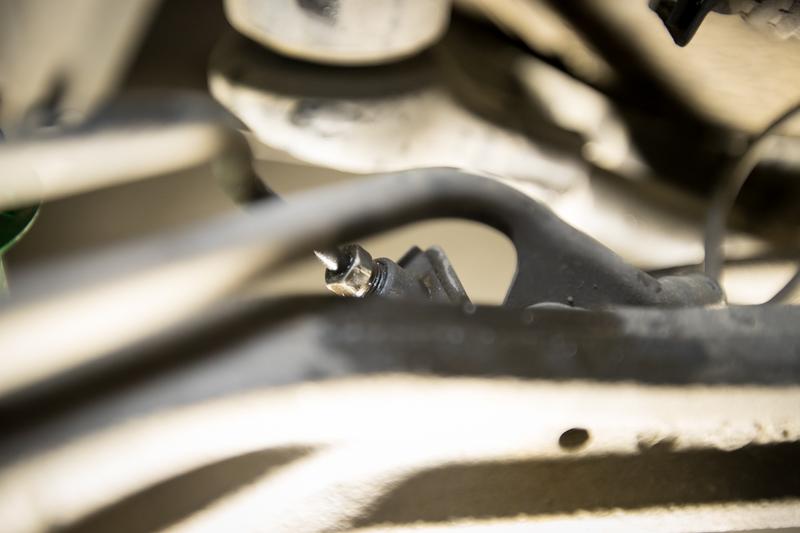
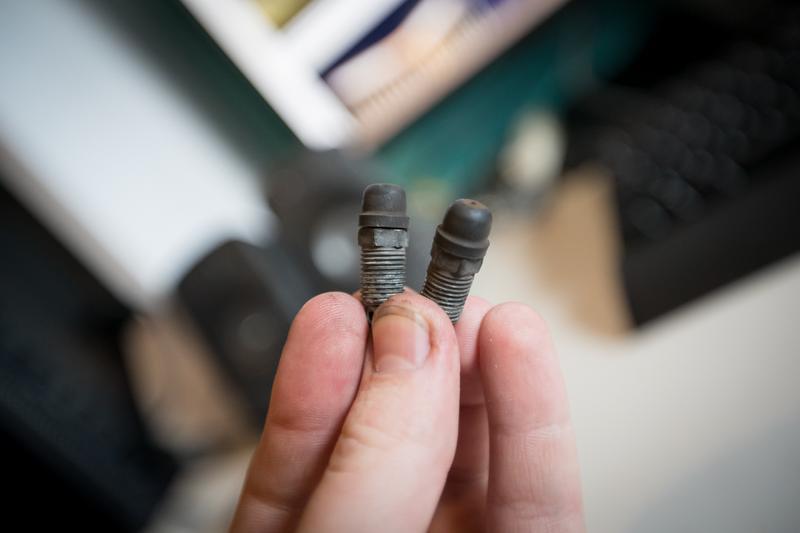
After doing the rear we cleaned out alot of the shit and things were looking much cleaner, there also a small amount of air in the system which is interesting, irrelevant though. Once that was done it was time to turn to the fronts. To my extreme frustration the previous owner, whether it was a workshop or him, managed to make the bleed nipple into a vertically perfect circle on both sides. So for now that’s going to be for flushing and that also means I won’t be able to do the braided lines either. Oh well, Benny has got a set for me that he is sending first thing on Monday so it’s not the biggest problem.
At least in the meantime I can get the pads and rotors sorted.
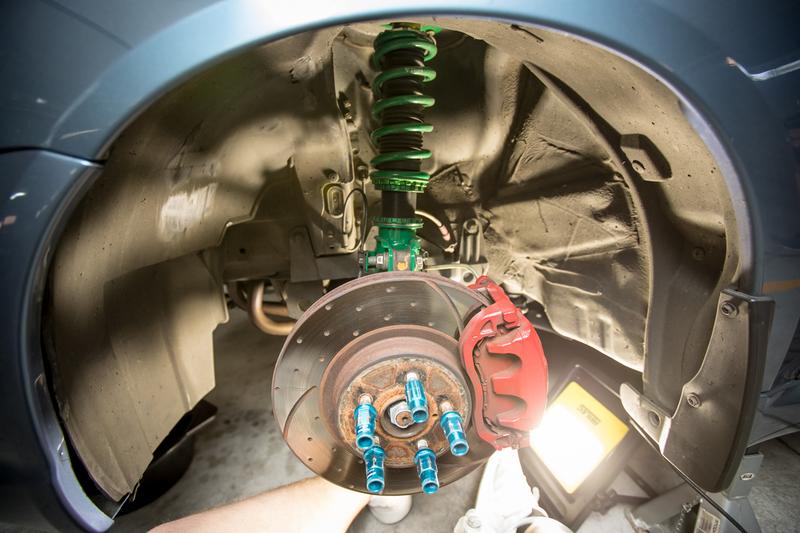
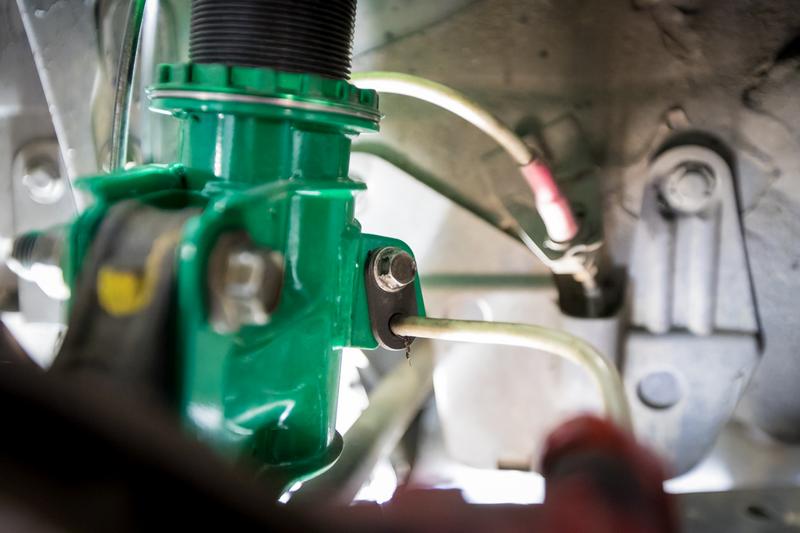
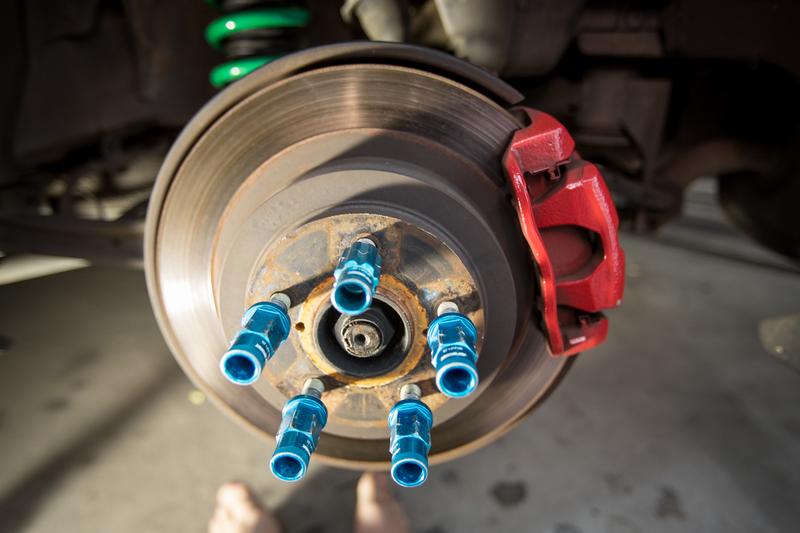
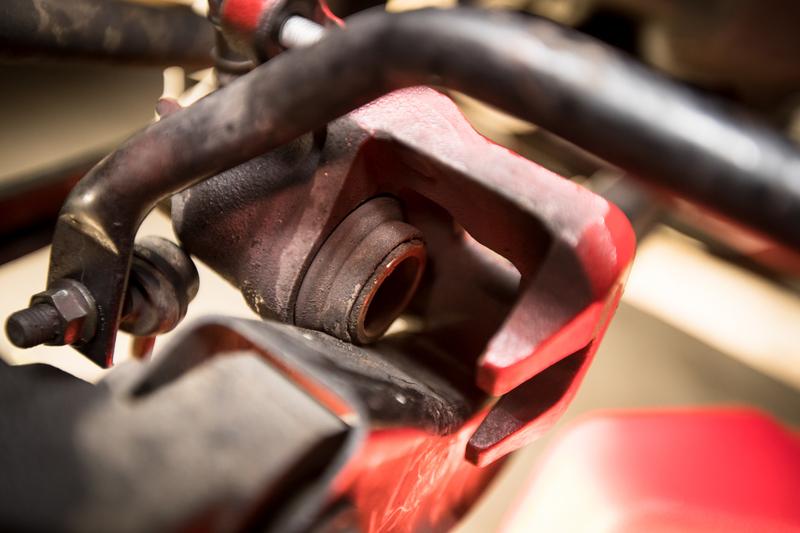
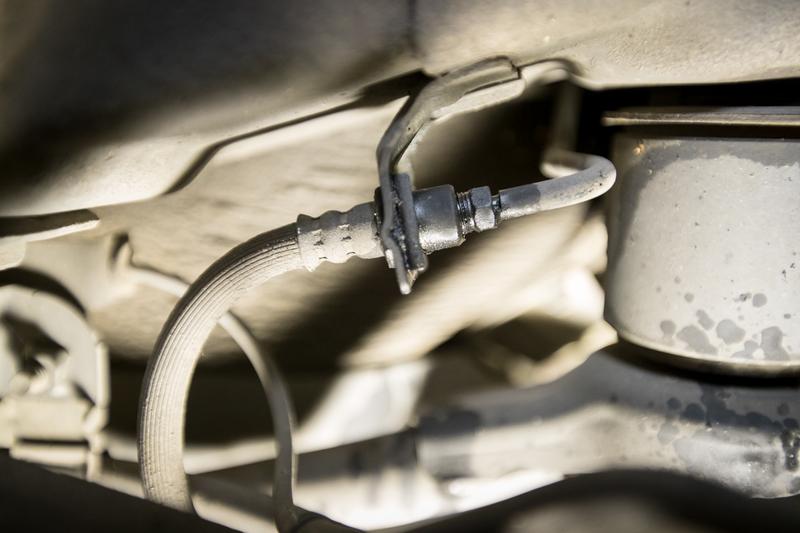
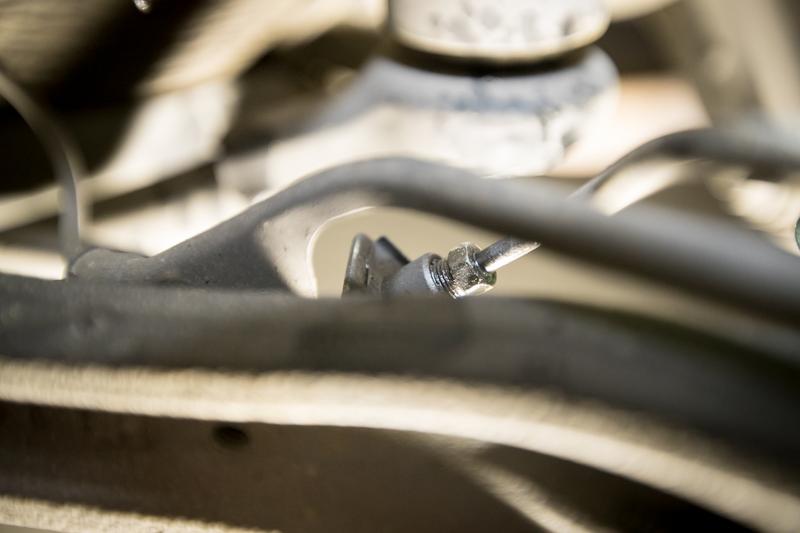
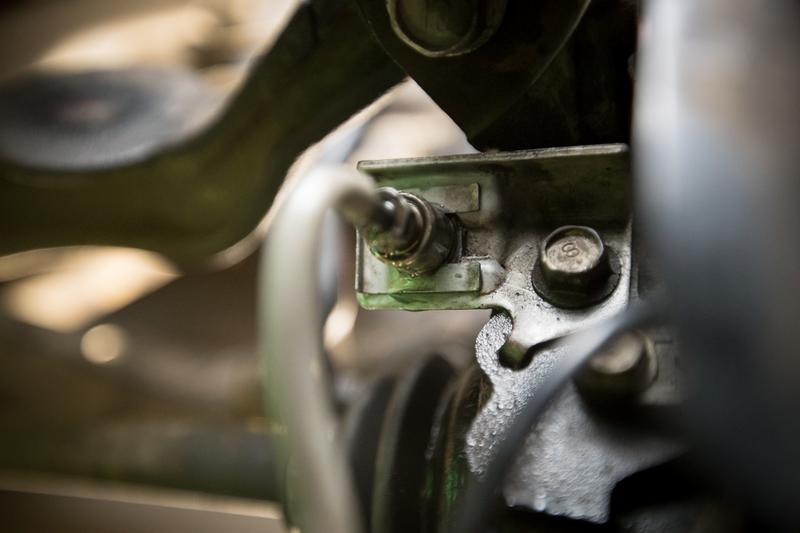
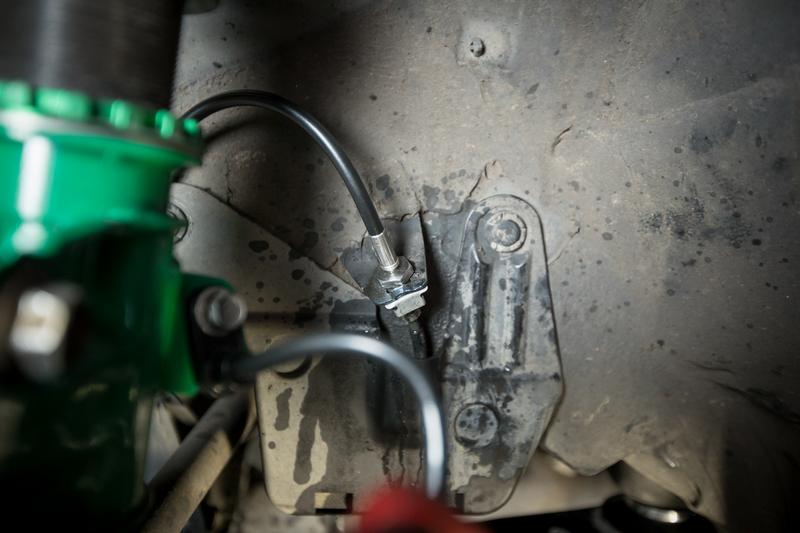
Line disconnected from coilovers.
Caliper off.
The guide-pins were removed so they could get a proper clean with some new silicon paste applied.
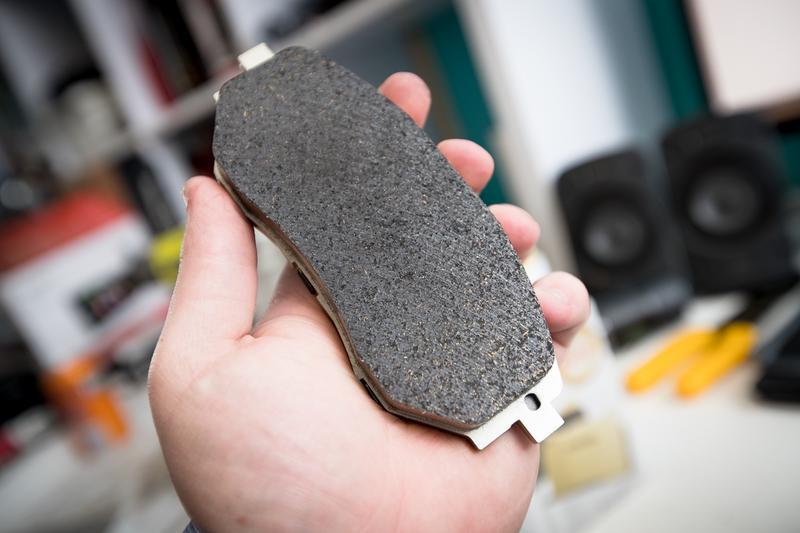
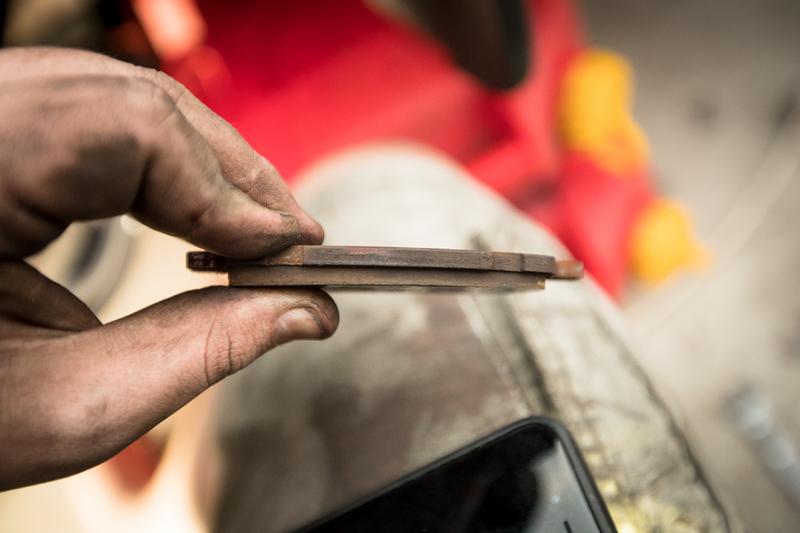
Pads could then come off, more meat them I thought left on them.

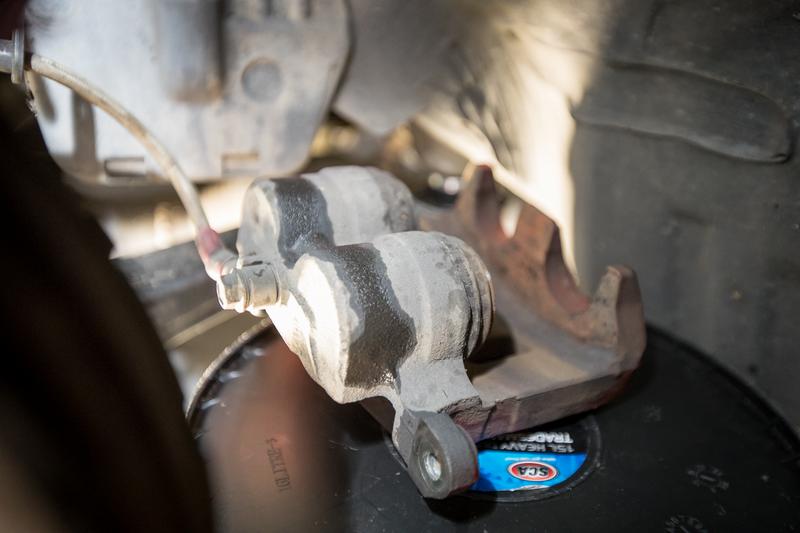
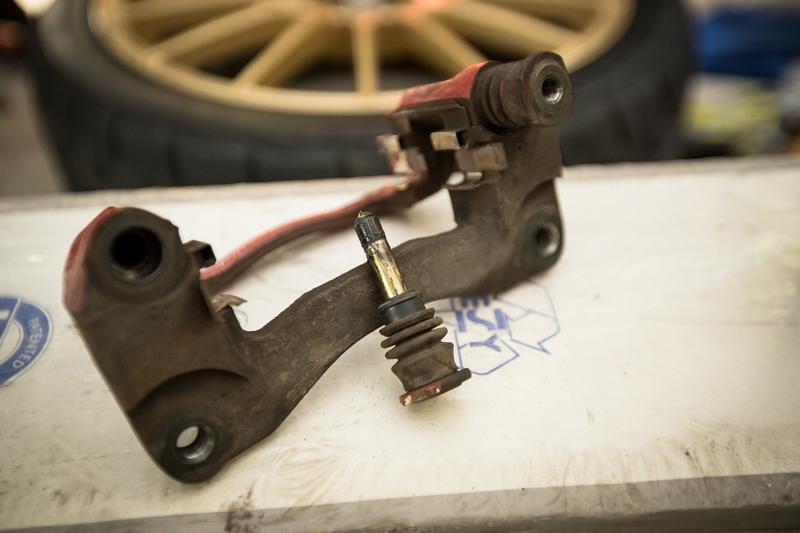
Caliper mounting bracket was next.
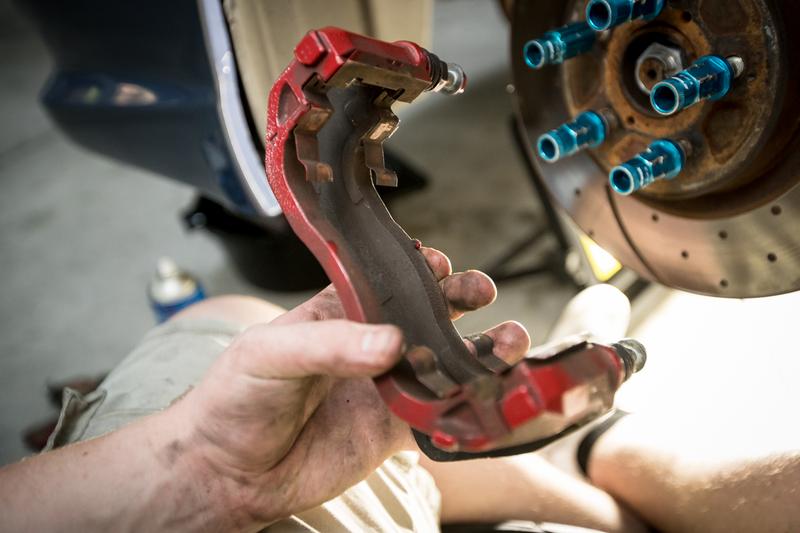
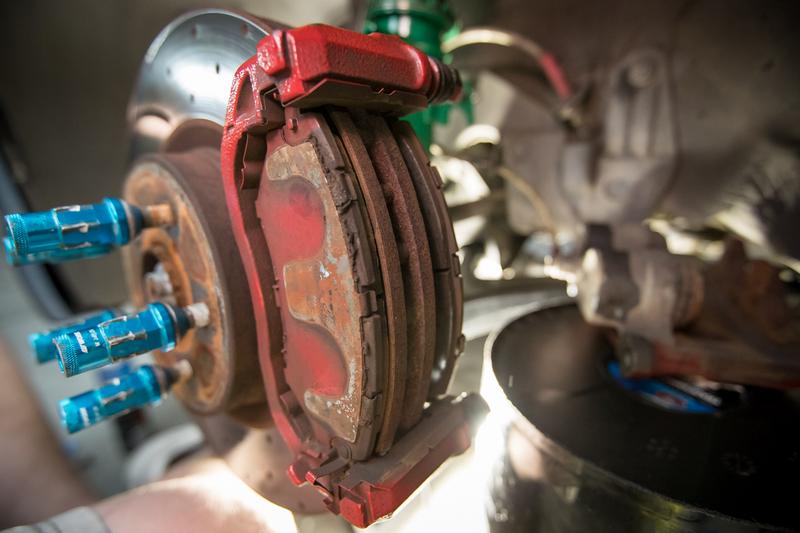
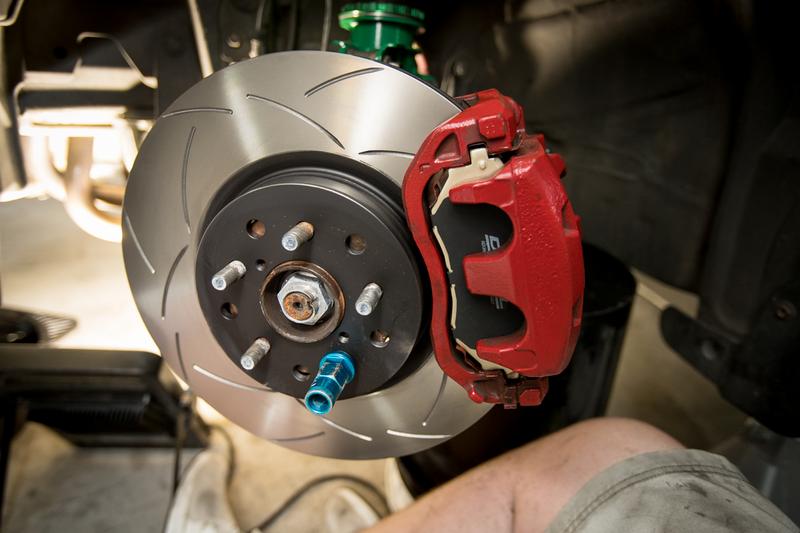
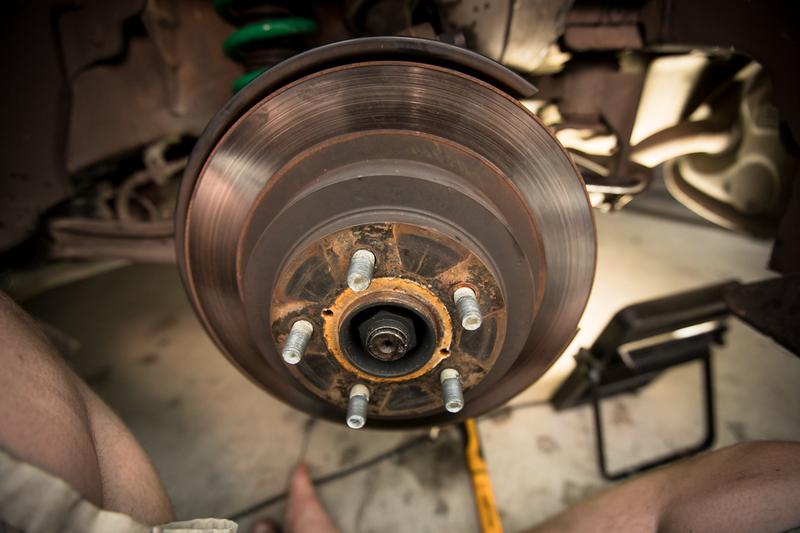
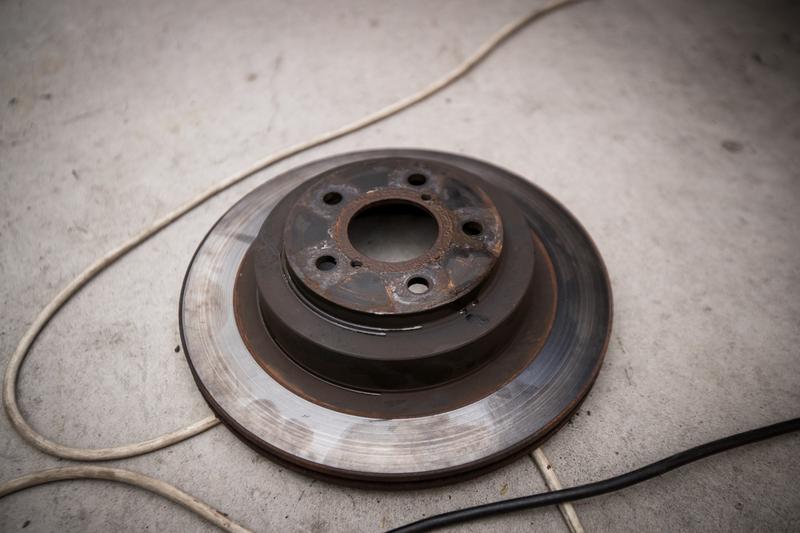
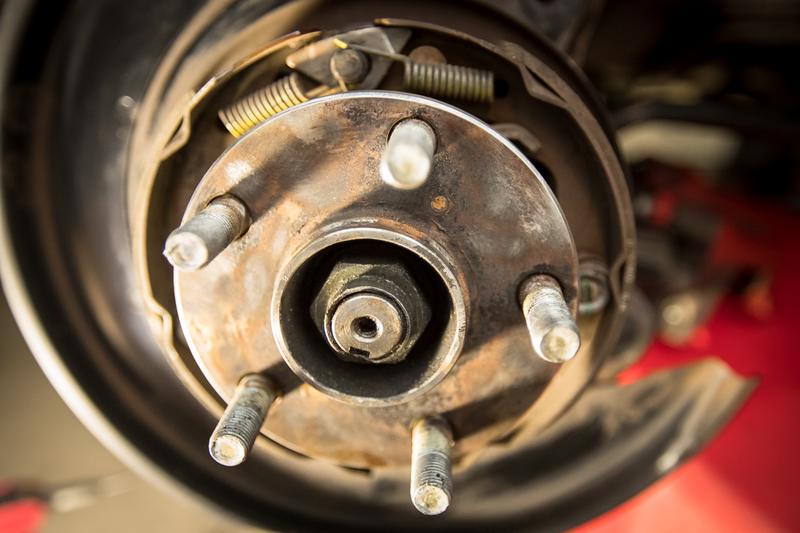
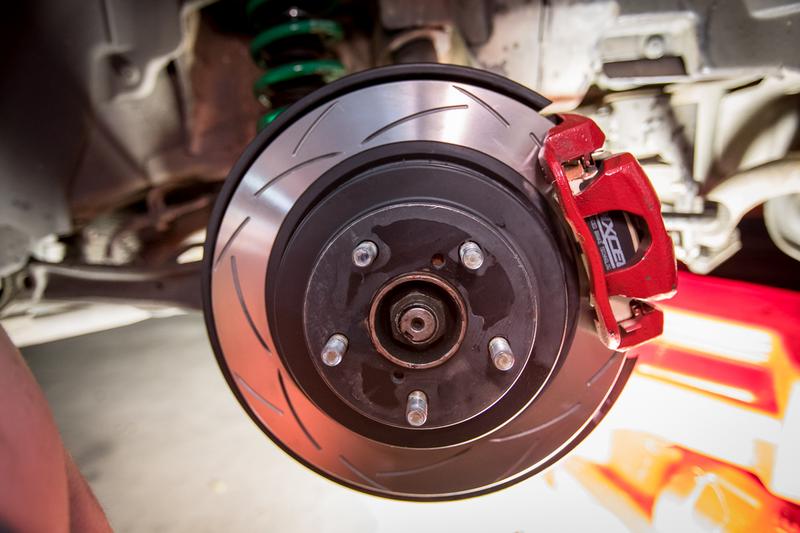
Rotor could then come off, man so happy to see these RDA’s go, they were so badly warped it’s insane.
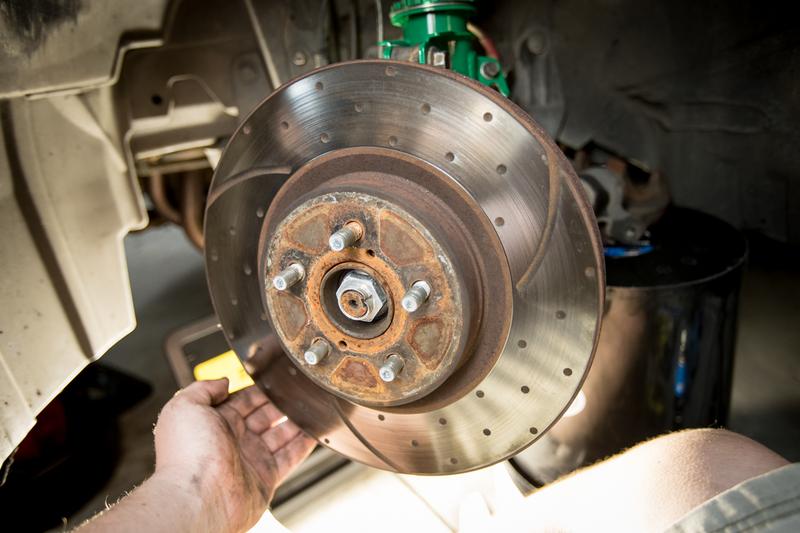
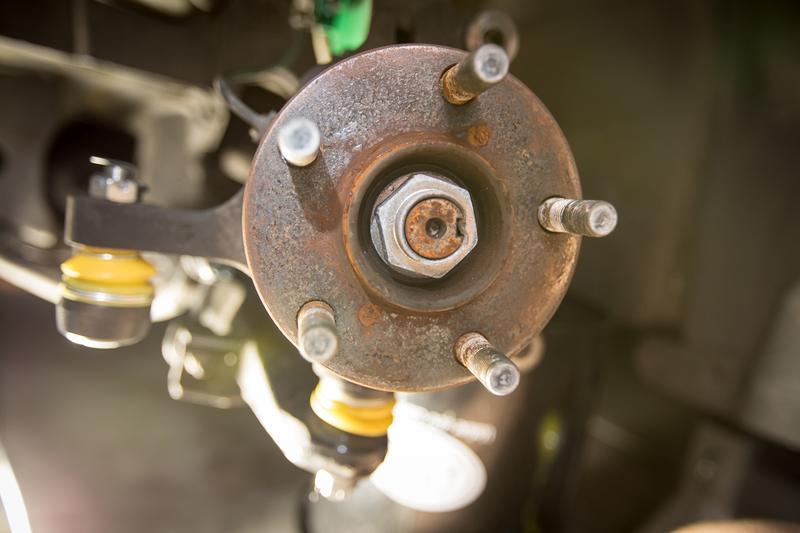
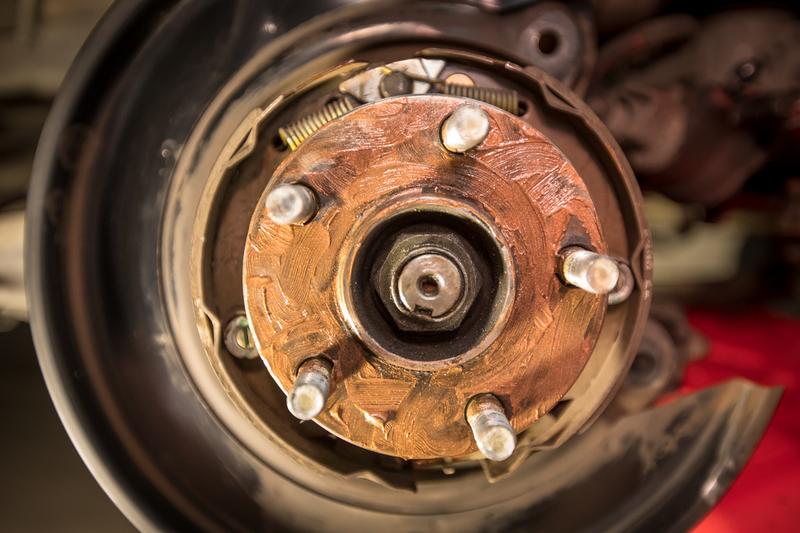
The hub got a good sanding and a healthy does of copper anti-seise.
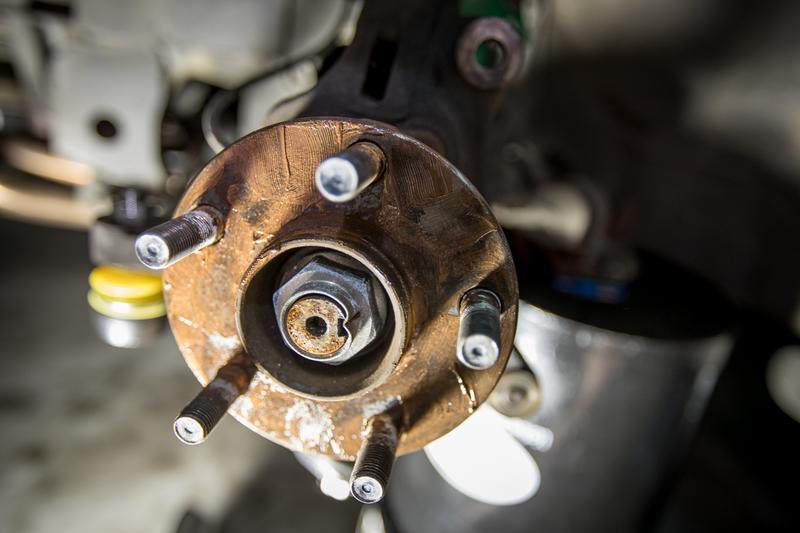
Rotors on.
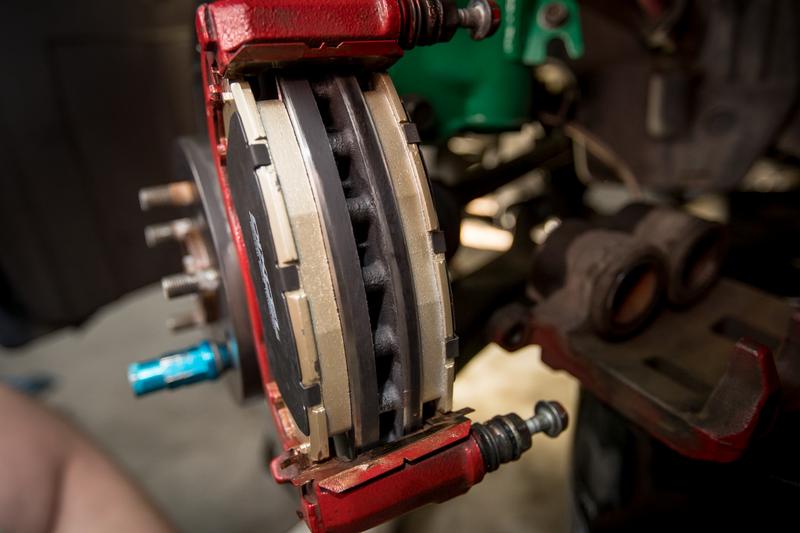
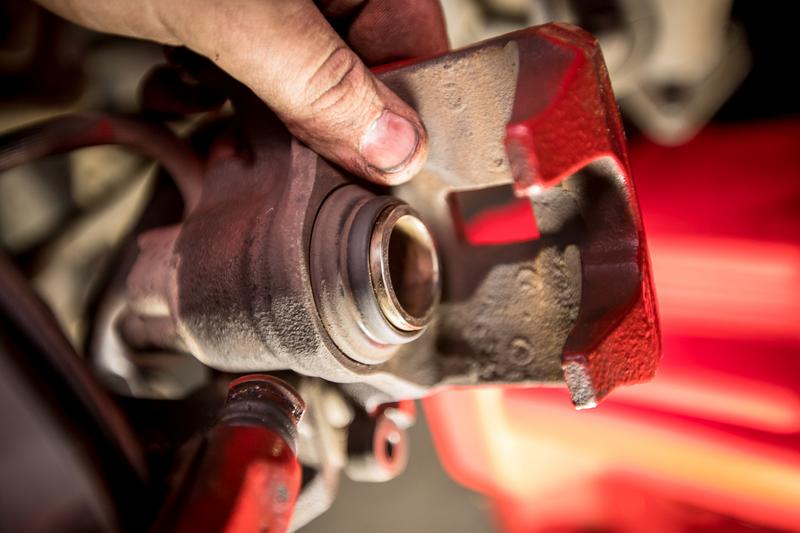
Before the caliper could go back on the pistons needed a good clean. I was happy to see the pistons were in decent shape, no splits.

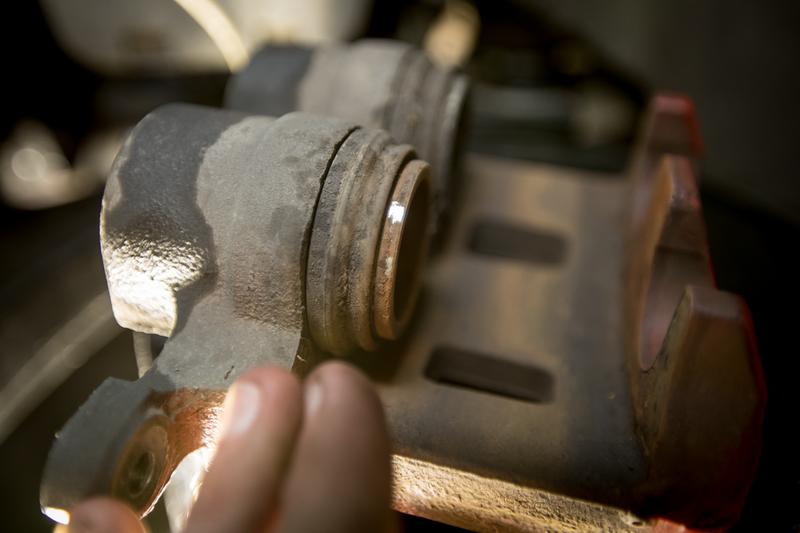
Better.
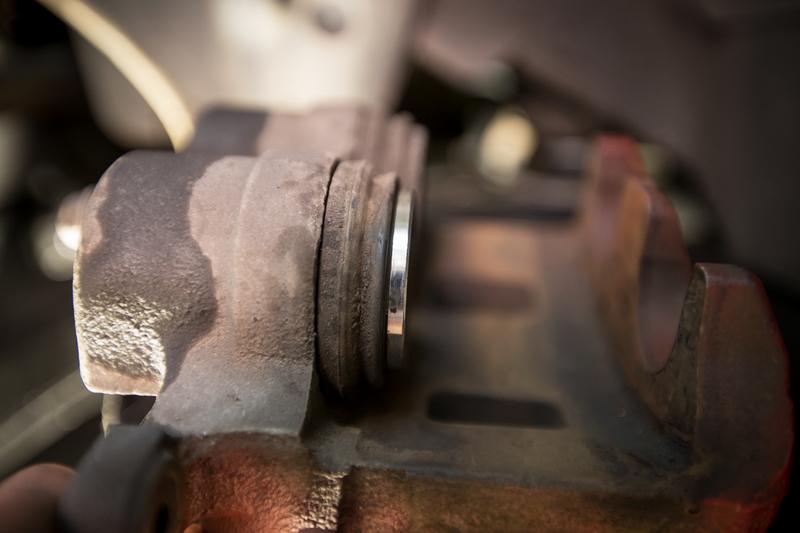

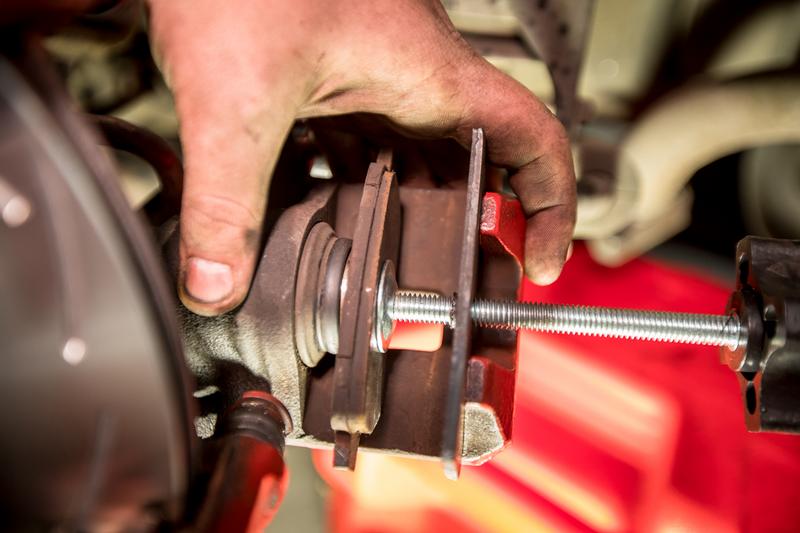
Then wound back.
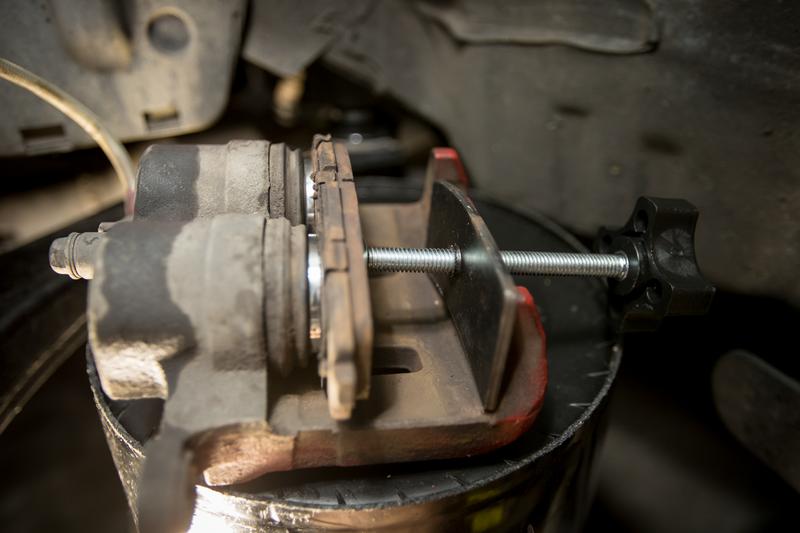
Pads could then go in and done.
The other side could then be done.
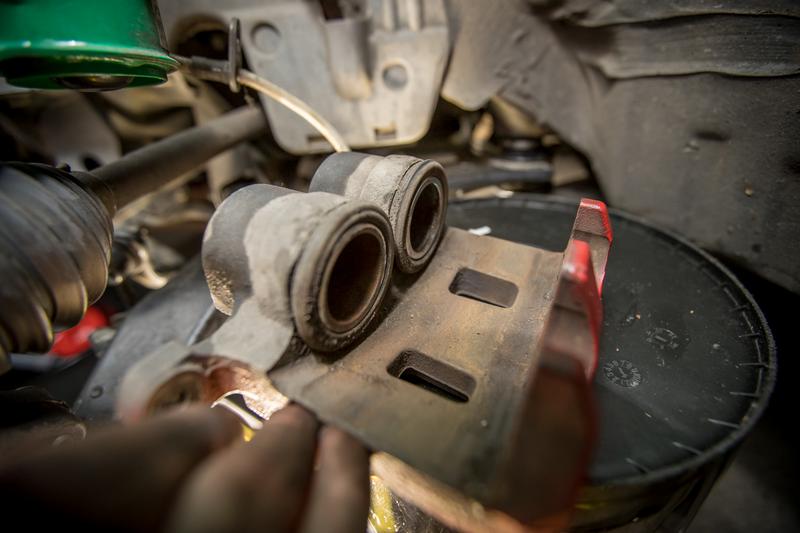
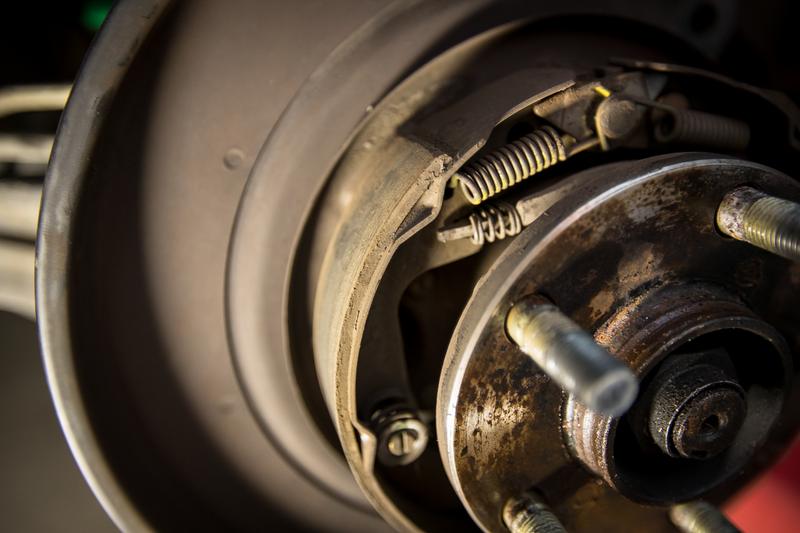
It was then time to tackle the rear. These seemed to really be on their last leg, even cracking in some places.

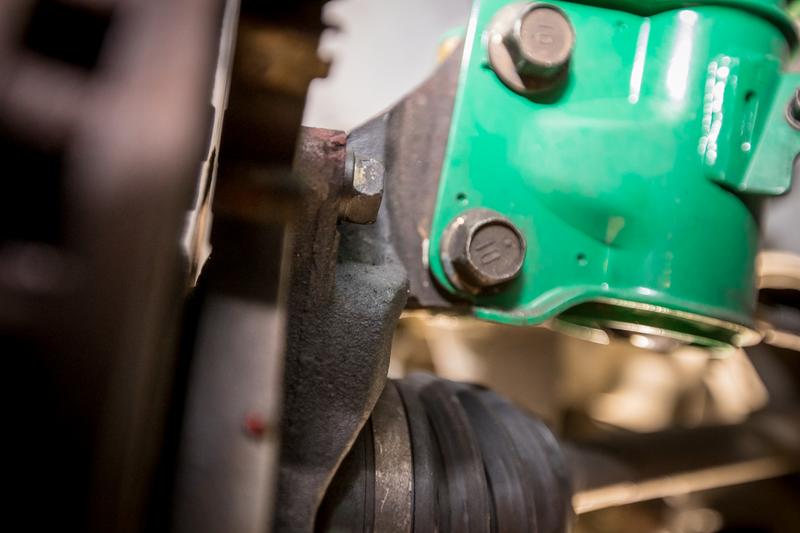
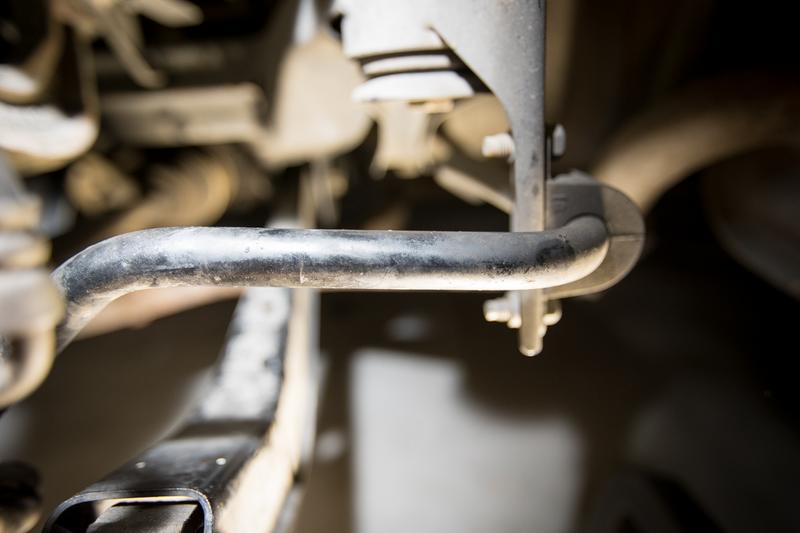
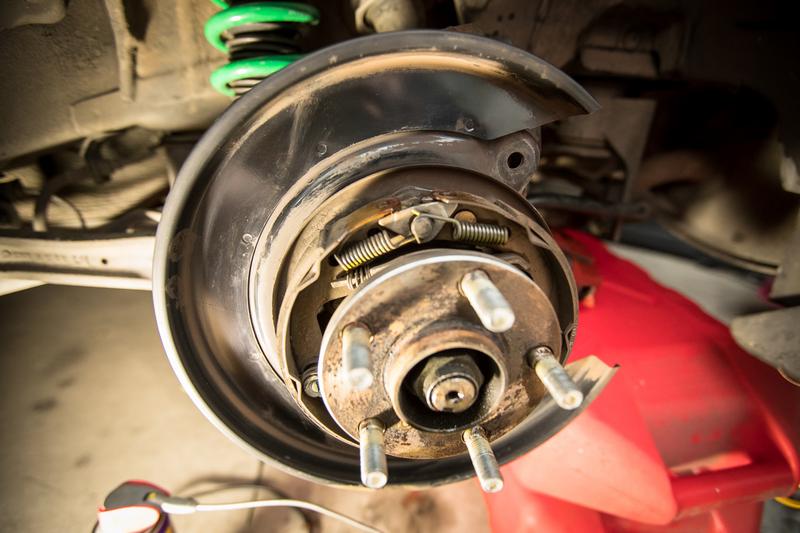
First thing was this arm, it needed to move out the way to make the access to bit easier to the calliper bolts.
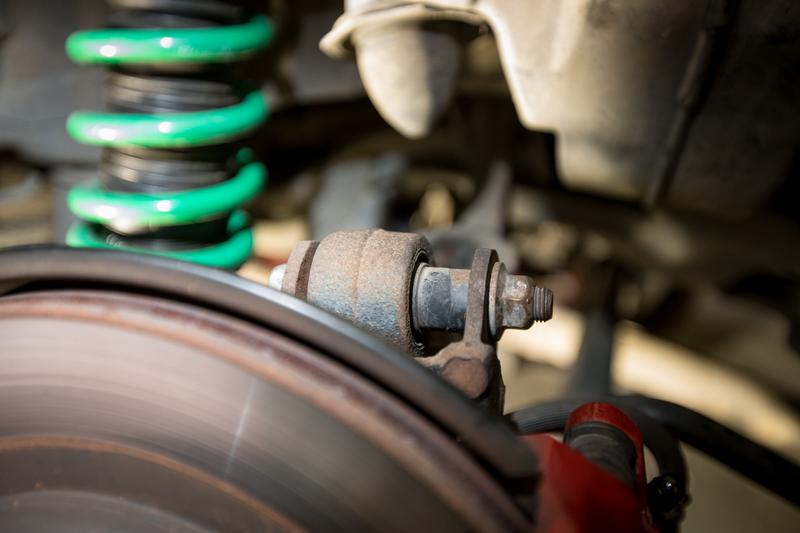
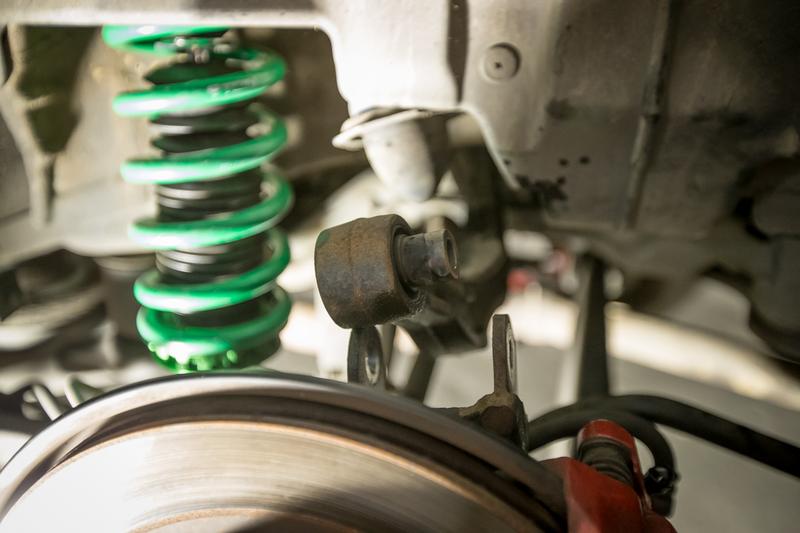
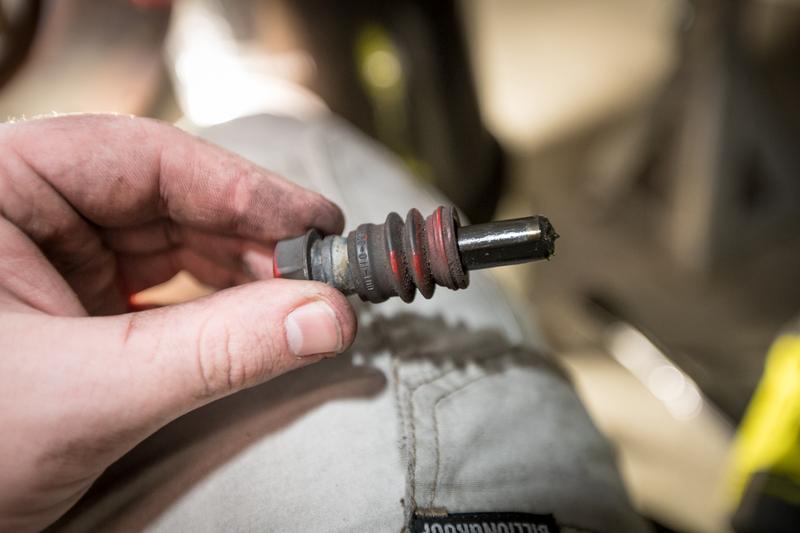
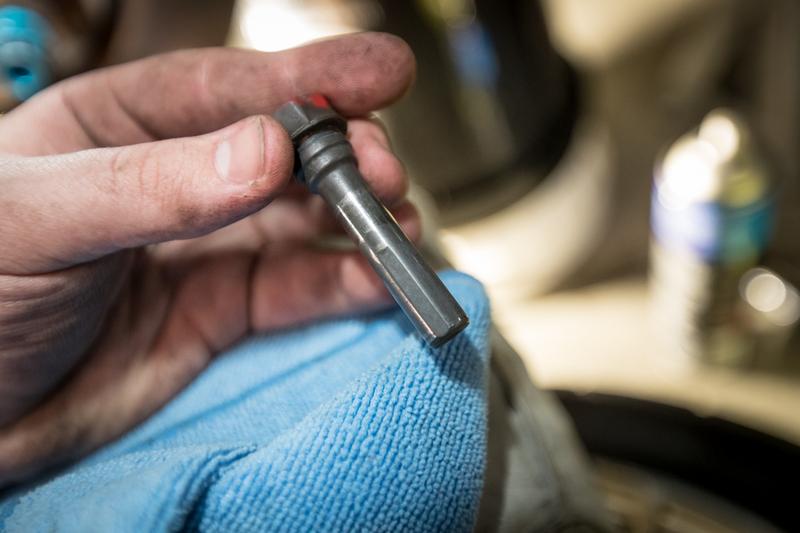
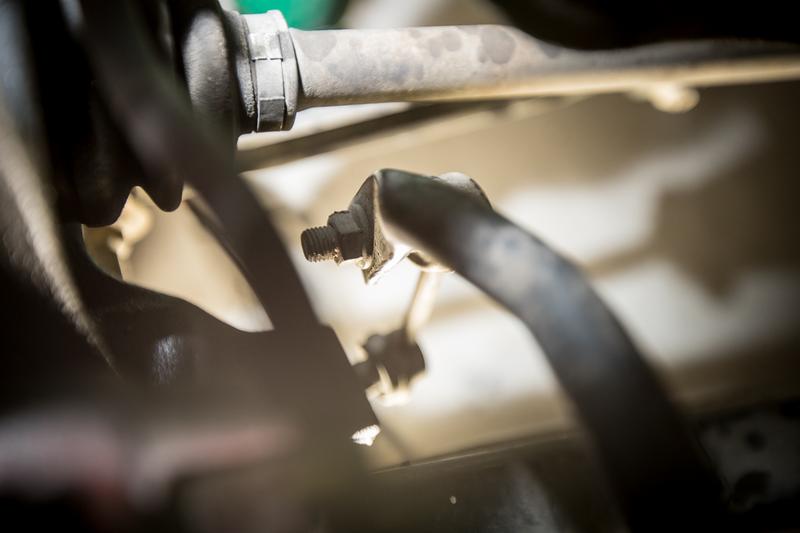
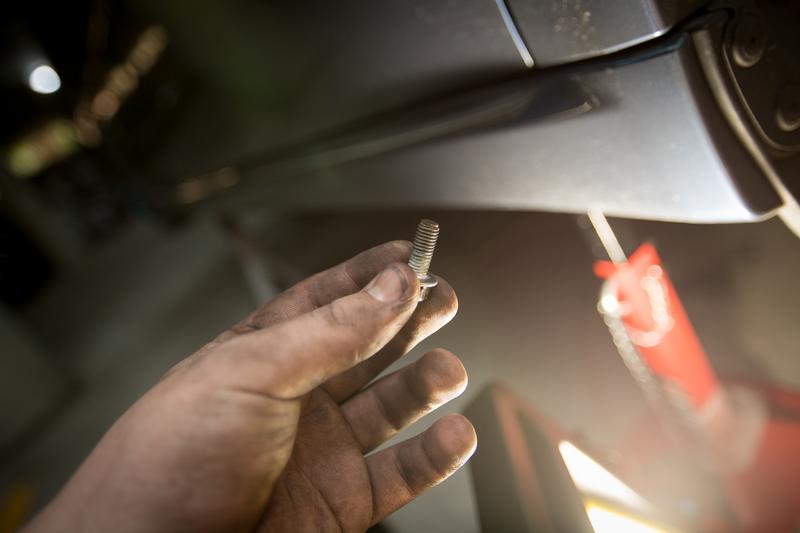
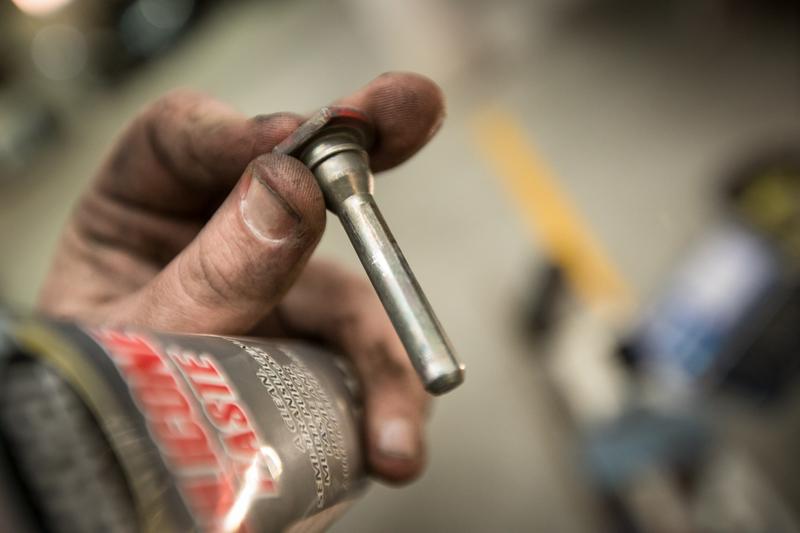
I also removed on of the end-links to get a big of movement out of the rear swaybar, Subaru don't make access easy.
Calliper then removed.

The old rotor did not want to come off but with the help of a mallet and a bolt eventually it came loose.
Handbrake shoes seem to be ok for now, they've done their job up until this point so they'll be fine for now.
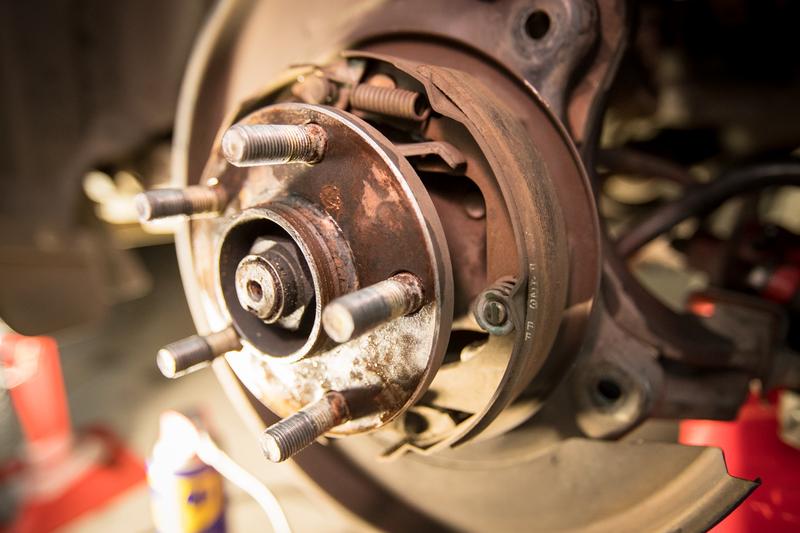
The hub and dust shields then got a bit of a clean.
The old pads didn't have much left on them.
The guide-pins could then be removed and cleaned and regreased.
Rotors were then cleaned, doing my best to keep as much of the black paint on.
Hubs were the greased and the rotor went on.
Before winding back it got a clean.
Then wound back.

Pads in and caliper on.
Rinse and repeat for the other side.
Rotors wise I decided to go for a set of Slotted DBA T2’s for a decent value to performance to bling ratio, I do love how they look.
They are big.
And after a shipping mishap the rears arrive some time later.
Not as big but still good looking.
[
The pads were a fairly easy choice, it seems to be what most people with these setups go for, I’ve heard nothing but good things and the price is pretty good.
While I was keen to have a look there was mishap with Garage 88 and I was sent pads for a JDM spec BPE which apparently doesn’t have the same brake setup as Australia.
After figuring out the issue I contacted Garage 88 and they had the correct parts next day. Truely epic customer service.
Now onto the correct goodies, Dixcel Type-M pads front and rear.
Goodies in the front.
Goodies in the back.
Not so sure how I feel about the gold but oh well.
Lastly was onto braided lines. The car already currently STI lines in the front but still has the old lines in the rear. So rather then just replacing one thing, I would just be better off replacing everything. BCW came to the rescue again and supplied some Hel Braided Brake Lines, in a stealthy all black.
They feel quality and also come with the necessary hardware.
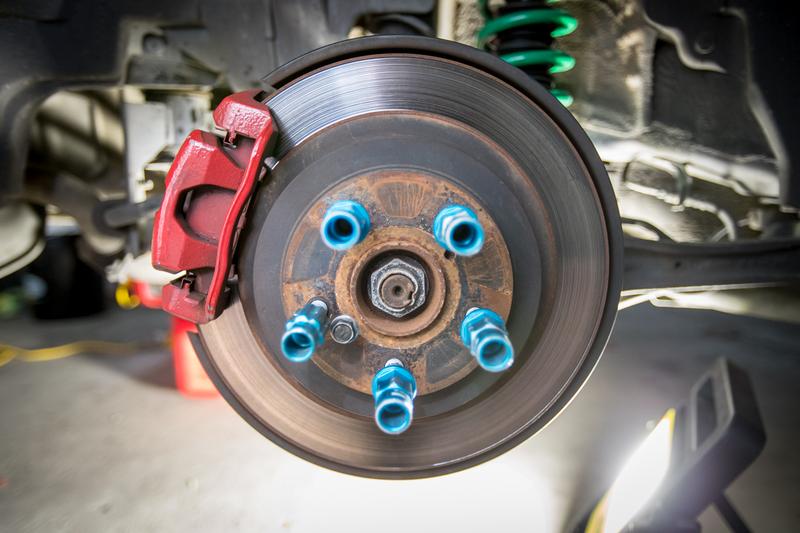
Before I start pulling anything apart I wanted to get started on flushing all the old fluid, cause who knows how long it’s been in there. I certainly haven’t changed it in the last two years of ownership. I decided on some Castrol React Performance Dot 4, also something that seems like a popular choice on Liberties.
Up and ready for work.
Started with pulling out a load of the old fluid out of the master cylinder to make thing a bit easier.
Ghetto bottle at the ready and the flushing could begin. Starting with passenger rear, being the furthest away from the master cylinder.
After doing the rear we cleaned out alot of the shit and things were looking much cleaner, there also a small amount of air in the system which is interesting, irrelevant though. Once that was done it was time to turn to the fronts. To my extreme frustration the previous owner, whether it was a workshop or him, managed to make the bleed nipple into a vertically perfect circle on both sides. So for now that’s going to be for flushing and that also means I won’t be able to do the braided lines either. Oh well, Benny has got a set for me that he is sending first thing on Monday so it’s not the biggest problem.
At least in the meantime I can get the pads and rotors sorted.
Line disconnected from coilovers.
Caliper off.
The guide-pins were removed so they could get a proper clean with some new silicon paste applied.
Pads could then come off, more meat them I thought left on them.
Caliper mounting bracket was next.
Rotor could then come off, man so happy to see these RDA’s go, they were so badly warped it’s insane.
The hub got a good sanding and a healthy does of copper anti-seise.
Rotors on.
Before the caliper could go back on the pistons needed a good clean. I was happy to see the pistons were in decent shape, no splits.
Better.
Then wound back.
Pads could then go in and done.
The other side could then be done.
It was then time to tackle the rear. These seemed to really be on their last leg, even cracking in some places.
First thing was this arm, it needed to move out the way to make the access to bit easier to the calliper bolts.
I also removed on of the end-links to get a big of movement out of the rear swaybar, Subaru don't make access easy.
Calliper then removed.
The old rotor did not want to come off but with the help of a mallet and a bolt eventually it came loose.
Handbrake shoes seem to be ok for now, they've done their job up until this point so they'll be fine for now.
The hub and dust shields then got a bit of a clean.
The old pads didn't have much left on them.
The guide-pins could then be removed and cleaned and regreased.
Rotors were then cleaned, doing my best to keep as much of the black paint on.
Hubs were the greased and the rotor went on.
Before winding back it got a clean.
Then wound back.
Pads in and caliper on.
Rinse and repeat for the other side.
Last edited by applegeek897 on Fri May 25, 2018 6:12 pm, edited 1 time in total.
Daily: '00 Daihatsu Cuore "Kelly" - Build Thread -
Project / Weekender: '05 Subaru Liberty 3.0R-B Wagon - Build Thread -
Motorcycle: '14 Triumph Street Triple 660 - Build Thread -
Project / Weekender: '05 Subaru Liberty 3.0R-B Wagon - Build Thread -
Motorcycle: '14 Triumph Street Triple 660 - Build Thread -
-
applegeek897 - Posts: 246
- Joined: Sun Jun 07, 2015 1:02 am
- Location: Sydney, NSW
- Car: 05' 3R-B Wagon, 00' Daihatsu Cuore
- Real name: James
- Profile URL: viewtopic.php?f=10&t=31247
Re: Member Profile - James' H6 Wagon - SKD55S
![]() by applegeek897 » Wed Oct 04, 2017 1:49 pm
by applegeek897 » Wed Oct 04, 2017 1:49 pm
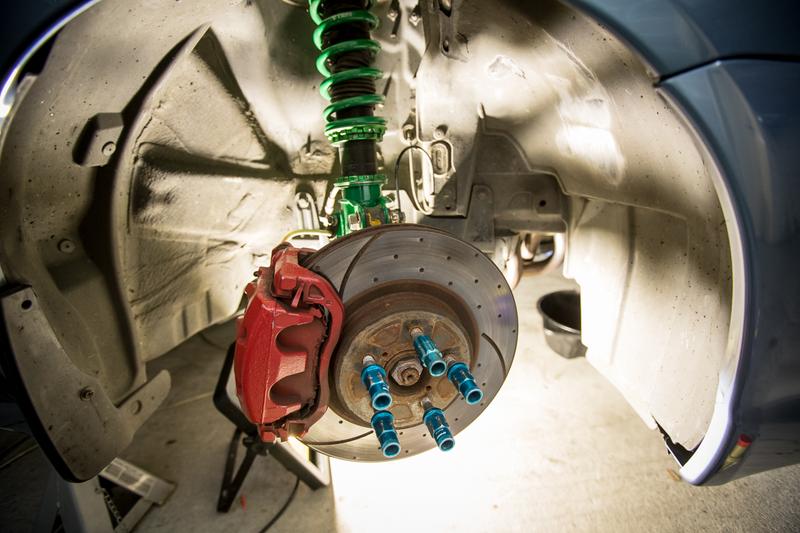
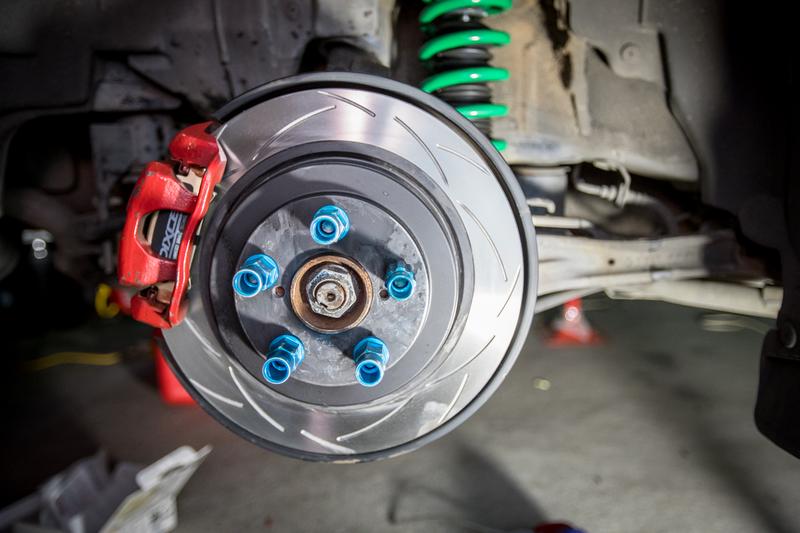
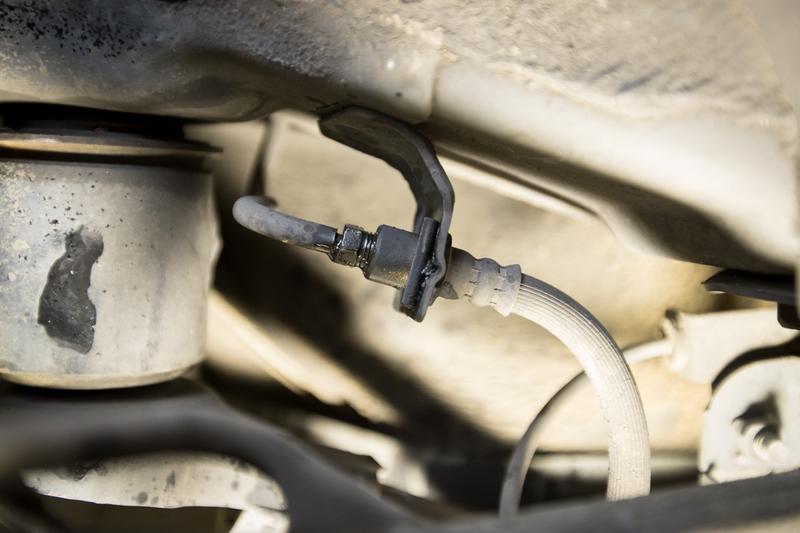
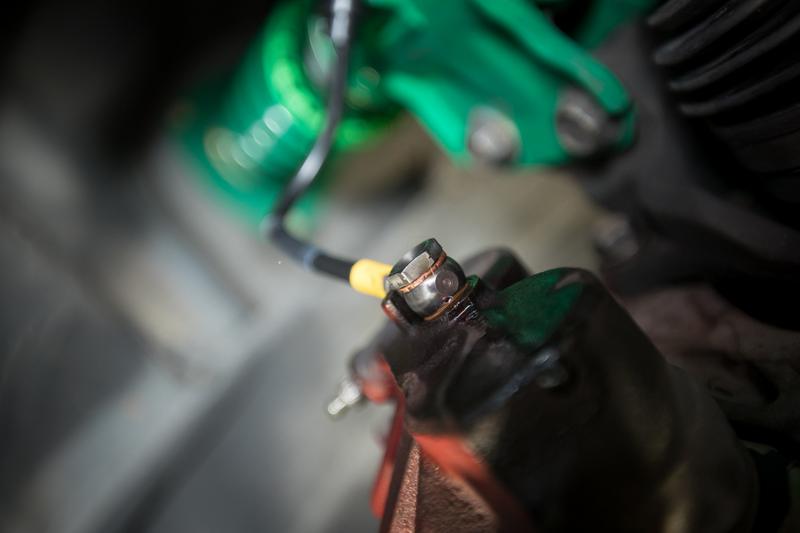
October 2017: I finally got a chance to attack the brake lines today. Starting with the rear.
They came out easier then I thought, out with the old and in with the new. The braided lines were a fair bit longer then the original.
And in they went.
Then the caliper side could come out.

Rinse and repeat for the other side.
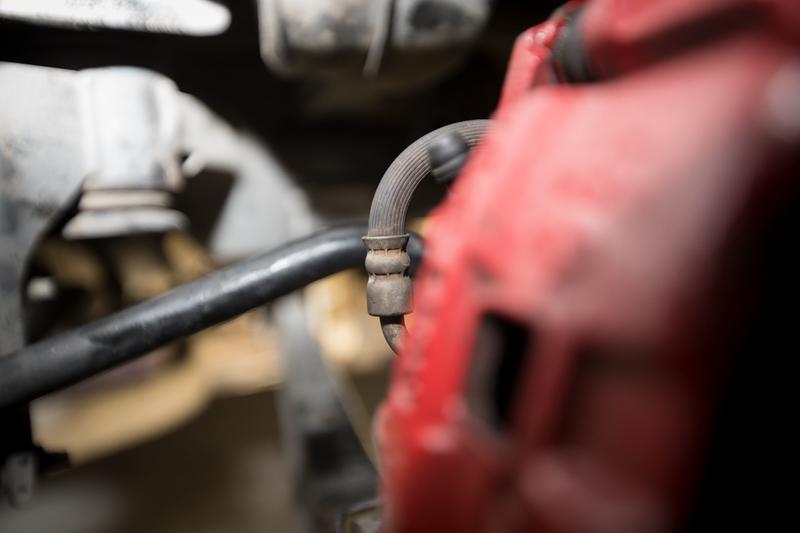
BCW had a set of used bleeders on hand to replace the completely rooted ones on the front brakes.
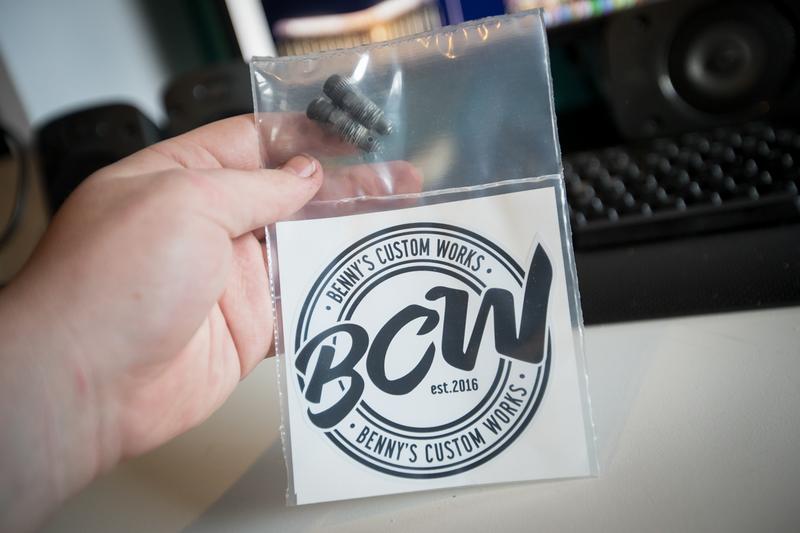
With the help of some vice grips I was able to get the old ones out.
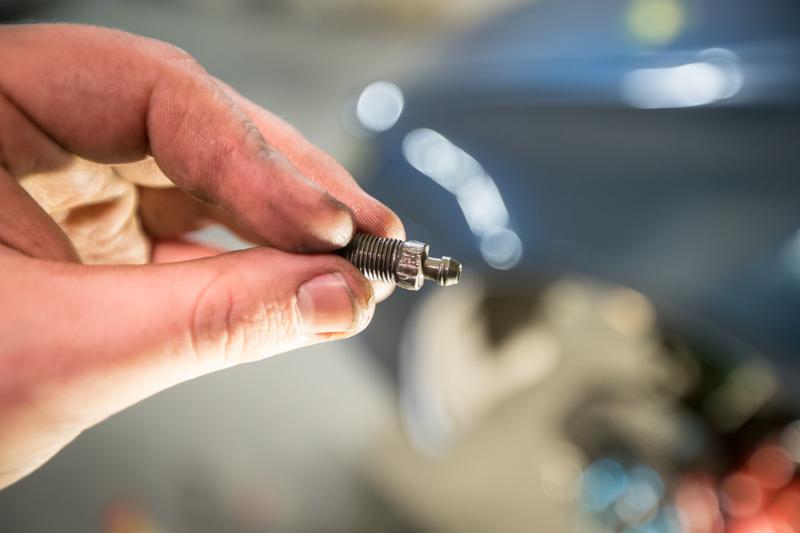
This was again pretty quick and easy, old STI lines out.
And the new lines in.
Brakes were then bled and I could finally get the car off the stands. They already feel great but they need a chance bed in still, so easy driving for a few hundred k's.
They came out easier then I thought, out with the old and in with the new. The braided lines were a fair bit longer then the original.
And in they went.
Then the caliper side could come out.
Rinse and repeat for the other side.
BCW had a set of used bleeders on hand to replace the completely rooted ones on the front brakes.
With the help of some vice grips I was able to get the old ones out.
This was again pretty quick and easy, old STI lines out.
And the new lines in.
Brakes were then bled and I could finally get the car off the stands. They already feel great but they need a chance bed in still, so easy driving for a few hundred k's.
Last edited by applegeek897 on Fri May 25, 2018 6:19 pm, edited 1 time in total.
Daily: '00 Daihatsu Cuore "Kelly" - Build Thread -
Project / Weekender: '05 Subaru Liberty 3.0R-B Wagon - Build Thread -
Motorcycle: '14 Triumph Street Triple 660 - Build Thread -
Project / Weekender: '05 Subaru Liberty 3.0R-B Wagon - Build Thread -
Motorcycle: '14 Triumph Street Triple 660 - Build Thread -
-
applegeek897 - Posts: 246
- Joined: Sun Jun 07, 2015 1:02 am
- Location: Sydney, NSW
- Car: 05' 3R-B Wagon, 00' Daihatsu Cuore
- Real name: James
- Profile URL: viewtopic.php?f=10&t=31247
Re: Member Profile - James' H6 Wagon - SKD55S
![]() by Moderate » Thu Oct 05, 2017 5:15 pm
by Moderate » Thu Oct 05, 2017 5:15 pm
Holy photo-documentation Batman. Love how thorough you are with the photographs. I tend to get too carried away to remember to shoot what I'm doing.
Quick question about the door-to-chassis wiring grommets. Is there a trick to prying them out besides brute force? I'm not looking forward to trying to push speaker wire through the S bend, and seeing how you had one end of the tube popped out that would actually be a very good way to go about it.
Quick question about the door-to-chassis wiring grommets. Is there a trick to prying them out besides brute force? I'm not looking forward to trying to push speaker wire through the S bend, and seeing how you had one end of the tube popped out that would actually be a very good way to go about it.
'05 Urban Grey 3.0R Spec B 6MT
-
Moderate - Posts: 10
- Joined: Thu Apr 28, 2016 4:09 pm
- Location: Victoria
- Real name: Anthony
Re: Member Profile - James' H6 Wagon - SKD55S
![]() by applegeek897 » Fri Oct 06, 2017 9:54 am
by applegeek897 » Fri Oct 06, 2017 9:54 am
Moderate wrote:Holy photo-documentation Batman. Love how thorough you are with the photographs. I tend to get too carried away to remember to shoot what I'm doing.
Quick question about the door-to-chassis wiring grommets. Is there a trick to prying them out besides brute force? I'm not looking forward to trying to push speaker wire through the S bend, and seeing how you had one end of the tube popped out that would actually be a very good way to go about it.
Haha thanks man, gives me an excuse to shoot something for myself for once.
In regards to the gromets, they will need a little bit of force but it's best to push on the actual lip rather then pulling from the middle part of the rubber as it's much thinner and more likely to brake. I used the tube as it was what I had lying around, but it did wonders. Needed some lube though, that was the main help.
Daily: '00 Daihatsu Cuore "Kelly" - Build Thread -
Project / Weekender: '05 Subaru Liberty 3.0R-B Wagon - Build Thread -
Motorcycle: '14 Triumph Street Triple 660 - Build Thread -
Project / Weekender: '05 Subaru Liberty 3.0R-B Wagon - Build Thread -
Motorcycle: '14 Triumph Street Triple 660 - Build Thread -
-
applegeek897 - Posts: 246
- Joined: Sun Jun 07, 2015 1:02 am
- Location: Sydney, NSW
- Car: 05' 3R-B Wagon, 00' Daihatsu Cuore
- Real name: James
- Profile URL: viewtopic.php?f=10&t=31247
Re: Member Profile - James' H6 Wagon - SKD55S
![]() by applegeek897 » Sat Oct 28, 2017 5:05 pm
by applegeek897 » Sat Oct 28, 2017 5:05 pm
October 2017: So here is finally the basically completed audio setup.
First thing after some testing it was to secure the amp to the carpet. I considered making some sort of bracket but good and strong velcro seemed to work for the old one so it would do fine.
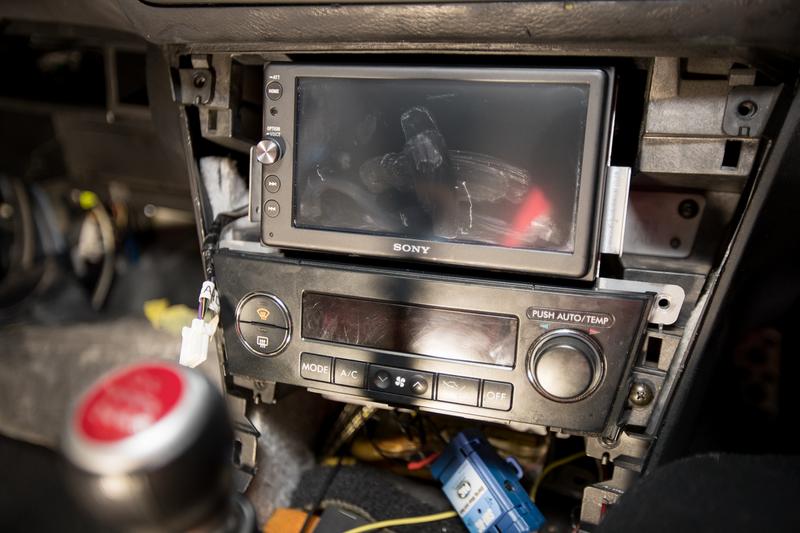
With all the bulk of wiring done the front half of the car could go back together. Starting with the glovebox.
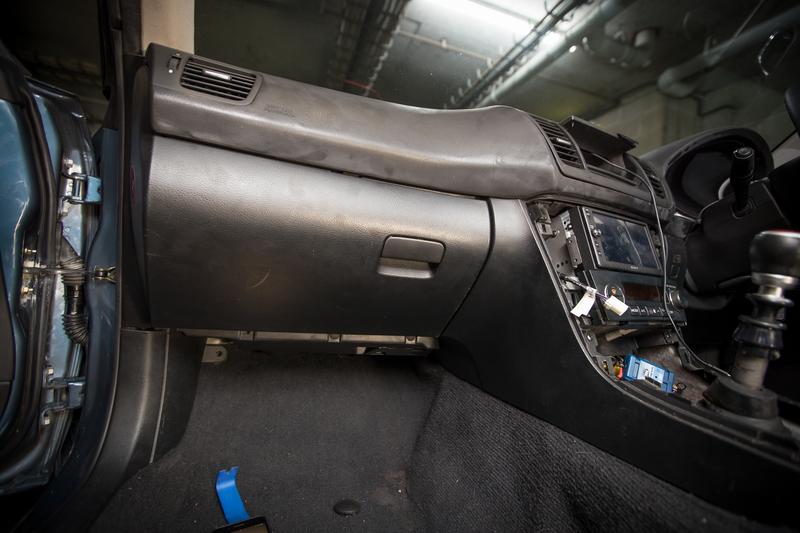
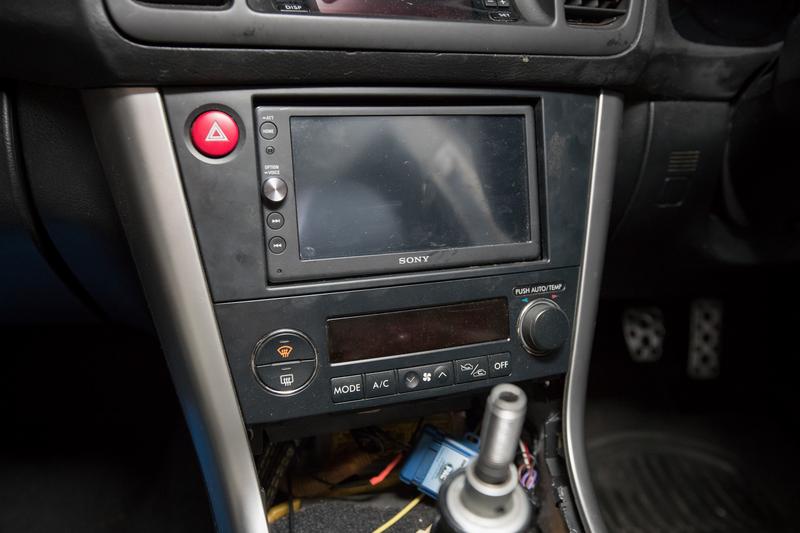
Headunit and HVAC.
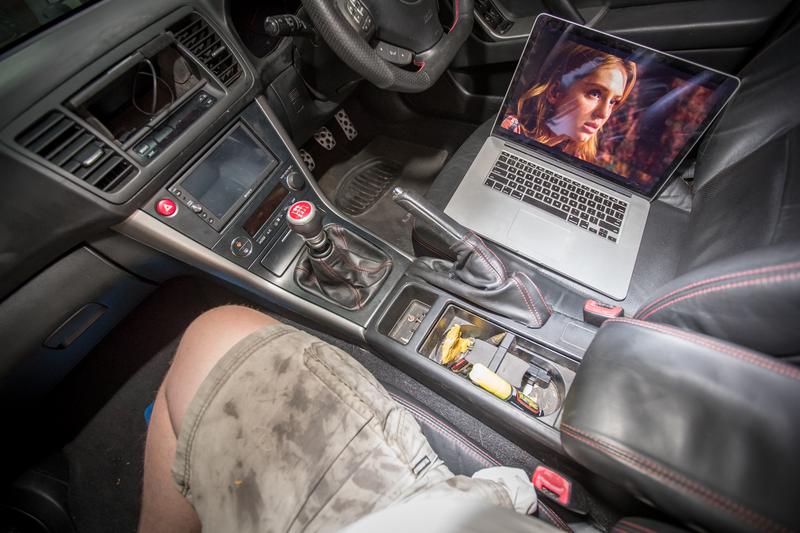
Shifter and centre console.

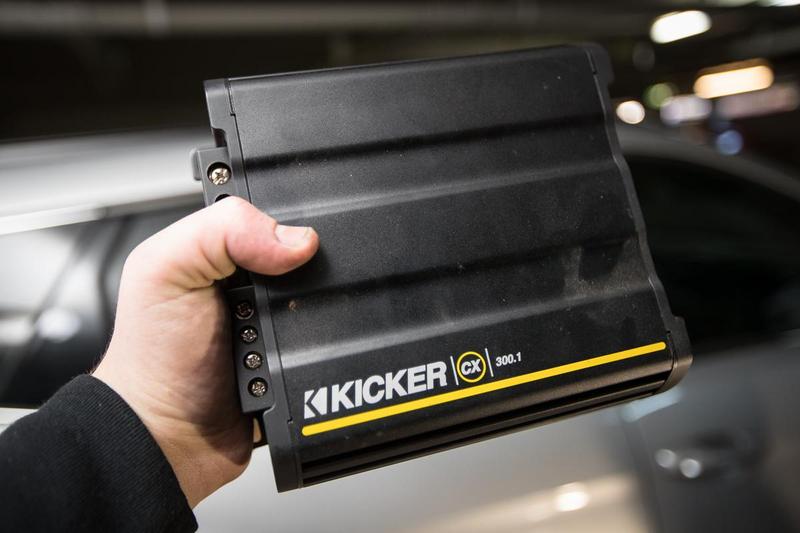
Once that was all done I moved into the boot to tackle the subwoofer. The car already had an aftermarket low-profile 8" kicker unit.
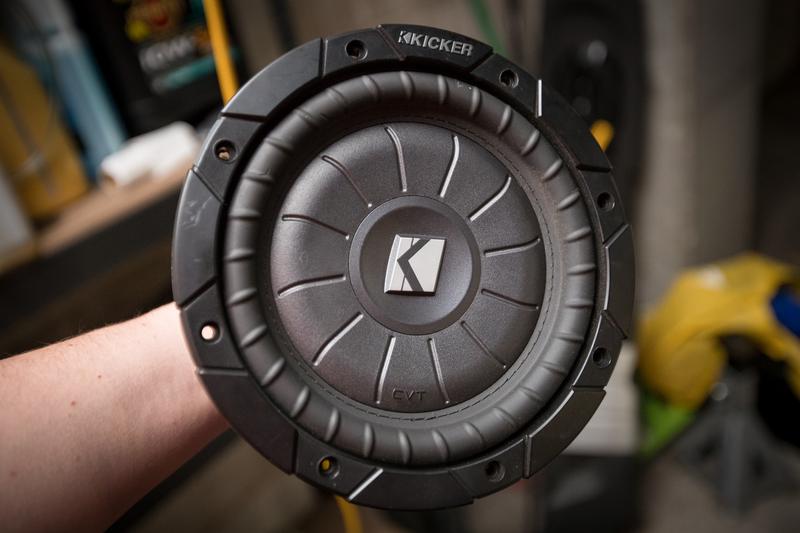
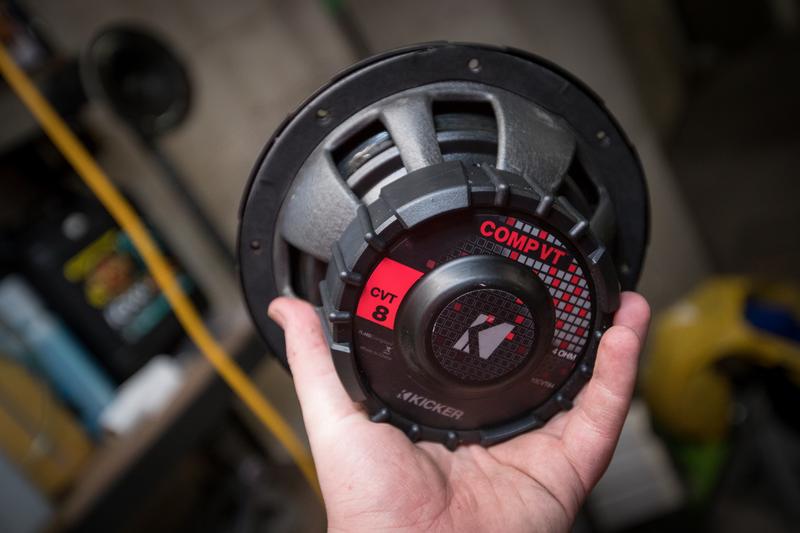
While it wasn't anything special it is better then stock and I thought I'll keep it for now. In the past I've had the sub on -3 at-least due to the horrendous rattle. Another thing I wonder how it was able to leave a factory with such a design flaw by Subaru. So that was the first thing to sort out.
Three layers later and it went in.
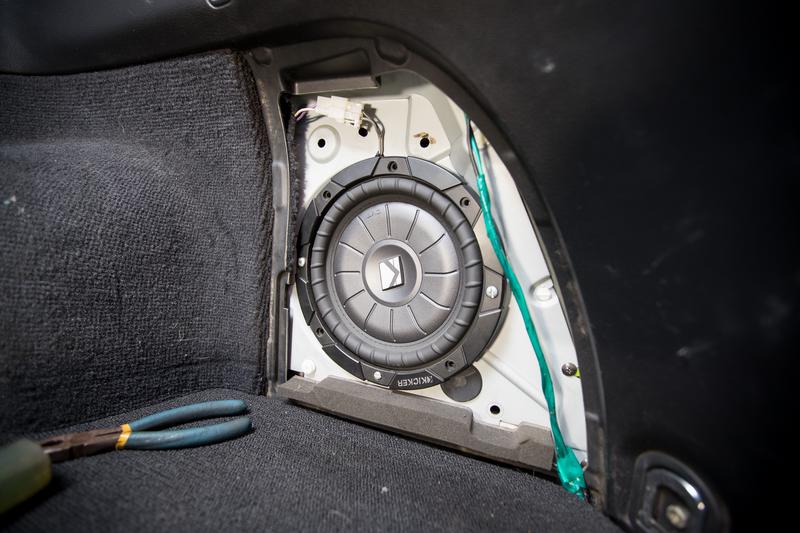
And after a quick test, it still sounded like utter shit. I had to sub from the daily out so I thought I'd quickly throw it in and give it ago. So much better. So for now that'll stay until a more permanent solution can be made. Likely just a new box and a wiring fix-up.
Moving onto the rear doors. Door cards off.
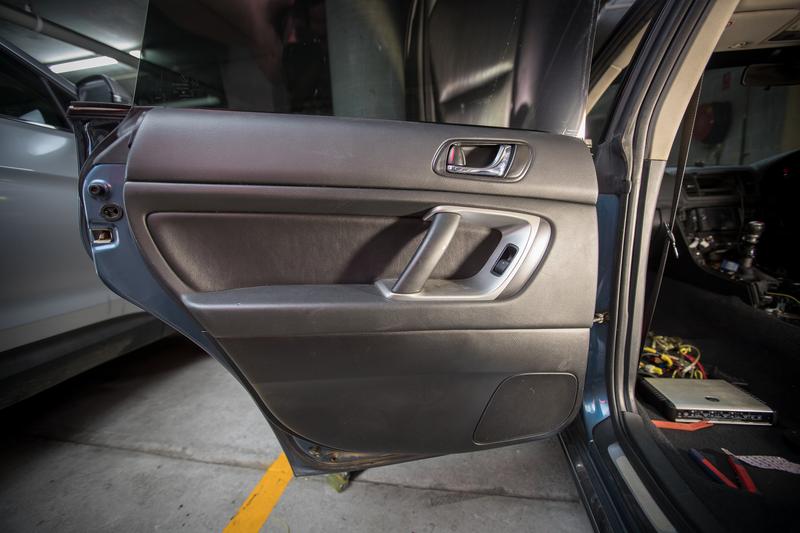
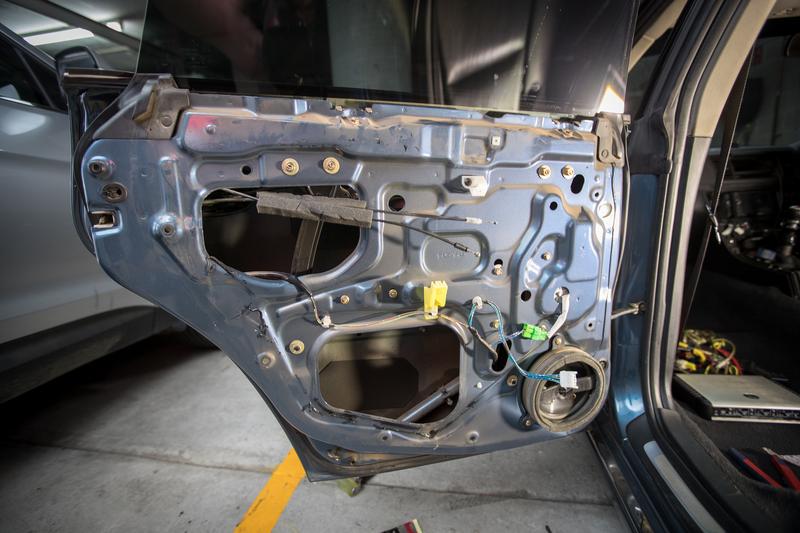
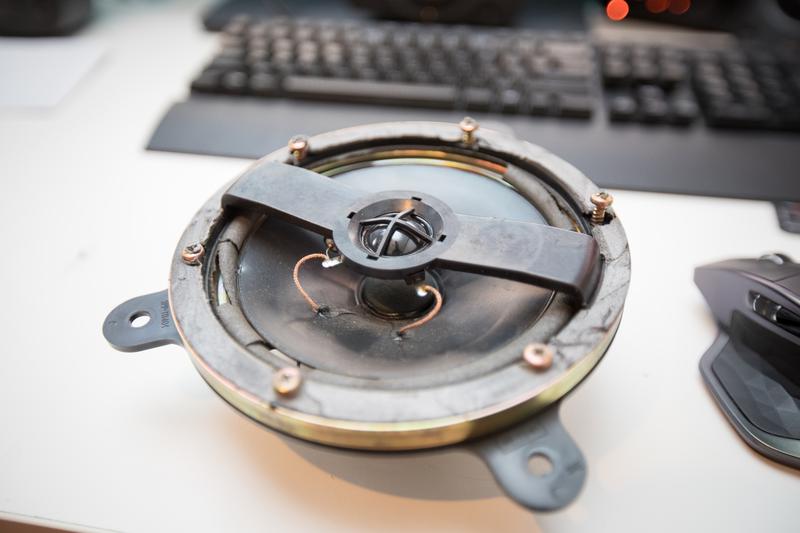
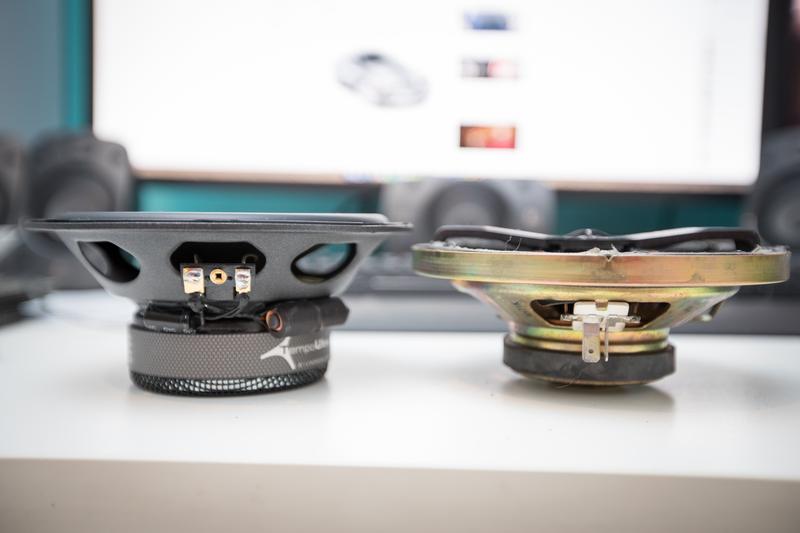
The old and very tired two way could then come out.

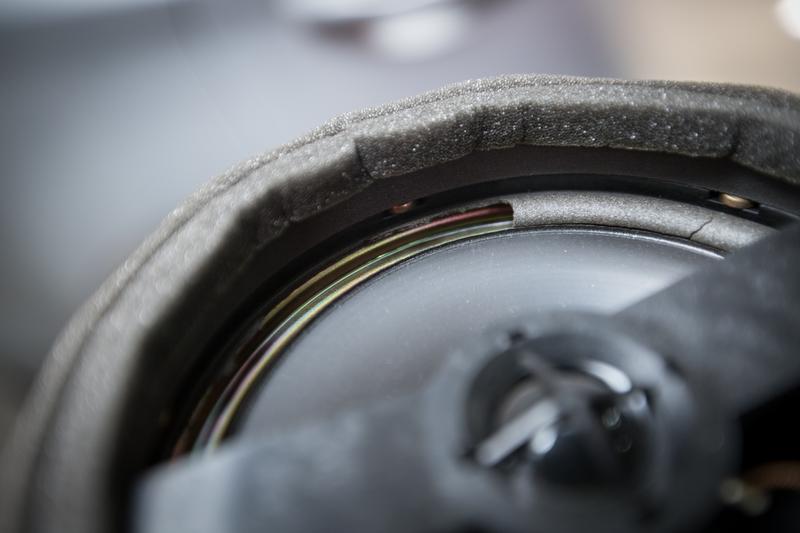
Such a big difference.
MDF mount mocked and made.
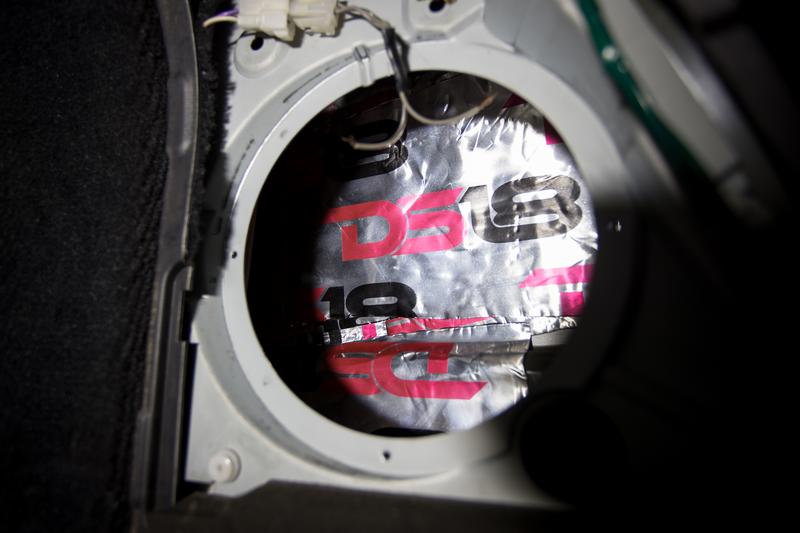
Before they went in the door got a clean and healthy dose of DS18.
Then the connectors could be crimped one, factory wires for the rears.
Then they could go in and after a very quick tune, the entire system already sounds epic. Certainly more tuning to do though. They got a very good testing on a big trip to and from Phillip Island for the MotoGP. Car was so nice to drive for it, although alignment is without question out on the rear, something to sort out for sure.
It was bug galore up front. Time for a good wash.

Ah much better.
First thing after some testing it was to secure the amp to the carpet. I considered making some sort of bracket but good and strong velcro seemed to work for the old one so it would do fine.
With all the bulk of wiring done the front half of the car could go back together. Starting with the glovebox.
Headunit and HVAC.
Shifter and centre console.
Once that was all done I moved into the boot to tackle the subwoofer. The car already had an aftermarket low-profile 8" kicker unit.
While it wasn't anything special it is better then stock and I thought I'll keep it for now. In the past I've had the sub on -3 at-least due to the horrendous rattle. Another thing I wonder how it was able to leave a factory with such a design flaw by Subaru. So that was the first thing to sort out.
Three layers later and it went in.
And after a quick test, it still sounded like utter shit. I had to sub from the daily out so I thought I'd quickly throw it in and give it ago. So much better. So for now that'll stay until a more permanent solution can be made. Likely just a new box and a wiring fix-up.
Moving onto the rear doors. Door cards off.
The old and very tired two way could then come out.
Such a big difference.
MDF mount mocked and made.
Before they went in the door got a clean and healthy dose of DS18.
Then the connectors could be crimped one, factory wires for the rears.
Then they could go in and after a very quick tune, the entire system already sounds epic. Certainly more tuning to do though. They got a very good testing on a big trip to and from Phillip Island for the MotoGP. Car was so nice to drive for it, although alignment is without question out on the rear, something to sort out for sure.
It was bug galore up front. Time for a good wash.
Ah much better.
Last edited by applegeek897 on Fri May 25, 2018 6:24 pm, edited 1 time in total.
Daily: '00 Daihatsu Cuore "Kelly" - Build Thread -
Project / Weekender: '05 Subaru Liberty 3.0R-B Wagon - Build Thread -
Motorcycle: '14 Triumph Street Triple 660 - Build Thread -
Project / Weekender: '05 Subaru Liberty 3.0R-B Wagon - Build Thread -
Motorcycle: '14 Triumph Street Triple 660 - Build Thread -
-
applegeek897 - Posts: 246
- Joined: Sun Jun 07, 2015 1:02 am
- Location: Sydney, NSW
- Car: 05' 3R-B Wagon, 00' Daihatsu Cuore
- Real name: James
- Profile URL: viewtopic.php?f=10&t=31247
Re: Member Profile - James' H6 Wagon - SKD55S
![]() by applegeek897 » Tue Oct 31, 2017 9:22 pm
by applegeek897 » Tue Oct 31, 2017 9:22 pm
October 2017: While things have been going fairly well on the Subaru lately it seemed it was time for another shit show. This time thanks to Suttons Subaru Rosebery. Now, while what happened happened, the manager completely sorted it out. More below.
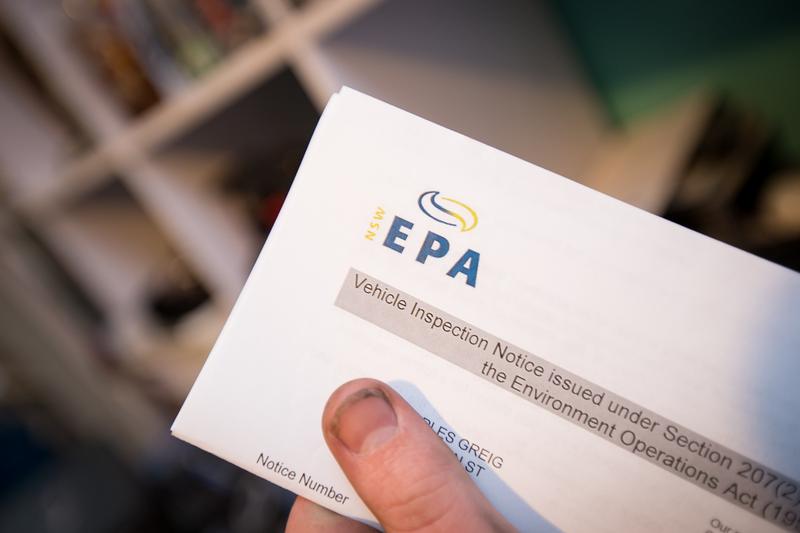
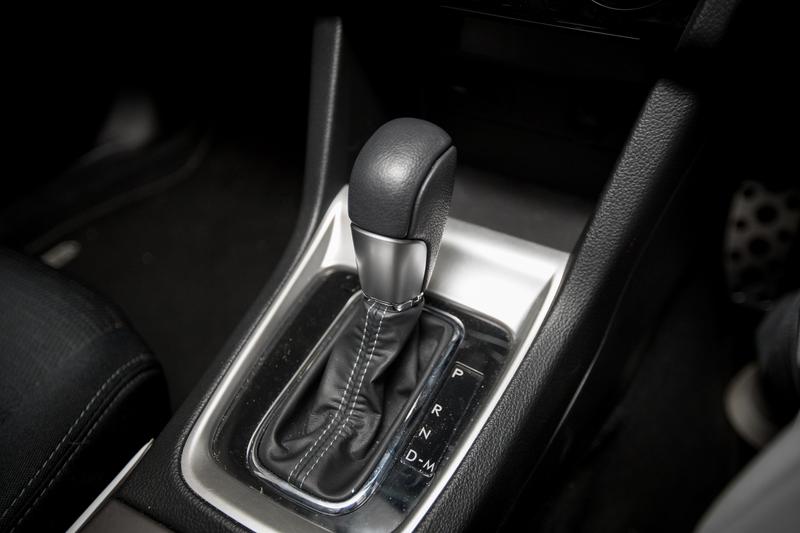
So, after months of saying I was going to do it and finally receiving my third letter for the airbag replacement it was finally time to get it done. Suttons Subaru Rosebery is my most local dealer so that's where is was to go. I was surprised as I was able to get in just days after calling as someone apparently cancelled. So in it went, I gave the car to them for two full days, I begged for them to take their time and be careful, 'yes sir of-course'. When it was ready to pick up I jumped in the car and straight away I saw it all. It was trashed. First thing I noticed was the shifter surround was cracked straight through.
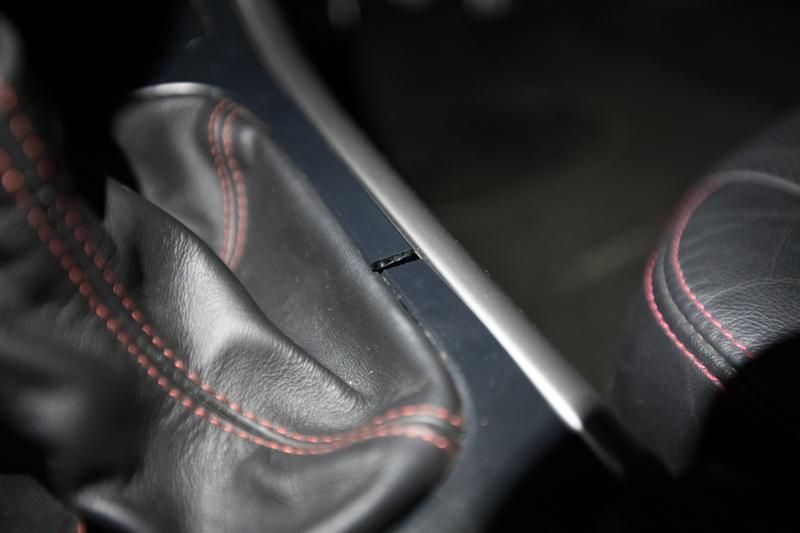
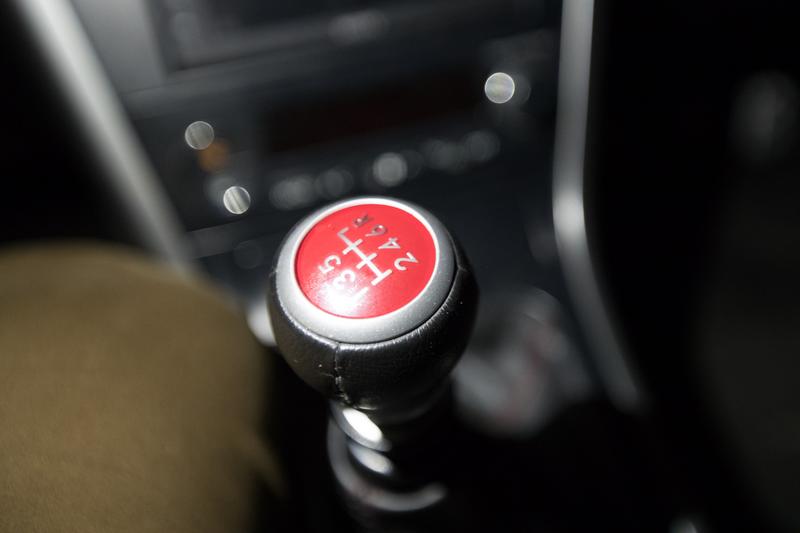
The gear knob wasn't even on straight, legit, this is how I got it back.
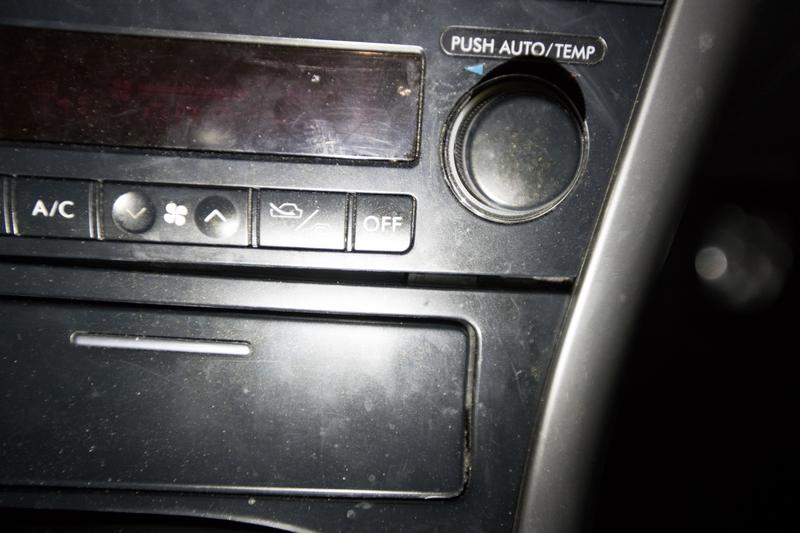
Shifter surround wasn't lined up with HVAC controls.
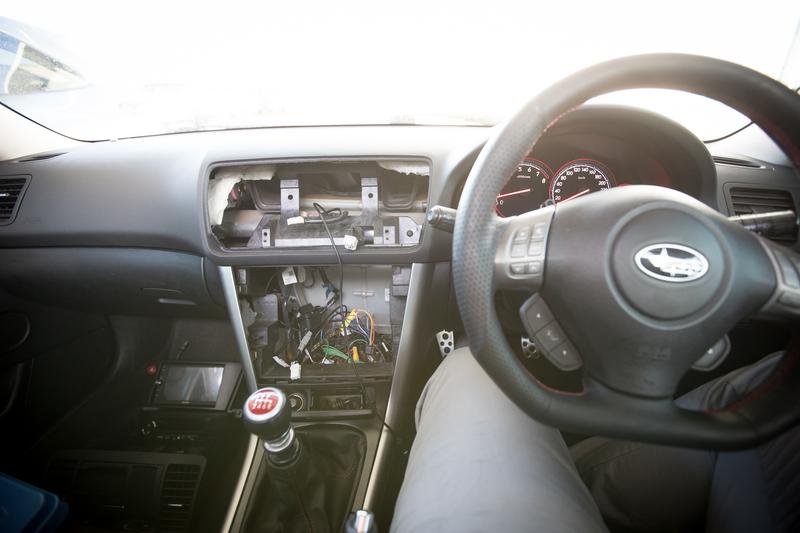
Drivers side a pillar was hanging like this.
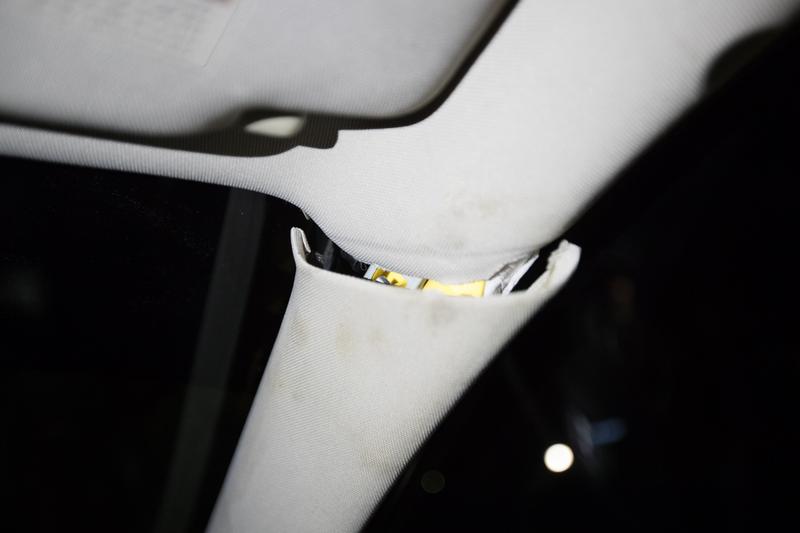
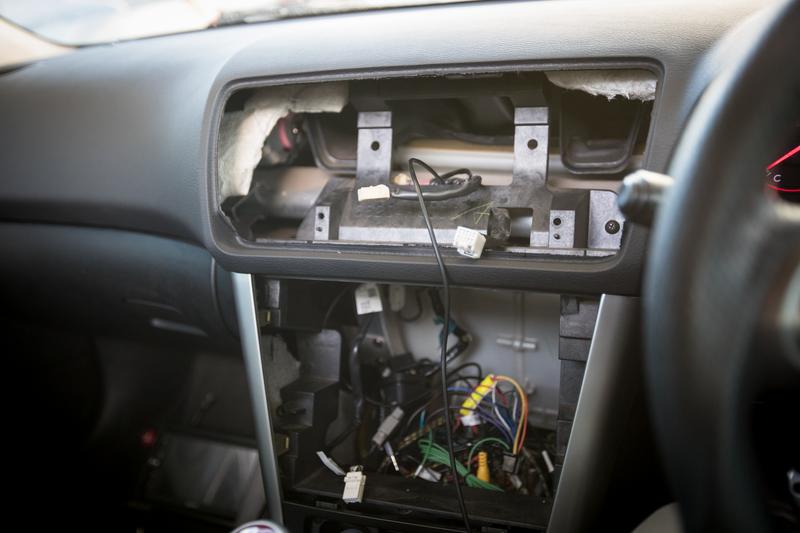
But nothing was as bad as the dash. Now by no means was my dash in perfect condition, but damn. They did a number on it.
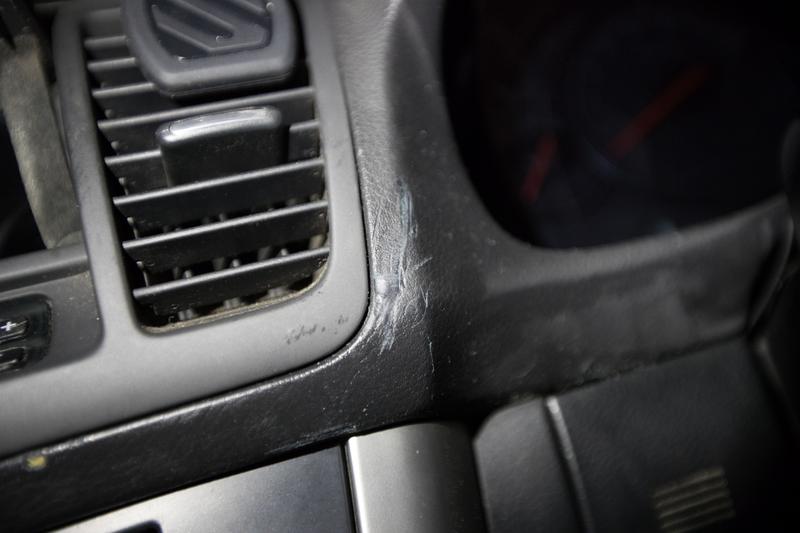
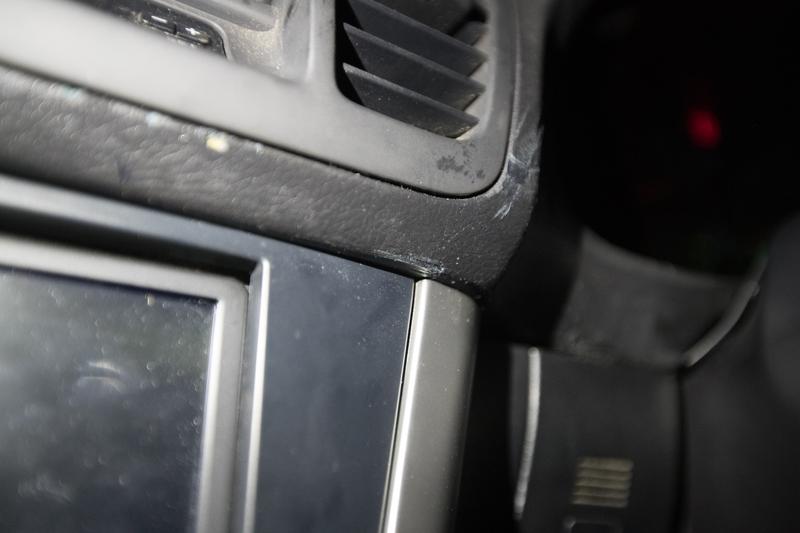
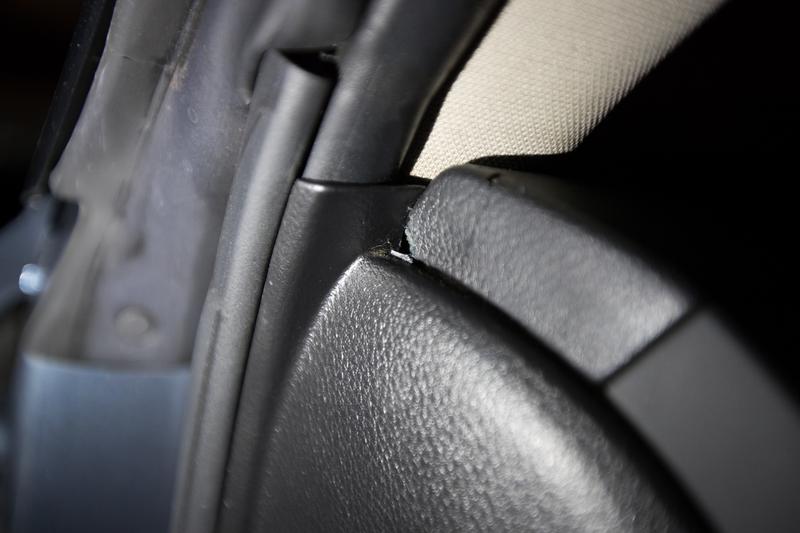
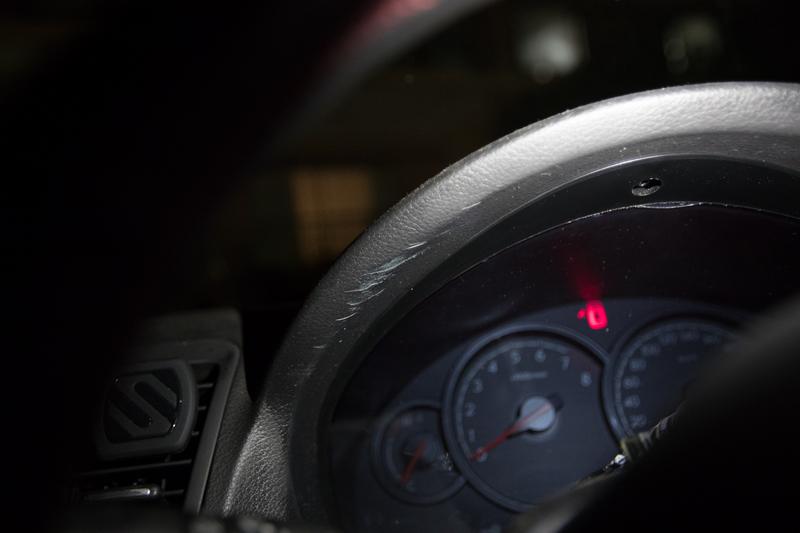
Once I saw all this I flew back into the office and called the manager over. He was furious at the whole ordeal and agreed to have everything sorted out. A dash replacement was approved by Subaru Australia as well as all the damaged bits and pieces.
I dropped past the dealership again yesterday to have the dash done. I was surprised to have a Levorg waiting for me to have as a loaner. It's a great car, but man. The CVT is horrific. I don't know what they were thinking there.

Anyway, I picked up the car and everything looks good, I requested the cubby and headunit to stay out as I have replacements for both anyway, cubby I got from a wreck and they're paying for a brand new headunit after scratching it too.
So at the end it kinda turned out good at least. Except the car seems to have developed some sort of clunk noise on decel, plus what sounds like something suspension related. Could be so many things. I'll do a service in the next couple of days and see if I can track down that noise. It never ends.
So, after months of saying I was going to do it and finally receiving my third letter for the airbag replacement it was finally time to get it done. Suttons Subaru Rosebery is my most local dealer so that's where is was to go. I was surprised as I was able to get in just days after calling as someone apparently cancelled. So in it went, I gave the car to them for two full days, I begged for them to take their time and be careful, 'yes sir of-course'. When it was ready to pick up I jumped in the car and straight away I saw it all. It was trashed. First thing I noticed was the shifter surround was cracked straight through.
The gear knob wasn't even on straight, legit, this is how I got it back.
Shifter surround wasn't lined up with HVAC controls.
Drivers side a pillar was hanging like this.
But nothing was as bad as the dash. Now by no means was my dash in perfect condition, but damn. They did a number on it.
Once I saw all this I flew back into the office and called the manager over. He was furious at the whole ordeal and agreed to have everything sorted out. A dash replacement was approved by Subaru Australia as well as all the damaged bits and pieces.
I dropped past the dealership again yesterday to have the dash done. I was surprised to have a Levorg waiting for me to have as a loaner. It's a great car, but man. The CVT is horrific. I don't know what they were thinking there.
Anyway, I picked up the car and everything looks good, I requested the cubby and headunit to stay out as I have replacements for both anyway, cubby I got from a wreck and they're paying for a brand new headunit after scratching it too.
So at the end it kinda turned out good at least. Except the car seems to have developed some sort of clunk noise on decel, plus what sounds like something suspension related. Could be so many things. I'll do a service in the next couple of days and see if I can track down that noise. It never ends.
Last edited by applegeek897 on Fri May 25, 2018 6:26 pm, edited 1 time in total.
Daily: '00 Daihatsu Cuore "Kelly" - Build Thread -
Project / Weekender: '05 Subaru Liberty 3.0R-B Wagon - Build Thread -
Motorcycle: '14 Triumph Street Triple 660 - Build Thread -
Project / Weekender: '05 Subaru Liberty 3.0R-B Wagon - Build Thread -
Motorcycle: '14 Triumph Street Triple 660 - Build Thread -
-
applegeek897 - Posts: 246
- Joined: Sun Jun 07, 2015 1:02 am
- Location: Sydney, NSW
- Car: 05' 3R-B Wagon, 00' Daihatsu Cuore
- Real name: James
- Profile URL: viewtopic.php?f=10&t=31247
Who is online
Users browsing this forum: No registered users and 38 guests