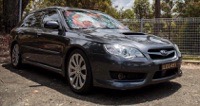
Ok guys after expansive searches and research,I have found a few options exist for aftermarket conversions for wagons but NOT the sedan,so ha gone down this path of my own build.
Things I found you will need for this are;
[*]Patience
[*]Spare set of light housings(unless you plan not driving a while).
[*]Rotary cutting Tool(Eg Dremel or similar.
[*]Flat head screwdriver med - small sized
[*]Protective Glases
[*]LED EL Wire 3 colours Red, Amber, White.
[*]Transformers 12v 5w (1 per connection)
[*]Soldering Iron & Solder
[*]Electrical tape & Heat Shrink
[*]Red LED Halo (optional)
[*]Rubber Butyl silicone tube style
Step 1;
Remove all light wiring harness from housing, and slowly begin to cut light housing along glue seams.
My personal choice was to use thin Dremel Cutting Discs for this, Eye protection on and maybe even dust mask
See below;
Note that top side of housing has an extra lip which needed cutting away to access glue seam.
At bottom of housing post fl gen 4 has mounting points for chrome strip I found best to angle at the seam below without
removing too much mounting support.
STEP 2;
Gently attempt to crack the seal with a smallish flat head screw driver, continuing slowly along one seam at a time, it it does not separate do not force or you may crack Lense, best to gently dremel cut a little deeper, see below.
STEP 3;
Measure with LED EL Wire length of area you wish to design with blue tac and allow extra for placing through housing holes drilled at suitable locations to your design for wiring up, see Below;
STEP 4;
Use Hot Glue gun to dab into place EL LED wire & Halo ( If Desired) See Below;
STEP 5;
Seal by using Butyl Mastic along housing where Cut, than place lense on andvise to leave to dry fora few days for best result, i chose to use good electrical tape to assist with pressure for best effect see Below;
STEP 6;
Attach male wiring connectors to EL Wire see You Tube Tutorial, link https://youtu.be/2XTTH-O4s-E
Then attach Transformers 5w-12V then connect to appropriate wiring connection on lighting harness.
Custom Tail Light Build (Gen 4 Sedan)
3 posts
• Page 1 of 1
Custom Tail Light Build (Gen 4 Sedan)
Last edited by LEG45Y on Wed Apr 01, 2015 3:26 pm, edited 1 time in total.
-

LEG45Y - Posts: 67
- Joined: Mon May 12, 2014 9:54 pm
- Location: Sydney (North Shore)
Re: Custom Tail Light Build (Gen 4 Sedan)
See Below Connector Examples;
See Below Transformer and testing light prior to soldering into Harness;
The Finished Product
See Below Transformer and testing light prior to soldering into Harness;
The Finished Product
Last edited by LEG45Y on Wed Apr 01, 2015 3:09 pm, edited 1 time in total.
-

LEG45Y - Posts: 67
- Joined: Mon May 12, 2014 9:54 pm
- Location: Sydney (North Shore)
Re: Custom Tail Light Build (Gen 4 Sedan)
Can an Admin here please move this post to viewforum.php?f=12 area.
-

LEG45Y - Posts: 67
- Joined: Mon May 12, 2014 9:54 pm
- Location: Sydney (North Shore)
3 posts
• Page 1 of 1
Who is online
Users browsing this forum: No registered users and 18 guests
