
Australian Liberty Owners Club
Member Profile: HyRax
Re: Member Profile: HyRax
![]() by cooki_monsta » Tue Feb 26, 2013 6:56 pm
by cooki_monsta » Tue Feb 26, 2013 6:56 pm
Can't wait til you sort your suspension upgrade out! I'm curious to know how your car will sit with your wheel fitment!
Philips 4000 K Bulbs / Alpine ICS-X7 Mobile Media Station / Pioneer 2-Way Component Speakers and 2-Way Coaxial Speakers / Exedy Heavy Duty Clutch with Single Mass Flywheel / XForce Mufflers / Tein Street Flex Coil-Overs / Subaru 17x8J +53 mm Wheels with 235/40R17 Dunlop SP Sport 01 Tires / Cusco Rear Sway Bar, End Links, and Brackets / DBA T2 Brake Rotors / Project Mu NS Brake Pads
http://web.stagram.com/n/cooki_monsta/
http://web.stagram.com/n/cooki_monsta/
-
cooki_monsta - Posts: 216
- Joined: Thu Sep 06, 2012 9:38 pm
- Location: South East Melbourne
- Car: MY05 BL9 > MY08 Z33
- Real name: Alister
- Profile URL: http://web.stagram.com/n/cooki_monsta/
Re: Member Profile: HyRax
![]() by HyRax » Tue Feb 26, 2013 11:24 pm
by HyRax » Tue Feb 26, 2013 11:24 pm
I'm curious too, but it will have to wait for now. All of life's other expenses are getting in the way first (gotta do my rego and greenslip this week!)... 
The only new thing on the car since I last posted was that I finally got around to installing a Cusco Master Brake Cylinder brace. Certainly stiffens up the pedal - it has pretty much zero free play now and feels very solid under the right masher. No more firewall flex!
The only new thing on the car since I last posted was that I finally got around to installing a Cusco Master Brake Cylinder brace. Certainly stiffens up the pedal - it has pretty much zero free play now and feels very solid under the right masher. No more firewall flex!
I was going to procrastinate, but I put it off...
-

HyRax - Posts: 1202
- Joined: Sat Jul 30, 2011 12:25 am
- Location: Sydney
- Car: ADM MY19 3.6R Outback
- Real name: Jeff
- Profile URL: viewtopic.php?f=10&t=15482
Re: Member Profile: HyRax
![]() by HyRax » Sun May 12, 2013 9:31 pm
by HyRax » Sun May 12, 2013 9:31 pm
So, I noticed that Subaru Genuine Parts were selling the Gen4 factory Steering Wheel Controls cheaper than usual (just under AUD$124 after USD conversion including delivery), so I figured I'd finally get one of my biggest gripes of the interior fixed.
Arrived in just on two weeks and took less than 30 minutes to install, which was FAR easier than I expected, plug and play!
Kit:
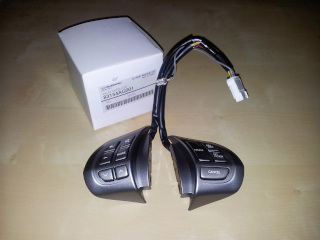
Click image for full size!
Before installation:
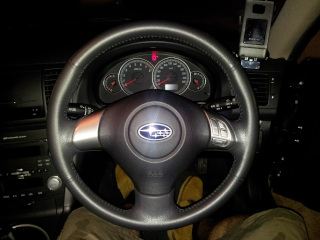
Click the image for full size!
After installation:
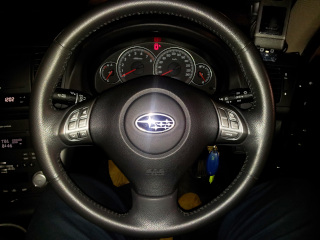
Click the image for full size!
A shot of both old and new controls:

Click the image for full size!
Much happier with the cosmetic steering wheel symmetry now and controlling the audio system is much simpler this way. The only annoying issue with the controls is that the up/down controls when in radio mode just seek frequencies instead of jumping between stored stations. Luckily I don't listen to the radio very often, so for controlling the CD side of things, it's great.
I was going to procrastinate, but I put it off...
-
HyRax - Posts: 1202
- Joined: Sat Jul 30, 2011 12:25 am
- Location: Sydney
- Car: ADM MY19 3.6R Outback
- Real name: Jeff
- Profile URL: viewtopic.php?f=10&t=15482
Re: Member Profile: HyRax
![]() by Corsair » Sun May 12, 2013 9:47 pm
by Corsair » Sun May 12, 2013 9:47 pm
Very envious. One of my biggest gripes also. Nice work and solid results!
I got this plan. It's called 'Save Ass'. And the way it works is this - I slip outta one of these windows and I run like a bastard!
-
Corsair - -stickered-
- Posts: 958
- Joined: Sun Sep 18, 2011 12:01 am
- Location: Melbourne
- Car: MY09 Liberty 2.5i
- Profile URL: viewtopic.php?f=10&t=15709
Re: Member Profile: HyRax
![]() by alessandro132 » Sun May 12, 2013 9:49 pm
by alessandro132 » Sun May 12, 2013 9:49 pm
HyRax wrote:The only annoying issue with the controls is that the up/down controls when in radio mode just seek frequencies instead of jumping between stored stations.
It's the same with the pre-facelift controls too
TEAM TOYOTA | TEAM HKS
Cusco, HPI, HKS, and a few other bits...
Cusco, HPI, HKS, and a few other bits...
-
alessandro132 - -stickered-
- Posts: 2380
- Joined: Wed Mar 21, 2012 8:40 am
- Location: Sydney
- Car: 2000 JZX100 Toyota Chaser Tourer V
- Real name: Al
- Profile URL: viewtopic.php?f=10&t=16914
Re: Member Profile: HyRax
![]() by HyRax » Sat Nov 23, 2013 3:15 pm
by HyRax » Sat Nov 23, 2013 3:15 pm
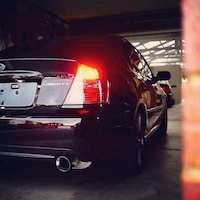
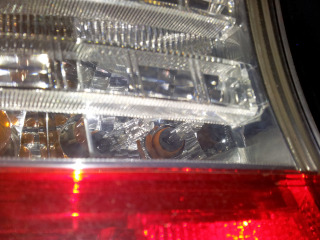
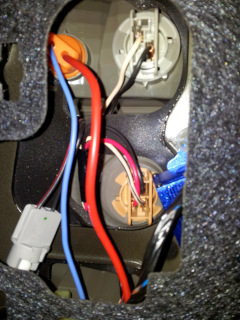
Haven't done a new mod for awhile and since noticing that the price of HID kits has dramatically dropped of late (Jaycar H7 kits are now only $50, with slimline 35w ballasts!), I decided to look at upgrading my reverse lights to HID, particularly as I've been spending an unusual amount of time parking in very dark places of late!
For some reason, reverse HID kits are more expensive than their front counterparts, but thankfully not by much. I found Max Vision Australia who list their stuff on FleaBay and obtained a 6,000K 15w HID universal kit with silicone socks that suit T10, T15, T20, T25 and S25 sockets for $87 plus delivery.
Click on the images for full size!
The ballast is simply mounted on one of the bolts that secures the taillight assembly (blue thing on the right of the middle image). The cables are looped below that and you can see the original globe socket (left of middle image) that is now connected to the ballast's input cable. Note that my camera phone has made the light in the night shot look more blue than it really is. To the naked eye it is very much white.
Took less than 20 minutes to install (because I spent 10 minutes of that figuring out how the universal silicone rubber bits were supposed to fit - it's very snug). In testing, full brightness is achieved in about 9-10 seconds but usable light is definitely attained in about 3 seconds.
The light spread is excellent and makes reversing in the dark that much easier. Standing behind the car at full brightness is not blinding either. Glary, but not blinding. During the day the reverse lights are also very visible but obviously with no glare.
Very happy.
For some reason, reverse HID kits are more expensive than their front counterparts, but thankfully not by much. I found Max Vision Australia who list their stuff on FleaBay and obtained a 6,000K 15w HID universal kit with silicone socks that suit T10, T15, T20, T25 and S25 sockets for $87 plus delivery.


Click on the images for full size!
The ballast is simply mounted on one of the bolts that secures the taillight assembly (blue thing on the right of the middle image). The cables are looped below that and you can see the original globe socket (left of middle image) that is now connected to the ballast's input cable. Note that my camera phone has made the light in the night shot look more blue than it really is. To the naked eye it is very much white.
Took less than 20 minutes to install (because I spent 10 minutes of that figuring out how the universal silicone rubber bits were supposed to fit - it's very snug). In testing, full brightness is achieved in about 9-10 seconds but usable light is definitely attained in about 3 seconds.
The light spread is excellent and makes reversing in the dark that much easier. Standing behind the car at full brightness is not blinding either. Glary, but not blinding. During the day the reverse lights are also very visible but obviously with no glare.
Very happy.
I was going to procrastinate, but I put it off...
-
HyRax - Posts: 1202
- Joined: Sat Jul 30, 2011 12:25 am
- Location: Sydney
- Car: ADM MY19 3.6R Outback
- Real name: Jeff
- Profile URL: viewtopic.php?f=10&t=15482
Re: Member Profile: HyRax
![]() by Corsair » Mon Nov 25, 2013 8:23 pm
by Corsair » Mon Nov 25, 2013 8:23 pm
Man that's bright! Looks good though. 
I got this plan. It's called 'Save Ass'. And the way it works is this - I slip outta one of these windows and I run like a bastard!
-
Corsair - -stickered-
- Posts: 958
- Joined: Sun Sep 18, 2011 12:01 am
- Location: Melbourne
- Car: MY09 Liberty 2.5i
- Profile URL: viewtopic.php?f=10&t=15709
Re: Member Profile: HyRax
![]() by bigBADbenny » Mon Nov 25, 2013 8:42 pm
by bigBADbenny » Mon Nov 25, 2013 8:42 pm
great tip, planning this for my wag, thanks!
-

bigBADbenny - Posts: 10486
- Joined: Tue Oct 04, 2011 6:36 pm
- Location: Collingwood, Melbourne
- Car: MY07 GT-B 6MT OBP Wagon
- Real name: Ben Richards
- Profile URL: http://tinyurl.com/agvbzop
Re: Member Profile: HyRax
![]() by HyRax » Sun Mar 02, 2014 2:08 am
by HyRax » Sun Mar 02, 2014 2:08 am
It's been a pretty busy February for me:
About a month ago I found that my cornering was starting to get all wishy-washy with the frontend feeling sloppier than usual. Turned out my lower control arm bushes were starting to go off. They weren't outright split, but damage was visible, so figured it was time to upgrade them. Replaced the front and rear bushes of the front lower control arm with the Whiteline KCA334 and Whiteline W0506 replacement bush kits respectively.
The KCA334 (also known as an "anti-lift kit") has made my handling and turn-in noticeably better. The front end feels much tighter and in fact feels like the suspension on a brand new car - I didn't think it would have made that much of a difference! As the moniker suggests, front lift of the car has been reduced under hard acceleration and when trying to deliberately provoke push-understeer around a tight corner, that has been reduced by a significant margin as well. Even in the wet, the car's cornering much more agile than before and the feedback you now feel in the wheel from the road is nothing short of marvellous now. The W0506 kit pretty much does nothing in the handling department, but while the control arms were out putting the KCA334 in, I figured I may as well replace the front bushes as well. It's a cheap kit so why not.
But like most mods, there is a downside. The KCA334 has removed a sizeable chunk of the "luxury ride" of the Liberty. The increase in NVH in the first couple of weeks of having it installed was enormous. Small bumps such as running over a simple cats-eye on the road now sound like you're dropping into a major pothole. While the physical bump is a little harsher, there's no real jarring experience, but the noise from the wheel is suitably boomy as it's no longer being absorbed by the rubber factory bush but instead being passed into the body of the car directly by the new polyurethane bush. I have not yet driven across noisy bitumen like you get on some country highways, but I can only imagine the drone that was already bad would only be worse.
But it's not all bad. It's now been nearly a month since having them installed and I have to say that I think the new bushes have gone through a settling-in process. Unless I've somehow gotten used to it, the NVH level has since reduced. Bumps are still louder than they used to be and certain bumps like speed bumps are still a little more physically, uh... bumpy than before, however the boomy noise factor appears to have taken itself a few decibels down a bit. I'm now very happy with how the car feels and the NVH increase I'm now experiencing is now far more acceptable than before. I highly recommend this upgrade to others.
No pics of the bushes since they're not really visually exciting.
Next up, a handful of cosmetic items:
Next major mod is likely to be coilovers and the next minor mod is likely to be an Android tablet installation to replace my temporary headunit installation, which replaces my originally proposed Linux-based CarPC project since Android has come so far now, and has so many apps available to make an in-car installation downright awesome that it would be a step backwards to go the way of an actual PC now.
About a month ago I found that my cornering was starting to get all wishy-washy with the frontend feeling sloppier than usual. Turned out my lower control arm bushes were starting to go off. They weren't outright split, but damage was visible, so figured it was time to upgrade them. Replaced the front and rear bushes of the front lower control arm with the Whiteline KCA334 and Whiteline W0506 replacement bush kits respectively.
The KCA334 (also known as an "anti-lift kit") has made my handling and turn-in noticeably better. The front end feels much tighter and in fact feels like the suspension on a brand new car - I didn't think it would have made that much of a difference! As the moniker suggests, front lift of the car has been reduced under hard acceleration and when trying to deliberately provoke push-understeer around a tight corner, that has been reduced by a significant margin as well. Even in the wet, the car's cornering much more agile than before and the feedback you now feel in the wheel from the road is nothing short of marvellous now. The W0506 kit pretty much does nothing in the handling department, but while the control arms were out putting the KCA334 in, I figured I may as well replace the front bushes as well. It's a cheap kit so why not.
But like most mods, there is a downside. The KCA334 has removed a sizeable chunk of the "luxury ride" of the Liberty. The increase in NVH in the first couple of weeks of having it installed was enormous. Small bumps such as running over a simple cats-eye on the road now sound like you're dropping into a major pothole. While the physical bump is a little harsher, there's no real jarring experience, but the noise from the wheel is suitably boomy as it's no longer being absorbed by the rubber factory bush but instead being passed into the body of the car directly by the new polyurethane bush. I have not yet driven across noisy bitumen like you get on some country highways, but I can only imagine the drone that was already bad would only be worse.
But it's not all bad. It's now been nearly a month since having them installed and I have to say that I think the new bushes have gone through a settling-in process. Unless I've somehow gotten used to it, the NVH level has since reduced. Bumps are still louder than they used to be and certain bumps like speed bumps are still a little more physically, uh... bumpy than before, however the boomy noise factor appears to have taken itself a few decibels down a bit. I'm now very happy with how the car feels and the NVH increase I'm now experiencing is now far more acceptable than before. I highly recommend this upgrade to others.
No pics of the bushes since they're not really visually exciting.
Next up, a handful of cosmetic items:
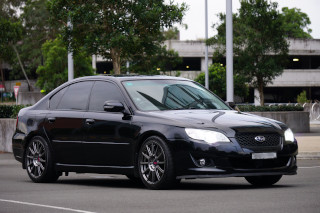
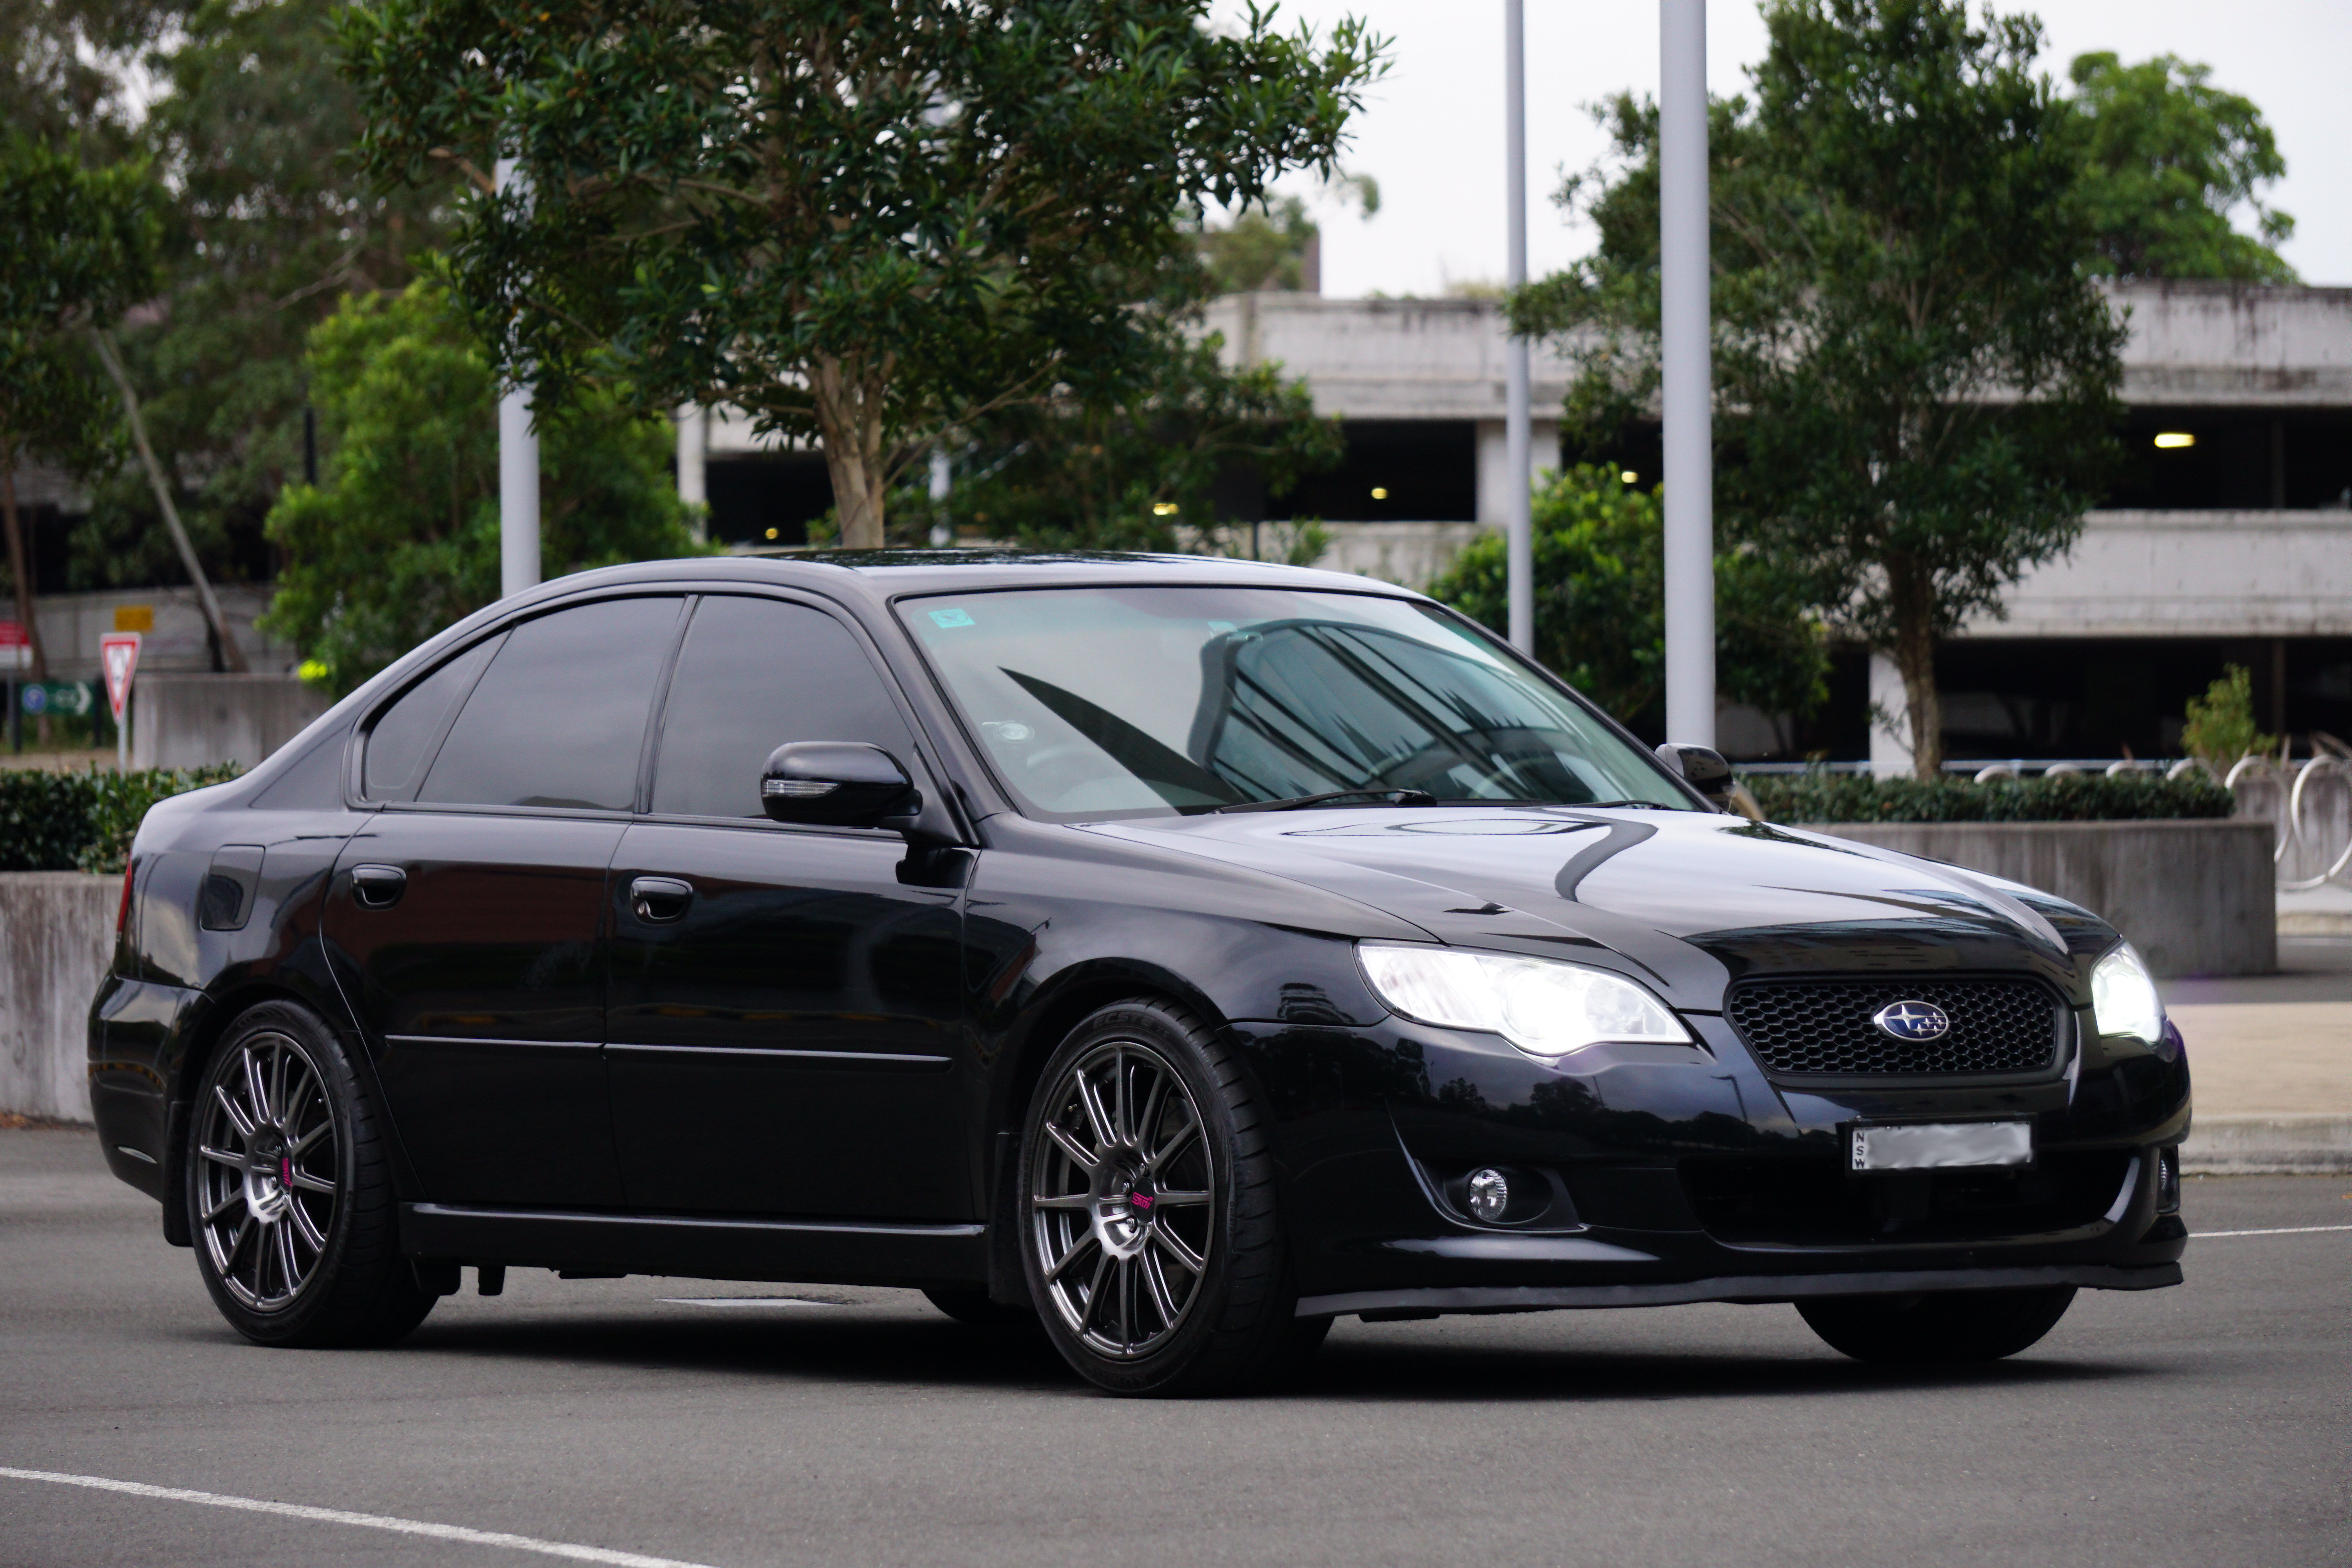
- Everytime I look at front bar lips, I feel that they look good but everyone seems to damage them quite easily. I came across a product called Rhino Lip which is basically a moulded strip of silicone rubber that you secure to the underside of your front bar with screws. Now it's no STi lip, but because it's silicone rubber, it's fairly tough and can withstand some scraping abuse and just flick back into shape because it's flexible. I saw various pics of cars including Liberty's with the Rhino Lip installed and figured it's an acceptable alternative to the official and copy plastic lips. Best of all, it's much cheaper!
Installing was a no-brainer. Got some screws from Bunnings and simply screwed through the lip into the bumper. If I don't like it, it's a simple case of removing it by simply removing the screws. I added some double-sided tape into the mix mostly to ensure that rubbish like dirt and leaves don't somehow wedge themselves between the lip and bumper.
See pics below.
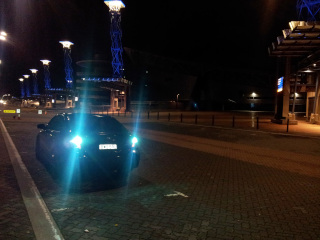
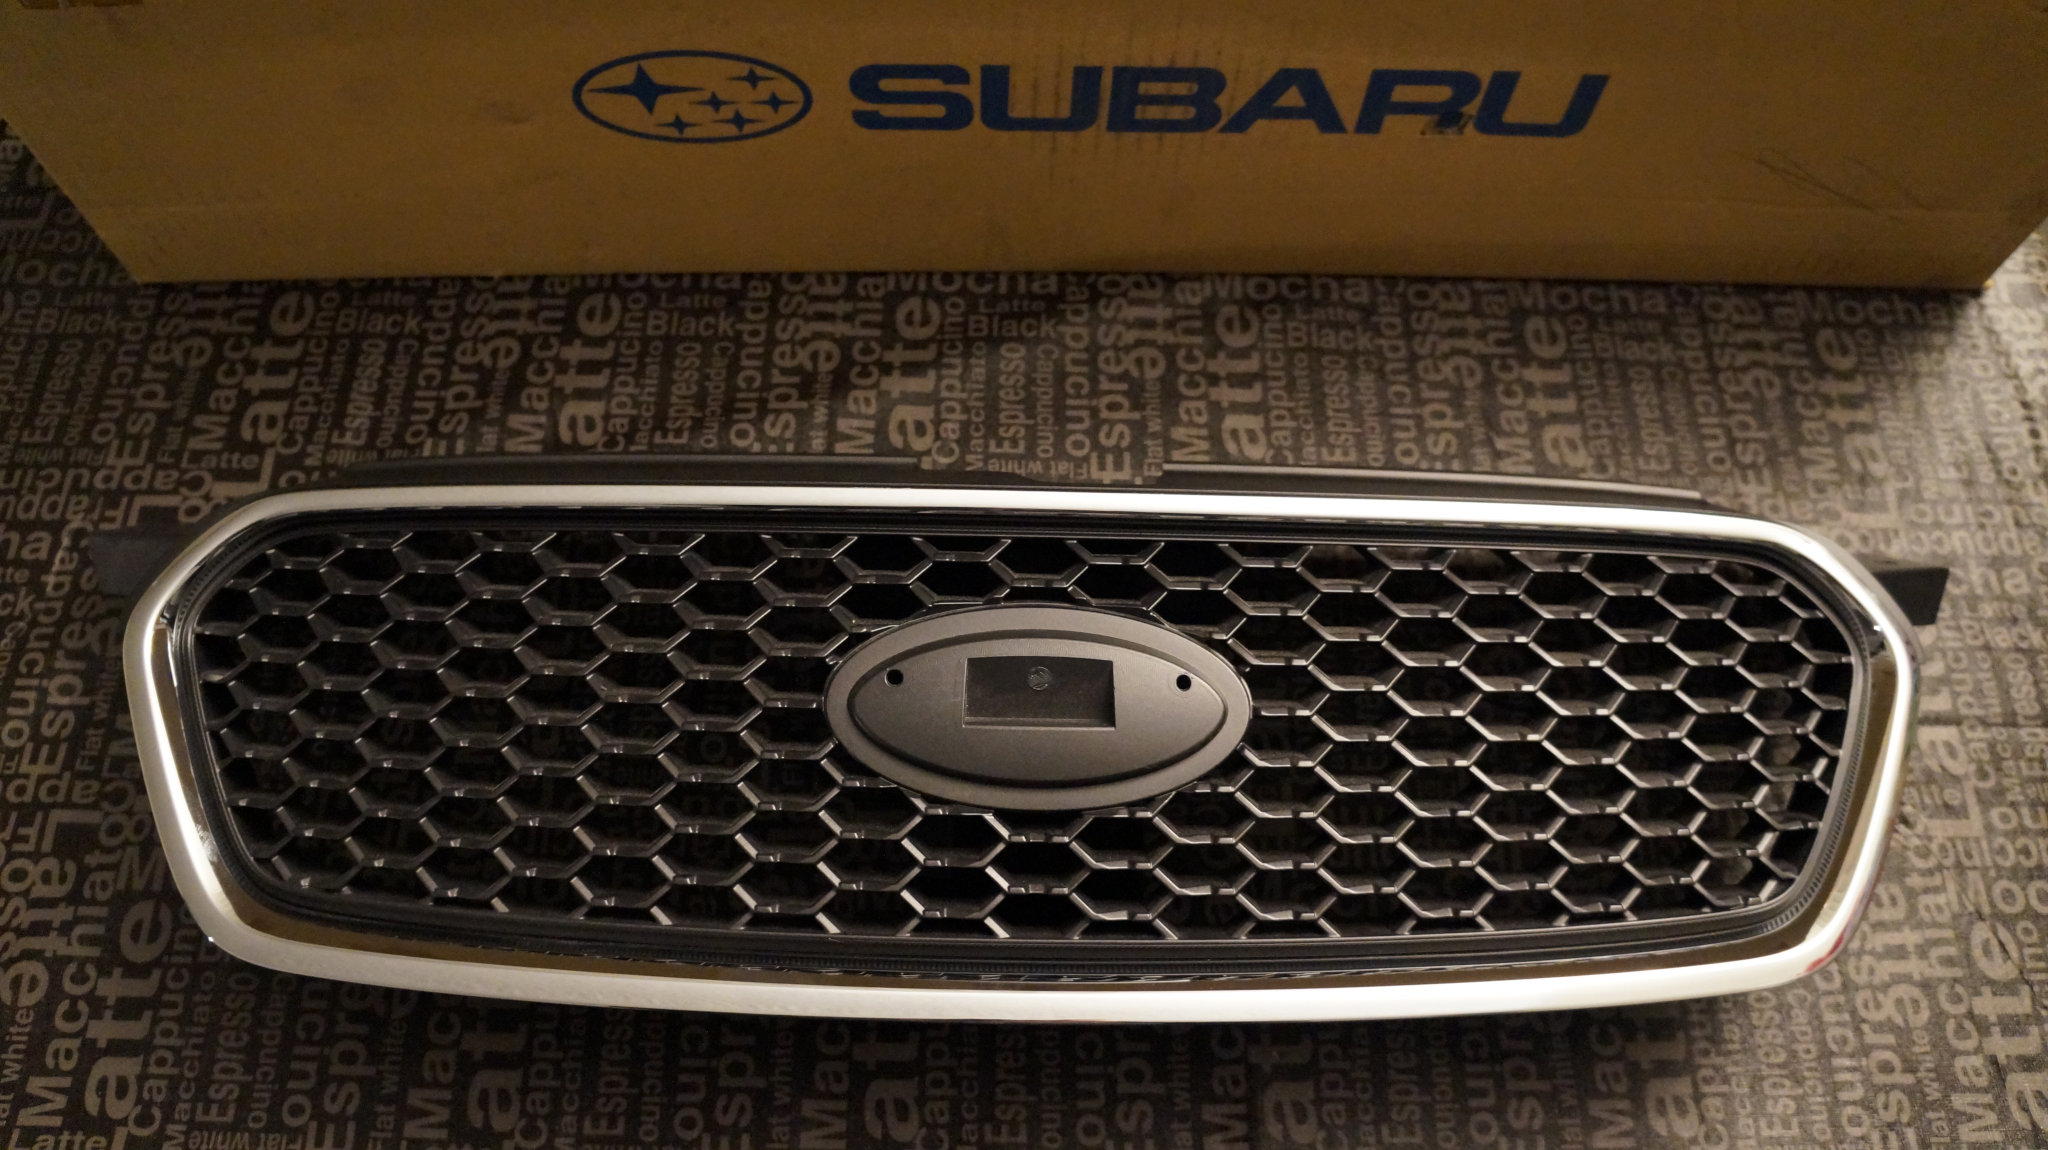
. - Saw some old pics of the Subaru Legacy S402. Loved the grille but dismissed the idea of getting my own initially until I saw some other members cars with the same grille albeit with a chrome edge unlike the S402 that has a black edge. Turned out that the S402 grille was just a normal JDM Spec B grille without the chrome bit.
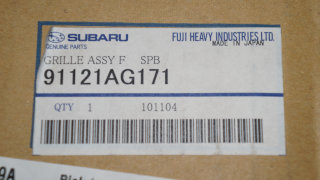
Did some research and found Sydney City Subaru had a JDM Spec B grille in stock and were willing to offload it at trade price. Got it and removed the chrome part to sand back and re-spray with primer, black and clear to look more like the S402 grille. I was originally going to buy a replacement Subaru logo badge as well until they told me that the trade price (not trade-in) for a new badge is $100!! So I figured I'd re-use my existing badge. How hard could it possibly be to remove?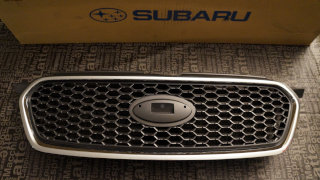
Well, it was a bitch - whatever double-sided tape Subaru use, it's brutal stuff, but after some tense moments fearing I'd somehow break the badge in two as I slowly pried it off with a variety of flat-edged objects until I could get my fingers in there properly, I successfully removed it, cleaned off the old tape, cleaned the logo and replaced it with fresh stuff.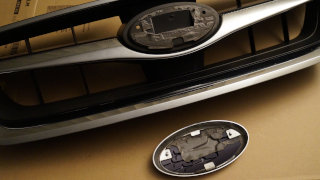
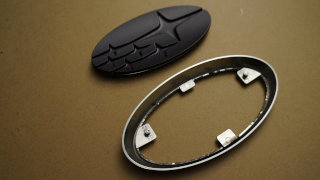
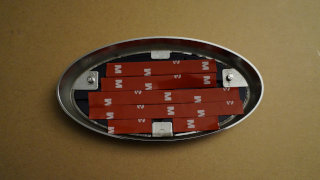
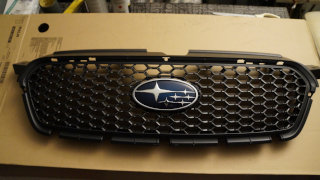
Finished product with the repainted chrome (now black) border reattached: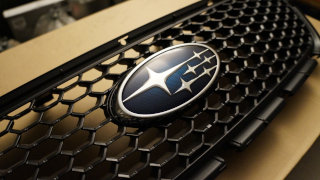
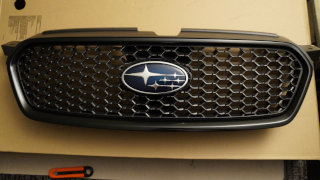
Anyway, after putting it all together, and after installing it on the car, it now looks that much better.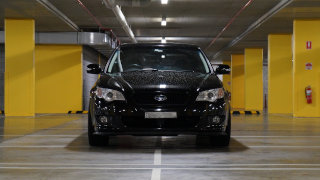
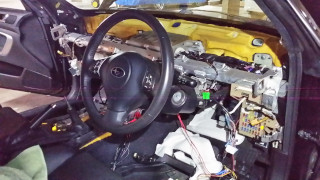
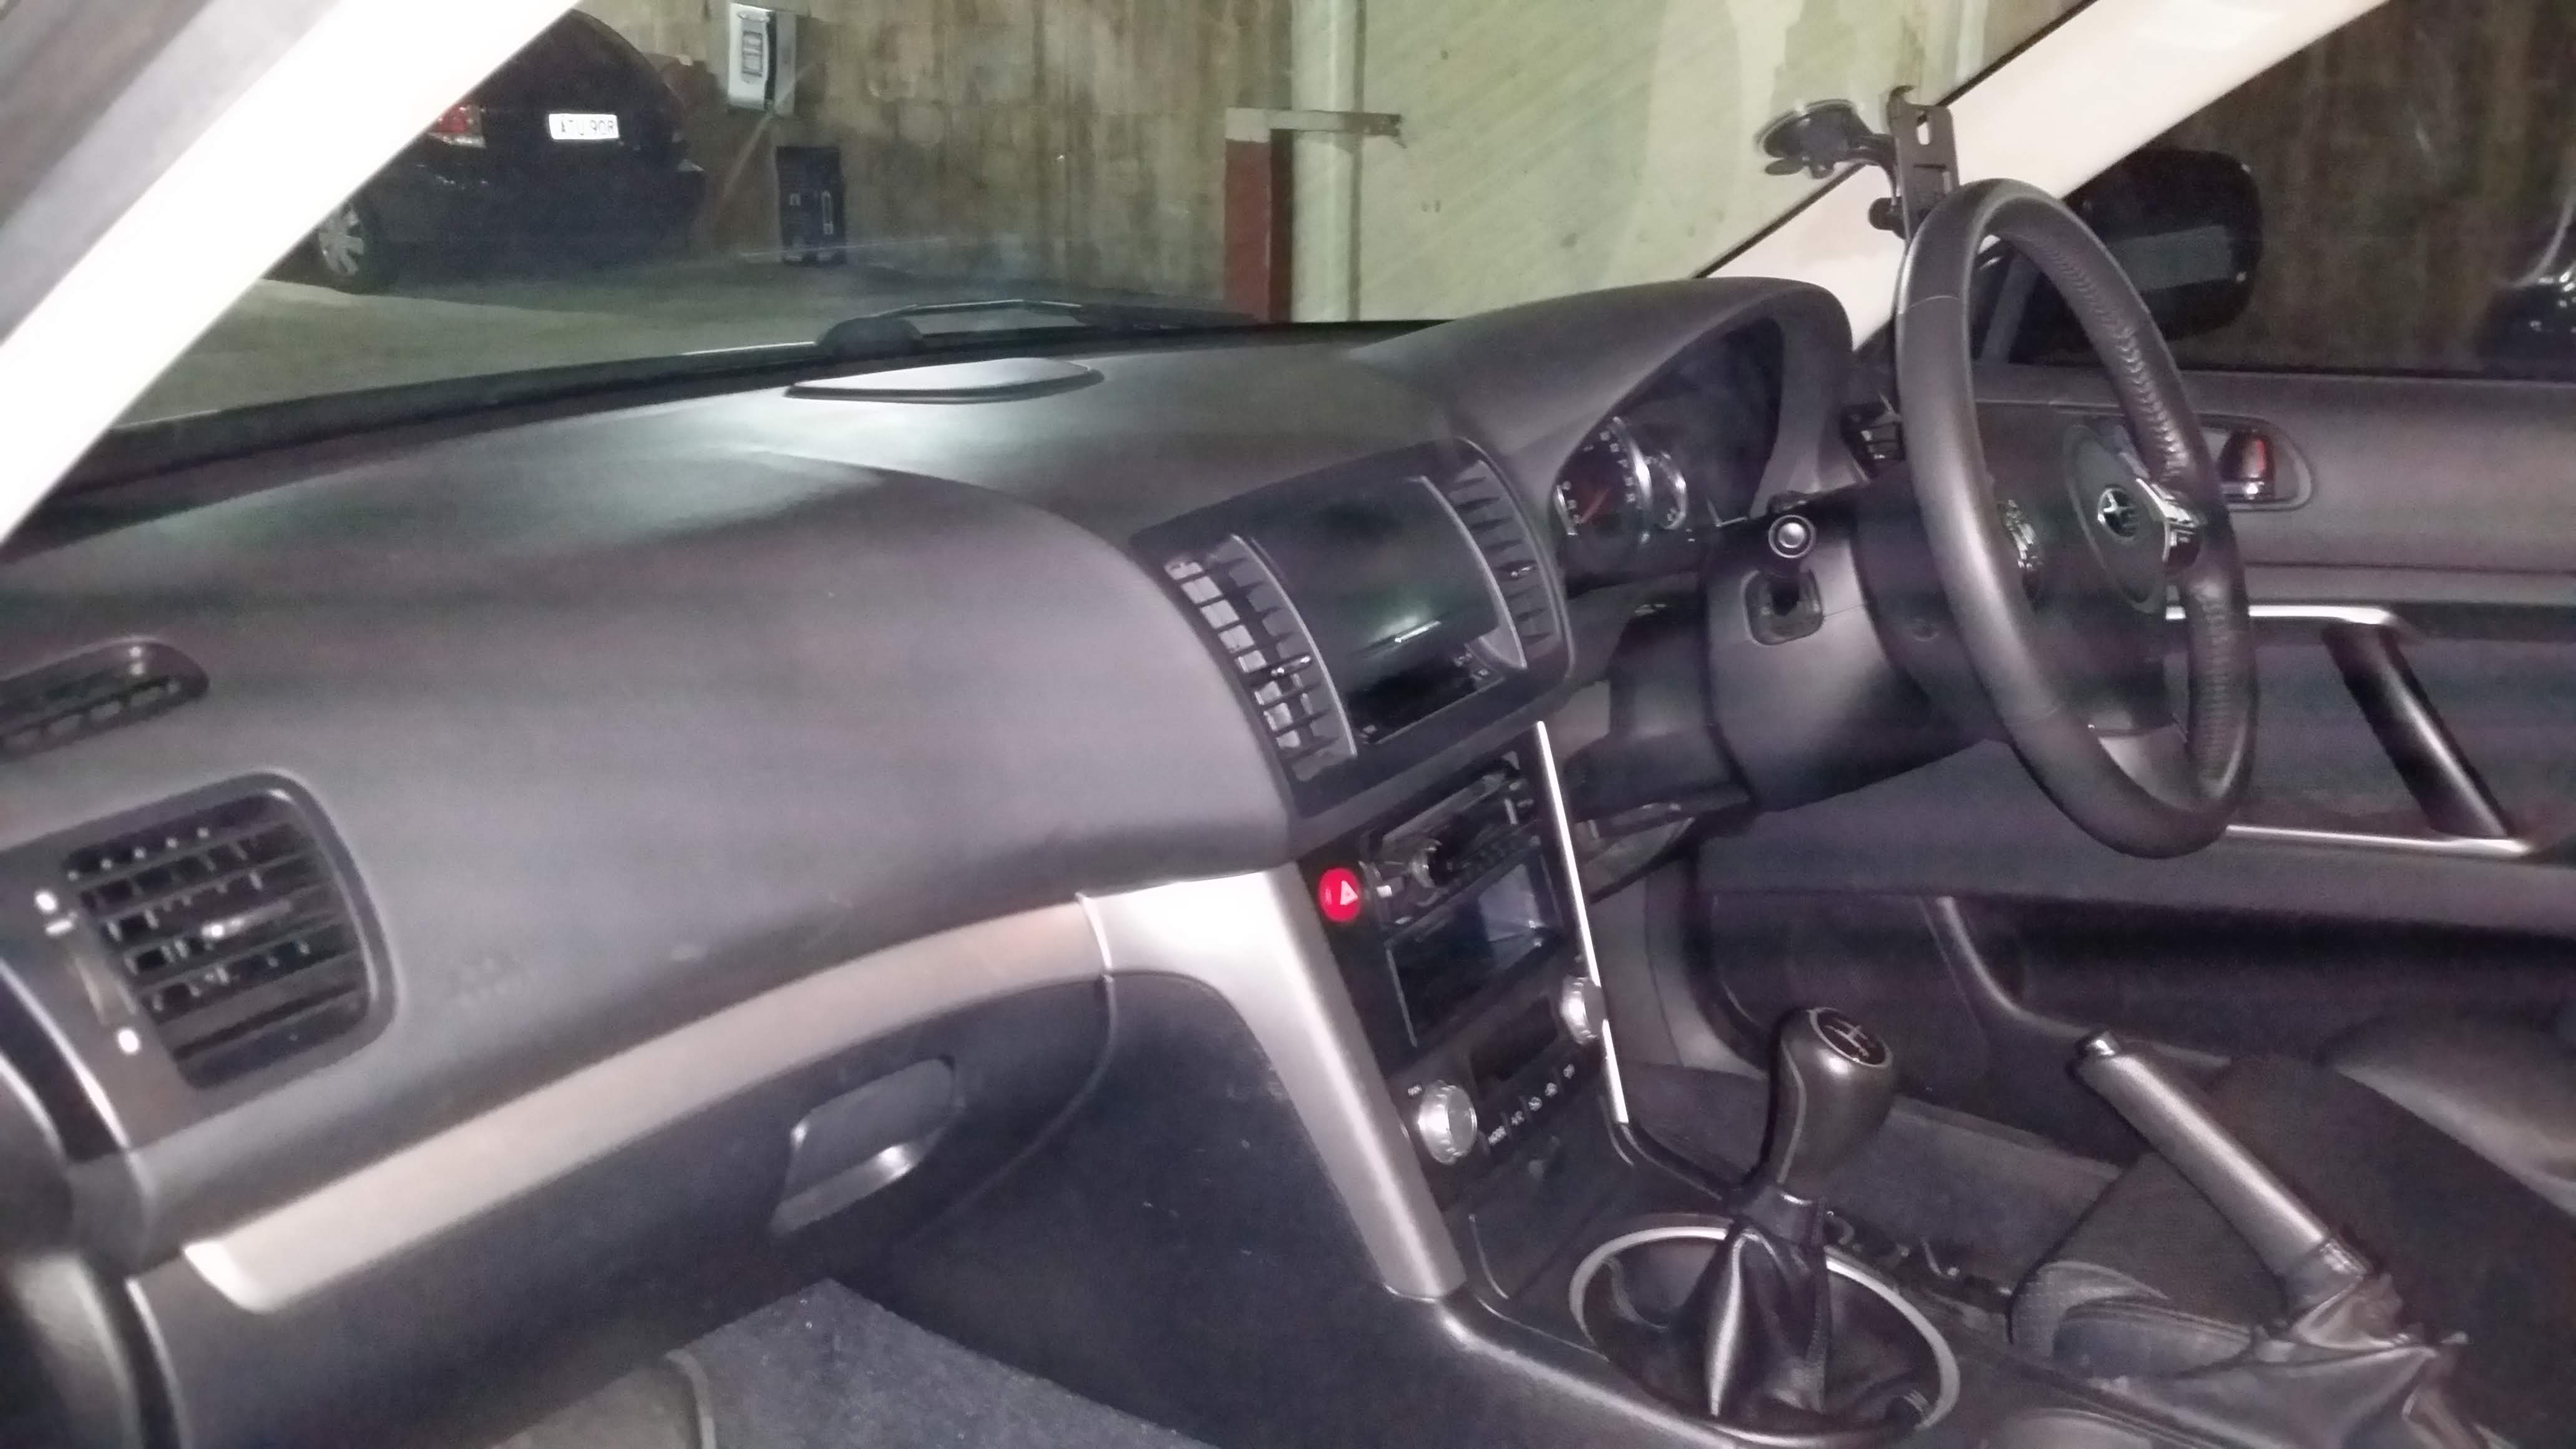
. - Finally, i've had some cosmetic damage in the centre of my dashboard for quite some time now. When I referred to an interior specialist, they told me that they wouldn't really be able to repair the damage completely, just minimise it. It bothered me enough that I decided to look into a replacement dash. Came across a wrecker called On Boost Auto Parts in Revesby NSW and they were happy to offload an MY07 Spec B dashboard to me for $200 including the passenger airbag. Unfortunately they wouldn't give it to me without the passenger airbag, so now I have a spare airbag that I'll probably go into an open field with and remote let off one day.
Anyway, removing the dash, whilst time-consuming initially because I was going through it step by step using the Service Manual and following where all the screws and snap-in points were, turned out to be a rather simple exercise in the end, and putting it all back together again was done in a fraction of the time it took me to pull it apart. If I were to do it again today, I'd get it done in 45 minutes tops easy now.
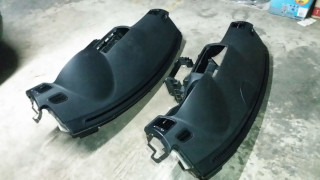
It's not as daunting as these images appear to make it out to be.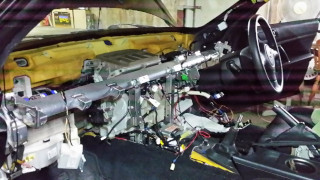
Old dash (bottom) vs the new dash (top) prior to installation. I had to remember to swap the VIN plate over from my dash to the new dash so it would appear in the little window at the bottom of the windscreen as well. Just drilled it out and riveted it into the new one.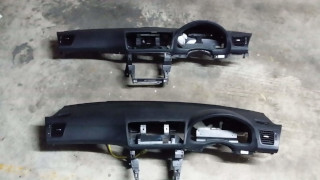
Now the new dash does include the center speaker which I can't utilise at the moment because the non-McIntosh headunit does not have a center-speaker output (and I'm not even using that anymore). I might decide to hook something else up to it, but for now it's just decoration with no function.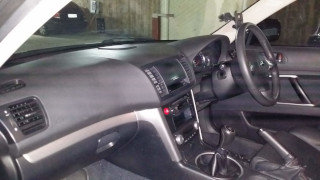


Next major mod is likely to be coilovers and the next minor mod is likely to be an Android tablet installation to replace my temporary headunit installation, which replaces my originally proposed Linux-based CarPC project since Android has come so far now, and has so many apps available to make an in-car installation downright awesome that it would be a step backwards to go the way of an actual PC now.
Last edited by HyRax on Mon May 02, 2022 10:28 pm, edited 1 time in total.
I was going to procrastinate, but I put it off...
-
HyRax - Posts: 1202
- Joined: Sat Jul 30, 2011 12:25 am
- Location: Sydney
- Car: ADM MY19 3.6R Outback
- Real name: Jeff
- Profile URL: viewtopic.php?f=10&t=15482
Re: Member Profile: HyRax
![]() by Devour » Sun Mar 02, 2014 6:42 am
by Devour » Sun Mar 02, 2014 6:42 am
Wow what an extensive writeup. I had the bushes in my 07 2.5i replaced recently with new factory bushes through warranty (just made it in as my extended warranty is just about expired) and while they probably might not be as good as the whiteline kit, it definitely made the car feel like a sharper turn in without the doughy feeling when turning. Great upgrade and I was going to mention in terms of the NVH slight increase you probably wont realise it after you drive it for awhile.
The genuine STi lip I had was very strong, i had the car low at certain times but if it did scrape or it sounded really bad i used to stop, pull over and check and there was very minor super light scratches on it. The lip you have looks great and suits the black at a fraction of the cost so well done.
That spec B grill looks great. I managed to pick one up second hand with a badge from a tbsti on it so I did the exact same thing on my 2.5i as i wanted a different grill but still wanted to be 'oem' and had seen a few other 2.5i's change it and it looked great. However i used carbon wrap few years back now for a 'temporary' solution since i thought the chrome is nice sometimes for that luxury quality look should i ever change or sell it but looking at yours, the blacked out bit painted instead of carbon wrapped looks significantly better.
Excellent work on doing the dash, I also have a few nudge/imprint/pushed in marks on the top leather (or is it faux leather?) that annoyed me to bits. Prev owner or when my dad/brother drove it but since its like mushy it never really came out. Seeing that yours only cost 200 seems like a really good deal. Great effort changing it and also adding the stereo buttons on your steering wheel which i would have liked to do previously since i always found it weird as i sat in gtbs and they always had it.
Keep up the great work, its good to see you are modding and working on the 2.5i!
-
Devour - Posts: 145
- Joined: Mon Aug 30, 2010 8:35 pm
- Location: Melbourne, Victoria
- Car: R34 GTR V-Spec / MY07 2.5i
- Real name: Aaron
Re: Member Profile: HyRax
![]() by bigBADbenny » Sun Mar 02, 2014 9:48 am
by bigBADbenny » Sun Mar 02, 2014 9:48 am
Outstanding effort as per usual!
Checking out Rhino Lip right now
Checking out Rhino Lip right now
-
bigBADbenny - Posts: 10486
- Joined: Tue Oct 04, 2011 6:36 pm
- Location: Collingwood, Melbourne
- Car: MY07 GT-B 6MT OBP Wagon
- Real name: Ben Richards
- Profile URL: http://tinyurl.com/agvbzop
Re: Member Profile: HyRax
![]() by HyRax » Sun Mar 02, 2014 1:07 pm
by HyRax » Sun Mar 02, 2014 1:07 pm
Devour wrote:Wow what an extensive writeup.
Yeah, got a bit long that one, but it was a big month! Cheers for the extensive reply!
Devour wrote:Great upgrade and I was going to mention in terms of the NVH slight increase you probably wont realise it after you drive it for awhile.
Absolutely. No doubt if I jump in another stock-bush Liberty right now it will feel downright soft and awful.
Devour wrote:The lip you have looks great and suits the black at a fraction of the cost so well done.
Thanks! The grey colour it comes in seems to suit most car colours from what I reviewed via the InterGoogle, but I like the subtlety it provides black cars. Adds to it without explicitly standing out.
Devour wrote:That spec B grill looks great. I managed to pick one up second hand with a badge from a tbsti on it so I did the exact same thing on my 2.5i as i wanted a different grill but still wanted to be 'oem' and had seen a few other 2.5i's change it and it looked great. However i used carbon wrap few years back now for a 'temporary' solution since i thought the chrome is nice sometimes for that luxury quality look should i ever change or sell it but looking at yours, the blacked out bit painted instead of carbon wrapped looks significantly better.
Cheers for that. For me the mesh look in most aftermarket grilles just didn't seem to work for the Liberty. Impreza yes, but not Liberty. I also didn't like the recessed look most of them had, so the JDM grille (which is still technically OEM to some degree) suited me better. Honeycomb just looks awesome IMO and the flow into the body lines doesn't look like I have a gaping hole in the front as if my grille was missing altogether! The painting was purely motivated by the look of the S402, though. Had I never seen it, I might have been happy with the chrome too, but then again the ADM grille has so much chrome in it, maybe I was subliminally happy to see it toned down a touch.
Devour wrote:I also have a few nudge/imprint/pushed in marks on the top leather (or is it faux leather?) that annoyed me to bits.
Yes, it's definitely faux - it's only about 3mm thick on top of the structure, so easily damaged. At wreckers, some dashboards are ruined by broken glass from the windscreen scratching the surface and even gouging holes.
Devour wrote:Great effort changing it and also adding the stereo buttons on your steering wheel which i would have liked to do previously since i always found it weird as i sat in gtbs and they always had it.
Yeah it's such a cheap part too. At the moment my audio controls are no longer working since I'm using an aftermarket Sony head unit now and have not been able to get my Axxess interface to detect my SWC's yet, but it detects the head unit OK (will write it up later once I have it working). This will change yet again once I move to an Android tablet setup.
Devour wrote:Keep up the great work, its good to see you are modding and working on the 2.5i!
It keeps it fun!
bigBADbenny wrote:Outstanding effort as per usual!
Checking out Rhino Lip right now
Thanks! Got mine through FleaBay and made an offer to the seller that essentially gave me free postage.
The screws I used were Buildex-brand button head size 8, 15x15mm needle-point self-drilling screws (part# X943292 - box of 100), sourced from Bunnings, selected because they were short and designed for outdoor use so they won't rust. I drove them in through the lip and bumper using a cordless drill with a phillips head bit. Used one screw every couple of inches or so to make the lip conform to the bumper shape. It's as solid as a rock. Only made a couple of V-cuts to allow the lip to better conform to the front corners of the bumper.
Here's an excellent installation how-to video someone did. I didn't use washers, though - I drilled right in through the lip and bumper.
I was going to procrastinate, but I put it off...
-
HyRax - Posts: 1202
- Joined: Sat Jul 30, 2011 12:25 am
- Location: Sydney
- Car: ADM MY19 3.6R Outback
- Real name: Jeff
- Profile URL: viewtopic.php?f=10&t=15482
Re: Member Profile: HyRax
![]() by Corsair » Sun Mar 02, 2014 6:11 pm
by Corsair » Sun Mar 02, 2014 6:11 pm
You say it's more simple than it looks, but I certainly lack the cohonies to pull off and replace my dash!
The grille looks excellent and suits a black car very well. I might look into the bushes/anti lift kit your purchased [thanks for the links] asI feel it's time for a new handling mod and coilovers are out of reach at this point.
Nice, practical and well researched work as always.
The grille looks excellent and suits a black car very well. I might look into the bushes/anti lift kit your purchased [thanks for the links] asI feel it's time for a new handling mod and coilovers are out of reach at this point.
Nice, practical and well researched work as always.
I got this plan. It's called 'Save Ass'. And the way it works is this - I slip outta one of these windows and I run like a bastard!
-
Corsair - -stickered-
- Posts: 958
- Joined: Sun Sep 18, 2011 12:01 am
- Location: Melbourne
- Car: MY09 Liberty 2.5i
- Profile URL: viewtopic.php?f=10&t=15709
Re: Member Profile: HyRax
![]() by HyRax » Sun Mar 02, 2014 9:15 pm
by HyRax » Sun Mar 02, 2014 9:15 pm
Corsair wrote:You say it's more simple than it looks, but I certainly lack the cohonies to pull off and replace my dash!
Everyone should pull apart their dash at least once.
Corsair wrote:I might look into the bushes/anti lift kit your purchased [thanks for the links] asI feel it's time for a new handling mod and coilovers are out of reach at this point.
I got my bushes via Car Mods Australia who were a bit cheaper than Whiteline's RRP, even with postage.
Corsair wrote:Nice, practical and well researched work as always.
Cheers!
I was going to procrastinate, but I put it off...
-
HyRax - Posts: 1202
- Joined: Sat Jul 30, 2011 12:25 am
- Location: Sydney
- Car: ADM MY19 3.6R Outback
- Real name: Jeff
- Profile URL: viewtopic.php?f=10&t=15482
Re: Member Profile: HyRax
![]() by HyRax » Sat Nov 15, 2014 12:56 pm
by HyRax » Sat Nov 15, 2014 12:56 pm
Been a long time since my last post!
Three months ago my clutch finally died. The spigot bearing was very close to exploding and I was getting squealing sounds for several seconds on cold startup, so lucky it was caught in time.
Now running an Exedy HD clutch and went through re-living my Learner years partially bunny-hopping and stalling the car for the first three days while it was bedding in. Now that it has settled, like how every new clutch feels, in-gear acceleration feels much stronger now with an apparent increase in torque when the reality is it's simply not slipping. Standing launches are also easier to pull off, but naturally this does mean there is a bit more strain being put on the gearbox when you do so.
And today's geeky milestone is:
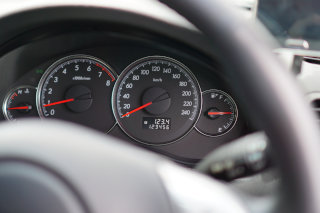
Click image for full-size!
I was going to procrastinate, but I put it off...
-
HyRax - Posts: 1202
- Joined: Sat Jul 30, 2011 12:25 am
- Location: Sydney
- Car: ADM MY19 3.6R Outback
- Real name: Jeff
- Profile URL: viewtopic.php?f=10&t=15482
Who is online
Users browsing this forum: No registered users and 10 guests