You can purchase a number of specialised camera mounts, and a number of specialised cameras, but they tend to be a little expensive. The following describes a very successful way of mounting a tripod into the back of a Liberty Sedan. This will probably work in a wagon but I am not sure how the ISOFIX points work in a wagon.
This was tested at Wakefield park in the back of 3 Liberty sedans and it worked very well - It stayed firmly in place no matter what the drivers did. It was also used successfully in the back of an Audi S4. There were no ISOFIX points in the back of the Audi so I attached the straps to locked rear seatbelts. This was a two man operation as someone had to lock and hold the seatbelts whilst I tensioned the straps.
Items required:
1 x Tripod
2 x Ratchet Straps

2 x ISOFIX anchor points (In most current Liberty’s)

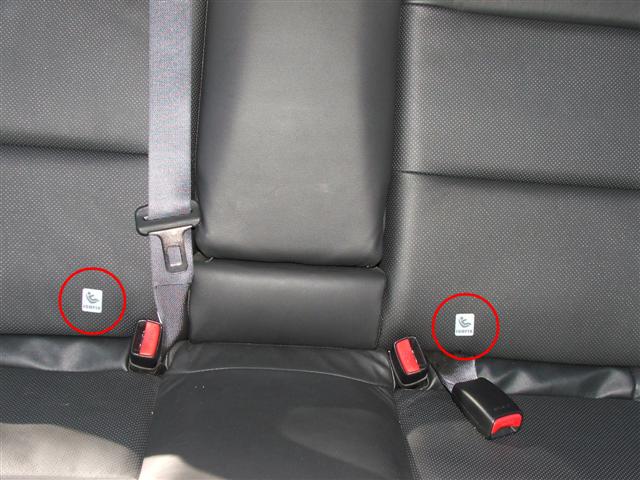
Location of ISOFIX Points
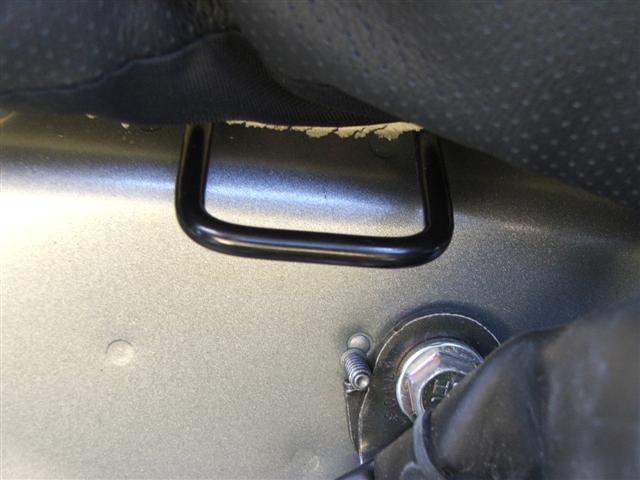
ISOFIX Hooks
Installation:
Step 1:
Set both your front seats in their desired location.
Step 2:
Unfold and extend your tripod and sit it in the rear of the passenger cabin. The two front feet should sit against the rear outboard front seat rail mounting points.

Passenger Side Tripod Foot

Driver Side Tripod Foot
In the centre of the rear seat, open the gap between the rear seat back and cushion and push the rear tripod foot into the gap to sit against metal.

Rear Tripod Leg - pushed into gap between seat back and cushion.
Step 3:
Adjust the legs of the tripod to give you the camera position you desire.

Mid Position

Mid Height - Forward

Offset - You can offset the Tripod head either way

High and Forward
Step 4:
Attach the ratchet side of the ratchet straps to the two inboard ISOFIX anchor points.

Step 5:
Feel underneath the back of both front seats and find the support tube that runs along the bottom of each seat. Note: The tube is slightly different each side. You may have to hold the carpet out of the way to find the tube. You are NOT looking for the seat rail.
Attached one hook to the inboard side of the passenger seat. Run the strap around the Drivers side of the tripod and back to the Passenger side ratchet strap. Feed the strap through the ratchet and take up the slack to stop the hook falling off while you do the other side. Do not over tighten at this stage!

Strap Hook attached to the rear inboard side of the Passenger Seat
Step 6:
Attach the second hook to the inboard side of rail on the drivers seat. Run the strap around the Passenger side of the tripod and back to the Driver side ratchet. Feed the strap through the ratchet and take up the slack - Again do not over tighten at this stage.

Strap Hook attached to the rear inboard side of the Driver Seat

Both Straps in place - note the way the straps cross.
Step 7:
Ensure that the Tripod legs are in the desired position and the leg adjustment nuts are tight. Begin to torque down the ratchet straps, in an even fashion. Continue to tighten the straps until the tripod is secured to the floor. The straps need to be tight enough to hold the tripod feet still.

Tripod secured in position and excess strap rolled up out of the way.
Note: If you over tighten the straps or move your front seats, you will most likely bend the legs on your tripod.
Step 8:
Level the Tripod head and attached your video camera to the top of the tripod. Adjust the camera's aim, zoom and other settings as required. You can be very creative!

Tripod as viewed from outside the car.
Removal
To remove the tripod, release the tension in the straps, remove the straps and then remove the tripod.


 Not taking anything away from the post as I love this idea, hence I did a very similar thing for our Melbourne cruise last month (used occy straps in lieu of your ratchet ones though), but yours is so much better executed! Works a treat doesn't it!