Walkthrough: Replacing the front O2 (Air Fuel Ratio) sensor

Show off what mods you've done to your car.

Walkthrough: Replacing the front O2 (Air Fuel Ratio) sensor

Postby gazmanster » Wed May 13, 2009 10:00 pm

I thought I'd share my experience replacing the front O2 sensor on my MY05 Liberty GT - so if you want to tackle this job have a read below...

Overall I it took me about 40 minutes and I was being extra careful and I am no mechanic.

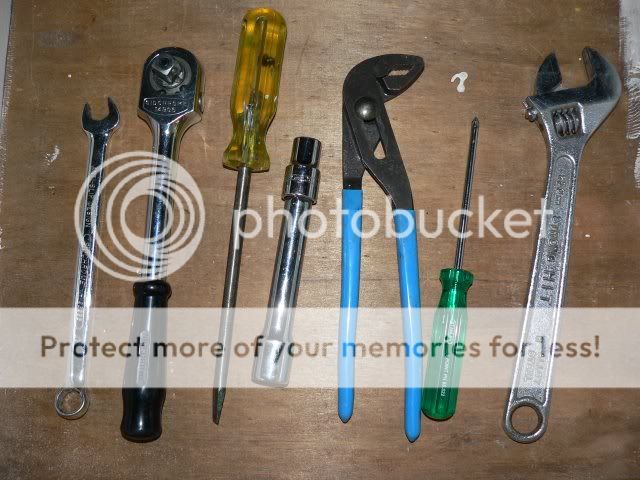
First the tools you will need:
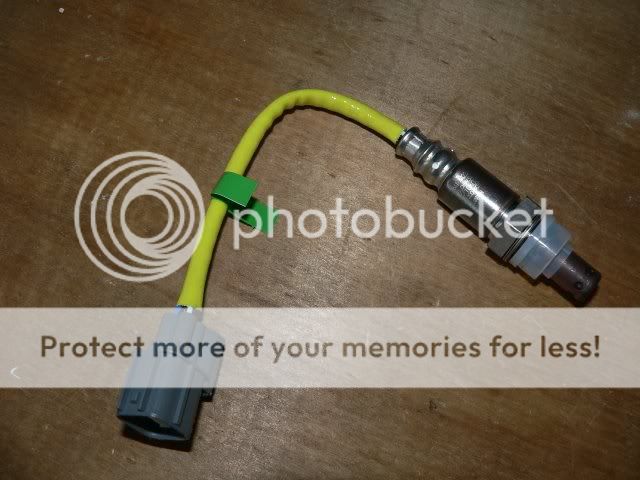
Image

Then the parts:

Image

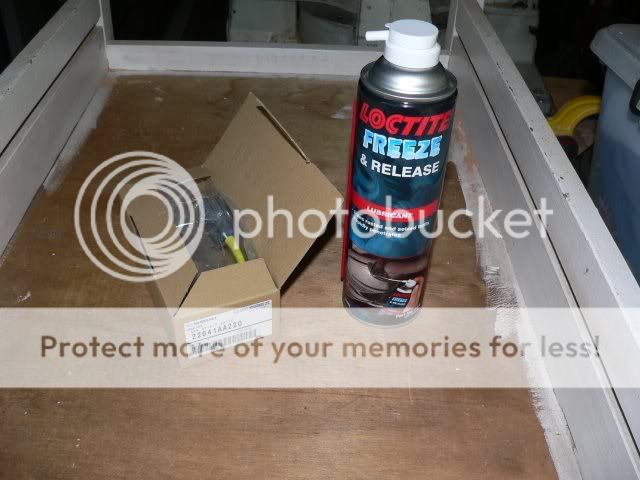
I used the Loctite Freeze and Release as I was paranoid that the sensor would be stuck firm - it worked a treat :D

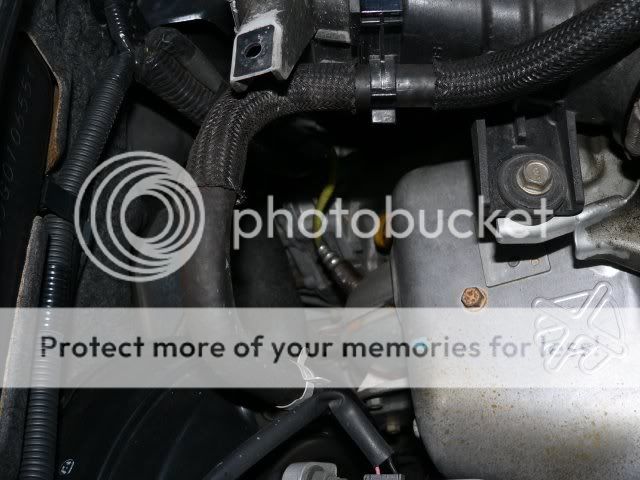
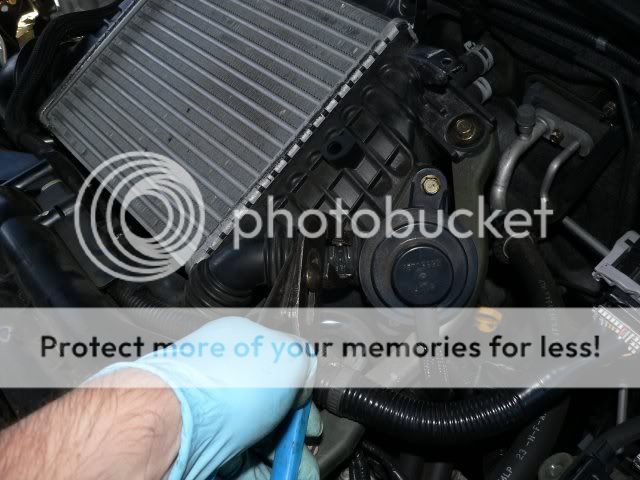
The sensor is shown below - it is near the firewall on the drivers side below the intercooler - there is no room to get in there to remove it without taking off the intercooler.

Image

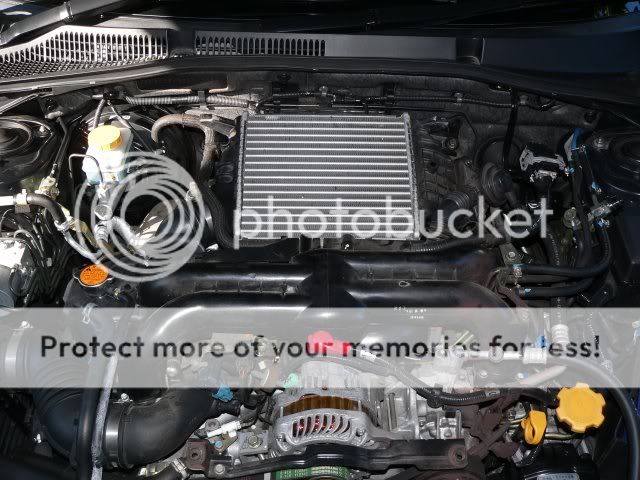
Firstly remove the engine cover - four screw clips and you're done:

Image

I also removed the -ve battery lead while I worked to help "reset" the ECU (not sure if this really does reset the ECU but my radio stations needed a re-tune anyway :roll:).

Image

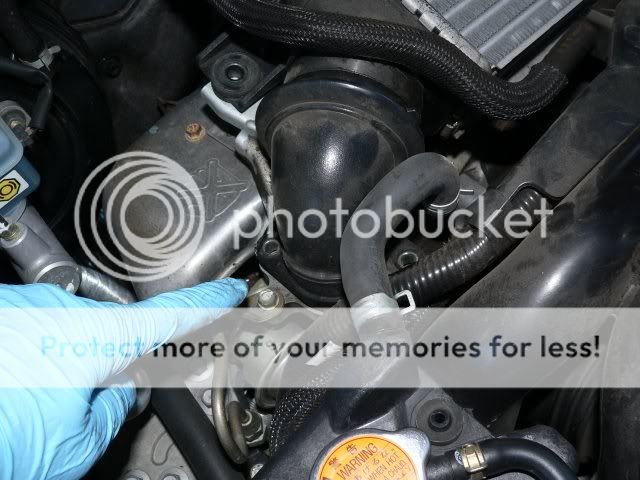
Remove the two bolts on this pipe (not sure what this is called :oops: ) - This pipe is sealed with a rubber like seal - so don't worry - there is no gasket to break.

Image

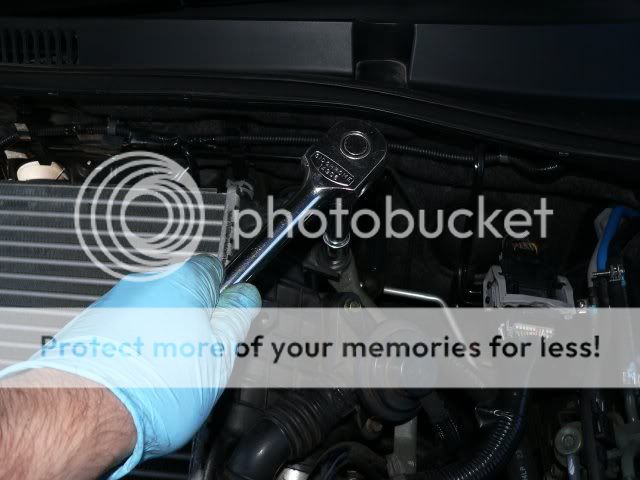
While you are on this side of the intercooler may as well remove the mounting bolt and unclip the flexible hose:

Image

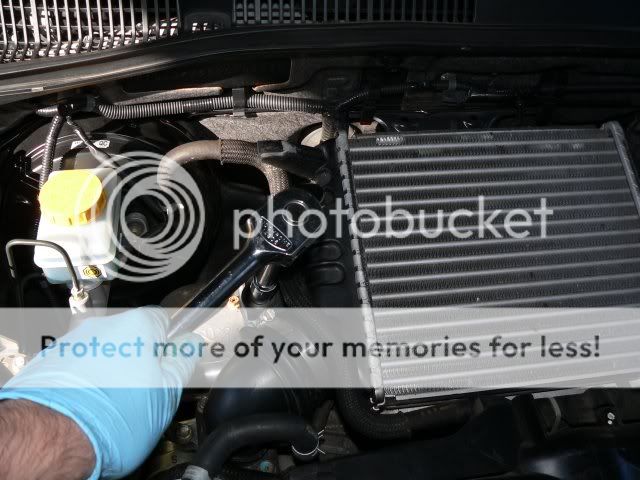
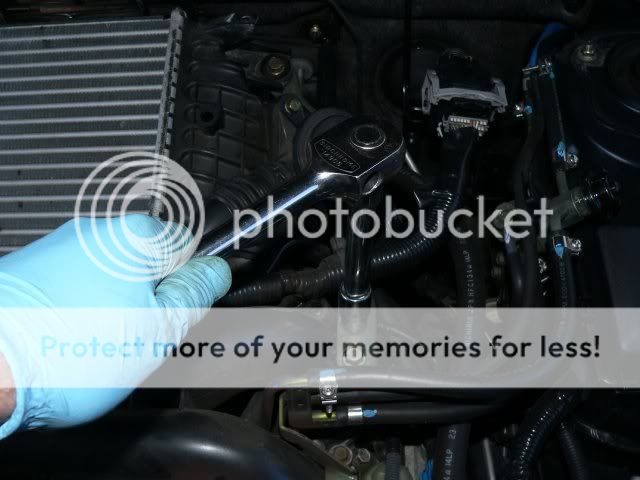
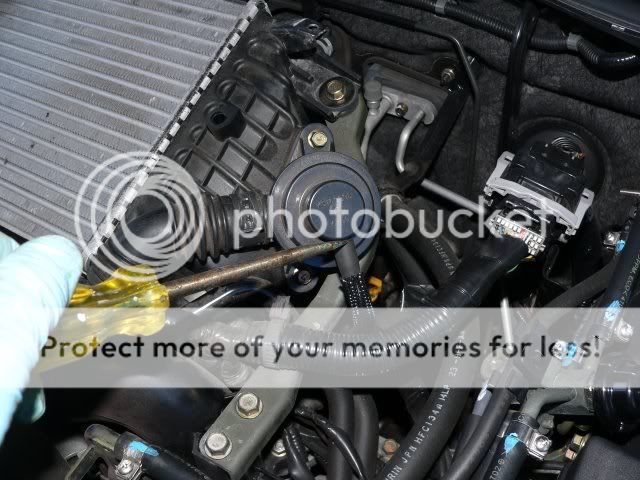
Now move to the other side of the intercooler and remove the mounting bolt, I also removed the entire mounting bracket (don't know if you need to but it is only two bolts):

Image

Image

Undo the hose clamp and disconnect the flexible hose from the blow off valve:

Image

Then remove the small flexible hose:

Image

Now undo the hose clamp:

Image


The intercooler is now free! - you can wiggle it off gently - it came off pretty easy for me.

Now you have a clear view of the sensor:

Image

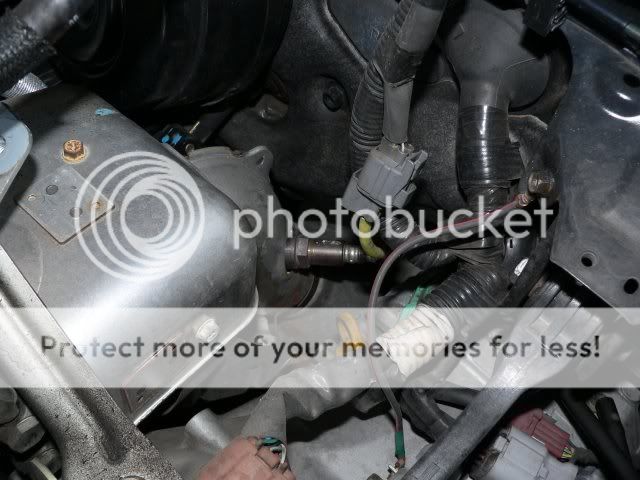
Dont forget to unclip the sensor.

I liberally sprayed the end of the sensor closest to the thread with the Freeze and Release for about 10 seconds and left it for about 5 minutes.

I used my trusty shifter to undo the sensor (I think it was around 22mm but my spanners only go up to 19mm) - it was firm but not stuck.

Here is the old sensor:

Image

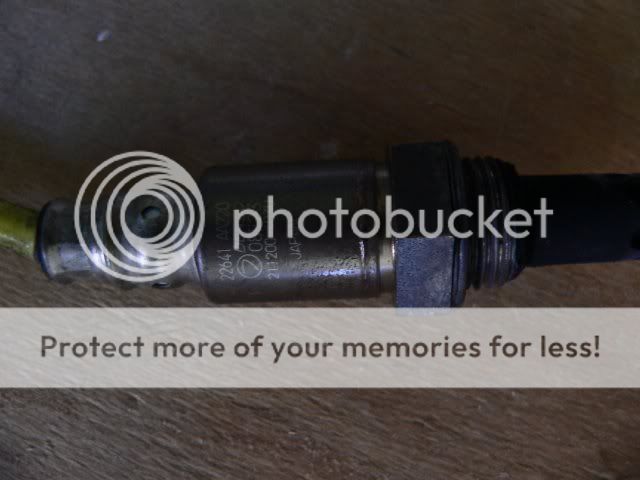
And the new one out of the box:

Image

The cover over the thread hides some thread anti-freeze stuff that looks like zinc paste to help prevent the thread from sticking in the future.

Now all you need to do is put the sensor back in and put everything back together - done.

I was stoked when I started her up and the Engine Light was gone (and has not returned since)!

Notes to self::
Dont drop bolts onto the top of engine unless you have a magnet on a stick :wink:
When the exhaust gets hot the stuff you sprayed to release the sensor will burn off and stink causing some smoke - don't freak out :lol:

Hope this helps.

Administrator - can you please move this post to the walkthrough section?
Last edited by gazmanster on Thu May 14, 2009 6:04 pm, edited 1 time in total.
User avatar
gazmanster
 
Posts: 15
Joined: Tue Apr 21, 2009 8:01 am
Location: Sydney's West
Car: MY05 Liberty GT 5SP Auto

Re: Walkthrough: Replacing the front O2 (Air Fuel Ratio) sen

Postby tangcla » Wed May 13, 2009 11:02 pm

gazmanster wrote:Dont drop bolts onto the top of engine unless you have a magnet on a stick :wink:
You really need to buy the magnetic tool. It's a godsend. :)

Nice walkthrough, too. I hope i never have to do it cos the last two times I had to replace the O2 sensor, it has been under parts warranty ;)
www.tangcla.com - photography

Canon 5D Mark III x2 | 16-35mm f/2.8L | 24-70mm f/2.8L IS | 70-200mm f/2.8L IS
100mm f/2.8L IS macro | 200mm f/2.0L IS | 580EX-II x2 | 430EX-II | PocketWizard TT1/TT5
User avatar
tangcla
 
Posts: 7409
Joined: Wed Aug 15, 2007 1:47 pm
Location: Melbourne, VIC
Car: B6 Audi S4 (4.2L V8)
Real name: Clarence
Profile URL: http://www.tangcla.com

Postby ultrablue » Thu May 14, 2009 2:29 pm

thanks for that ,your pics are not working for me
Image
User avatar
ultrablue
 
Posts: 424
Joined: Mon Jan 14, 2008 11:54 am
Location: Sydney
Car: 2010 ssv se

Postby gtspec » Thu May 14, 2009 3:01 pm

ultrablue wrote:thanks for that ,your pics are not working for me

+1
User avatar
gtspec
 
Posts: 864
Joined: Fri Jul 11, 2008 3:56 pm
Location: Sydney
Car: MY07 GT SpecB

Postby gazmanster » Thu May 14, 2009 6:05 pm

Updated image links - hopefully working for everyone now :)
User avatar
gazmanster
 
Posts: 15
Joined: Tue Apr 21, 2009 8:01 am
Location: Sydney's West
Car: MY05 Liberty GT 5SP Auto

Postby 3rspecb » Thu May 14, 2009 6:13 pm

nice gloves :wink:
MY06 3rspecb manual sedan, Urban Grey- Shockworks Coilovers '- Gone

MY17 SSv Redline, manual sedan, White.
3rspecb
 
Posts: 1342
Joined: Mon Oct 09, 2006 10:59 pm
Location: Melbourne
Car: MY17 SSv Redline
Real name: G

Postby smythie » Thu May 14, 2009 10:43 pm

I have found using an 8mm socket is a lot easier than a blade screw-driver for loosening or tightening hose clamps :winnk:

When tightening the clamp you do need to pay attention to not overtightening due to the much greater leverage you have
Flag Bitch

MY06 3.0RB
User avatar
smythie
 
Posts: 5227
Joined: Mon Oct 27, 2008 12:46 pm
Location: Sydney (w-end)
Car: MY06 3RB - Blue


Return to Post your mods

Who is online

Users browsing this forum: No registered users and 35 guests